参考:https://guides.gradle.org/building-java-web-applications
1.运行和调试
IDEA创建gradle项目,项目结构如下

各个文件:
build.gradle
// https://guides.gradle.org/building-java-web-applications
plugins {
    id 'java'
    id 'war'
    id 'org.akhikhl.gretty' version '1.4.2'
}

group 'ServletDemo'
version '1.0-SNAPSHOT'

sourceCompatibility = 1.8

repositories {
    mavenCentral()
}

dependencies {
    // https://mvnrepository.com/artifact/javax.servlet/javax.servlet-api
    providedCompile group: 'javax.servlet', name: 'javax.servlet-api', version: '3.1.0'
    testCompile group: 'junit', name: 'junit', version: '4.12'
}
HelloServlet.java
package servlets;

import javax.servlet.ServletException;
import javax.servlet.annotation.WebServlet;
import javax.servlet.http.HttpServlet;
import javax.servlet.http.HttpServletRequest;
import javax.servlet.http.HttpServletResponse;
import java.io.IOException;

@WebServlet(name = "HelloServlet", urlPatterns = {"hello"}, loadOnStartup = 1)
public class HelloServlet extends HttpServlet {
    int i = 0; // Servlet "persistence"

    protected void doGet(HttpServletRequest request, HttpServletResponse response)
            throws IOException {
        response.getWriter().print("Hello, World! " + i++);
    }

    protected void doPost(HttpServletRequest request, HttpServletResponse response)
            throws ServletException, IOException {
        String name = request.getParameter("name");
        if (name == null) name = "World";
        request.setAttribute("user", name);
        request.getRequestDispatcher("response.jsp").forward(request, response);
    }
} ///:~
index.html
<!DOCTYPE html>
<html lang="en">
<head>
    <meta charset="UTF-8">
    <title>Servlet Demo</title>
</head>
<body>
    <p>Say <a href="hello">Hello</a></p>
    <form method="post" action="hello">
        <h2>Name:</h2>
        <input type="text" id="say-hello-text-input" name="name" />
        <input type="submit" id="say-hello-button" value="Say Hello" />
    </form>
</body>
</html>
response.jsp
<%@ page contentType="text/html;charset=UTF-8" language="java" %>
<html>
    <head>
        <title>Hello Page</title>
    </head>
    <body>
        <h2>Hello, ${user}!</h2>
    </body>
</html>
然后点击左侧的Gradle面板,选择任务gretty.appRun就可以启动app,通过localhost:8080访问
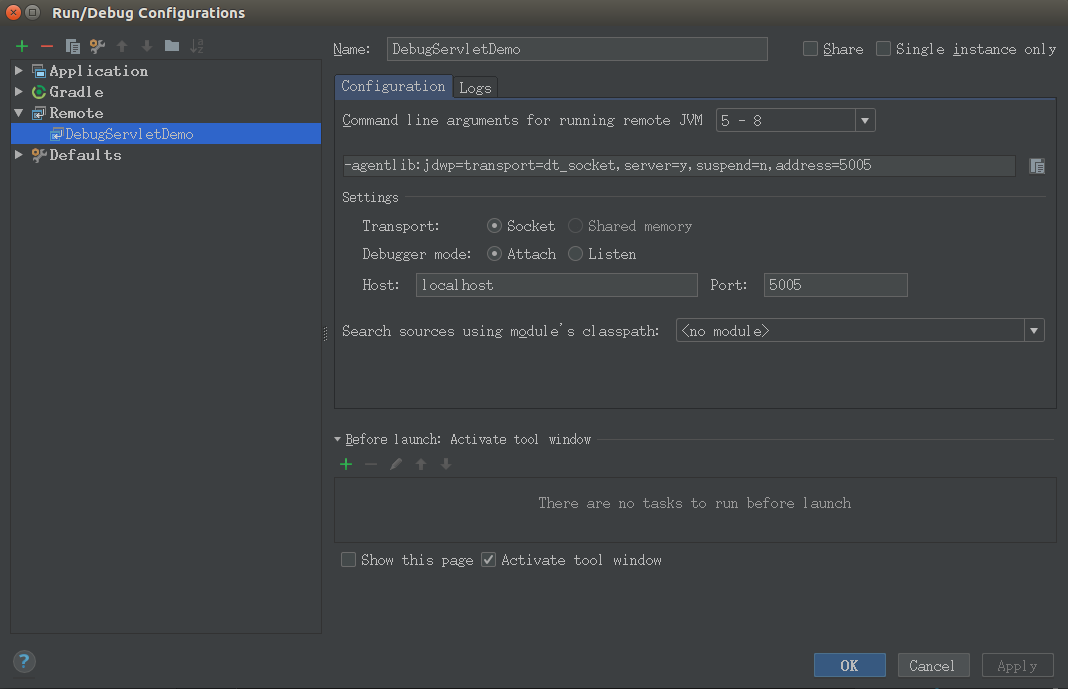
如果要 调试,那么在Gradle面板中选择任务gretty.appRunDebug,启动该任务后,选择Run->Edit Configurations 然后添加一个Remote Run/Debug,如下图,名为DebugServletDemo,根据gretty官方文档,默认debug port是5005,所以这里填好host和port
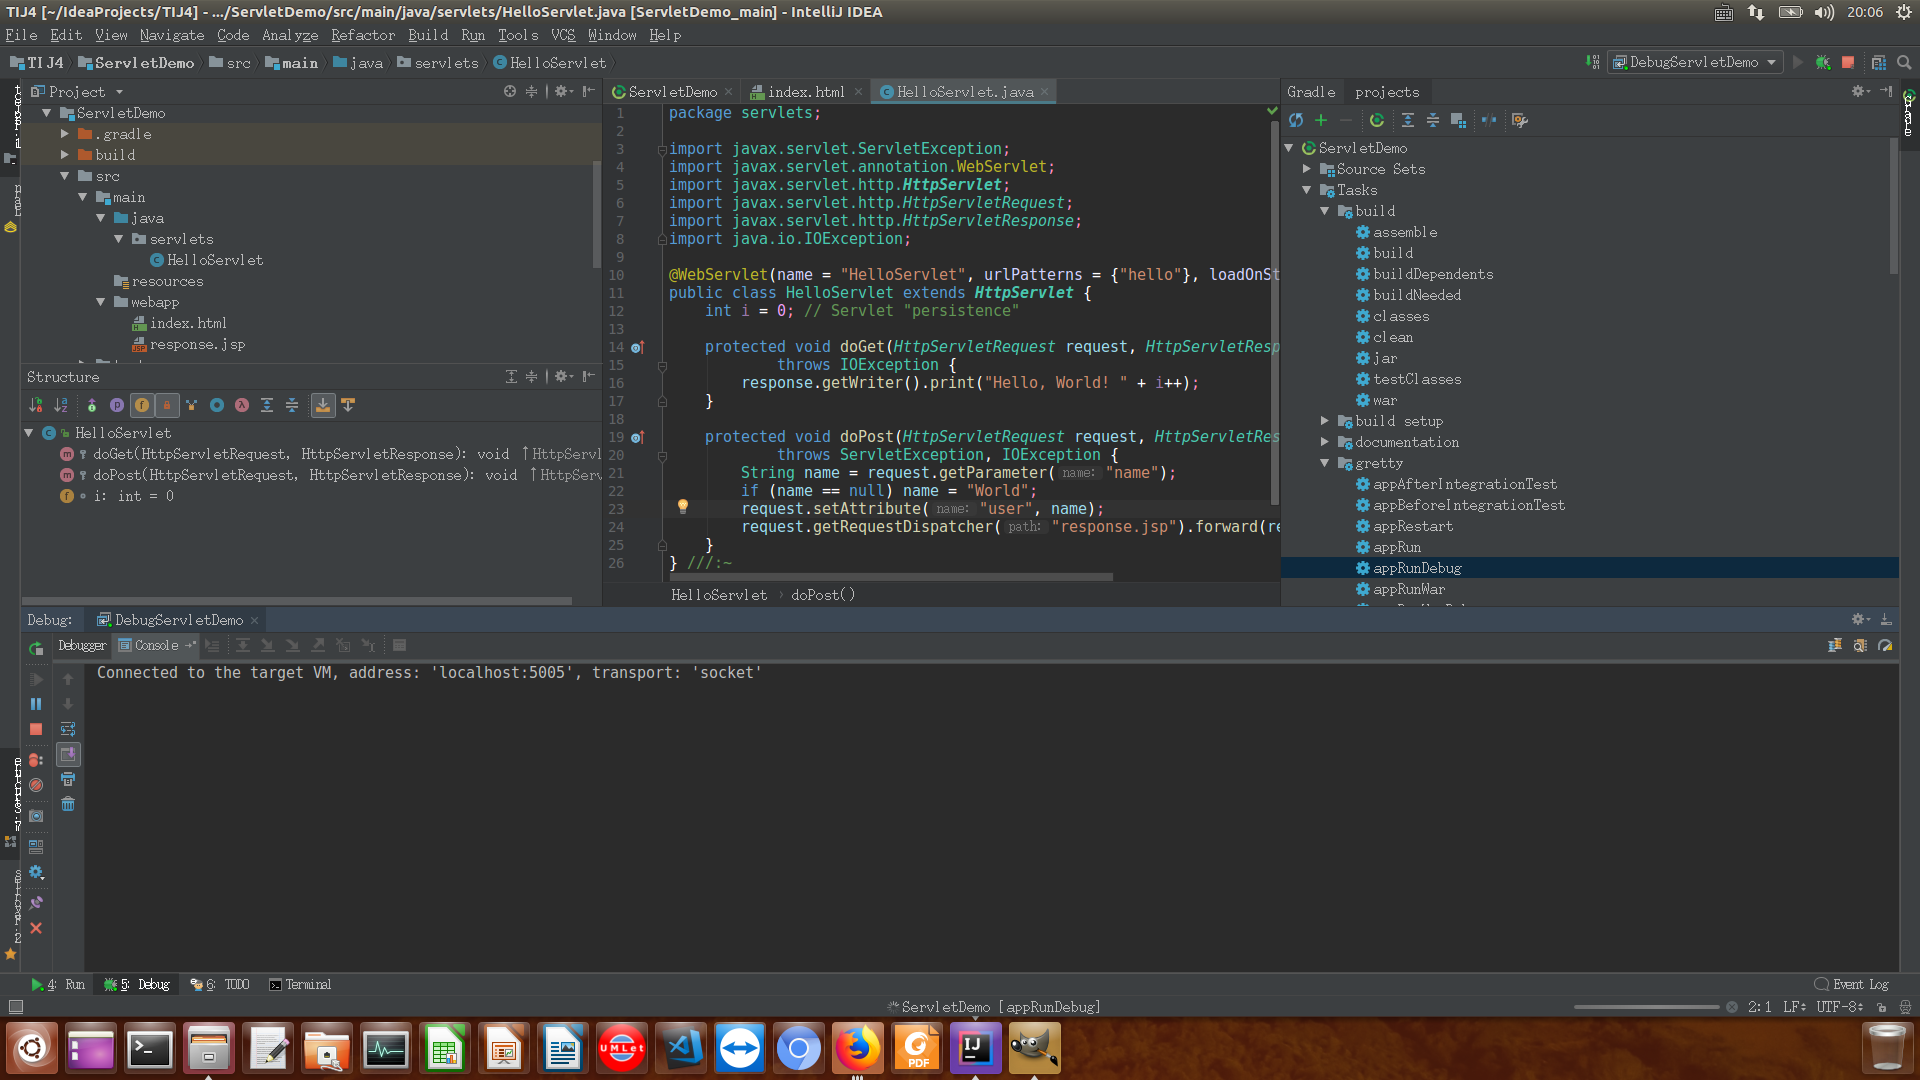
然后在Gradle面板中启动任务gretty.appRunDebug,如下图Run选项卡中所示,在5005端口等待Debugger的连接

接下来再启动Run->Debug->DebugServletDemo,如下图Debug选项卡中所示,Debugger已连接上5005端口
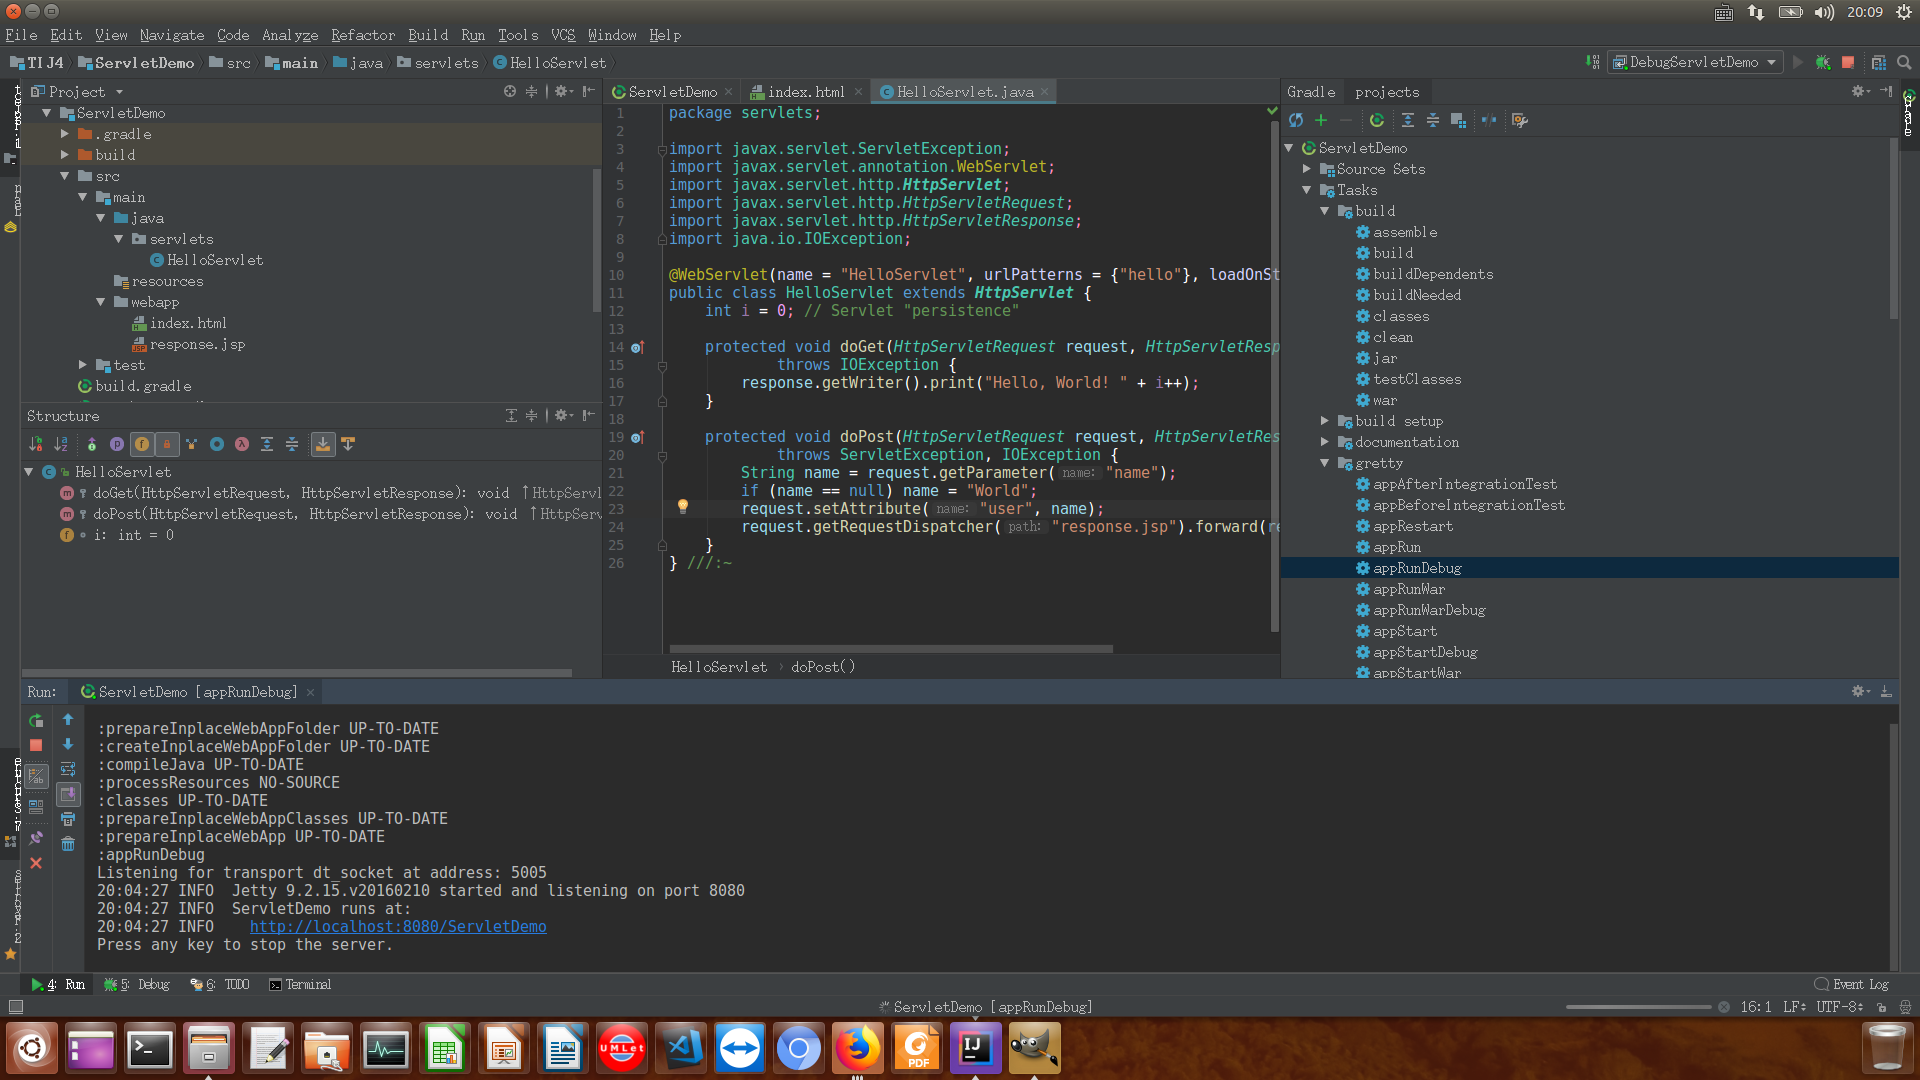
此时再次查看Run选项卡,会发现其中内容如下,点击该http链接开始调试
2.部署到tomcat
2.1. 打包war只需要Gradle面板中选择build.build任务即可,然后把war包放到tomcat安装目录的webapps/目录下,这里我的war包名为ServletDemo-1.0-SNAPSHOT.war
2.2. 修改tomcat安装目录下的conf/tomcat-users.xml,如下内容,从而可以使用tomcat的管理权限
<?xml version="1.0" encoding="UTF-8"?>
<!--
  Licensed to the Apache Software Foundation (ASF) under one or more
  contributor license agreements.  See the NOTICE file distributed with
  this work for additional information regarding copyright ownership.
  The ASF licenses this file to You under the Apache License, Version 2.0
  (the "License"); you may not use this file except in compliance with
  the License.  You may obtain a copy of the License at

      http://www.apache.org/licenses/LICENSE-2.0

  Unless required by applicable law or agreed to in writing, software
  distributed under the License is distributed on an "AS IS" BASIS,
  WITHOUT WARRANTIES OR CONDITIONS OF ANY KIND, either express or implied.
  See the License for the specific language governing permissions and
  limitations under the License.
-->
<tomcat-users xmlns="http://tomcat.apache.org/xml"
              xmlns:xsi="http://www.w3.org/2001/XMLSchema-instance"
              xsi:schemaLocation="http://tomcat.apache.org/xml tomcat-users.xsd"
              version="1.0">
<!--
  NOTE:  By default, no user is included in the "manager-gui" role required
  to operate the "/manager/html" web application.  If you wish to use this app,
  you must define such a user - the username and password are arbitrary. It is
  strongly recommended that you do NOT use one of the users in the commented out
  section below since they are intended for use with the examples web
  application.
-->
<!--
  NOTE:  The sample user and role entries below are intended for use with the
  examples web application. They are wrapped in a comment and thus are ignored
  when reading this file. If you wish to configure these users for use with the
  examples web application, do not forget to remove the <!.. ..> that surrounds
  them. You will also need to set the passwords to something appropriate.
-->
<!--
  <role rolename="tomcat"/>
  <role rolename="role1"/>
  <user username="tomcat" password="<must-be-changed>" roles="tomcat"/>
  <user username="both" password="<must-be-changed>" roles="tomcat,role1"/>
  <user username="role1" password="<must-be-changed>" roles="role1"/>
-->
    <role rolename="manager-gui"/>
    <user username="admin" password="1qaz2WSX" roles="manager-gui"/>
</tomcat-users>
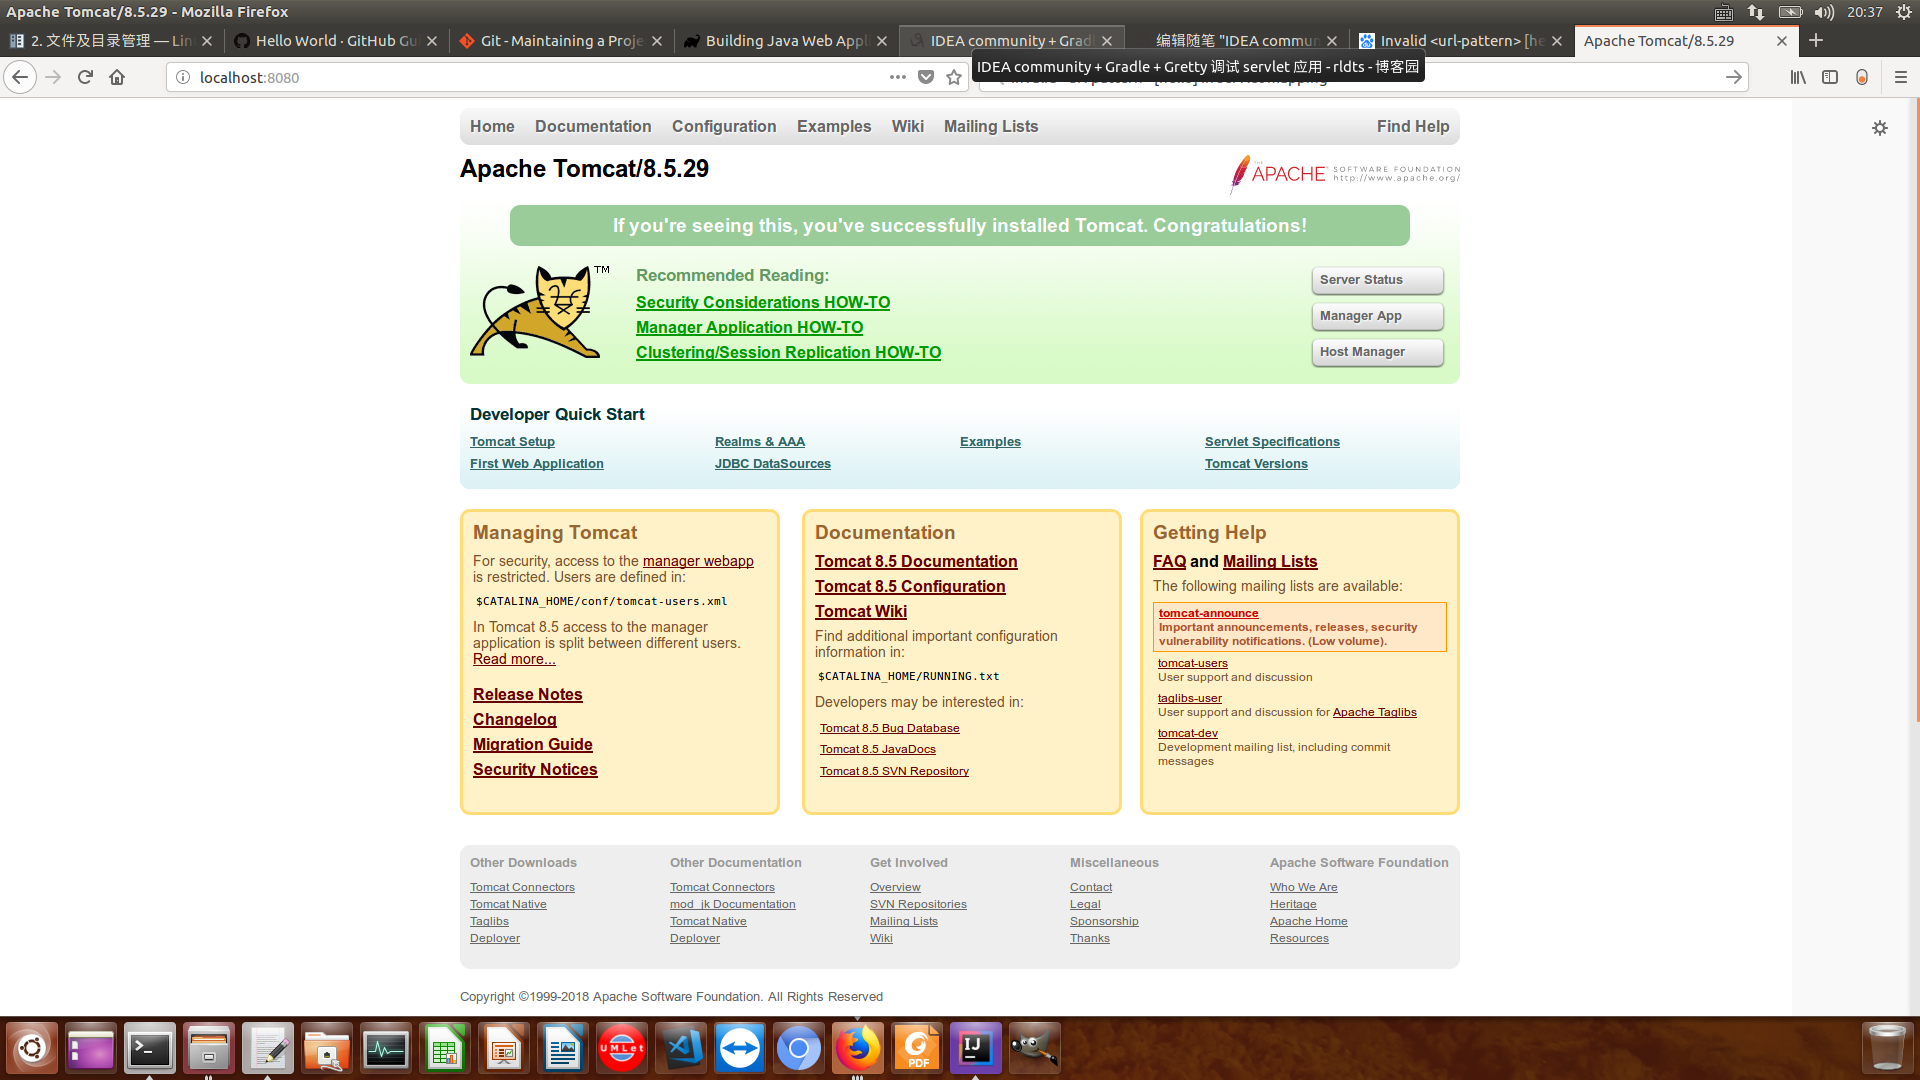
2.3. 启动tomcat,访问localhost:8080,如下:
2.4. 点击"Manager App"按钮,进入如下页面,然后start ServletDemo-1.0-SNAPSHOT即可访问
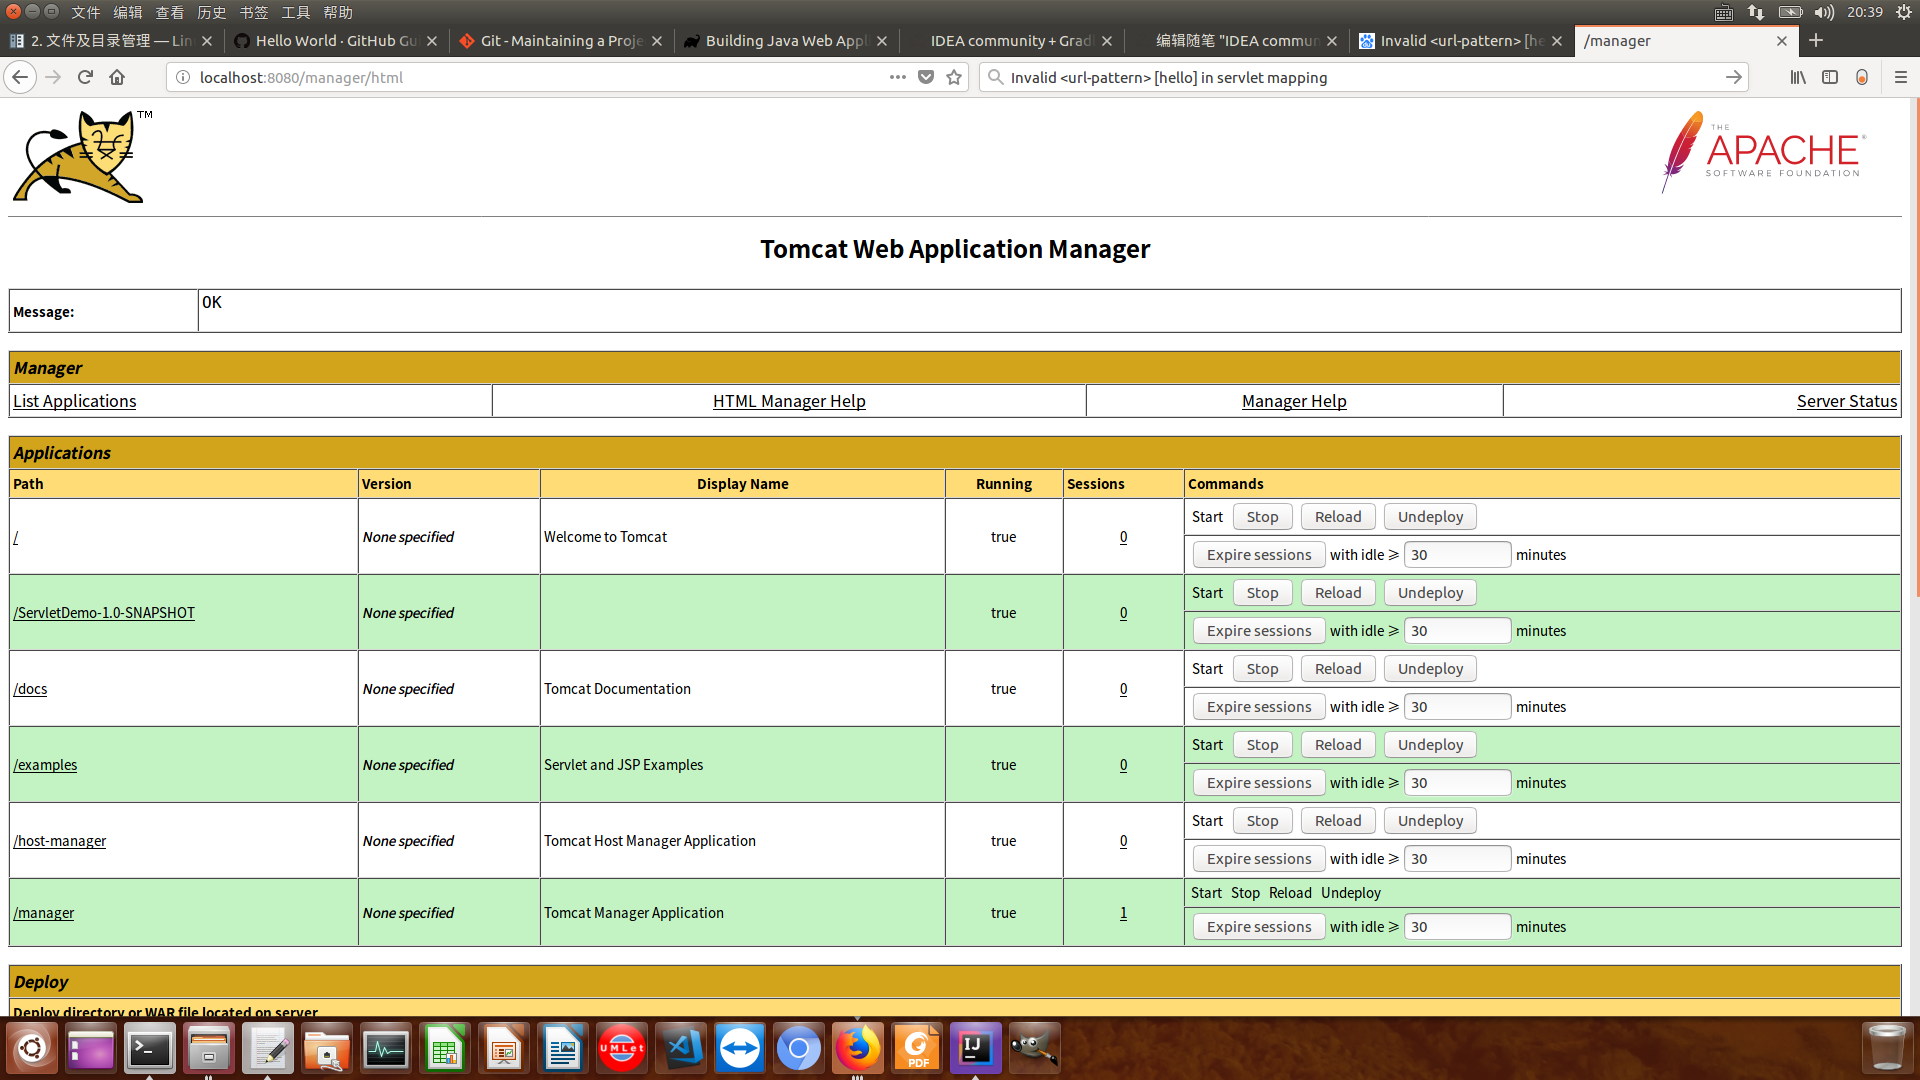
2.4.1. 这里我发现war包的app不能启动,在tomcat的logs/manager.2018.xx.xx.log中发现报错Invalid <url-pattern> [hello] in servlet mapping,去HelloServlet.java中把urlPatterns="hello"改为urlPatterns="/hello"即可}改为