昨天在sohu的网站上面看到一个新闻,是报道日本在地震前后的图片对比效果如:http://news.sohu.com/s2011/2919/s279798594/
自己玩了下决定很有意思,就研究了下下!呵呵。当然得有两张一样大小的图片:
步骤如下:
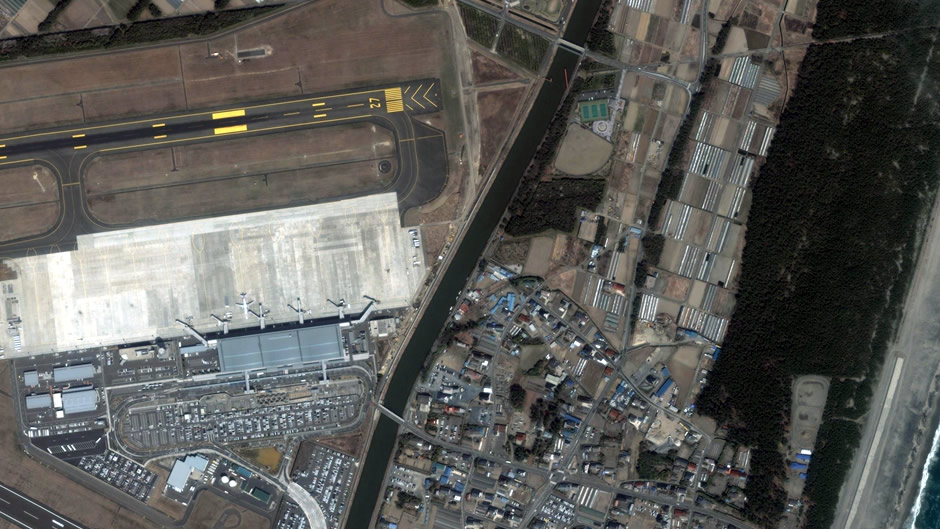
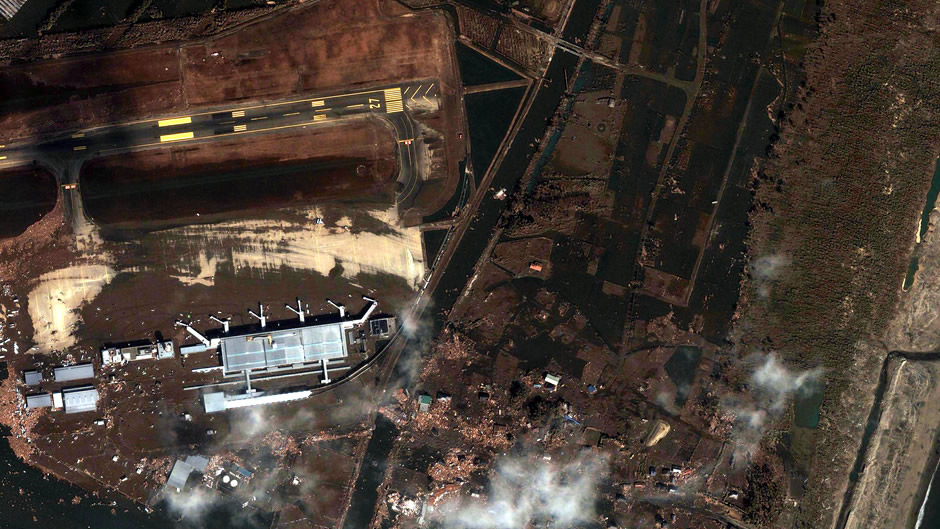
1.在页面上定义几个层:(下面图片使用sohu的,呵呵)
<div class="imgdiv">
你懂的...
<img rel="before" src="http://news.sohu.com/upload/2011ribendizhenqianhou/sendai-airport-1.jpg" width="900px" height="529px" />
<img rel="after" src="http://news.sohu.com/upload/2011ribendizhenqianhou/sendai-airport-2.jpg" width="900px" height="529px" />
</div>
2.定义css样式,主要为了以后让imgdiv层加两张图片的时候,让第二张图片覆盖第一个:(下面还定义了after和before的样式,会觉得奇怪么?看完第三布就会理解了。)
.imgdiv {
overflow:hidden;
position:relative;
}
.after {
left:0;
position:absolute;
top:0;
}
.before {
left:0;
position:absolute;
top:0;
}
3.接下来就是jq脚本了,首先并需明白原理:窗帘式就是说在鼠标(手)拉的时候显示出背后的东西,也就是鼠标移动事件。通过移动鼠标来改变brfore层显示的宽度,您还需要理解event参数和他clientX和Y的含义,
还有offset()的使用。这里不多说,下个jq文档可以查到。
$(".imgdiv").each(function () {
$(this).width($(this).find("img[rel=before]").attr("width")).height($(this).find("img[rel=before]").attr("height"));//定义当前层为图片的高度和宽度
$(this).append("<div class='after'></div>").find(".after").css({ "background": "url(" + $(this).find("img[rel=after]").attr("src") + ")", "width": $(this).find("img[rel=after]").attr("width") + "px", "height": $(this).find("img[rel=after]").attr("height") + "px" });//定义第一个层(背面层) 为图片after
$(this).append("<div class='before'></div>").find(".before").css({ "background": "url(" + $(this).find("img[rel=before]").attr("src") + ")", "width": $(this).find("img[rel=before]").attr("width") - 40 + "px", "height": $(this).find("img[rel=before]").attr("height") + "px" });//定义第二个层(外面) 为图片before
$(this).find("img").remove();//移除图片
//定义移动事件
$(this).mousemove(function (event) {
var offset = $(this).offset().left;
if ((event.clientX - offset) < ($(this).find(".after").width() - 50) && (event.clientX - offset) > 50) {//这个判断是为了预留外面层显示的限制范围,最少要显示50px 最多显示(宽度-50px)
$(this).find(".before").width(event.clientX - offset);//设置外面层宽度
}
}
其实原理还是蛮简单的...