首先需要JAR包
Spring整合Structs2的JAR包
struts2-spring-plugin-2.3.4.1.jar
下载地址
链接: https://pan.baidu.com/s/1o7I0Bdo 密码: eg3a
spring-web-4.2.4.RELEASE.jar
这个JAR包在Spring框架包的libs中有
Structs2所需JAR包如下:

也需要放进来
我整理的Struts2下载地址
链接: https://pan.baidu.com/s/1mh9blwc 密码: nsrp
制作一个Web项目,当服务器启动时自动加载Spring中的XML配置文件 启动struts过滤
web.xml文件代码
<?xml version="1.0" encoding="UTF-8"?>
<web-app xmlns:xsi="http://www.w3.org/2001/XMLSchema-instance" xmlns="http://xmlns.jcp.org/xml/ns/javaee" xsi:schemaLocation="http://xmlns.jcp.org/xml/ns/javaee http://xmlns.jcp.org/xml/ns/javaee/web-app_3_1.xsd" id="WebApp_ID" version="3.1">
  <display-name>2017-12-30_SSH</display-name>

  <!-- 监听的文件名 ContextLoaderListener父类ContextLoader中的一个属性得到param-name-->
  <context-param>
  <param-name>contextConfigLocation</param-name>
  <param-value>classpath:bean.xml</param-value>
  </context-param>


    <!-- 服务器启动自动加载XML配置文件 监听器 -->
    <listener>
    <listener-class>org.springframework.web.context.ContextLoaderListener</listener-class>
    </listener>

      <!-- struts2过滤器 -->
   <filter>
        <filter-name>struts2</filter-name>
        <filter-class>
            org.apache.struts2.dispatcher.ng.filter.StrutsPrepareAndExecuteFilter
        </filter-class>
    </filter>
    <filter-mapping>
        <filter-name>struts2</filter-name>
        <url-pattern>/*</url-pattern>
    </filter-mapping>

  <welcome-file-list>
    <welcome-file>index.html</welcome-file>
    <welcome-file>index.htm</welcome-file>
    <welcome-file>index.jsp</welcome-file>
    <welcome-file>default.html</welcome-file>
    <welcome-file>default.htm</welcome-file>
    <welcome-file>default.jsp</welcome-file>
  </welcome-file-list>
</web-app>
注意struts2的配置文件struts.xml文件名和位置不要弄错,放在src路径下
因为src下是类路径
struts.xml代码:
<?xml version="1.0" encoding="UTF-8"?>
<!DOCTYPE struts PUBLIC
    "-//Apache Software Foundation//DTD Struts Configuration 2.3//EN"
    "http://struts.apache.org/dtds/struts-2.3.dtd">

<struts>
    <package name="default" extends="struts-default" namespace="/">

    <!-- action的class不要写全名会创建两个对象,而写Spring配置文件中id的内容,只建一个对象
                  前提有struts2-spring-plugin-2.3.4.1.jar -->

        <action name="userAction" class="userAction">
        </action>
    </package>
</struts>
这里的<action name="userAction" class="userAction">
class无需再写类的全名,否则对象和Spring的bean.xml中对象相重,同时建立两个对象了
bean.xml代码:
<?xml version="1.0" encoding="UTF-8"?>
<beans xmlns="http://www.springframework.org/schema/beans"
    xmlns:xsi="http://www.w3.org/2001/XMLSchema-instance" xmlns:context="http://www.springframework.org/schema/context"
    xmlns:aop="http://www.springframework.org/schema/aop" xmlns:tx="http://www.springframework.org/schema/tx"
    xsi:schemaLocation="
        http://www.springframework.org/schema/beans http://www.springframework.org/schema/beans/spring-beans.xsd
        http://www.springframework.org/schema/context http://www.springframework.org/schema/context/spring-context.xsd
        http://www.springframework.org/schema/aop http://www.springframework.org/schema/aop/spring-aop.xsd
        http://www.springframework.org/schema/tx http://www.springframework.org/schema/tx/spring-tx.xsd">

    <!-- c3p0连接池得到dataSource -->
    <bean id="dataSource" class="com.mchange.v2.c3p0.ComboPooledDataSource">
        <property name="driverClass" value="com.mysql.jdbc.Driver"></property>
        <property name="jdbcUrl" value="jdbc:mysql://localhost:3306/sw_database"></property>
        <property name="user" value="root"></property>
        <property name="password" value="root"></property>
    </bean>

    <bean id="userAction" class="com.swift.action.UserAction" scope="prototype"></bean>

</beans>
这里的<bean id="userAction" class="com.swift.action.UserAction" scope="prototype"></bean>
Scope中的prototype是非单例对象
action对象的类要继承ActionSupport类
代码如下:
package com.swift.action;

import com.opensymphony.xwork2.ActionSupport;

public class UserAction extends ActionSupport {

    @Override
    public String execute() throws Exception {
        System.out.println("action..................");
        return NONE;
    }

}
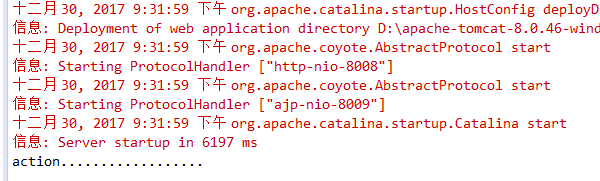
显示结果如上