1 简介
微软发布的 COCO 数据库是一个大型图像数据集, 专为对象检测、分割、人体关键点检测、语义分割和字幕生成而设计。
COCO 数据库的网址是:
- MS COCO 数据集主页:http://mscoco.org/
- Github 网址:https://github.com/Xinering/cocoapi
- 关于 API 更多的细节在网站: http://mscoco.org/dataset/#download
COCO API 提供了 Matlab, Python 和 Lua 的 API 接口. 该 API 接口可以提供完整的图像标签数据的加载, parsing 和可视化。此外,网站还提供了数据相关的文章, 教程等。
在使用 COCO 数据库提供的 API 和 demo 之前, 需要首先下载 COCO 的图像和标签数据(类别标志、类别数量区分、像素级的分割等 ):
- 图像数据下载到
coco/images/文件夹中 - 标签数据下载到
coco/annotations/文件夹中
下面我们来探讨一下如何利用 Python 来使用 COCO 数据集?
COCO API 对 WIndows 系统不是太友好,首先我先是 fork 了 COCO API,然后下载到本地,并切换到:D:APIcocoapiPythonAPI。
cd D:APIcocoapiPythonAPI
打开 Makefile 可以看到 API 的安装和使用说明。
在 Windows 下直接运行 python setup.py build_ext --inplace 会报错:
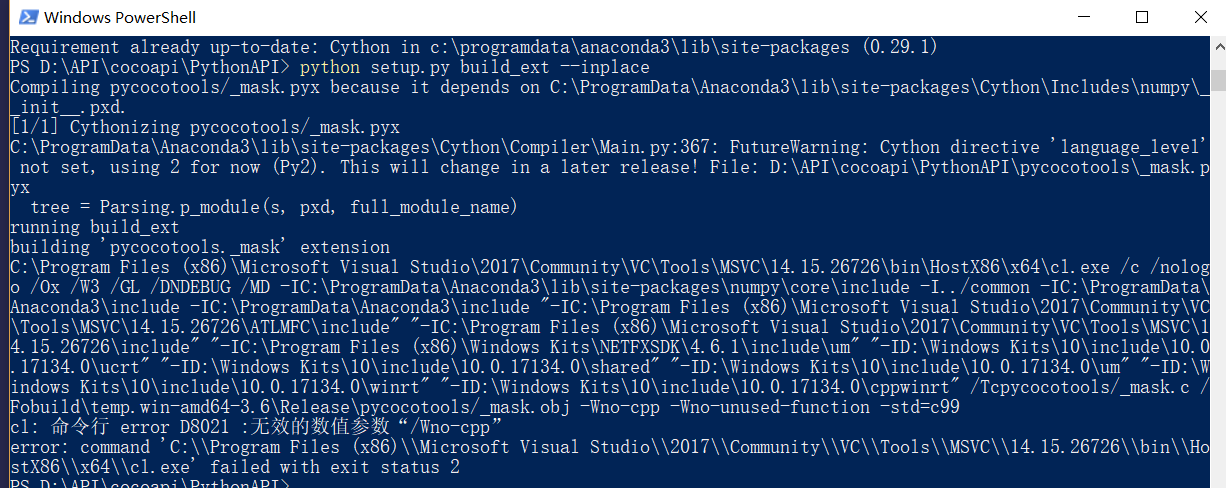
Windows 中 (一般需要安装 visual studio)有许多的坑,参考 Windows 10 编译 Pycocotools 踩坑记 暴力删掉参数 Wno-cpp 和 Wno-unused-function,如下图所示:

这样,我们便可以使用 pycocotools,不过每次你想要调用 pycocotools 都需要先载入局部环境:
import sys
sys.path.append('D:APIcocoapiPythonAPI')   # 将你的 `pycocotools` 所在路径添加到系统环境
如果你不想这么麻烦,你可以直接将 pycocotools 安装在你的主环境下:
先切换到包所在路径
cd D:APIcocoapiPythonAPI
然后,运行
python setup.py build_ext install
rd build   # 删除
在 Linux 下,不需要上面这么多编译步骤,我们直接在终端输入下列命令即可正常使用 COCO API:
pip3 install -U Cython
pip3 install -U pycocotools
下面你便可载入 pycocotools 了。
2 COCO API
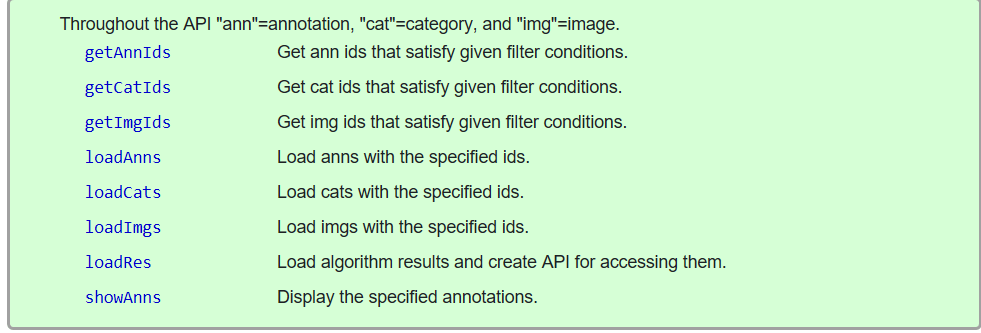
COCO API 可以帮助你载入、解析和可视化 annotations。 该 API 支持 multiple annotation 格式 (详情见 data format). 更多关于 API 的细节可参考 coco.py,同时你也可以查看 Python API demo。
COCO API 的记号说明:
3 MASK API
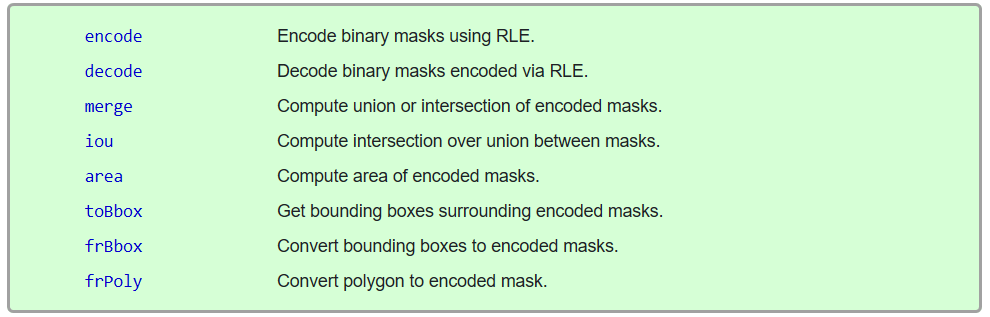
COCO 为每个实例对象提供分割掩码(segmentation masks)。这就产生了两个挑战: 紧凑地存储掩码和高效地执行掩码计算。 MASK API 使用自定义运行长度编码 (Run Length Encoding, RLE) 方案解决这两个难题。RLE 表示的大小与掩码的边界像素数成正比, 并且可以在 RLE 上直接有效地计算操作 (如面积、联合或交集)。具体来说, 假设 shapes 相当简单, RLE 表示形式为 (O(sqrt{n}), 其中 (n) 是对象中的像素数, 而通常计算量同样是 (O(sqrt{n}))。在解码掩码 (存储为阵列) 上进行相同操作的自然的计算量将是 (O(n))。
Mask API 提供了一个用于操作以 RLE 格式存储的掩码的接口。这个 API 被定义在 mask.py。最后, 大多数 ground truth masks 存储为多边形 (相当紧凑), 这些多边形在需要时转换为 RLE。
下面我们来解读一下 pycocoDemo.ipynb。由于 COCO API 对 Windows 不是那么友好,为了避免去调试各种 Bug,下面我们先在 Linux 系统下来使用 COCO API。下面我是在 Jupyter Notebook 下运行代码的。
4 pycocoDemo.ipynb 解读
%matplotlib inline
import zipfile
import os
import numpy as np
import skimage.io as io
import matplotlib.pyplot as plt
import pylab
pylab.rcParams['figure.figsize'] = (8.0, 10.0)

# -------------------
try:       # pycocotools 已经加入了全局环境变量中
    from pycocotools.coco import COCO
except ModuleNotFoundError:
    import sys
    # 加载 COCO API 环境
    sys.path.append('D:APIcocoapiPythonAPI')
    from pycocotools.coco import COCO

root = 'E:/Data/coco'  # 你下载的 COCO 数据集所在目录

# 查看 images 下的图片
os.listdir(f'{root}/images')
['test2014.zip',
 'test2015.zip',
 'test2017.zip',
 'train2014.zip',
 'train2017.zip',
 'unlabeled2017.zip',
 'val2014.zip',
 'val2017.zip']
下面我以 val2017.zip 图片数据集为例,来说明下面的一些问题。
Z = zipfile.ZipFile(f'{root}/images/val2017.zip')
Z.namelist()[7]   # 查看一张图片的文件名
'val2017/000000463918.jpg'
由于 Z.read 函数返回的是 bytes,所以,我们需要借助一些其他模块来将图片数据转换为 np.uint8 形式。
img_b = Z.read(Z.namelist()[7])
print(type(img_b))
<class 'bytes'>
方式1:np.frombuffer(img_b, 'B')
import numpy as np
import cv2

img_flatten = np.frombuffer(img_b, 'B')
img_cv = cv2.imdecode(img_flatten, cv2.IMREAD_ANYCOLOR)
print(img_cv.shape)
(359, 500, 3)
方式2:imageio.imread
import imageio
img_io = imageio.imread(img_b)
print(img_io.shape)
(359, 500, 3)
方式3:mxnet.image.imdecode
import mxnet as mx
img_mx = mx.image.imdecode(img_b)
下面我们来看看这张图片张什么样?
from matplotlib import pyplot as  plt

plt.subplot(231)
plt.imshow(cv2.cvtColor(img_cv, cv2.COLOR_BGR2RGB))
plt.title('OpenCV')
plt.axis('off')
plt.subplot(232)
plt.imshow(img_io)
plt.title('imageio')
plt.axis('off')
plt.subplot(233)
plt.imshow(img_io)
plt.title('MXNet')
plt.axis('off')
plt.show()
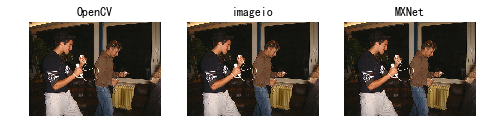
考虑到 OpenCV 的高效性,我们采用方式1 来处理 images 下的图片数据。
def buffer2array(Z, image_name):
    '''
    无需解压,直接获取图片数据

    参数
    ===========
    Z:: 图片数据是 ZipFile 对象
    '''
    buffer = Z.read(image_name)
    image = np.frombuffer(buffer, dtype="B")  # 将 buffer 转换为 np.uint8 数组
    img = cv2.imdecode(image, cv2.IMREAD_COLOR)
    return img


img = buffer2array(Z, Z.namelist()[8])
print('图片的尺寸:', img.shape)
图片的尺寸: (480, 640, 3)
4.1 获取标签信息(利用官方给定教程)
这里有一个坑 (由 PIL 引发) import skimage.io as io 在 Windows 下可能会报错,我的解决办法是:
-
先卸载 Pillow,然后重新安装即可。
-
插曲:PIL(Python Imaging Library)是Python一个强大方便的图像处理库,名气也比较大。Pillow 是 PIL 的一个派生分支,但如今已经发展成为比 PIL 本身更具活力的图像处理库。
dataDir = cocox.root
dataType = 'val2017'
annFile = '{}/annotations/instances_{}.json'.format(dataDir, dataType)
# initialize COCO api for instance annotations
coco=COCO(annFile)
loading annotations into memory...
Done (t=0.93s)
creating index...
index created!
COCO??
COCO 是一个类:
Constructor of Microsoft COCO helper class for reading and visualizing annotations.
:param annotation_file (str): location of annotation file
:param image_folder (str): location to the folder that hosts images.
4.2 COCO categories and supercategories
cats = coco.loadCats(coco.getCatIds())
nms = [cat['name'] for cat in cats]
print('COCO categories:
{}
'.format(' '.join(nms)))

nms = set([cat['supercategory'] for cat in cats])
print('COCO supercategories:
{}'.format(' '.join(nms)))
COCO categories:
person bicycle car motorcycle airplane bus train truck boat traffic light fire hydrant stop sign parking meter bench bird cat dog horse sheep cow elephant bear zebra giraffe backpack umbrella handbag tie suitcase frisbee skis snowboard sports ball kite baseball bat baseball glove skateboard surfboard tennis racket bottle wine glass cup fork knife spoon bowl banana apple sandwich orange broccoli carrot hot dog pizza donut cake chair couch potted plant bed dining table toilet tv laptop mouse remote keyboard cell phone microwave oven toaster sink refrigerator book clock vase scissors teddy bear hair drier toothbrush

COCO supercategories:
appliance sports person indoor vehicle food electronic furniture animal outdoor accessory kitchen
# get all images containing given categories, select one at random
catIds = coco.getCatIds(catNms=['person', 'dog', 'skateboard'])
imgIds = coco.getImgIds(catIds=catIds)
imgIds = coco.getImgIds(imgIds=[335328])
img = coco.loadImgs(imgIds[np.random.randint(0, len(imgIds))])[0]
img
{'license': 4,
 'file_name': '000000335328.jpg',
 'coco_url': 'http://images.cocodataset.org/val2017/000000335328.jpg',
 'height': 640,
 'width': 512,
 'date_captured': '2013-11-20 19:29:37',
 'flickr_url': 'http://farm3.staticflickr.com/2079/2128089396_ddd988a59a_z.jpg',
 'id': 335328}
官方给的这个代码需要将图片数据集解压:
# load and display image
# use url to load image
# I = io.imread(img['coco_url'])
I = io.imread('%s/images/%s/%s' % (dataDir, dataType, img['file_name']))
plt.axis('off')
plt.imshow(I)
plt.show()
我们可以使用 zipfile 模块直接读取图片,而无须解压:
image_names[-1]
'E:/Data/coco/images/val2017.zip'
val_z = zipfile.ZipFile(image_names[-1])
I = image.imdecode(val_z.read('%s/%s' % (dataType, img['file_name']))).asnumpy()
# 或者直接使用 I = buffer2array(val_z, val_z.namelist()[8])
plt.axis('off')
plt.imshow(I)
plt.show()
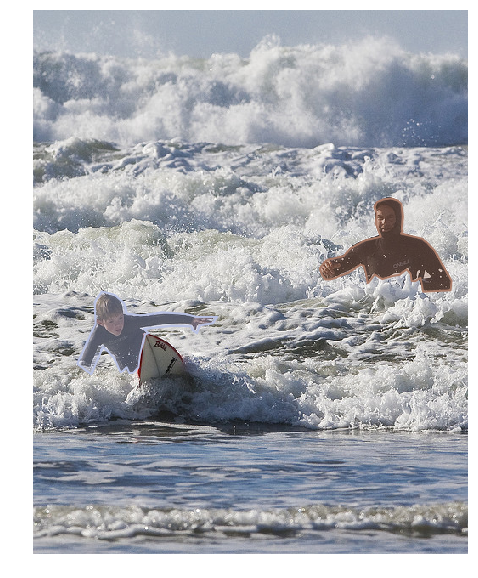
4.3 载入和展示 instance annotations
plt.imshow(I)
plt.axis('off')
annIds = coco.getAnnIds(imgIds=img['id'], catIds=catIds, iscrowd=None)
anns = coco.loadAnns(annIds)
coco.showAnns(anns)
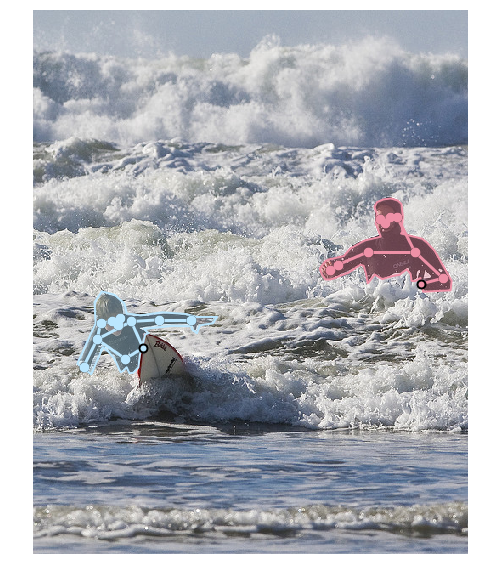
4.4 载入人体关键点标注
初始化人体关键点标注(person keypoints annotations)的 COCO api
annFile = '{}/annotations/person_keypoints_{}.json'.format(dataDir, dataType)
coco_kps = COCO(annFile)
loading annotations into memory...
Done (t=0.43s)
creating index...
index created!
show:
plt.imshow(I)
plt.axis('off')
ax = plt.gca()
annIds = coco_kps.getAnnIds(imgIds=img['id'], catIds=catIds, iscrowd=None)
anns = coco_kps.loadAnns(annIds)
coco_kps.showAnns(anns)
4.5 载入和展示 caption annotations
annFile = '{}/annotations/captions_{}.json'.format(dataDir, dataType)
coco_caps = COCO(annFile)
loading annotations into memory...
Done (t=0.06s)
creating index...
index created!
show:
annIds = coco_caps.getAnnIds(imgIds=img['id'])
anns = coco_caps.loadAnns(annIds)
coco_caps.showAnns(anns)
plt.imshow(I)
plt.axis('off')
plt.show()
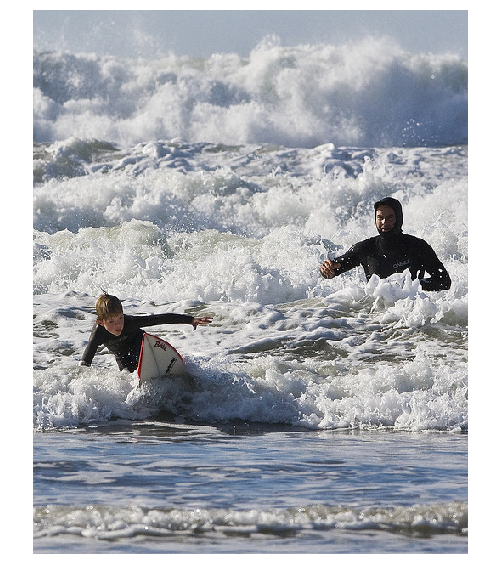
A couple of people riding waves on top of boards.
a couple of people that are surfing in water
A man and a young child in wet suits surfing in the ocean.
a man and small child standing on a surf board  and riding some waves
A young boy on a surfboard being taught to surf.

5 更新
2018/11/29
我在 Github 上放置了一个仓库:datasetsome,该仓库存储一些数据集处理相关的 API,如果感觉对您有帮助,请给个 star。
你也可以在线编辑:https://mybinder.org/v2/gh/DataLoaderX/datasetsome/master
除此之外,我还写了一个 深度学习常用数据集 API。
为了令 Windows 系统也可以更好的使用 COCO 数据集,我打算开发一个可以适用于 Windows 和 Linux 系统是 API,同时利用 Python 的 ZipFile 模块直接读取 images 下的图片数据以及 annotations 下的标注数据。(直接跳过解压这一费时的步骤)该 API 的更新我放置在了 cocox。欢迎大家阅览!
2018/11/30
2018/12/3
COCO 数据集使用说明书 着重介绍了 cocoz.py。
2018/12/13
自制 COCO api 直接读取类 COCO 的标注数据的压缩文件 改进 ImageZ,使其支持索引和切片以及迭代功能。为了令其他数据也可以使用 ImageZ 类,我将 ImageZ 的输入参数改为 images 所在路径,其他不变。同时,举了一个 Kaggle 比赛的例子:Humpback Whale Identification 来说明 ImageZ 的通用性。
2018/12/23
2019/1/29
利用 ImageZ 与 MXNet 实战 Kaggle 猫狗分类
2019/3/30
更多的项目更新
2019/4/1
- 利用 ImageZ 与 AnnZ:Faster RCNN 学习与实现
- GitHub:meet 求点赞。
2019/10/12
创建计算机视觉社区:动手实践计算机视觉。本社区欢迎大家贡献与计算机视觉相关的代码或者文档,同时也欢迎大家分享一些有意思的 idea 或者 issue。还可以在 gitter@cv-actions 或者 GitPress@cv_actions 交流计算机视觉学习心得。
2020/01/01
programming项目记录本人自学的些许笔记。在 book 放置了我的第一本书,该书记录了如何使用 Git 去管理项目以及如何使用 Python 处理数据集,训练神经网络,做符号运算。同时也介绍了 MXNet 与 TensorFlow2 的基本使用。介绍了如何设计属于自己的深度学习环境和 GitHub 社区。您亦可以下载 tutorials 观看。
本篇博文已经被收录到了 book。