SpringBoot入门建站全系列(九)文件上传功能与下载方式
Spring对文件上传做了简单的封装,就是用MultipartFile这个对象去接收文件,当然有很多种写法,下面会一一介绍。
文件的下载很简单,给一个链接就行,而这个链接怎么生成,也有很多方式,下面也会讲解下常用的方式。
application.properties 中需要添加下面的配置:
spring.servlet.multipart.enabled=true
spring.servlet.multipart.max-file-size=20MB
spring.servlet.multipart.max-request-size=50MB
这里,
- spring.servlet.multipart.max-file-size是对单个文件大小的限制。
- spring.servlet.multipart.max-request-size是对单次请求的大小进行限制
至此,已经可以正常的进行上传下载了,就剩下写代码了。
文件上传的几种方式
在Controller的RequestMapping注解的方法参数中,直接将MultipartFile作为参数传递进来。
package com.cff.springbootwork.web.file;

import org.slf4j.Logger;
import org.slf4j.LoggerFactory;
import org.springframework.beans.factory.annotation.Autowired;
import org.springframework.beans.factory.annotation.Value;
import org.springframework.web.bind.annotation.RequestMapping;
import org.springframework.web.bind.annotation.RequestParam;
import org.springframework.web.bind.annotation.RestController;
import org.springframework.web.multipart.MultipartFile;

import com.cff.springbootwork.dto.ResultModel;
import com.cff.springbootwork.service.UploadService;

@RestController
@RequestMapping("/file")
public class FileRest {
	private Logger log = LoggerFactory.getLogger(this.getClass());

	@Value("${upload.static.url}")
	private String uploadStaticUrl;

	@Autowired
	UploadService uploadService;

	@RequestMapping("/upload")
	public ResultModel upload(@RequestParam("files") MultipartFile file) {
		try {
			if (file.isEmpty()) {
				return ResultModel.error("文件不能为空!");
			}
			String fileName = uploadService.saveUploadFile(file);
			return ResultModel.ok(uploadStaticUrl + fileName);
		} catch (Exception e) {
			e.printStackTrace();
			log.error("文件上传失败!", e);
			return ResultModel.error("文件上传失败!");
		}
	}
}
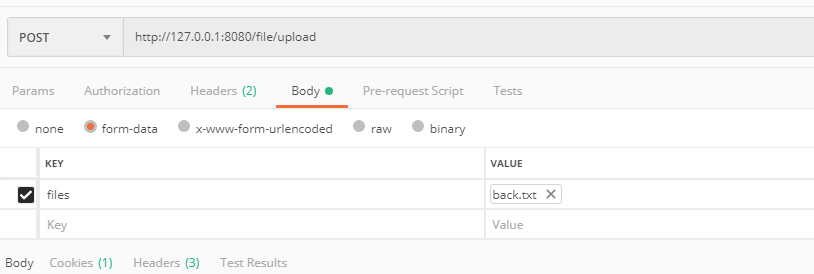
测试的时候,使用postman可以这样传参:
2.2 多个文件上传
在Controller的RequestMapping注解的方法参数中,直接将MultipartFile作为list传递进来。在FileRest中增加uploadList方法。
package com.cff.springbootwork.web.file;

import java.util.ArrayList;
import java.util.List;

import org.slf4j.Logger;
import org.slf4j.LoggerFactory;
import org.springframework.beans.factory.annotation.Autowired;
import org.springframework.beans.factory.annotation.Value;
import org.springframework.web.bind.annotation.RequestMapping;
import org.springframework.web.bind.annotation.RequestParam;
import org.springframework.web.bind.annotation.RestController;
import org.springframework.web.multipart.MultipartFile;

import com.cff.springbootwork.dto.ResultModel;
import com.cff.springbootwork.service.UploadService;

@RestController
@RequestMapping("/file")
public class FileRest {
	private Logger log = LoggerFactory.getLogger(this.getClass());

	@Value("${upload.static.url}")
	private String uploadStaticUrl;

	@Autowired
	UploadService uploadService;

	@RequestMapping("/upload")
	public ResultModel upload(@RequestParam("files") MultipartFile file) {
		try {
			if (file.isEmpty()) {
				return ResultModel.error("文件不能为空!");
			}
			String fileName = uploadService.saveUploadFile(file);
			return ResultModel.ok(uploadStaticUrl + fileName);
		} catch (Exception e) {
			e.printStackTrace();
			log.error("文件上传失败!", e);
			return ResultModel.error("文件上传失败!");
		}
	}

	@RequestMapping("/uploadList")
	public ResultModel uploadList(@RequestParam("files") List<MultipartFile> fileList) {
		try {
			List<String> list = new ArrayList<>();
			for (MultipartFile file : fileList) {
				String fileName = uploadService.saveUploadFile(file);
				list.add(uploadStaticUrl + fileName);
			}
			return ResultModel.ok(list);
		} catch (Exception e) {
			e.printStackTrace();
			log.error("文件上传失败!", e);
			return ResultModel.error("文件上传失败!");
		}
	}
}
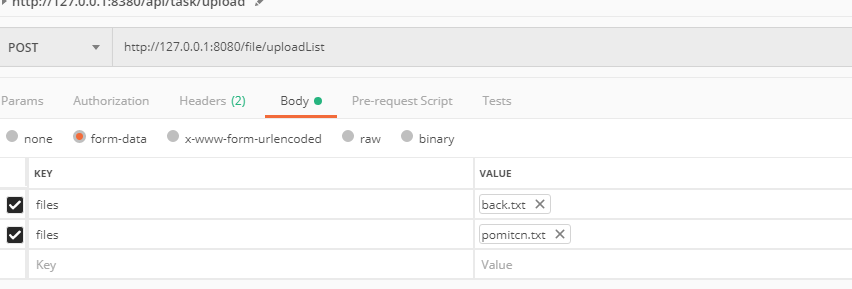
测试的时候,使用postman可以这样传参:
从HttpServletRequest中取文件
新建uploadByRequest方法,将HttpServletRequest作为参数,Spring自动传入。
Spring对Request做了一层封装,如果有文件,它就是MultipartHttpServletRequest。
然后我们可以从MultipartHttpServletRequest获取到MultipartFile。后面的处理方式一样了。
package com.cff.springbootwork.web.file;

import java.util.ArrayList;
import java.util.HashMap;
import java.util.List;
import java.util.Map;

import javax.servlet.http.HttpServletRequest;

import org.slf4j.Logger;
import org.slf4j.LoggerFactory;
import org.springframework.beans.factory.annotation.Autowired;
import org.springframework.beans.factory.annotation.Value;
import org.springframework.util.MultiValueMap;
import org.springframework.web.bind.annotation.RequestMapping;
import org.springframework.web.bind.annotation.RequestParam;
import org.springframework.web.bind.annotation.RestController;
import org.springframework.web.multipart.MultipartFile;
import org.springframework.web.multipart.MultipartHttpServletRequest;

import com.cff.springbootwork.dto.ResultModel;
import com.cff.springbootwork.service.UploadService;

@RestController
@RequestMapping("/file")
public class FileRest {
	private Logger log = LoggerFactory.getLogger(this.getClass());

	@Value("${upload.static.url}")
	private String uploadStaticUrl;

	@Autowired
	UploadService uploadService;

	@RequestMapping("/upload")
	public ResultModel upload(@RequestParam("files") MultipartFile file) {
		try {
			if (file.isEmpty()) {
				return ResultModel.error("文件不能为空!");
			}
			String fileName = uploadService.saveUploadFile(file);
			return ResultModel.ok(uploadStaticUrl + fileName);
		} catch (Exception e) {
			e.printStackTrace();
			log.error("文件上传失败!", e);
			return ResultModel.error("文件上传失败!");
		}
	}

	@RequestMapping("/uploadList")
	public ResultModel uploadList(@RequestParam("files") List<MultipartFile> fileList) {
		try {
			List<String> list = new ArrayList<>();
			for (MultipartFile file : fileList) {
				String fileName = uploadService.saveUploadFile(file);
				list.add(uploadStaticUrl + fileName);
			}
			return ResultModel.ok(list);
		} catch (Exception e) {
			e.printStackTrace();
			log.error("文件上传失败!", e);
			return ResultModel.error("文件上传失败!");
		}
	}

	@RequestMapping("/uploadByRequest")
	public ResultModel uploadByRequest(HttpServletRequest request) {
		try {
			Map<String, MultipartFile> files = new HashMap<>();

			if (request instanceof MultipartHttpServletRequest) {
				MultipartHttpServletRequest req = (MultipartHttpServletRequest) request;
				MultiValueMap<String, MultipartFile> multiValueMap = req.getMultiFileMap();
				if (multiValueMap != null && !multiValueMap.isEmpty()) {
					for (String key : multiValueMap.keySet()) {
						files.put(key, multiValueMap.getFirst(key));
					}
				}
			}
			if (files.isEmpty())
				return ResultModel.error("文件木有?");

			List<String> list = new ArrayList<>();
			for (MultipartFile file : files.values()) {
				String fileName = uploadService.saveUploadFile(file);
				list.add(uploadStaticUrl + fileName);
			}
			return ResultModel.ok(list);
		} catch (Exception e) {
			e.printStackTrace();
			log.error("文件上传失败!", e);
			return ResultModel.error("文件上传失败!");
		}
	}
}
测试的时候,传参方式使用上面两种都可以了。
三、文件下载方式
文件上传成功后,我们同时会提供下载功能。下载功能很简单,有以下几种方式:
3.1 Spring配置映射
新建一个WebStaticConfig配置类,实现WebMvcConfigurer接口即可:
import org.springframework.beans.factory.annotation.Value;
import org.springframework.context.annotation.Configuration;
import org.springframework.web.servlet.config.annotation.ResourceHandlerRegistry;
import org.springframework.web.servlet.config.annotation.WebMvcConfigurer;

@Configuration
public class WebStaticConfig implements WebMvcConfigurer {
	@Value("${upload.static.local}")
	private String uploadStaticLocal;

	@Override
	public void addResourceHandlers(ResourceHandlerRegistry registry) {
		registry.addResourceHandler("/static/**").addResourceLocations("file:" + uploadStaticLocal);
	}

	public String getUploadStaticLocal() {
		return uploadStaticLocal;
	}

	public void setUploadStaticLocal(String uploadStaticLocal) {
		this.uploadStaticLocal = uploadStaticLocal;
	}

}
这句话将当前服务器(比如是http://127.0.0.1:8080)的/static路径(http://127.0.0.1:8080/static/)下的资源,映射到uploadStaticLocal指定的本地路径下的文件。
然后我们就可以直接访问文件了。
3.2 代理(nginx)映射
代理首选nginx了。高性能快捷的代理转发工具。
比如要将http://127.0.0.1:8081/static/下的资源,映射到/static/指定的本地路径下的文件,可以这样配置
server {
    listen       8081;
    server_name  localhost;

	location /static {
		alias /static/;
		index index.html;
	}
}
这里为什么用8081而不是上面的8080了呢?因为上面的8080端口已经被SpringBoot应用占用了。nginx要在另一个端口监听了,如果非要将SpringBoot应用和静态资源在一个端口,可以对SpringBoot应用也做代理,例如:
server {
    listen       8081;
    server_name  localhost;

    location ^~ /api/ {
        proxy_pass   http://127.0.0.1:8080/;
    }

    location /static {
        alias /static/;
        index index.html;
    }
}
3.3 ResponseEntity读取文件并返回
比如我们在FileRest的Controller中建立个downloadFile方法,传入文件名,将文件读取为byte,包装成ResponseEntity返回。
    @RequestMapping(value = "/downloadFile", method = { RequestMethod.GET })
    public ResponseEntity<byte[]> downloadFile(@RequestParam("fileName") String fileName) {
        try {
            File file = new File(fileName);
            byte[] body = null;
            InputStream is = new FileInputStream(file);
            body = new byte[is.available()];
            is.read(body);
            is.close();
            HttpHeaders headers = new HttpHeaders();
            headers.add("Content-Disposition", "attchement;filename=" + file.getName());
            HttpStatus statusCode = HttpStatus.OK;
            ResponseEntity<byte[]> entity = new ResponseEntity<byte[]>(body, headers, statusCode);
            return entity;
        } catch (Exception e) {
            e.printStackTrace();
            return null;
        }

    }