目录
1.插件
(https://cn.vuejs.org/v2/guide/plugins.html)
--1.1开发插件
(function (){
	//需要向外暴露的插件对象
	const MyPlugin = {}
	//插件对象必须有一个install()
	MyPlugin.install = function (Vue, options) {

	  // 1. 添加全局方法或 property
	  Vue.myGlobalMethod = function () {
	    // 逻辑...
		console.log('Vue函数对象的方法myGlobalMethod()')
	  }

	  // 2. 添加全局资源
	  // Vue.directive('my-directive', {
	  //   bind (el, binding, vnode, oldVnode) {
	  //     // 逻辑...

	  //   }
	  //   ...
	  // })
	  Vue.directive('my-directive', function(el,binding){
		  el.textContent = binding.value.toUpperCase()
	  })

	  // 3. 注入组件选项
	  // Vue.mixin({
	  //   created: function () {
	  //     // 逻辑...
	  //   }
	  //   ...
	  // })

	  // 4. 添加实例方法
	  Vue.prototype.$myMethod = function (methodOptions) {
	    // 逻辑...
		console.log('Vue实例对象的方法$myMethod')
	  }
	}

	//向外暴露
	window.MyPlugin = MyPlugin
})()
1.2使用插件
<!DOCTYPE html>
<html>
	<head>
		<meta charset="utf-8">
		<title></title>
		<script src="https://cdn.jsdelivr.net/npm/vue/dist/vue.js"></script>
		<script src="./js/zyqplugin.js" type="text/javascript" charset="utf-8"></script>
	</head>
	<body>
		<div id="test">
			<p v-my-directive="msg"></p>
		</div>
		<script type="text/javascript">
			//声明使用插件
			Vue.use(MyPlugin)//内部会执行MyPlugin.install(Vue)
			Vue.myGlobalMethod()
			var a = new Vue({
				el:'#test',
				data:{
					msg:'I'
				}
			})
			a.$myMethod()
		</script>
	</body>
</html>
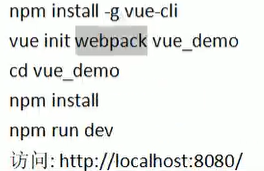
2.使用vue-cli创建项目
- vue-cli是vue官方提供的脚手架工具
- github:(https://github.com/vuejs/vue.cli)
- 作用:从(https://github.com/vuejs-templates)下载模板项目
--2.1安装vue-cli
- 安装好node.js的msi版本后会自动安装好vue-cli
- 使用npm命令安装
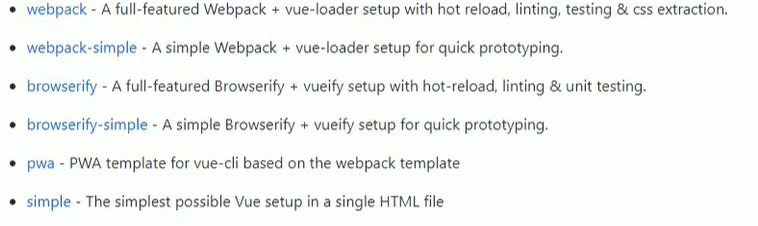
--2.2使用vue-cli提供的模板
提供了六个模板
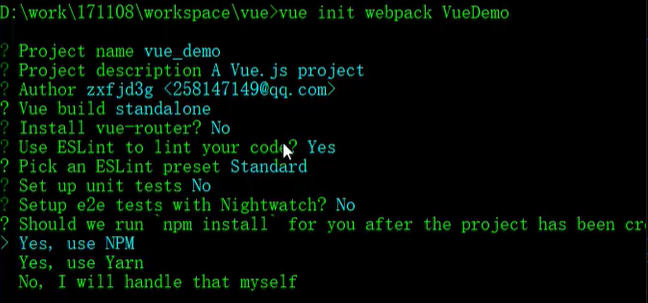
由于只是测试所以选项如下
在上面图片的最后一行如果选择手动下载会弹出如下操作
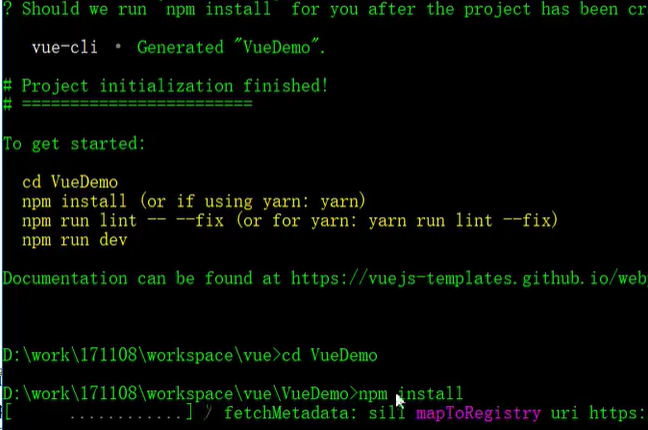
下载时间会比较久
然后进入项目的文件夹就可以运行了
3.基于脚手架编写项目
--3.1里面的文件
- 在修改了文件夹名字的基础上还要打卡一级目录的package.json修改项目名
- config文件夹中的index.js(当前项目的描述文件)
- port:可以修改端口号
- autoOpenBrowser:true是否自动打开浏览器
- .babelrc
babel:具有ES6转ES5,JsX转js的功能
rc:runtime control运行时控制,描述babel是怎么运行的,就是babel的配置文件 - .eslintrc和eslintignore
eslint默认会对一些文件进行检查
eslintignore就配置一些需要被eslint忽略的文件
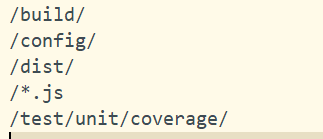
build文件夹,config文件夹等,和js文件都不会被eslint检查
----3.1.1main.js
相当于一个main函数,springboot的里面的启动类文件
- 入口js创建Vue实例
----3.1.2App.vue(根组件)
应用都会有一个根组件
main.js和App.vue都放在src的根文件下,其他文件放在components文件夹下
--3.2什么是组件
局部功能界面,包含所有要实现相关功能的资源(html、css、js、图片等)
--3.3结构梳理
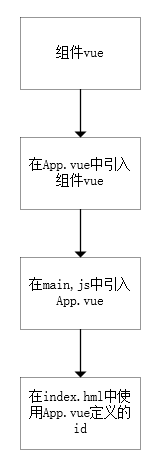
----3.3.1详细代码
- test.vue
<template>
  <div>
    <p class="msg">{{msg}}</p>
  </div>
</template>

<script>
  //默认向外暴露端口
  export default{//配置对象(与Vue一致)
    data () {//在Vue中data可以写对象也可以写函数,但是在组件中必须写函数
      return{
        msg:'Hello Vue Component'
      }
    }
  }
</script>

<style>
  .msg{
    color:red;
    font-size:30px;
  }
</style>
- App.vue
<template>
  <div>
    <img class="logo" src="./assets/logo.png" alt="logo"/>
    <!-- 第三步:使用组件标签 -->
    <test/>
  </div>
</template>

<script>
  //第一步:引入tets.vue组件
  import test from './components/test.vue'
  export default{
    //第二步:映射组件标签
    components:{
      test
    }
  }
</script>

<style>
  .logo{
     200px;
    height:200px;
    opacity: 0.5;
  }
</style>
- main.js
/*
 入口js:创建Vue实例
 */
import Vue from 'vue'
import App from './App.vue'

new Vue({
  el:'#app',
  components:{//将其映射成标签
    App
  },
  template:'<App/>'//使用组件标签
})
- index.html
<!DOCTYPE html>
<html>
  <head>
    <meta charset="utf-8">
    <meta name="viewport" content="width=device-width,initial-scale=1.0">
    <title>vue_demo</title>
  </head>
  <body>
    <div id="app"></div>
    <!-- built files will be auto injected -->
  </body>
</html>
4.项目的打包和发布
--4.1打包
npm run build
--4.2发布1:使用静态服务器工具包
npm install -g serve
serve dist
访问:http://localhost:5000
--4.3发布2:使用动态web服务器(tomcat)
修改配置:webpack.prod.conf.js
output:{
publicPath:'/xxx/' //打包文件夹的名称
}
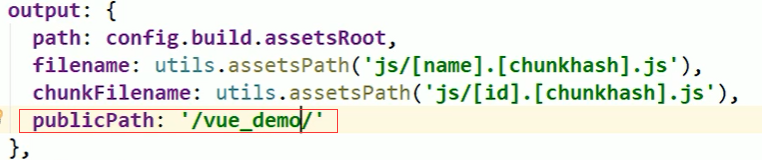
重新打包:nom run build
修改dist文件夹为项目名:xxx
将xxx拷贝到运行的tomcat的webapps目录下
访问:http://localhost:8080/xxx