RMAN之辅助数据库
辅助数据库是为了某种测试目的,来创建一个和某一时刻的目标数据库完全一样的数据库
1. 目标数据库和辅助数据库的环境需求
生产环境中,目标数据库和辅助数据库应该存放在不同的服务器上;两个数据库装相同版本的oracle软件即可。目标库和辅助数据库要求要有网络连接,目标库必须是归档模式。
在我看来辅助数据库是RMAN整库全备的一种升级,相比整库备份恢复更简单很多东西都通过duplicate命令来实现,很方便。
2. 安装配置流程
1)基础环境:
| 主机名 | IP | SID | 说明 |
|---|---|---|---|
| server1 | 192.168.0.50 | PROE | Oracle目标库 |
| serverT | 192.168.1.50 | AUX | 辅助数据库 |
2)为辅助数据库创建密码文件:
这里正常启动主库,创建静态参数文件然后发送给辅助数据库
SYS@proe>create pfile='/home/oracle/initaux.ora' from spfile;

File created.

#发送给辅助数据库
[root@server1 oracle]# scp initaux.ora serverT:/u01/app/oracle/product/11.2.0/db_home1/dbs/
The authenticity of host 'servert (192.168.1.50)' can't be established.
RSA key fingerprint is 98:1b:c3:45:cf:b4:b1:52:5e:9c:27:65:4b:42:d4:15.
Are you sure you want to continue connecting (yes/no)? yes
Warning: Permanently added 'servert' (RSA) to the list of known hosts.
root@servert's password:
initaux.ora                                                                  100%  950     0.9KB/s   00:00

#辅助数据库进行相应的修改
[oracle@serverT dbs]$ pwd
/u01/app/oracle/product/11.2.0/db_home1/dbs
[oracle@serverT dbs]$ ls
hc_proe.dat  init.orabak       lkPROE    orapwproe      spfileproe.ora.bak
initaux.ora  initproe.ora.bak  orapwaux  snapcf_proe.f
[root@serverT dbs]# chown oracle:oinstall initaux.ora
[root@serverT dbs]# chmod 640 initaux.ora --进行授权
[oracle@serverT dbs]$ vim initaux.ora  --相关的路径都要进行修改

proe.__db_cache_size=687865856
proe.__java_pool_size=16777216
proe.__large_pool_size=33554432
proe.__oracle_base='/u01/app/oracle'#ORACLE_BASE set from environment
proe.__pga_aggregate_target=520093696
proe.__sga_target=1090519040
proe.__shared_io_pool_size=0
proe.__shared_pool_size=335544320
proe.__streams_pool_size=0
*.audit_file_dest='/u01/app/oracle/admin/aux/adump' 这里需要修改
*.audit_trail='db'
*.compatible='11.2.0.4.0'
*.control_files='/u01/app/oracle/oradata/aux/control01.ctl','/u01/app/oracle/fast_recovery_area/aux/control02.ctl'#Restore Controlfile
*.db_block_size=8192
*.db_domain='zzl.com'
*.db_name='aux'
*.db_recovery_file_dest='/u01/app/oracle/fast_recovery_area'
*.db_recovery_file_dest_size=4385144832
*.diagnostic_dest='/u01/app/oracle'
*.memory_target=1600126976
*.open_cursors=300
*.processes=1500
*.remote_login_passwordfile='EXCLUSIVE'
*.sessions=1655
*.undo_tablespace='UNDOTBS1'
db_file_name_convert='/u01/app/oracle/oradata/proe/','/u01/app/oracle/oradata/aux/'
log_file_name_convert='/u01/app/oracle/oradata/proe/','/u01/app/oracle/oradata/aux/'  两个库地址映射关系,convert是转化恢复路径
3)创建参数文件需要的路径:
[oracle@serverT admin]$ mkdir -pv aux/adump
mkdir: created directory `aux'
mkdir: created directory `aux/adump'

[oracle@serverT oradata]$ mkdir  aux
[oracle@serverT oradata]$ ls
aux  proe
4) 启动aux实例:
[oracle@serverT oradata]$ export ORACLE_SID=aux
[oracle@serverT oradata]$ sqlplus  / as sysdba
SQL*Plus: Release 11.2.0.4.0 Production on Mon Jul 13 07:50:13 2020

Copyright (c) 1982, 2013, Oracle.  All rights reserved.

Connected to an idle instance.

SYS@aux>create spfile from pfile;

File created.

SYS@aux>startup nomount;  此时数据库可以启动到nomount状态。
ORACLE instance started.

Total System Global Area 1603411968 bytes
Fixed Size                  2253664 bytes
Variable Size            1040190624 bytes
Database Buffers          553648128 bytes
Redo Buffers                7319552 bytes
5)为目标数据库和辅助数据库配置静态监听:
[oracle@serverT admin]$ vim listener.ora

6)配置本地服务名:
[oracle@serverT admin]$ vim tnsnames.ora

验证:
tnsping两台机器可以通过


在两台机器上测试网络连接对方数据库

7) 目标数据库备份:
RMAN> sql 'alter system archive log current';

sql statement: alter system archive log current

RMAN> backup as compressed backupset database plus archivelog;
Starting backup at 15-JUL-20
current log archived
using target database control file instead of recovery catalog
allocated channel: ORA_DISK_1
channel ORA_DISK_1: SID=10 device type=DISK
channel ORA_DISK_1: starting compressed archived log backup set
channel ORA_DISK_1: specifying archived log(s) in backup set
input archived log thread=1 sequence=5 RECID=59 STAMP=1045671287
input archived log thread=1 sequence=6 RECID=60 STAMP=1045671287
channel ORA_DISK_1: starting piece 1 at 15-JUL-20
channel ORA_DISK_1: finished piece 1 at 15-JUL-20
piece handle=/u01/app/oracle/fast_recovery_area/PROE/backupset/2020_07_15/o1_mf_annnn_TAG20200715T153620_hjxdhn26_.bkp tag=TAG20200715T153620 comment=NONE
...
Finished backup at 15-JUL-20

Starting Control File and SPFILE Autobackup at 15-JUL-20
piece handle=/data/backup/eashrdb/eashrdb_control_c-485315595-20200715-01 comment=NONE
Finished Control File and SPFILE Autobackup at 15-JUL-20
8)传输目标库的备份文件到恢复数据库:
[oracle@server1 admin]$ cd /u01/app/oracle/fast_recovery_area/PROE/backupset/
[oracle@server1 backupset]$ ls
2020_07_13  2020_07_14  2020_07_15
[oracle@server1 backupset]$ cd 2020_07_15
[oracle@server1 2020_07_15]$ ls
o1_mf_annnn_TAG20200715T153314_hjxd9tpq_.bkp  o1_mf_annnn_TAG20200715T153620_hjxdho3r_.bkp
o1_mf_annnn_TAG20200715T153314_hjxd9vr4_.bkp  o1_mf_annnn_TAG20200715T153647_hjxdjhgk_.bkp
o1_mf_annnn_TAG20200715T153444_hjxddn1y_.bkp  o1_mf_nnndf_TAG20200715T153318_hjxd9z1l_.bkp
o1_mf_annnn_TAG20200715T153620_hjxdhn26_.bkp  o1_mf_nnndf_TAG20200715T153622_hjxdhp6v_.bkp
[oracle@server1 2020_07_15]$ du -sh
647M    .
[oracle@server1 2020_07_15]$ logout
[root@server1 admin]# cd /u01/app/oracle/fast_recovery_area/PROE/backupset/
[root@server1 backupset]# ls
2020_07_13  2020_07_14  2020_07_15
[root@server1 backupset]# cd 2020_07_15/
[root@server1 2020_07_15]# ls
o1_mf_annnn_TAG20200715T153314_hjxd9tpq_.bkp  o1_mf_annnn_TAG20200715T153620_hjxdho3r_.bkp
o1_mf_annnn_TAG20200715T153314_hjxd9vr4_.bkp  o1_mf_annnn_TAG20200715T153647_hjxdjhgk_.bkp
o1_mf_annnn_TAG20200715T153444_hjxddn1y_.bkp  o1_mf_nnndf_TAG20200715T153318_hjxd9z1l_.bkp
o1_mf_annnn_TAG20200715T153620_hjxdhn26_.bkp  o1_mf_nnndf_TAG20200715T153622_hjxdhp6v_.bkp
[root@server1 2020_07_15]# scp ./* serverT:/u01/app/oracle/fast_recovery_area/PROE/backupset/2020_07_15/
root@servert's password:
o1_mf_annnn_TAG20200715T153314_hjxd9tpq_.bkp                                 100%  455KB 455.0KB/s   00:00
o1_mf_annnn_TAG20200715T153314_hjxd9vr4_.bkp                                 100%   14MB   7.0MB/s   00:02
o1_mf_annnn_TAG20200715T153444_hjxddn1y_.bkp                                 100%   40KB  39.5KB/s   00:00
o1_mf_annnn_TAG20200715T153620_hjxdhn26_.bkp                                 100%  455KB 455.0KB/s   00:00
o1_mf_annnn_TAG20200715T153620_hjxdho3r_.bkp                                 100%   14MB   7.0MB/s   00:02
o1_mf_annnn_TAG20200715T153647_hjxdjhgk_.bkp                                 100% 3072     3.0KB/s   00:00
o1_mf_nnndf_TAG20200715T153318_hjxd9z1l_.bkp                                  38%  118MB   5.4MB/s   00:35 ET
...
在恢复数据库中授权数据文件
[root@serverT 2020_07_15]# chown oracle:oinstall ./*

[root@serverT 2020_07_15]# ll
total 661584
-rw-r----- 1 oracle oinstall    465920 Jul 13 12:12 o1_mf_annnn_TAG20200715T153314_hjxd9tpq_.bkp
-rw-r----- 1 oracle oinstall  14624768 Jul 13 12:12 o1_mf_annnn_TAG20200715T153314_hjxd9vr4_.bkp
-rw-r----- 1 oracle oinstall     40448 Jul 13 12:12 o1_mf_annnn_TAG20200715T153444_hjxddn1y_.bkp
-rw-r----- 1 oracle oinstall    465920 Jul 13 12:12 o1_mf_annnn_TAG20200715T153620_hjxdhn26_.bkp
-rw-r----- 1 oracle oinstall  14638592 Jul 13 12:12 o1_mf_annnn_TAG20200715T153620_hjxdho3r_.bkp
-rw-r----- 1 oracle oinstall      3072 Jul 13 12:12 o1_mf_annnn_TAG20200715T153647_hjxdjhgk_.bkp
-rw-r----- 1 oracle oinstall 323608576 Jul 13 12:13 o1_mf_nnndf_TAG20200715T153318_hjxd9z1l_.bkp
-rw-r----- 1 oracle oinstall 323608576 Jul 13 12:13 o1_mf_nnndf_TAG20200715T153622_hjxdhp6v_.bkp
9) 使用duplicate命令来复制目标库信息到辅助数据库。
在目标库操作。
[oracle@server1 admin]$ rman target sys/123456@proe auxiliary sys/oracle@aux

Recovery Manager: Release 11.2.0.4.0 - Production on Wed Jul 15 15:49:38 2020

Copyright (c) 1982, 2011, Oracle and/or its affiliates.  All rights reserved.

connected to target database: PROE (DBID=485315595)
connected to auxiliary database: AUX (not mounted)
把备份文件拷贝到aux对应的目录上,同时也要把需要的目录创建出来,注意scp传输后的权限问题。
这个目录问题的话,如果未创建执行下列命令会报错并且数据库也会从nomount状态切换到未启动状态,需要手动启动到nomount因为参数文件已经生效所以可以启动成功。整个恢复过程还需要注意辅助数据库的磁盘容量问题,避免出现磁盘不足导致的失败。

RMAN> run{
2> allocate auxiliary channel aux1 device type disk;
3> duplicate target database to aux;
4> }
最后再辅助数据库上校验一下:
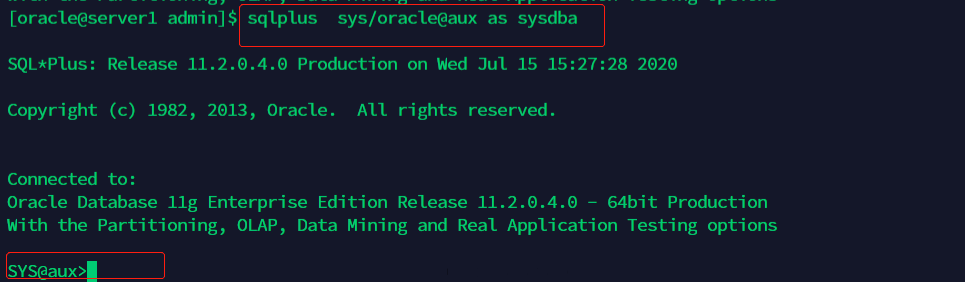
[oracle@serverT admin]$ sqlplus sys/oracle@aux as sysdba

SYS@aux> select instance_name,status from v$instance;

 INSTANCE_NAME STATUS
 ---------------------- ------------
 aux OPEN
恢复数据库搭建成功。
3. 关于duplicate介绍
引用:
RMAN Duplicate 是从Oracle 10g就已经开始有的一个功能;但是在11g的时候进行了很多增强,免去了10g版本下需要人工复制到备机上过来进行恢复的尴尬境地。通过11g的Duplicate可以创建一个完全相同但DBID不同的备机数据库。在11g的RMAN Duplicate中可以通过Active database duplicate和Backup-based duplicate两种方法实现。我们在用户现场采用的是Active Database Duplicate;因为它不用先把目标数据库进行RMAN备份,只需要目标数据库处于归档模式下即可通过网络对数据库进行恢复,且恢复完成后能够自动Open Duplicate Database。这样就正好满足了用户不用人工干预的需求。尤其是对于大数据库特别是TB级别的数据库其优点时非常明显,恢复前不需要进行单独的备份,减少了备份及拷贝备份文件的时间,同时还节省了备份空间。参考:https://blog.csdn.net/wuweilong/article/details/46346067
这位大佬用恢复数据库实现异机的在线备份。
4. 总结
整个过程主要是两个数据库之间网络需要畅通,同时目标库必须是归档不然无法RMAN全备。其次两个数据库对应的文件路径需要一致。最后因为我是克隆的两个库把恢复数据库参数文件控制文件人为损坏同时修改SID,所以两个库在内存,以及相关参数都是完全一样的这点需要注意。如果资源紧张这个测试也完全可以在一台主机上进行,修改SID即可,这样虽然会省去很多不必要的操作但也失去了很多遇到问题的机会,而且在真实环境中也几乎遇不到这种情况。