一、什么是 MVC
MVC 其实是一种架构思想,将软件按照模型、视图、控制器来划分。
- M:是指 Model,就是模型层,指工程中的 JavaBean,作用是处理数据。
- V:是指 View,视图层,指工程中的 html 或 jsp 等页面,作用是与用户进行交互,展示数据。
- C:是指 Controller,控制层,指工程中的 servlet,作用是接收请求和响应浏览器。
关于 M 中的 javabean,可以分为两类:
- 实体类Bean:专门存储业务数据的,如 Student、User 等。
- 业务处理 Bean:指 Service 或 Dao 对象,专门用于处理业务逻辑和数据访问。
MVC 工作流程
- 用户通过视图层发送请求到服务器
- 在服务器中请求被 Controller 接收
- Controller 调用相应的Model层处理请求
- 处理完毕将结果返回到 Controller
- Controller再根据请求处理的结果找到相应的View视图,渲染数据后最终响应给浏览器
二、什么是 SpringMVC
SpringMVC 是 Spring 的一个后续产品,是 Spring 的一个子项目,SpringMVC 是 Spring 为表述层开发提供的一整套完备的解决方案。
目前业界普遍选择了 SpringMVC 作为 Java EE 项目表述层开发的首选方案。
SpringMVC 的特点
- Spring 家族原生产品,与 IOC 容器等基础设施无缝对接
- 基于原生的 Servlet,通过了功能强大的前端控制器 DispatcherServlet,对请求和响应进行统一处理
- 表述层各细分领域需要解决的问题全方位覆盖,提供全面解决方案
- 代码清新简洁,大幅度提升开发效率
- 内部组件化程度高,可插拔式组件即插即用,想要什么功能配置相应组件即可
- 性能卓著,尤其适合现代大型、超大型互联网项目要求
三、开发环境准备
在实现世界著名程序之前需要准备好开发环境。
- IDE:idea 2018.3
- 构建工具:maven3.5.4
- 服务器:tomcat8
- Spring版本:5.3.1
四、动手实现 Hello world
一起动动手。
1. 创建工程
这里新建一个 project,我这取名叫 springmvc。然后在里面新建一个 module,叫 springmvc-demo1,最终完成下来。

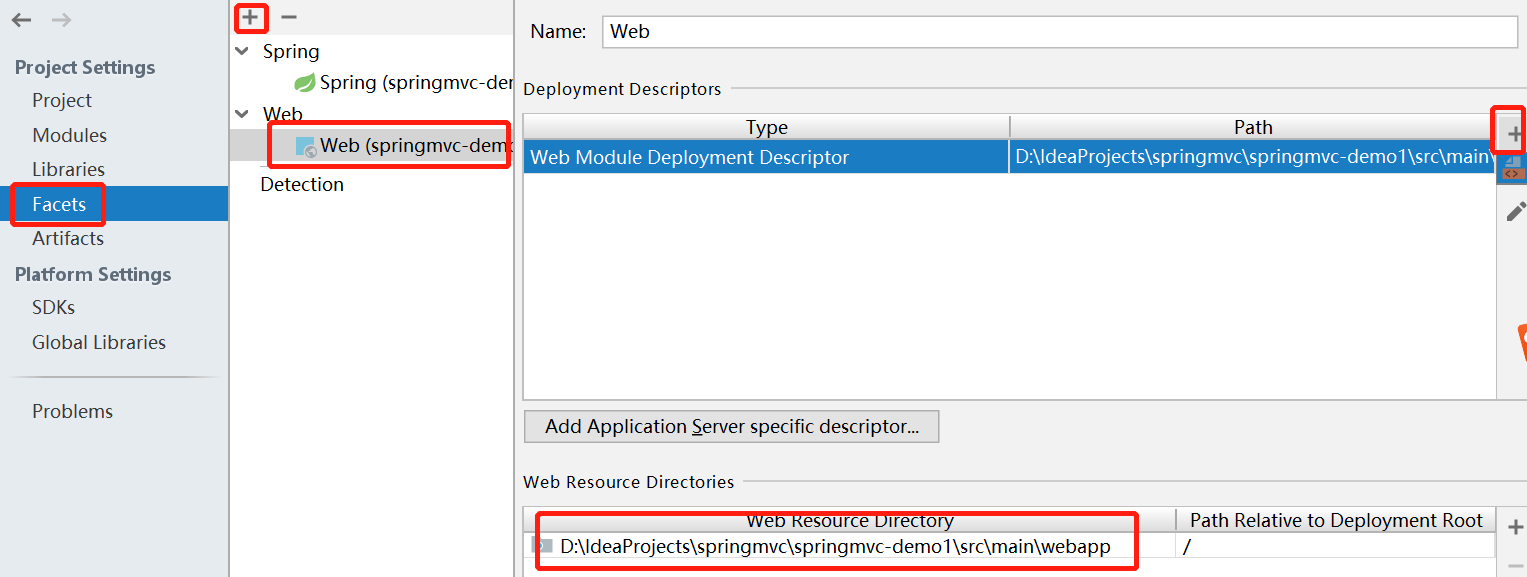
注意,添加 web模块,是在 File-Project structure 里。
2. 引入依赖
在模块 springmvc-demo1 下面的 pom.xml 文件里,需要引入相关依赖。
<?xml version="1.0" encoding="UTF-8"?>
<project xmlns="http://maven.apache.org/POM/4.0.0"
         xmlns:xsi="http://www.w3.org/2001/XMLSchema-instance"
         xsi:schemaLocation="http://maven.apache.org/POM/4.0.0 http://maven.apache.org/xsd/maven-4.0.0.xsd">
    <parent>
        <artifactId>springmvc</artifactId>
        <groupId>com.pingguo.mvc</groupId>
        <version>1.0-SNAPSHOT</version>
    </parent>
    <modelVersion>4.0.0</modelVersion>

    <artifactId>springmvc-demo1</artifactId>
    <!--打包方式-->
    <packaging>war</packaging>

    <dependencies>
        <!-- SpringMVC -->
        <dependency>
            <groupId>org.springframework</groupId>
            <artifactId>spring-webmvc</artifactId>
            <version>5.3.1</version>
        </dependency>

        <!-- 日志 -->
        <dependency>
            <groupId>ch.qos.logback</groupId>
            <artifactId>logback-classic</artifactId>
            <version>1.2.3</version>
        </dependency>

        <!-- ServletAPI -->
        <dependency>
            <groupId>javax.servlet</groupId>
            <artifactId>javax.servlet-api</artifactId>
            <version>3.1.0</version>
            <scope>provided</scope>
        </dependency>

        <!-- Spring5和Thymeleaf整合包 -->
        <dependency>
            <groupId>org.thymeleaf</groupId>
            <artifactId>thymeleaf-spring5</artifactId>
            <version>3.0.12.RELEASE</version>
        </dependency>
    </dependencies>

</project>
3. 配置 web.xml
在 webapp 下的 web.xml 中如下配置:
<?xml version="1.0" encoding="UTF-8"?>
<web-app xmlns="http://xmlns.jcp.org/xml/ns/javaee"
         xmlns:xsi="http://www.w3.org/2001/XMLSchema-instance"
         xsi:schemaLocation="http://xmlns.jcp.org/xml/ns/javaee http://xmlns.jcp.org/xml/ns/javaee/web-app_4_0.xsd"
         version="4.0">

    <!-- 配置SpringMVC的前端控制器,对浏览器发送的请求统一进行处理 -->
    <servlet>
        <servlet-name>springMVC</servlet-name>
        <servlet-class>org.springframework.web.servlet.DispatcherServlet</servlet-class>
        <!-- 通过初始化参数指定SpringMVC配置文件的位置和名称 -->
        <init-param>
            <!-- contextConfigLocation为固定值 -->
            <param-name>contextConfigLocation</param-name>
            <!-- 使用classpath:表示从类路径查找配置文件,例如maven工程中的src/main/resources -->
            <param-value>classpath:springMVC.xml</param-value>
        </init-param>
        <!--
             作为框架的核心组件,在启动过程中有大量的初始化操作要做
            而这些操作放在第一次请求时才执行会严重影响访问速度
            因此需要通过此标签将启动控制DispatcherServlet的初始化时间提前到服务器启动时
        -->
        <load-on-startup>1</load-on-startup>
    </servlet>
    <servlet-mapping>
        <servlet-name>springMVC</servlet-name>
        <!--
            设置springMVC的核心控制器所能处理的请求的请求路径
            /所匹配的请求可以是/login或.html或.js或.css方式的请求路径
            但是/不能匹配.jsp请求路径的请求
        -->
        <url-pattern>/</url-pattern>
    </servlet-mapping>
</web-app>
3. 配置 spring 配置文件
在 resources 下新建 配置文件。
<?xml version="1.0" encoding="UTF-8"?>
<beans xmlns="http://www.springframework.org/schema/beans"
       xmlns:xsi="http://www.w3.org/2001/XMLSchema-instance"
       xmlns:context="http://www.springframework.org/schema/context"
       xsi:schemaLocation="http://www.springframework.org/schema/beans http://www.springframework.org/schema/beans/spring-beans.xsd
                           http://www.springframework.org/schema/context http://www.springframework.org/schema/context/spring-context.xsd">
    <!-- 自动扫描包 -->
    <context:component-scan base-package="com.pingguo.mvc.controller"></context:component-scan>

    <!-- 配置Thymeleaf视图解析器 -->
    <bean id="viewResolver" class="org.thymeleaf.spring5.view.ThymeleafViewResolver">
        <property name="order" value="1"/>
        <property name="characterEncoding" value="UTF-8"/>
        <property name="templateEngine">
            <bean class="org.thymeleaf.spring5.SpringTemplateEngine">
                <property name="templateResolver">
                    <bean class="org.thymeleaf.spring5.templateresolver.SpringResourceTemplateResolver">

                        <!-- 视图前缀 -->
                        <property name="prefix" value="/WEB-INF/templates/"/>

                        <!-- 视图后缀 -->
                        <property name="suffix" value=".html"/>
                        <property name="templateMode" value="HTML5"/>
                        <property name="characterEncoding" value="UTF-8" />
                    </bean>
                </property>
            </bean>
        </property>
    </bean>
</beans>
这里视图层使用 Thymeleaf,先不着急前后端分离,学习要一步步地来。
4. 编写请求控制器
由于前端控制器对浏览器发送的请求进行了统一的处理,但是具体的请求有不同的处理过程,因此需要创建处理具体请求的类,即请求控制器。
请求控制器中每一个处理请求的方法成为控制器方法。
因为SpringMVC的控制器由一个POJO(普通的Java类)担任,因此需要通过 @Controller 注解将其标识为一个控制层组件,交给 Spring 的 IoC容器管理,此时 SpringMVC 才能够识别控制器的存在。
package com.pingguo.mvc.controller;

import org.springframework.stereotype.Controller;
import org.springframework.web.bind.annotation.RequestMapping;

@Controller
public class HelloController {
    // @RequestMapping注解:处理请求和控制器方法之间的映射关系
    // @RequestMapping注解的value属性可以通过请求地址匹配请求,/表示的当前工程的上下文路径
    @RequestMapping(value = "/")
    public String index() {
        // 返回视图名称
        return "index";
    }

    @RequestMapping("/target")
    public String toTarget() {
        return "target";
    }
}
这里我直接加了 2 个方法,对应两个页面。
5. 编写页面文件
在 webapp/WEB-INF/templates 下,编写 html 文件。
index.html
<!DOCTYPE html>
<html lang="en" xmlns:th="http://www.thymeleaf.org">
<head>
    <meta charset="UTF-8">
    <title>首页</title>
</head>
<body>
<h1>Hello World</h1>
<a th:href="@{/target}">访问目标页面 target.html </a>
</body>
</html>
这里加了一个<a>标签,用来跳转到另一个页面 target.html。里面的th:href="@{/target}用的是 thymeleaf 里的语法,不用太过纠结与此,这不是本次学习的重点。因为后面最终还是会用前后端分离的方式进行应用的开发。
target.html
<!DOCTYPE html>
<html lang="en" xmlns:th="http://www.thymeleaf.org">
<head>
    <meta charset="UTF-8">
    <title>target</title>
</head>
<body>
<h1>target</h1>
</body>
</html>
6. 启动项目
因为项目打包方式是 war 包,部署在 tomcat 里,所以要先在本地安装个 tomcat,教程网上一大把。
然后,在idea 中 add run configuration。
先是 Deployment。
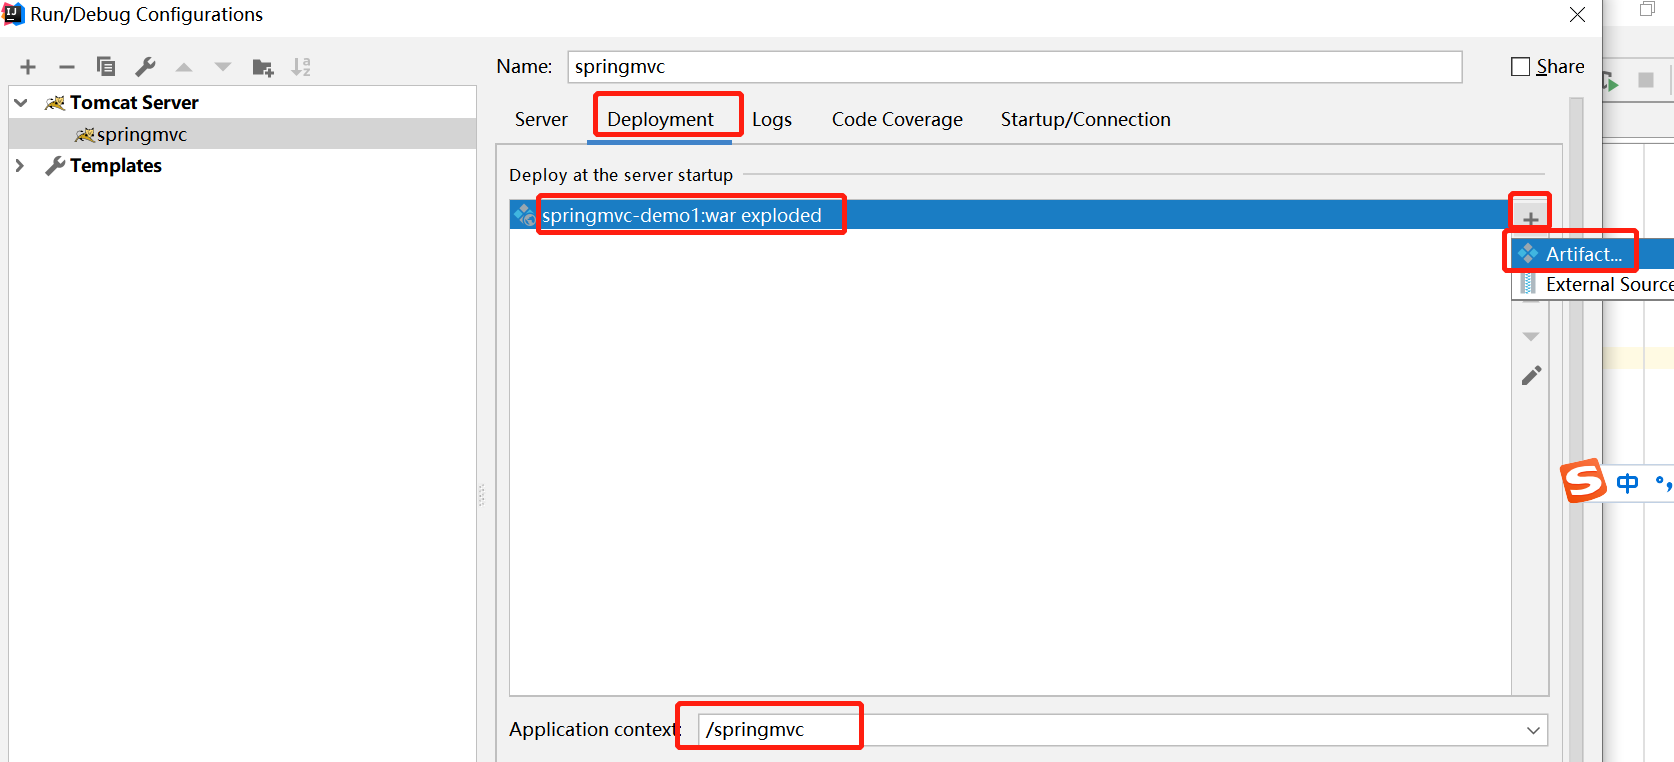
这里的 Application context 就是应用上下文了,比如我要访问 /target,实际项目启动后在浏览器中访问的是:http://localhost:8080/springmvc/target 。
接下来,就是 Server 配置了。

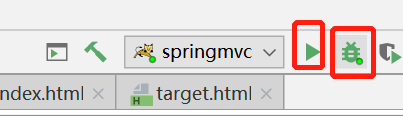
启动,可以run 也可以 debug,debug 下可以用来断点调试。
启动之后,默认会打开 http://localhost:8080/springmvc/。
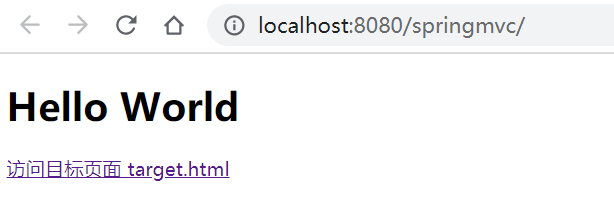
点击 index 页的 跳转连接,成功跳转到 target 页。
再回顾下请求页面的过程:
- 浏览器发送请求,若请求地址符合前端控制器的 url-pattern,该请求就会被前端控制器DispatcherServlet处理。
- 前端控制器会读取 SpringMVC 的核心配置文件,通过扫描组件找到控制器,将请求地址和控制器中 @RequestMapping 注解的 value 属性值进行匹配,若匹配成功,该注解所标识的控制器方法就是处理请求的方法。
- 处理请求的方法需要返回一个字符串类型的视图名称,该视图名称会被视图解析器解析,加上前缀和后缀组成视图的路径,通过 Thymeleaf 对视图进行渲染,最终转发到视图所对应页面。
感谢《尚硅谷》的学习资源。