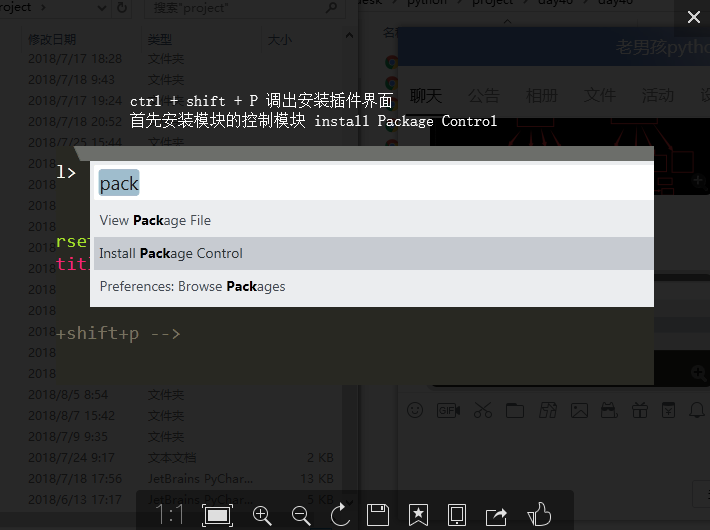
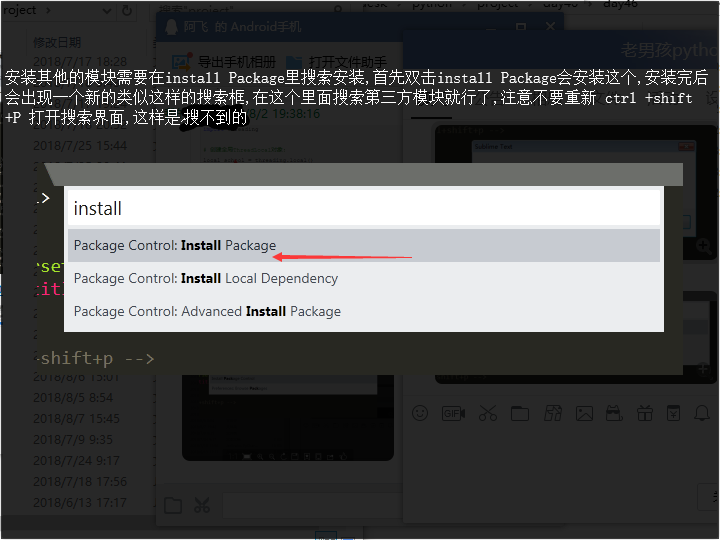
一.工具 sublime text 3
安装插件
二.
web的三大标准:
(1)html 结构标准
(2)css 表现(样式标准)
(3)js 行为标准
公共的属性:
id:
身份证 一个页面中只有一个唯一的id
<p id = 'aaa'>文字1</p>
<p class = 'aaa'>文字2</p>
<p class = 'aaa'>文字2</p>
<p class = 'aaa'>文字2</p>
css选择器:
*{
通配符选择器
}
标签选择器
div{
}
id选择器
#aaa{
color:red
}
类选择器
.aaa{
}
class:
title: ***
鼠标悬浮到内容显示的标题
(1)行内标签
a
属性 href:链接网络资源或者本地资源地址 target:_self:默认的在本页打开网址 _blank:在空白页面打开新的网址
span strong em i
img:行内块
属性:
src:链接的图片资源(本地图片资源或者cdn)
alt:图片加载失败的时候显示的文本
(2)块级标签:
div:
division 分割
作用:分页面中的每块区域
p:
段落标签:
p标签内部只能放行内(span,a,img,input)的标签,不能放块标签
ul:它的孩子只能是li
li ol dl dt dd
特点:
(1)行内标签:
1.在一行内显示
2.不能设置宽高,默认是字体的大小
(2)块级标签:
1.独占一行
2.可以设置宽高,如果不设置宽 默认是父亲的100%的宽度
(3)行内块标签:(img,input)
1.在一行内显示
2.可以设置宽高
<!DOCTYPE html>
<html>
<head>
    <meta charset="utf-8">
    <!-- 网页的标题 -->
    <title>练习标签</title>
    <link rel="stylesheet" type="text/css" href="./index.css">
    <!-- 内接css样式 -->
    <style type="text/css">
        /*  class定义的标识使用.  */
        .logo{
            font-size:24px;
            color:orange;
        }
        /*  id定义的标识使用# */
        #wrap{
            width: 100%;
            height: 100px;
            background: yellow;
        }
    </style>
</head>
<body>
    <div>
        <a href="http://www.baidu.com" target="_blank">百度一下</a>
        <span>单词</span>
        <p>哈哈哈哈</p>
        <strong>文本内容加粗</strong>
        <font face="微软雅黑" color="green" size="8">这是使用了font标签的字</font>
        <em>斜体标签</em>    <i>也是斜体标签</i>
        <u>下划线标签</u>
        <a href="#" style="color:red;">文本内容</a>
        <h1>这是使用h1加粗的字</h1>
        <font></font>
    </div>
    <div>
        <span>
            <a href="">详细信息</a>
            <a href="">生产日期</a>
        </span>

    </div>
    <div class="header">
        <div class="logo">这是使用class类写的logo字</div>
        <ul>
            <li>
                <!-- 使用 div + css + ul + li + a + img -->
                <a href="http://www.baidu.com" target="_blank">
                    <img src="./timg.jpg" width="50">
                </a>
            </li>
            <li>手机</li>
            <li>笔记本</li>
            <li>平板</li>
        </ul>
        <ol>
            <li>
                <img src="https://ss1.bdstatic.com/70cFvXSh_Q1YnxGkpoWK1HF6hhy/it/u=3323017670,3063552351&fm=27&gp=0.jpg" width="50">
            </li>
            <li>使用ol手机</li>
            <li>使用ol电脑</li>
            <li>使用ol笔记本</li>
            <li>
                <a href="#top">返回顶部</a>
            </li>
        </ol>

        <div id="wrap">
            <span class="luffy">路飞学城</span>
            <img src="https://timgsa.baidu.com/timg?image&quality=80&size=b9999_10000&sec=1533539266322&di=7d9b3d336e56ad6b2309e0740bdbc0d8&imgtype=0&src=http%3A%2F%2Fimg.app178.com%2Ftu%2F201603%2Fovymy5vnvvm.jpg" width='50' alt="美女没出来" title="哈哈哈">

        </div>
        <div>
            <span>这个不应该有黄色背景</span>
        </div>
    </div>

</body>
</html>
<!DOCTYPE html>
<html>
<head>
    <meta charset="utf-8">
    <title></title>
</head>
<body>
    <div align="right">
        测试字符串1
    </div>
    <div align="left">
        测试字符串2
    </div>
    <div>
        <a href="" name="n1">n1锚点</a>
    </div>
    <div align="center">
        测试字符串3
    </div>
    <!-- name属性是HTML4.0以前使用的,id属性是4.0后使用的,为了向前兼容,两个属性都要写上 -->
    <div id="d1">

        <pre>
              咏鹅
                作者:骆宾王
            鹅鹅鹅
            曲项向天歌
            白毛浮绿水
            红掌拨清波
        </pre>
    </div>
    <div>
        <a href="15732136803@163.com">邮箱联系</a>
    </div>
    <div>
        <pre>

        </pre>

        <a href="#">返回顶部</a>
        <a href="#d1">返回咏鹅</a>
        <a href="#n1">返回n1锚点</a>
    </div>
    <div>
        <a href="https://www.baidu.com/" title="悬停文本" target="_blank">超链接的其他功能</a>
    </div>
    <div>
        <a href="https://baike.baidu.com/item/%E9%9E%A0%E5%A9%A7%E7%A5%8E/10201840?fr=aladdin" target="_blank">
            <center>
            <img src="https://timgsa.baidu.com/timg?image&quality=80&size=b9999_10000&sec=1533571010068&di=db493f3cbe38371f276b5b69af3057ea&imgtype=0&src=http%3A%2F%2Fimg5.duitang.com%2Fuploads%2Fitem%2F201509%2F21%2F20150921015016_zfEk5.thumb.700_0.jpeg" alt="找不到图片" title="鞠婧祎" align='center' wight='400' height="400">
            <!-- 使用align='center'发现无法居中,查了下是因为容器没有居中,然后使用center标签就行了 -->
            </center>
        </a>
    </div>
    <div>
        <ul>
            <li>
                <b>北京市</b>
                <ul>
                    <li>海淀区</li>
                    <li>朝阳区</li>
                    <li>东城区</li>
                </ul>
            </li>
            <li>
                <b>广州市</b>
                <ul>
                    <li>天河区</li>
                    <li>越秀区</li>
                </ul>
            </li>

        </ul>
    </div>
    <div>
        <dl>
            <dt>第一条规则</dt>
            <dd>不准睡觉</dd>
            <dd>不准交头接耳</dd>
            <dd>不准走神</dd>

            <dt>第二条规则</dt>
            <dd>可以泡妞</dd>
            <dd>可以找妹子</dd>
        </dl>
    </div>
    <div>
        <table border="1">
            <caption>人物介绍</caption>
            <tbody>
                <tr>
                    <td>小马哥</td>
                    <td>18</td>
                    <td>男</td>
                    <td>山东</td>
                </tr>
            </tbody>

            <thead>
                <tr>
                    <td>小岳岳</td>
                    <td>45</td>
                    <td>男</td>
                    <td>河南</td>
                </tr>
            </thead>
            <tfoot>
                <tr>
                    <td>邓紫棋</td>
                    <td>23</td>
                    <td>女</td>
                    <td>香港</td>
                </tr>
            </tfoot>
        </table>
    </div>
    <div>
        <form>
        姓名:<input value="呵呵" >逗比<br>
        昵称:<input value="哈哈" readonly=""><br>
        名字:<input type="text" value="name" disabled=""><br>
        密码:<input type="password" value="pwd" size="50"><br>
        性别:<input type="radio" name="gender" value="male" checked="">男
              <input type="radio" name="gender" value="female" >女<br>
        爱好:<input type="checkbox" name="love" value="eat">吃饭
              <input type="checkbox" name="love" value="sleep">睡觉
              <input type="checkbox" name="love" value="bat">打豆豆
        </form>
    </div>

</body>
</html>
css的引入方式
1.行内样式
<div style='color:red;'></div>
2.内接样式
3.外接样式
外接式
导入式
<!-- 实现百度的注册页面,并的server端进行交互,提交数据传给server端 --> <!DOCTYPE html> <html lang="en"> <head> <meta charset="UTF-8"> <title>百度一下</title> <link rel="stylesheet" href="main.css"> </head> <body> <div class="div1"> <table> <tr> <td><img src="百度.jpg" alt="图片消失了"> </td> <td><span class="c4">|</span>  <span class='c4'>注册百度账号</span></td> </tr> </table> <pre> </pre> <form action="http://127.0.0.1:9090/" method="get" target="_blank" class='form1'> <label for="username" class="c1">用户名</label>  <input type="text" name='username' placeholder = '请设置用户名' id='username' class="c2"> <br> <label for="phone" class="c1">手机号</label>  <input type="text" name='phone' placeholder = '可用于登录和找回密码' id='phone' class="c2"> <br> <label for="password" class="c1">密码</label>     <input type="password" name='password' placeholder = '请设置登录密码' id='password' class="c2"> <br> <label for="vcode" class="c1">验证码</label>  <input type="text" name='vcode' placeholder = '请输入验证码' id='vcode' > <input type="button" value='获取短信验证码' id='button1'><br> <div class='div2'> <input type="checkbox"><span class='c3'>阅读并接受</span><a href="" class='c3'>«百度用户协议»</a><span class="c3">及</span><a href="" class='c3'>«百度用户隐私保护声明»</a><br> </div> <input type="submit" value='注册' class='regist' > </form> </div> </body> </html>
#服务端的代码
import re
import socketserver
class Myserver(socketserver.BaseRequestHandler):
    def handle(self):
        ret = self.request.recv(1024).decode('utf-8')
        # ret = ret.split('
',1)[0]
        list = re.findall(r'=(w+)',ret)
        # print(ret)
        print('username:',list[0],'	','password:',list[1])
        self.request.send(b"HTTP//1.1 200 OK

")
        self.request.send(b'send succeed!')
if __name__ == '__main__':
    server = socketserver.ThreadingTCPServer(('127.0.0.1', 9090), Myserver)
    server.serve_forever()
# http://127.0.0.1:9090/?username=alex&phone=15732136803&password=123456&vcode=123
三.
<!DOCTYPE html>
<html lang="en">
<head>
    <meta charset="UTF-8">
    <title>Document</title>
    <style>
        /*通配符匹配去边距,一般不用这种方式,用下面的方式*/
        *{
            padding: 0;
            margin: 0;
        }

        html,body,div,p,ul,li,ol,dl,span,a{
            padding: 0;
            margin: 0;
        }
        /*去除列表左边的圆点*/
        ul{
            list-style: none;
        }

        /*重置样式*/
        #box{
            width: 200px;
            height: 200px;
            background-color: red;
        }
        /*并集选择器*/
        /*多个选择器之间使用逗号隔开。表示选中的页面中的多个标签。一些共性的元素,可以使用并集选择器*/
        h3,p,a,span{
            font-size: 14px;
            color: #999
        }
        /*这是p特有的属性*/
        p{
            font-size: 20px;
            color: red;
        }
        /*交集选择器*/
        /*使用.表示交集选择器。第一个标签必须是标签选择器,第二个标签必须是类选择器 语法:div.active*/
        p.active{
            background-color: rgb(248,115,0);
        }
        /*属性选择器*/
        input[name='user']{
            font-size: 20px;
        }
        input[type='password']{
            font-size: 20px;
        }

    </style>
</head>
<body>
    <div id="box" class="wrap"></div>
    <h3>哈哈哈</h3>
    <p >哈哈哈1</p>
    <p class="active">哈哈哈2</p>
    <p >哈哈哈3</p>
    <a href="#">哈哈哈</a>
    <span>哈哈哈</span>
    <ul>
        <li>111</li>
    </ul>
    <input type="text" name="user" id="" class="">
    <input type="password">
    <!-- js -->
    <script type="text/javascript">

        /*
            1.找东西
        */
        var oDiv = document.getElementById('box');

        // 2.事件

        oDiv.onclick = function() {
            oDiv.style.backgroundColor = 'green';
        }


    </script>

</body>
</html>
四.
后代选择器 使用空格表示后代选择器。父元素的后代(包括儿子,孙子,重孙子)
子代选择器 使用>表示子代选择器。比如div>p,仅仅表示的是当前div元素选中的子代(不包含孙子....)元素p
    /*伪类选择器*/

        /*a标签 要遵循 爱恨准则 LoVe HAte,一定要按顺序写*/
         a:link{
            color: green;
        }
        /*访问过后显示的样式*/
         a:visited{
            color: yellow;
        }

        /*鼠标的悬浮显示的样式*/
         a:hover{
            color: yellow;
        }
        /*摁住的时候显示的样式*/
         a:active{
            color: yellowgreen;
        }
<!DOCTYPE html>
<html lang="en">
<head>
	<meta charset="UTF-8">
	<title>Document</title>
	<link rel="stylesheet" href="index.css">
</head>
<body>
	<div class="box1">
		<a href="">这是一行文字</a>
	</div>

	<div class="box2">
		<a href="">这是一段文字,有很多内容,会换行</a>
	</div>
	<div class="box3">
		<img src="http://t2.hddhhn.com/uploads/tu/201801/9999/c63fb8c291.jpg" alt="">
	</div>

	<div class="box4">
		<img src="https://ss0.bdstatic.com/70cFvHSh_Q1YnxGkpoWK1HF6hhy/it/u=3972169330,4211815266&fm=27&gp=0.jpg" alt="">
		<p><a href="http://www.baidu.com" target="_block">百度一下</a></p>
		<a class="a1" href="">第二个</a>
		<a href="">第三个</a>
	</div>

	<div class="box5 clearfix">
		<div class="l1"></div>
		<div class="l2"></div>
		<div class="l3"></div>
	</div>

	<div class="box6">
		<div class="son">

		</div>
	</div>

	<div class="box7">
		<p>这是背景图上的文字</p>
		<img src="https://ss1.bdstatic.com/70cFuXSh_Q1YnxGkpoWK1HF6hhy/it/u=415293130,2419074865&fm=27&gp=0.jpg" alt="">
	</div>

	<div class="box8">

	</div>

	<div class="box9">
	    <div class="l1"></div>
	    <div class="l2"></div>
	    <div class="l3"></div>
	    <div class="g1"></div>
	</div>

</body>
</html>
/*浮动定位的元素可以任意设置宽高,使用diaplay将行内转化正块后行内元素可以设置宽高*/
/*cursor: pointer;鼠标悬浮变成小手
text-decoration: line-through;设置文字中间穿过横线
*/

*{
    margin: 0;
    padding: 0;
}

/*去掉列表前的点*/
ul{
    list-style: none;
}

a{
    text-decoration:none;
    color: black;
}


.clearfix:after{
    content: '.';
    /*变成块级标签*/
    display: block;
    /*可见的元素隐藏 隐藏完占位置*/
    visibility: hidden;
    height: 0;
    clear: both;
}
/*单行文字的居中........................................*/
/*a标签比较特殊只能通过设置父级标签的属性text-align来进行水平居中*/
.box1{
    width: 200px;
    height: 100px;
    border: 1px solid red;
    line-height: 100px;
    text-align: center;
}

/*多行文字的居中..........................................*/
.box2{
    /*需要计算,增加padding需要减少height*/
    width: 200px;
    height: 66px;
    border: 1px solid red;
    font-size: 16px;
    padding-top: 34px;
    text-align: center;
}

/*图片的居中.............................................*/
.box3{
    width: 200px;
    height: 100px;
    border: 1px solid red;
    /*text-align:center也可用于图片的水平居中*/
    text-align: center;


}


/*


margin: 0 auto; 元素水平居中布局无效
失效原因:
1,要给居中的元素一个宽度,否则无效。
2,该元素一定不能浮动或绝对定位,否则无效。
3,在HTML中使用<center></center>标签,需考虑好整体构架,否者全部元素都会居中的。
4,有时需要给父级元素添加text-align: center;
5,有时可能涉及到 <!DOCTYPE>类型相关定义。

1、为什么图片不能实现水平居中?
原因是img是行内元素,当不设置宽度时,它并不会像块级元素一样自动填充为浏览器的宽度,
所以不存在当设置宽度时产生的剩余空间。不符合以上margin:auto;实现居中的原理

总结一下,margin:auto;实现水平居中的条件
元素必须为块级元素
元素必须定宽

2,垂直居中使用子绝父相
.father{
     height:200px;
    position: relative;
    background-color: yellow;
 }
.father .son{
      position: absolute;
     height:100px;
    500px;
    margin:auto ;
    background: red;
    //下面的这些设置是必要的,不然会默认在父容器的左上角
    bottom: 0;
    right: 0;
    top: 0;
    left: 0;
  }

  这种居中的原理是:如果son不设置宽高,那么son会被拉升为父级的宽高(相当于拥有自动填充特性),所以这时设置宽高,就可以实现水平和垂直方向的居中

  margin是块级元素的属性


*/

.box3 img{
    width: 50%;
    height: 50%;
    /*尽管我们不能使用margin:auto 但是可以通过计算使用margin-top:来进行垂直居中,所以通常我们居中图片使用text-align: center; + margin-top: px; */
    margin-top:25px;
}

/*图片和文字混合的情况......................................*/
.box4{
    width: 200px;
    height: 150px;
    text-align: center;
    border: 1px solid yellow;
}

.box4 img{
    height: 60%;
    margin-top: 10px;
}

/*浮动的简单例子.............................*/
.box5{
    /* 300px;*/
    border: 1px solid red;
}

.box5 div{
    width: 100px;
    height: 100px;
    float: left;
}

.box5 .l1{
    background-color: red;
}

.box5 .l2{
    background-color: green;
}

.box5 .l3{
    background-color: yellow;
}

/*定位的简单例子....子绝父相..........................*/
/*绝对定位参考点页面左上角,固定定位参考点浏览器左上角*/
.box6{
    width: 200px;
    height: 150px;
    position: relative;
    border: 1px solid blue;
}

.box6 .son{
    width: 20px;
    height: 20px;
    position: absolute;
    background-color: red;
    top:50px;
    left:50px;
}

/*设置背景图片...........................................*/
.box7{
    /* 100%; 把这个注释掉了应为当设置盒子宽度为浏览器宽度,后面有设置了盒子的边框,这样盒子的总宽度就会超过浏览器的宽度*/
    height: 120px;
/*    background-image: url('https://i1.mifile.cn/a4/cms_15337986888589_wGuOE.jpg');
    background-repeat: no-repeat; 不平铺
    background-position: center top; 背景图片位于当前容器的位置 center表示水平居中 top表示竖直方向靠上*/
    /*可以简写成*/
    background: url('https://i1.mifile.cn/a4/cms_15337986888589_wGuOE.jpg') no-repeat 10px center;
    /*设置背景图片的大小*/
    background-size: 50% 50% ;
    /*可以写文字,会浮在背景图上边*/
    text-align: center;
    border: 1px solid purple;
}

.box7 img{
    height: 50%;
    margin-left: -500px;
}
/*不知道为什么使用background-attachment: fixed时必须要先给定body一个定长,可能是只有高度确定了才能进行窗口可视化吧
详细参见博客https://www.cnblogs.com/starof/p/4511367.html*/
body{
    height: 2000px;
}
.box8{
    /*相当于开一个高度为300px的窗口可以看见背景图*/
    height: 300px;
    background:url('https://ss2.bdstatic.com/70cFvnSh_Q1YnxGkpoWK1HF6hhy/it/u=4045053342,2052749244&fm=27&gp=0.jpg') no-repeat 0 0;
    /*固定背景图的父级容器是整个浏览器窗口,所以下面设置的大小是窗口的大小*/
    background-size: 100% 100%;
    background-attachment: fixed;
    border: 1px solid red;
}

/*另一种玩法
.box8{
     300px;
    height: 300px;
    background:url('https://ss2.bdstatic.com/70cFvnSh_Q1YnxGkpoWK1HF6hhy/it/u=4045053342,2052749244&fm=27&gp=0.jpg') no-repeat center center;
    background-size: 100px 100px;
    background-attachment: fixed;
    border: 1px solid red;
    margin: auto;
}*/

/*可以使用 no-repeat -100px 100px 后面的两个属性切图(精灵图),
.box8{

    height: 300px;
    background:url('https://ss2.bdstatic.com/70cFvnSh_Q1YnxGkpoWK1HF6hhy/it/u=4045053342,2052749244&fm=27&gp=0.jpg') no-repeat -100px 100px;
    background-size: 50%;
    background-attachment: fixed;
    border: 1px solid red;
    margin: auto;
}*/


/*绝对定位和浮动的关系,绝对定位会压盖浮动的..............................*/
.box9{
  height: 200px;
}

.box9 .l1{
  float: left;
  background-color: red;
  width: 100px;
  height: 200px;
}
.box9 .l2{
  float: left;
  background-color: green;
  width: 100px;
  height: 200px;
}
.box9 .l3{
  float: left;
  background-color: yellow;
  width: 100px;
  height: 200px;
}
.box9 .g1{
  position: absolute;
  top:1220px;
  left:100px;
  width: 20px;
  height: 20px;
  background-color: purple;
}
Javascript简称js,语法与c语言的语法基本一致,下面是swith()语句的用法,有点忘了,就把它贴上来了
    <script>
        var gameScore = 'better';
        switch(gameScore){

        //case表示一个条件 满足这个条件就会走进来 遇到break跳出。break终止循环。如果某个条件中不写 break,那么直到该程序遇到下一个break停止
            case 'good':
            console.log('玩的很好');
            //break表示退出
            break;
            case  'better':
            console.log('玩的老牛逼了');

            case 'best':
            console.log('恭喜你 吃鸡成功');
            break;

            default:
            console.log('很遗憾');

        }
    </script>
js中函数的创建
<!DOCTYPE html>
<html lang="en">
<head>
    <meta charset="UTF-8">
    <title></title>
    <script>

        //  1.普通函数创建
        function add(x,y){

            return x+y;
        };

        // 2. 函数对象 匿名函数
        // var add;在js中存在变量提升,在程序加载时会将所有的变量名提升至前面,包括函数名也是变量,但这只是声明有这个变量,变量的内容和函数的功能还是在定义变量(函数)后才能使用

        var add = function(x,y) {
            return x+y;
        };

    </script>
</head>
<body>


</body>
</html>
js中的DOM操作 //DOM Document Object Model 文档对象模型 BOM指的是浏览器 window指的是浏览器窗口,所有的全局变量都挂载在window下,当我们引用一个模块时(如jquery)就是把jquery文件挂载到window下
<!DOCTYPE html>
<html lang="en">
<head>
    <meta charset="UTF-8">
    <title>Document</title>
    <style>
    /*    #active{
            background-color: red;
            100px;
            height: 100px;
        }*/
        /*#box1{
             100px;
            height: 100px;
        }*/

        .box2{
            width:100px;
            height: 100px;
            background-color: green;
        }

        .active2{
            background-color: red;
        }


    </style>
</head>
<body>

    <div id='active'></div>
    <div id="box1"></div>
    <div class="box2"></div>
    <button>隐藏</button>
    <div class="active2"></div>


    <script>
        /*console.log()对比伪数组和数组方法
        function add(){
            console.log(arguments);
            console.log(new Array());
        }

        add(5,6);*/


        /*使用DOM引用窗口(window),文档(document),html(document.documentElement),body标签 (document.body)
        console.log(window);
        console.log(document);
        console.dir(document);
        //console.log(),会在浏览器控制台打印出信息。
        //console.dir()可以显示一个对象所有的属性和方法。
        console.log(document.documentElement);
        console.log(document.body);

        var oDiv = document.getElementById('active');
        var isRed = true;
        oDiv.onclick = function(){
            if(isRed){
                oDiv.style.backgroundColor = 'green';
                isRed = false;
                oDiv.style.width = '200px';
                oDiv.style.display = 'none'

            }
            else{
                oDiv.style.backgroundColor = 'red';
                isRed = true;
            }
        }
        */


        // js三步走  1.获取事件对象 2.事件 3.驱动程序 执行的操作
        // js中的this相当于python中的self,谁调用的此事件 this就指向了谁

        // 1.获取的DOM的三种方式
        var oDiv = document.getElementById('active');
        var oDiv2 = document.getElementsByTagName('div')[0]; //得到的是个伪数组,所以需要加索引
        var oBox = document.getElementsByClassName('.box')[0];


        /*通过判断盒子颜色使得点击变色
        var Box = document.getElementById('box1');
        Box.style.backgroundColor = 'yellow';
        Box.onclick = function(){
            console.log(this)
            console.log(Box.style.backgroundColor)
            // 这个if里判断的是行内样式而不是内接样式,所以需要在点击前将行内样式置为yellow
            if(Box.style.backgroundColor == 'yellow'){
                Box.style.backgroundColor = 'purple';
                // alert(666)
            } else{
                Box.style.backgroundColor = 'yellow';
            }
        }
        */


        /*使用class属性调用标签,点击事件改变文字动态插入代码,innnerText  innerHTML

        var Box2 = document.getElementsByClassName('box2')[0];
        var Btn = document.getElementsByTagName('button')[0];
        Btn.onclick = function(){
            if(Box2.style.display != 'none'){
            Box2.style.display = 'none';
            this.innerText ='显示';
            }else{
                Box2.style.display = 'block';
                var name = 'alex';
                Box2.innerHTML = `<ul>
                        <li>
                            ${name}
                        </li>
                    </ul>
                `
            }
        }*/


        var Box2 = document.getElementsByClassName('box2')[0];
        var isGreen = true;
        Box2.onclick = function(){
            if (isGreen) {
                Box2.className = Box2.className + ' active2';
                isGreen = false;
            }else{
                Box2.className = 'box2';
                isGreen = true;
            }
        }

    </script>

</body>
</html>
js中的入口函数
<!DOCTYPE html>
<html lang="en">
<head>
    <meta charset="UTF-8">
    <title></title>


</head>
<body>
    <div id="box"></div>
    <script>
        //入口函数

        // 当窗口加载完成之后 才调用次方法  回调函数

        // 窗口加载 1.文档 2.图片再加载

        // 1.覆盖现象(后一个window.load后覆盖前边的window.load)  2 必须等待着图片加载完成才调用次回调函数
        window.onload = function() {
            console.log(document.getElementById('box'));


            // dom操作
        };
        window.onload = function() {
            console.log(2);


            // dom操作
        };
    </script>

</body>
</html>
js创建删除追加子元素
<script>

        window.onload = function() {

            var oDiv = document.getElementById('box');
            var oBtn = document.getElementById('btn');
            var oDel = document.getElementById('del');
            var oUl = document.getElementById('box2');
            console.log(oUl.children);
            var lis = oUl.children;


            // 创建DOM
            var oP = document.createElement('p');

            oBtn.onclick = function(){

                // 追加
                oDiv.appendChild(oP);


                // 修改DOM的属性
                oP.id = 'p1';
                oP.className = 'p1';
                oP.style.color = 'green';
                oP.innerText = 'alex'

            };

            oDel.onclick = function(){
                // 删除
                oDiv.removeChild(oP);
            }


        };
    </script>
js实现选项卡
在本例中因为js本身变量提升的原因,使得我们不得不给table增加index属性以保存当前 伪数组索引的值,在es6中使用let代替var声明变量 i ,就可以避免变量提升的问题
<!DOCTYPE html>
<html>
    <head>
        <meta charset="UTF-8">
        <title></title>
        <style type="text/css">
            *{
                padding: 0;
                margin: 0;
            }
            ul{
                list-style: none;
            }
            #tab{
                width: 480px;
                margin: 20px auto;
                border: 1px solid red;
            }
            ul{
                width: 100%;
                overflow: hidden;
            }
            ul li{
                float: left;
                width: 160px;
                height: 60px;
                line-height: 60px;
                text-align: center;
                background-color: #cccccc;
            }

            ul li a{
                text-decoration: none;
                color:black;
            }
            li.active{
                background-color: red;
            }
            p{
                display: none;
                height: 200px;
                text-align: center;
                line-height: 200px;
                background-color: red;
            }
            p.active{
                display: block;

            }

        </style>
    </head>
    <body>
        <div id="tab">
            <ul>
                <li class="active">
                    <a href="#">首页</a>
                </li>
                <li>
                    <a href="#">新闻</a>
                </li>
                <li>
                    <a href="#">图片</a>
                </li>
            </ul>
            <p class="active">首页内容</p>
            <p>新闻内容</p>
            <p>图片内容</p>


        </div>
    </body>
    <script type="text/javascript">
        window.onload = function(){
            // //需求:鼠标放到上面的li上,li本身变色(添加类),对应的p也显示出来(添加类);
                    //思路:1.点亮上面的盒子。   2.利用索引值显示下面的盒子。

            var tabli = document.getElementsByTagName('li');
            var tabContent = document.getElementsByTagName('p')
            var i;
            for( i= 0; i < tabli.length; i++){
                //因为变量提升的原因,i是全局变量,所以在循环内部引用的i是全局变量的i,一直是最后循环后的结果3
                // 绑定索引值(新增一个自定义属性:index属性)
                // tabli[i].index  = i;
                tabli[i].index = i;
                console.dir(this.index);
                tabli[i].onclick = function(){

                    // 1.点亮上面的盒子。   2.利用索引值显示下面的盒子。(排他思想)
                    for(var j = 0; j < tabli.length; j++){

                        console.log(this);
                        tabli[j].className = '';
                        tabContent[j].className = '';

                    }
                    this.className = 'active'  //标题添加active类,变红

                    tabContent[this.index].className = 'active'; //内容区域添加active类,变红
                }
        }
        }

    </script>
</html>
js中的面向对象,创建对象
<!DOCTYPE html>
<html lang="en">
<head>
    <meta charset="UTF-8">
    <title></title>
</head>
<body>

    <script>

        // 普通函数
        function add(x,y) {
            // body...
        };
        // var fav = function(){

        // }


        // js里的面向对象是一种伪面向对象,只是看起来和面向对象差不多,真正实现面向对象的是es6
        // 字典  Object  1,字面量方式创建对象  常用
        var person = {
            name:'alex',
            age:18,
            fav:function(){
                alert(this.name);
            }
        };

        person.fav();


        //2,构造函数的方式创建对象,这里是以Object作为原型(构造函数)创建对象的
        var person2 =  new Object();
        person2.name = 'perfey';

        person2.fav = function(){
            console.log('学习');
        };

        person2.fav();

        //在js中使用var a1 = new 构造函数名() 自己定义构造函数
        function Animal(){
            // 当前对象
            // this
        };

        var a1 = new Animal();


        //3,原型继承的方式创建对象
        function Student(name,age){
            this.name = name;
            this.age = age;
        };

        Student.prototype.fav = function(argument){
            // body...
            console.log(this);
            console.log(this.name);
        };
        // 实例化对象
        var s1 = new Student('太白',18);
        s1.fav();

        // Object  String
        console.log(s1.__proto__ instanceof Object);
        // instanceof 判断某个对象是否是某个构造函数(对象)的对象
        console.log(Student.prototype instanceof Object);
        console.log(s1.__proto__ === Student.prototype)
        // 原型模式如类模式一样,都是是一种编程泛型,即编程的方法论。另外最近大红大紫的函数编程也是一种编程泛型。JavaScript之父Brendan Eich在设计JavaScript时,从一开始就没打算为其加入类的概念,而是借鉴了另外两门基于原型的的语言:Self和Smalltalk。

        // 既然同为面向对象语言,那就得有创建对象的方法。在类语言中,对象基于模板来创建,首先定义一个类作为对现实世界的抽象,然后由类来实例化对象;而在原型语言中,对象以克隆另一个对象的方式创建,被克隆的母体称为原型对象。
        // 推荐博客https://www.cnblogs.com/shenjp/p/6517743.html


    </script>
</body>
</html>
1.面向对象(伪面向对象)
原型
function Animal(name,age){
this.name = name;
this.age = age;
};
Animal.prototype.showName = function(){
console.log(this.name);
}
var a = new Animal();
a.showName()
字面量方式创建
var obj = {
name:'alex',
age:18,
fav:function(){
}
};
2.定时器
setTimeout() 一次性定时器
<script>
        //1000毫秒==1秒 异步 如果请求数据时 出现数据阻塞 那么可以简单实用 异步调用
        var a = setTimeout(function(){

            console.log(1);

        },3000)

        console.log(2);
        clearTimeout(a); //清定时器,执行这个语句就不会输出1了,因为是异步执行在延时中就结束了定时器
    </script>
setInterval() 循环周期的定时器
    <div id="box"></div>
    <script>
        var oBox = document.getElementById('box');
        var i = 0;
        var timer = null;
        timer = setInterval(function(){
            i+=3;

            // oBox.style.left = i + 'px';
            oBox.style.left = `${i}px`; //es6模板字符串

            if (i > 200) {
                clearInterval(timer);
            }


        },50)
    </script>
使用定时器: 上来先清定时器 clearInterval(),再开定时器
3.BOM
先看看这个,不用深究

<script>
        document.getElementsByTagName('form')[0].onsubmit = function (e) {
            alert(1);
            // 阻止默认事件
            e.preventDefault()
            console.log(1111);

            // ajax请求
            $.ajax({
                url:'http://127.0.0.1:8800',
                method:'get',
                success:function (data) {
                    console.log(data);
                }
            })

        }
    </script>
open(); <===>window.open()
location.href = '地址' <====> window.location.href = '地址'
锚点值跳转
<!DOCTYPE html>
<html lang="en">
<head>
    <meta charset="UTF-8">
    <title></title>
</head>
<body>

    <!-- history 历史记录  hash锚点值,a标签中指的是a标签的href地址 -->
    <a href="#/login">登录</a>
    <a href="#/register">注册</a>

    <div id="app"></div>


    <script>

         //onhashchange监测锚点值的跳转

        window.onhashchange = function () {
            console.log(location.hash);
            var oDiv = document.getElementById('app');
            switch (location.hash) {
                case '#/login':
                    //未来要与后端进行的交互的代码
                    oDiv.innerHTML = '<h2>我是登录页面</h2>'
                    oDiv.innerHTML = '<h2>我是登录页面222222</h2>'//后一个 innerHTML会覆盖前一个innerHTML
                    break;
                case '#/register':
                    oDiv.innerHTML = '<h2>我是注册页面</h2>'
                    break;
                default:
                    // statements_def
                    break;
            }

        };


    </script>
</body>
</html>
----------------------------------------------------------------------------------------------------------------------------------------------------------
clientTop 内容区域到边框顶部的距离 ,说白了,就是边框的高度
clientLeft 内容区域到边框左部的距离,说白了就是边框的宽度
clientWidth 内容区域+左右padding 可视宽度 不包含border
clientHeight 内容区域+ 上下padding 可视高度 不包含border
offsetWidth占位宽 内容+padding+border
offsetHeight占位高
offsetTop: 单独设置该盒子(子)为定位和没有定位 那么是到body顶部的距离
如果父盒子设置了相对定位, 以父辈盒子为基准
scrollHeight:只读属性,返回该元素内容高度。包含被overflow隐藏掉的部分。包含padding,不包含边框,不包含margin.
scrollWidth : 只读属性,内容的高度+padding,返回该元素内容区域宽度和自身宽度中较大的一个,若自身宽度大于内容宽度(存在滚动条),则scrollWidth>clientWidth.
scrollTop : 设置或获取该元素顶部距离其容器顶部的距离,无滚动条时为0
scrollleft : 读取或设置元素滚动条到元素左边的距离。
详见博客:https://www.cnblogs.com/zxjwlh/p/6284330.html
---------------------------------------------------------------------------------------------------------------------------------------------
原生js添加删除类
<!--为 <div> 元素添加 class:-->
document.getElementById("myDIV").classList.add("mystyle");

<!--为 <div> 元素添加多个类:-->
document.getElementById("myDIV").classList.add("mystyle", "anotherClass", "thirdClass");

<!--为 <div> 元素移除一个类:-->
document.getElementById("myDIV").classList.remove("mystyle");

<!--为 <div> 元素移除多个类:-->
document.getElementById("myDIV").classList.remove("mystyle", "anotherClass", "thirdClass");

<!--检查是否含有某个CSS类-->
myDiv.classList.contains('myCssClass'); //return true or false
jquery模块相关
<!--
使用jquery模块
1,引包 <script src="jquery.js"></script>

2,入口函数
    js中的入口函数(后一个入口函数会覆盖前边的入口函数)
    window.onload = function() {

            };


    jquery中的入口函数
    $(document).ready(function () {

            });
    简便写法:
    $(function () {
            }

3,
jquery对象转化为js对象
    $('.box')[0] ==> jquery对象
js对象转化为jquery对象
    js对象      ===>  $(js对象)

 -->
 <body>

    <div class="box" style=" 200px;height: 200px;"></div>
    <div class="box" style=' 100px;height: 100px;'></div>
    <!-- 1.引包 -->
    <script src="jquery.js"></script>

    <script>

        $(function () {

            console.log($('.box'),'jquery对象')
            console.log($('.box')[0],'js对象,第一个box')
            console.log($('.box')[1],'js对象,第二个box')
            console.dir($('.box')[0],'js对象,第一个box的方法和属性')
            console.dir($('.box')[1],'js对象,第二个box的方法和属性')


            // 1.事件对象  2.事件  3事件驱动

            $('.box').click(function () {

                console.log(this);

                // js对象转化 jquery对象 $(js对象) 就可以使用jquery的属性和方法
                console.log($(this));

                // jquery 链式编程(通过函数返回这个jquery对象来实现的,网上有实现原生js的链式编程,详见博客https://www.jb51.net/article/117814.htm)
                $(this).css({
                    'backgroundColor':'green',
                    'width':'300px'
                }).attr('id','box');

            });

        });


    </script>

<!--
4,juery中的选择器
和js一致 id选择器使用#  类选择器使用. 标签选择器直接写标签名   后代选择器   亲子代选择器使用>  这些就是常用的


5,jquery排他实现
 -->

<body>
    <ul>
        <li>
            <button>按钮1</button>
        </li>
        <li>
            <button>按钮2</button>
        </li>
        <li>
            <button>按钮3</button>
        </li>
        <li>
            <button>按钮4</button>
        </li>
    </ul>


<script src="jquery.min.js"></script>

<script>

    $(function () {

        $('button').click(function(event) {

            // 链式编程
            $(this).css('backgroundColor','red').parent().siblings('li').children('button').css('backgroundColor','white')
            // .parent() 找到父节点      .children() 找到子节点    .siblings() 找到兄弟节点,不包括自己
        });


    });
</script>
</body>

<!--
6,juery实现选项卡

-->
<script type="text/javascript">

    $(function () {
        $('#box button').click(function(event) {
           // 通过.index方法可以直接获得当前jquery对象的索引
           var i = $(this).index();

            $(this).css('backgroundColor','red').siblings('button').css('backgroundColor','#fff');
            // .eq() 通过索引筛选选择器
            $('ul li').eq(i).css('color','green').siblings('li').css('color','#000');

        });

    });


</script>

<!--
7,jqurey中的动画
使用动画时一定要先停止再设置
$('.box').stop().show(1000,function () {});  在1s内显示,并执行函数内代码
$('.box').stop().hide(1000,function () {});  在1s内隐藏
$('.box').stop().toggle(1000,function () {});  toggle开关 触发一次显示,再触发一次隐藏
$(selector).slideDown(speed, 回调函数);  卷帘门,显示
$(selector).slideUp(speed, 回调函数);    卷帘门,隐藏
$(selector).slideToggle(speed, 回调函数);  toggle开关卷帘门
$(selector).fadeIn(speed, callback);  淡入动画
$(selector).fadeOut(1000);         淡出动画
$(selector).fadeToggle('fast', callback);    淡入淡出切换


$(selector).animate({params}, speed, callback);
作用:执行一组CSS属性的自定义动画。
    第一个参数表示:要执行动画的CSS属性(必选)
    第二个参数表示:执行动画时长(可选)
    第三个参数表示:动画执行完后,立即执行的回调函数(可选)

//自定义动画

var json = {"width": 500, "height": 500, "left": 300, "top": 300, "border-radius": 100};
var json2 = {
        "width": 100,
        "height": 100,
        "left": 100,
        "top": 100,
        "border-radius": 100,
        "background-color": "red"
    };
$("div").animate(json, 1000, function () {
    $("div").animate(json2, 1000, function () {
        alert("动画执行完毕!");
    });
});

8,导入自己写的模块
<script src="module.js"></script>

以下是module.js中的代码
// 自执行函数 闭包函数
(function(window){
    alert(1);
    var a =2;
    window.$ = a;
})(window);

//function()括号里的window是形参,外边括号里的window是实参
等价于下面

var func = function(window){
    alert(1);
    var a =2;
    window.$ = a;
};
func(window)

当导入模块后就自动执行函数内的代码,通过给window添加一个属性$来接收模块中的变量a,这样就把变量以$的形式挂载到window中了,可以通过设置不同的属性名字来把不同模块中的相同名字的变量区分开,防止变量之间的覆盖

    1.模块中可以定义变量

     2.模块中可以定义字面量创建对象
     var obj = {
         name:'alex',
         fav:function(){
        alert('喜欢拍av');
         }
     };
     3.模块中可以定义函数
     function add(x,y){
         return x+y;
     };
     function add2(x,y){
         return x+y;
     };
     function add3(x,y){
         return x+y;
     };


     4.模块中可以定义构造函数

     function Animal (name) {
         this.name = name;
     };
     Animal.prototype.showName = function () {
         alert(this.name);
     };

     5.模块中可以定义对象
     function Animal (name) {
         this.name = name;
     };
     Animal.prototype.showName = function () {
         alert(this.name);
     };

     var a1 = new Animal('太白');
-->
jquery的属性操作模块分为四个部分:html属性操作,dom属性操作,类样式操作和值操作
<!--
jquery的属性操作模块分为四个部分:html属性操作,dom属性操作,类样式操作和值操作

    html属性操作:是对html文档中的属性进行读取,设置和移除操作。比如attr()、removeAttr()
js对象 $('div')[0].id = 'box'; 设置 id
$('div')[0].setAttribute('class', 'box'); 设置类名
var value = $('div')[0].getAttribute('class'); 获取类名
        attr()
            获取值  var id = $('div').attr('id')
            设置值    $('div').attr('class','box')
            设置多个值    $('div').attr({name:'hahaha',class:'happy'})
        removeAttr()
            删除单个属性        $('#box').removeAttr('name');
            删除多个属性        $('#box').removeAttr('name class');


    DOM属性操作:对DOM元素的属性进行读取,设置和移除操作。比如prop()、removeProp()
        返回属性的值    $(selector).prop(property)
        设置属性和值    $(selector).prop(property,value
        设置多个属性和值    $(selector).prop({property:value, property:value,...})
            prop()  获取或设置input标签中checked的value(attr()并不能得到input中checked value的值是false还是true,永远返回的是checked所以只能用prop())
            <input type="radio" name="sex" checked=""> 男
            <input type="radio" name="sex"> 女

            var chec = $('input').attr('checked');
            console.log(chec);         //checked
            console.dir($('input')[0].checked);    //true
            console.dir($('input')[1].checked);    //false
            console.log($('input').eq(0).prop('checked')); //true
            console.dir($('input')[0]);  //第一个input js对象
    类样式操作:是指对DOM属性className进行添加,移除操作。比如addClass()、removeClass()、toggleClass()
        $('div').addClass("box");//追加一个类名到原有的类名     相当于js中的 .className = ' box'
        $('div').addClass("box box2");//追加多个类名
        $('div').removeClass('box'); //移除一个或多个类
        $('div').removeClass();     //移除全部的类
        $('div').toggleClass('box')    //如果存在(不存在)就删除(添加)一个类,开关式的添加删除
    值操作:是对DOM属性value进行读取和设置操作。比如html()、text()、val()
        html()
            $('#box').html(); //获取选中标签元素中所有的内容      相当于js中的 innerHTML
            $('#box').html('<a href="https://www.baidu.com">百度一下</a>');//设置值:设置该元素的所有内容 会替换掉 标签中原来的内容

        text()
            $('#box').text(); //获取匹配元素包含的文本内容      相当于js中的 innerText
            $('#box').text('<a href="https://www.baidu.com">百度一下</a>'); //设置该所有的文本内容;注意:值为标签的时候 不会被渲染为标签元素 只会被当做值渲染到浏览器中
        val()用于表单控件中获取值,比如input textarea select等等
            $('[type="text"]').val()  表单控件中获取值     相当于js 中的 value  var inputValue = document.getElementById("demo1"$('[type="text"]').val('321'); 表单控件中设置值 $('input').val('设置了表单控件中的值'); -->
<!-- jquery的文档操作DOM操作 其实这些也不用格外的记,等用到的时候查jquery参考手册就行了
  1,之前的js DOM操作
      var oUl = document.getElementsByTagName('ul')[0];
      var oLi = document.createElement('li');
       oLi.innerHTML = '赵云';
      oUl.appendChild(oLi);
  2,插入操作
      父元素.append(子元素)   //子元素可以为:stirng | element(js对象) | jquery元素
        $('ul').append('<li>1233</li>'); // 如果追加的是jquery对象那么这些元素将从原位置上消失。简言之,就是一个移动操作。
      子元素.appendTo(父元素)   //追加到某元素 子元素添加到父元素

      父元素.prepend(子元素);//前置添加, 添加到父元素的第一个位置
        $('ul').prepend('<li>我是第一个</li>')
      子元素.prependTo(父元素); // 添加到父元素的第一个位置
        $('<li>我还是第一个</li>').prependTo('ul');

      同级间插入
        $('ul').after('<div>在列表的后面插入</div>'); <==> $('<div>在列表的后面插入</div>').inserAfter('ul');
        $('ul').before('<div>在列表的前面插入</div>');<==> $('<div>在列表的前面插入</div>').inserBefore('ul');
        $('h2').replaceWith('<h3>太白</h3>'); //将所有匹配的元素替换成指定的string、js对象、jquery对象。
  clone()
      $('button').click(function() {
      // 1.clone():克隆匹配的DOM元素
      // 2.clone(true):元素以及其所有的事件处理并且选中这些克隆的副本(简言之,副本具有与真身一样的事件处理能力)
      $(this).clone(true).insertAfter(this); })
   删除操作
      $(selector).remove(); //删除节点后,事件也会删除(简言之,删除了整个标签)
      $(selector).detach(); //删除节点后,事件会保留
        var $btn = $('button').detach()
        //此时按钮能追加到ul中,并就有之前的事件
        $('ul').append($btn)
      $(selector).empty(); //清空选中元素中的所有后代节点
        //清空掉ul中的子元素,保留ul
        $('ul').empty() -->
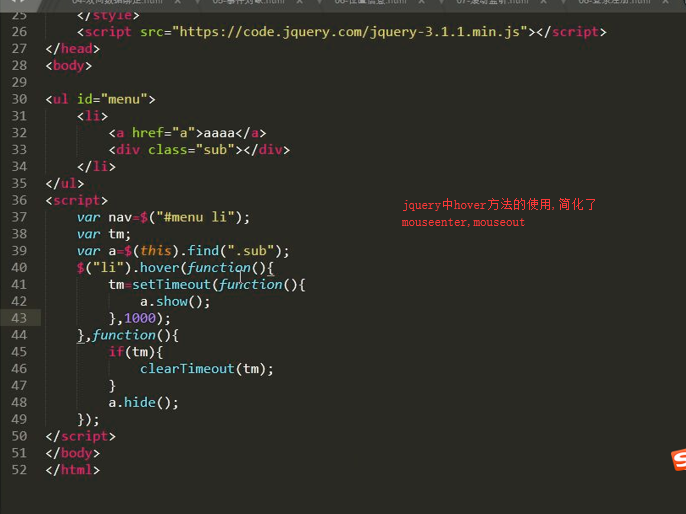
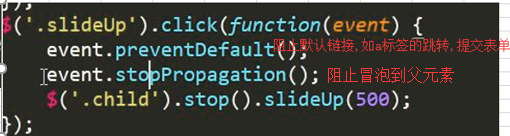
使用jquery实现二级菜单(当鼠标移入一级菜单时显示二级菜单,并且移出一级菜单移入二级菜单也不消失,这个应该是只能使用jquery,使用js时移出一级菜单移入二级菜单,二级菜单会消失)
<!DOCTYPE html>
<html>
<head lang="en">
    <meta charset="UTF-8">
    <title></title>
    <style type="text/css">
        * {
            margin: 0;
            padding: 0;
        }

        ul {
            list-style: none;
        }

        .wrap {
            width: 330px;
            height: 30px;
            margin: 100px auto 0;
            padding-left: 10px;
            background-color: pink;
        }

        .wrap li {
            background-color: green;
        }

        .wrap > ul > li {
            float: left;
            margin-right: 10px;
            position: relative;
        }

        .wrap a {
            display: block;
            height: 30px;
            width: 100px;
            text-decoration: none;
            color: #000;
            line-height: 30px;
            text-align: center;
        }

        .wrap li ul {
            position: absolute;
            top: 30px;
            display: none;
        }
    </style>
    <script src="./jquery.js"></script>
    <script>
        //入口函数
        $(document).ready(function () {
            //需求:鼠标放入一级li中,让他里面的ul显示。移开隐藏。
            var jqli = $(".wrap>ul>li");

            // //绑定事件
            jqli.mouseenter(function () {
                $(this).children("ul").stop().slideDown(1000);
            });

            // //绑定事件(移开隐藏)
            jqli.mouseleave(function () {
                $(this).children("ul").stop().slideUp(1000);
            });
        });
    </script>

</head>
<body>
<div class="wrap">
    <ul>
        <li>
            <a href="javascript:void(0);">一级菜单1</a>
            <ul>
                <li><a href="javascript:void(0);">二级菜单2</a></li>
                <li><a href="javascript:void(0);">二级菜单3</a></li>
                <li><a href="javascript:void(0);">二级菜单4</a></li>
            </ul>
        </li>
        <li>
            <a href="javascript:void(0);">二级菜单1</a>
            <ul>
                <li><a href="javascript:void(0);">二级菜单2</a></li>
                <li><a href="javascript:void(0);">二级菜单3</a></li>
                <li><a href="javascript:void(0);">二级菜单4</a></li>
            </ul>
        </li>
        <li>
            <a href="javascript:void(0);">三级菜单1</a>
            <ul>
                <li><a href="javascript:void(0);">三级菜单2</a></li>
                <li><a href="javascript:void(0);">三级菜单3</a></li>
                <li><a href="javascript:void(0);">三级菜单4</a></li>
            </ul>
        </li>
    </ul>
</div>
</body>
</html>
jquery获取位置信息的方法
.width() 获取宽度
.width(value) 设置宽度
.height() 获取高度
.height(value) 设置高度
.innerWIdth() 获取内部宽
.innerWIdth(value) 设置内部宽
.innerHeight() 获取内部高
.innerHeight(value) 设置内部宽
.outerWidth(includeMargin) 获取外部宽,includeMargin参数是一个布尔值,表示是非在计算时包含元素的margin值
.outerWIdth(value) 设置外部宽
.outerHeight(includeMargin) 获取外部高
.outerHeight(value)
.offset() 返回一个包含top和left属性的对象(注意:jquery不支持隐藏元素的偏移坐标)
$('p').offset({top:10,left:30}) ; 设置偏移
.position() 获取匹配元素中第一个元素的当前坐标
.scrollLeft() 获取匹配的元素集合中第一个元素的当前水平滚动条的位置(页面卷走的宽度)
.scrollTop() 获取匹配的元素集合中第一个元素的当前迟滞滚动条的位置(页面卷走的高度)
.scrollLeft(value) 设置每个匹配元素的水平滚动条的位置
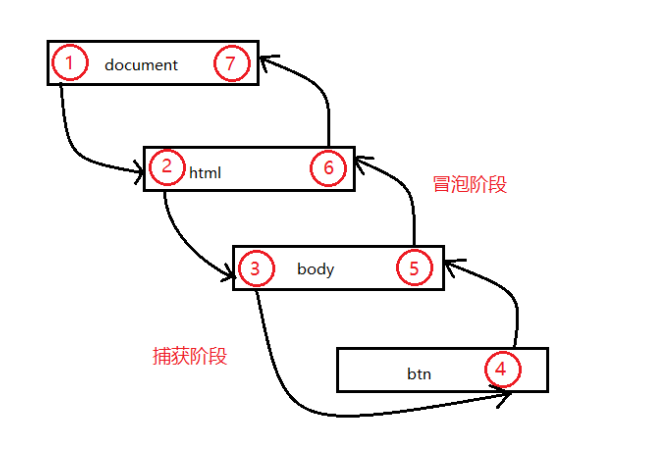
jquery事件流概念
当我们点击一个按钮时,产生了点击事件,这个事件的发生有如下图的几个阶段
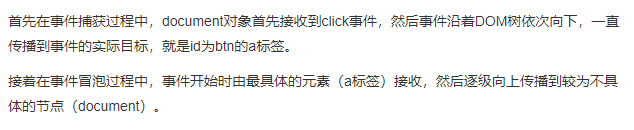
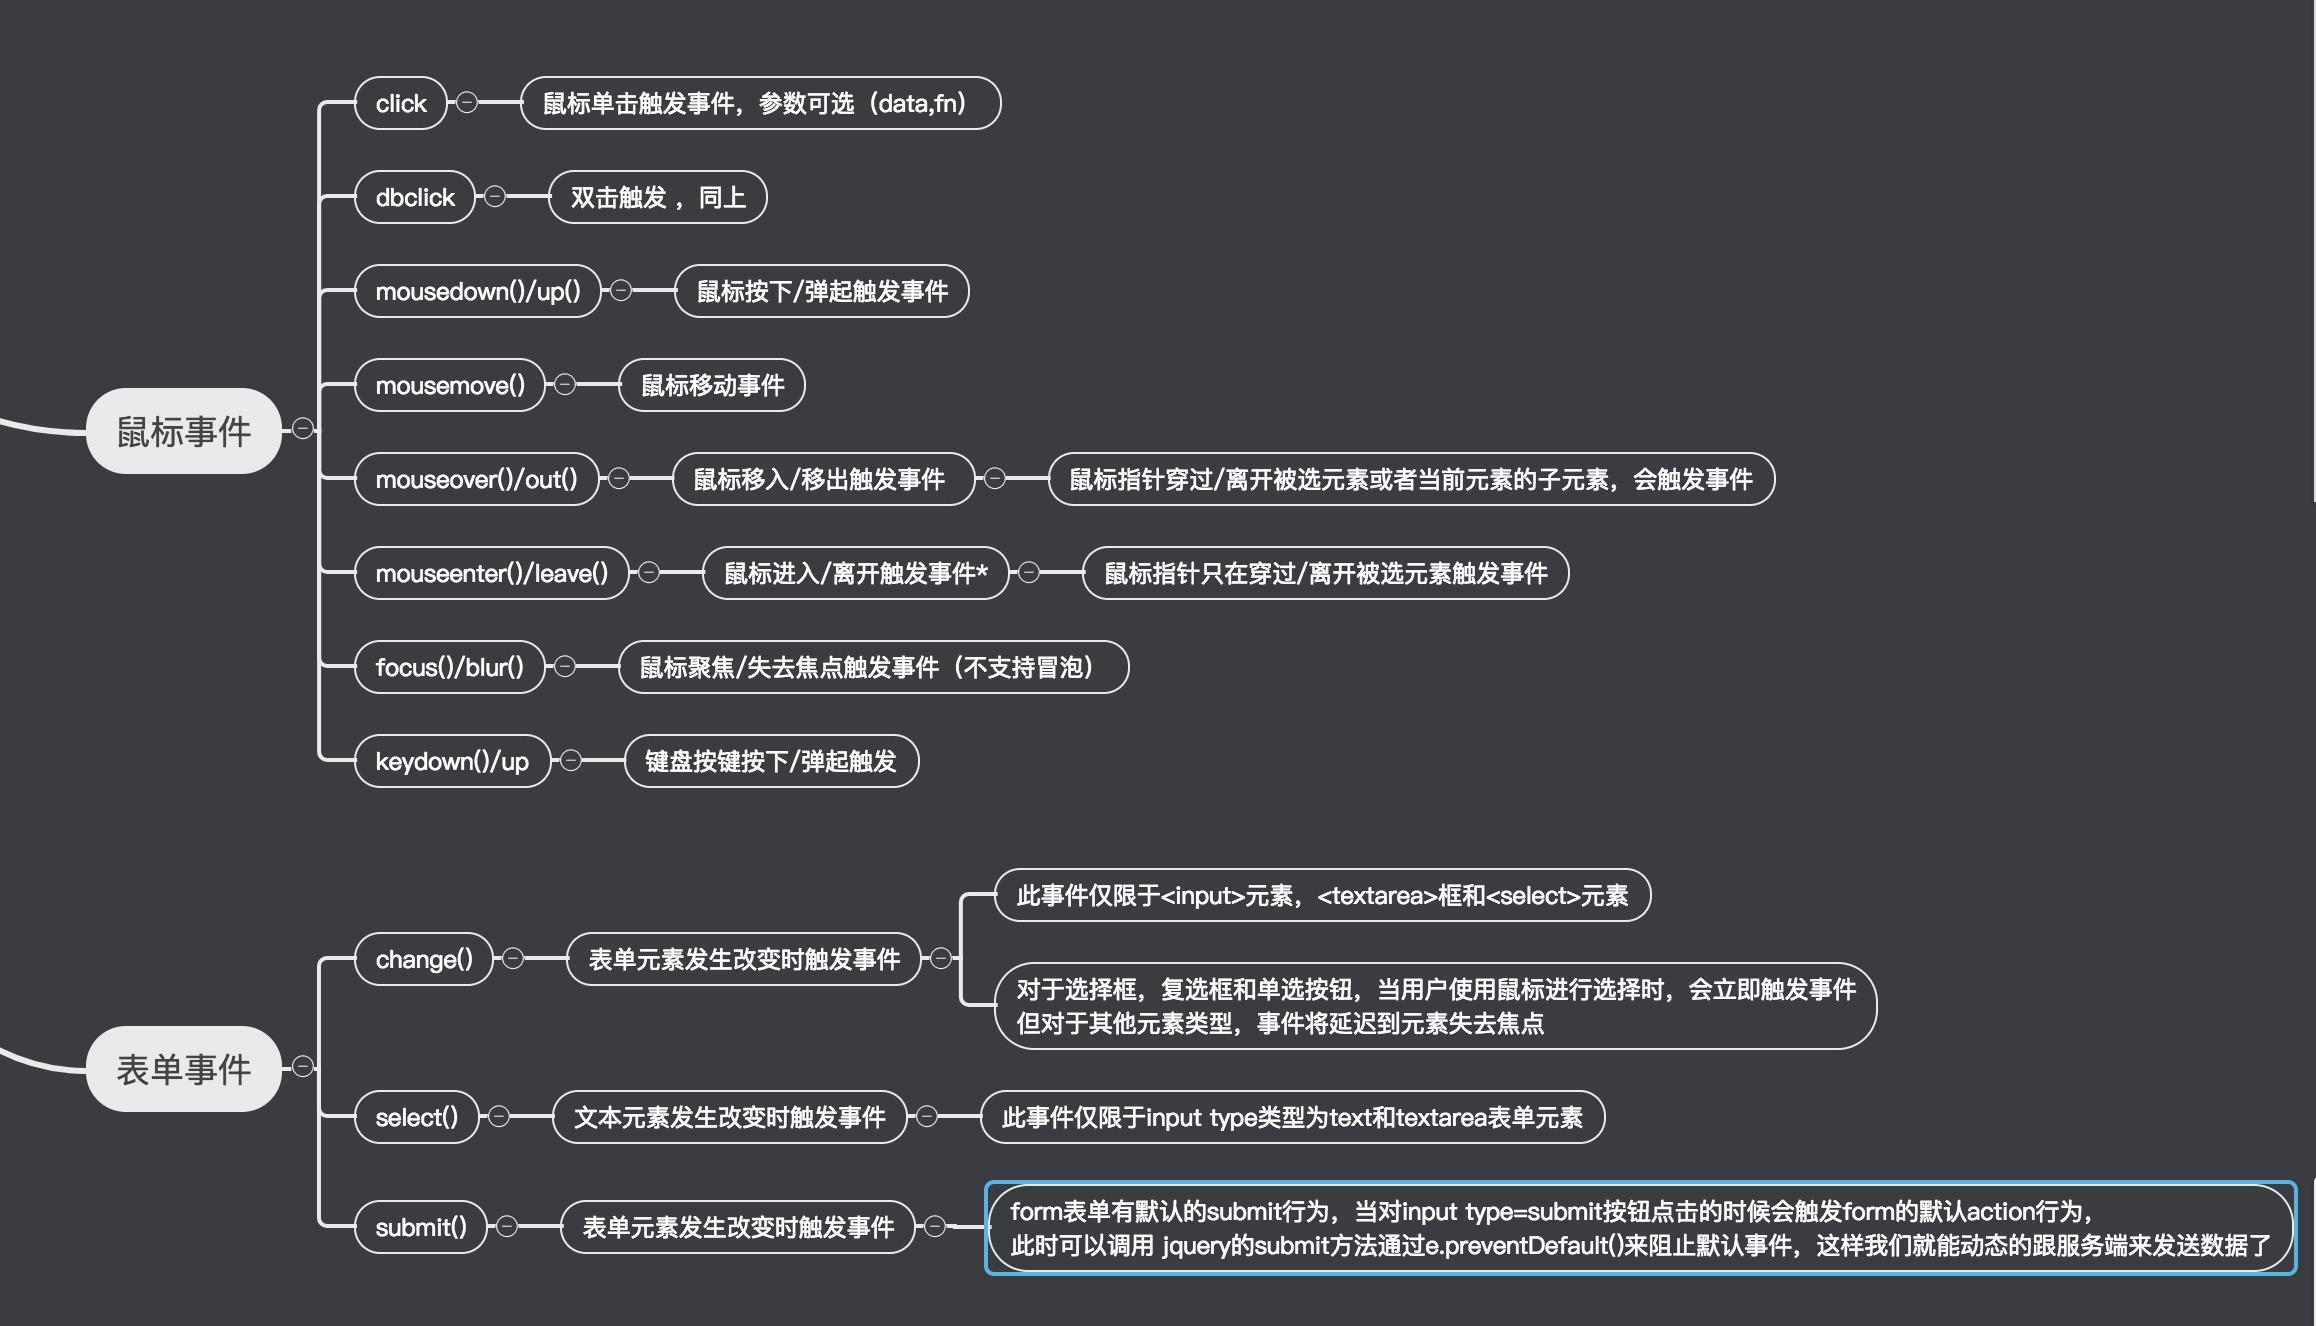
jquery事件对象及事件操作(图片如果看不清,右击在新标签中打开图片放大就行了)
jquery事件的绑定和解除
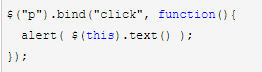
绑定事件
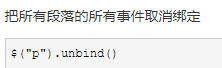
解除绑定 unbind(type,fn);
绑定事件的方式:
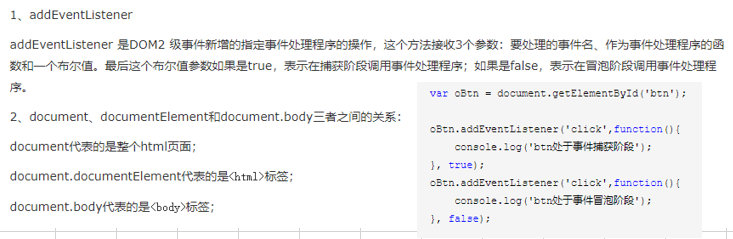
js中
.addEventLister()
.onclick()
jquery中
$().click()
$().bind()
自定义事件:
trigger(type,data);

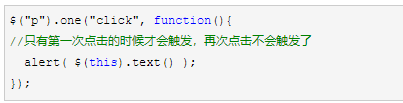
一次性事件:为每一个匹配元素的特定事件(像click)绑定一个一次性的事件处理函数。在每个对象上,这个事件处理函数只会被执行一次。其他规则与bind()函数相同
one(type,data,fn)
事件委托:利用冒泡的原理,把事件加到父级上,触发执行效果
事件源 :
跟this作用一样(他不用看指向问题,谁操作的就是谁),event对象下的
使用情景:
•为DOM中的很多元素绑定相同事件;
•为DOM中尚不存在的元素绑定事件;
<!DOCTYPE html>
<html lang="en">
<head>
    <meta charset="UTF-8">
    <title></title>
</head>
<body>

    <ul>
        <li>alex</li>
        <li>tailiang</li>
    </ul>
    <script src="jquery.js"></script>
    <script>
        $(function () {
            //直接点击事件处理,不会给未来插入的元素添加事件

            // $('ul li').click(function(event) {
            //      Act on the event
            //     alert($(this).text());
            // });

            // 事件委托去处理,li是ul的儿子

            $('ul').on('click','li',function () {
                // body...
                alert($(this).text());
            })


            // bind   on

            // 未来发生的事情

            $('ul').append('<li class="a">俊杰</li>');


        })

    </script>

</body>
</html>