前言
开发一个AspNetCore的中间件需要理解RequestDelegate。另外,还需要理解.NET Core中的依赖注入。还有一个就是内嵌资源的访问。例如:EmbeddedFileProvider 的使用。那么本文就这三点做一个简单的介绍。理解了这些那么基本上开发下去就不难了。
RequestDelegate
对于RequestDelegate的介绍,大家可以看一下这篇文章:https://www.cnblogs.com/artech/p/inside-asp-net-core-pipeline-01.html。
我这里就简单通过代码过一下,下面是一个简单的HelloWorld的例子。
namespace LayIM.AspNetCore.WebDemo.Middleware
{
    public class HelloWorldMiddleWare
    {
        private readonly RequestDelegate next;
        public HelloWorldMiddleWare(RequestDelegate next)
        {
            this.next = next;
        }

        public async Task Invoke(HttpContext context)
        {
            await context.Response.WriteAsync("hello world");
        }
    }

    public static class HelloWorldExtensions
    {
        public static void UseHelloWorld(IApplicationBuilder builder)
        {
            builder.UseMiddleware<HelloWorldMiddleWare>();
        }
    }
}
然后在Startup中将这个中间件注册到IApplicationBuilder中即可。就像 app.UseMvc() 一样。
 public void Configure(IApplicationBuilder app, IHostingEnvironment env)
        {
            app.UseHelloWorld();
        }
看一下运行效果:

那么这个就是RequestDelegate的用法,那么我们可以看到,在HelloWorldMiddleware中有一个类型为RequestDelegate的next变量。这样就使得调用链串联起来。我们通过RequestDelegate 就能做一些全局性的工作了,比如请求校验,筛选,日志,统计等等,看需求吧。然后在根据情况选择是否执行 next?.Invoke(context) 方法,将请求流程走下去,直到走完所有流程或者走到某个被拦截掉的流程为止。同样的道理,在LayIM.AspNetCore 中拦截了开头为{/layim}的请求。否则继续 执行其他业务逻辑。示例代码如下:
 if (context.IsLayIMRequest(options) == false)
     {
         await next?.Invoke(context);
         return;
     }
虽然没有加注释,但是也能看得出来,判断是否是LayIM的请求,如果不是,直接跳过。
DependencyInjection
依赖注入相信大家都很熟悉了,要说他有什么好处,最直观的一个好处就是解耦。在之前的LayIM_NetClient项目中,我是直接将融云的实现放到中间件中,这种就是耦合性太高。用户如果不想使用融云的话,就没法用了。那么在LayIM.AspNetCore 项目中,通过使用依赖注入的方式,将核心接口与实现类分离,达到不用改核心代码,直接扩展新的实现类即可做到业务实现转换。这里我直接用项目中的例子作为介绍:
在初始化Middleware的时候,系统会自动将IServiceProvider注入到中间件中
 public LayIMMiddleware(RequestDelegate next, LayIMOptions options,IServiceProvider serviceProvider)
        {
            this.next = next;
            this.options = options;
            this.serviceProvider = serviceProvider;
            LayIMServiceLocator.SetServiceProvider(this.serviceProvider);
        }
我通过LayIMServiceLocator 来保存IServiceProvider的实例,那么在使用的时候。通过它就可以得到我们想要的服务了。下面是一个获取Token的例子。在ILayIMServer 接口中定义了如下方法:
TokenResult GetToken(string userId);
然后在新的RongCloud项目中实现该方法,并且扩展IServiceCollection
 public class RongCloudServer : ILayIMServer
    {
        private readonly RongCloudConfig config;
        public RongCloudServer(RongCloudConfig config)
        {
            this.config = config;
        }
        public TokenResult GetToken(string userId)
        {
            return new TokenResult
            {
                code = 0,
                msg = "ok",
                token = "123456"
            };
        }
    }
 public static void AddLayIM(this IServiceCollection services, RongCloudConfig config)
        {
            services.AddSingleton(config);
            services.AddSingleton<ILayIMServer, RongCloudServer>();
        }
那么,在Demo中我们可以这么使用了:
 public void ConfigureServices(IServiceCollection services)
        {
            services.AddMvc();

            services.AddLayIM(config =>
            {
                config.AppKey = "123456";
                config.AppSecret = "654321";
            });
        }
这里呢,如果不想使用融云通讯的话,可以自己去实现ILayIMServer接口,然后做自己的扩展即可。
核心端依赖于接口,处理逻辑如下:(其他代码可先忽略,暂时看中间两行代码)
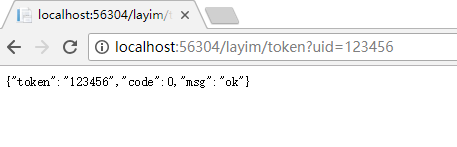
 //获取连接websocket的token
  routes.AddQueryCommand("/token", context =>
  {
    var server = LayIMServiceLocator.GetService<ILayIMServer>();
    return server.GetToken(context.Request.Query["uid"]);
  });
可以看到,先通过ServiceLocator获取了ILayIMServer接口,然后调用接口方法即可。这样就达到了框架代码与实现代码解耦的目的。我们看一下效果:
代码运行正常,在这里呢不在演示其他实现。如果不明白的小伙伴可以去下载代码调试,或者直接私信我即可。
EmbeddedFileProvider
好文推荐:https://www.cnblogs.com/artech/p/net-core-file-provider-04.html
大家知道,正如SwaggerUI那样,为什么我们配置了,就能访问到UI界面呢?他的资源文件在哪里呢?其实这就是内嵌资源起到的作用。想深入理解的小伙伴可以查阅其他资料,这里我只是简单介绍如何去实现内嵌资源的访问。
其实很简单,如下几句代码就搞定:
  app.UseFileServer(new FileServerOptions
            {
                RequestPath = options.ApiPrefix,
                FileProvider = new EmbeddedFileProvider(assembly, "namespace"),
            });
可以看到,FileProvider是EmbeddedFileProvider,其中传入了两个参数,一个是程序集,一个是静态资源的命名空间。
不过当我们添加静态文件之后需要注意的是,要将文件生成操作属性设置成为嵌入的资源,否则访问不到。(不过还有使用配置文件的做法)

那么这样的话,我们访问一下静态资源,效果如下:

那么动态资源和静态资源都可以访问了,那么我们就可以进行下一步的工作了。
总结
本文简单介绍了中间件的基础知识和使用方式、嵌入资源的访问以及依赖注入的简单使用,之所以说是预备知识,是因为在后续的开发过程中都会使用到。
博客预告:LayIM.AspNetCore Middleware 开发日记(三)基础框架搭建
项目地址:https://github.com/fanpan26/LayIM.AspNetCore (本文代码对应blog2分支)欢迎小伙伴们star 围观 提意见。