08.IdentityServer4登录中心
08.IdentityServer4登录中心
IdentityServer就是一套Framework,实现了OAuth的授权
理解OAuth流程,学会怎么使用他
http://ruanyifeng.com/blog/2014/05/oauth_2_0.html
客户端模式(client credentials)
客户端模式,在使用微信支付或者支付宝支付的时候,会使用这种模式

简单的实现一个IdentityServer
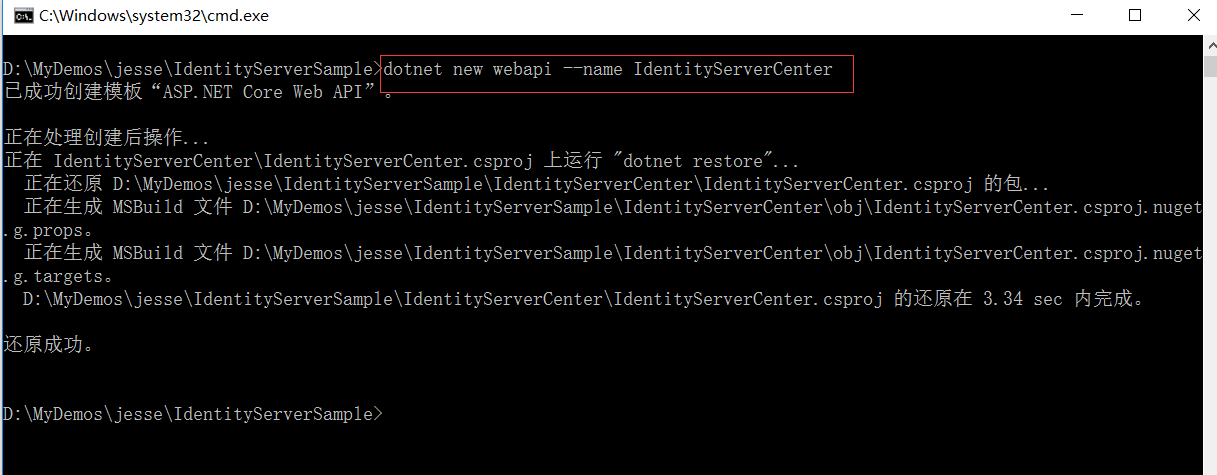
首先新建webapi的项目
在我的电脑D:MyDemosjesse下创建文件夹IdentityServerSample
D:MyDemosjesseIdentityServerSample
然后在这个文件夹下面打开dos窗体。创建webapi的项目
dotnet new webapi --name IdentityServerCenter
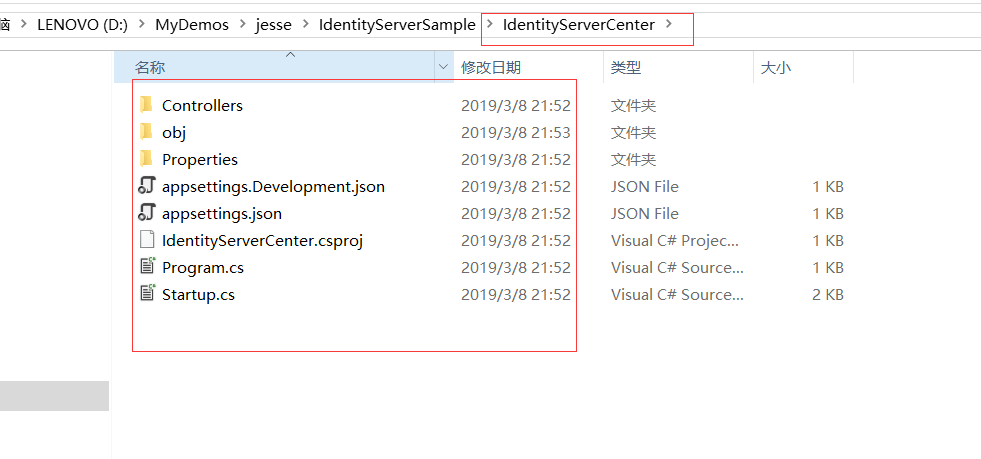
D:MyDemosjesseIdentityServerSampleIdentityServerCenter
视频上用VScode打开的。 我还是用VS2017打开吧
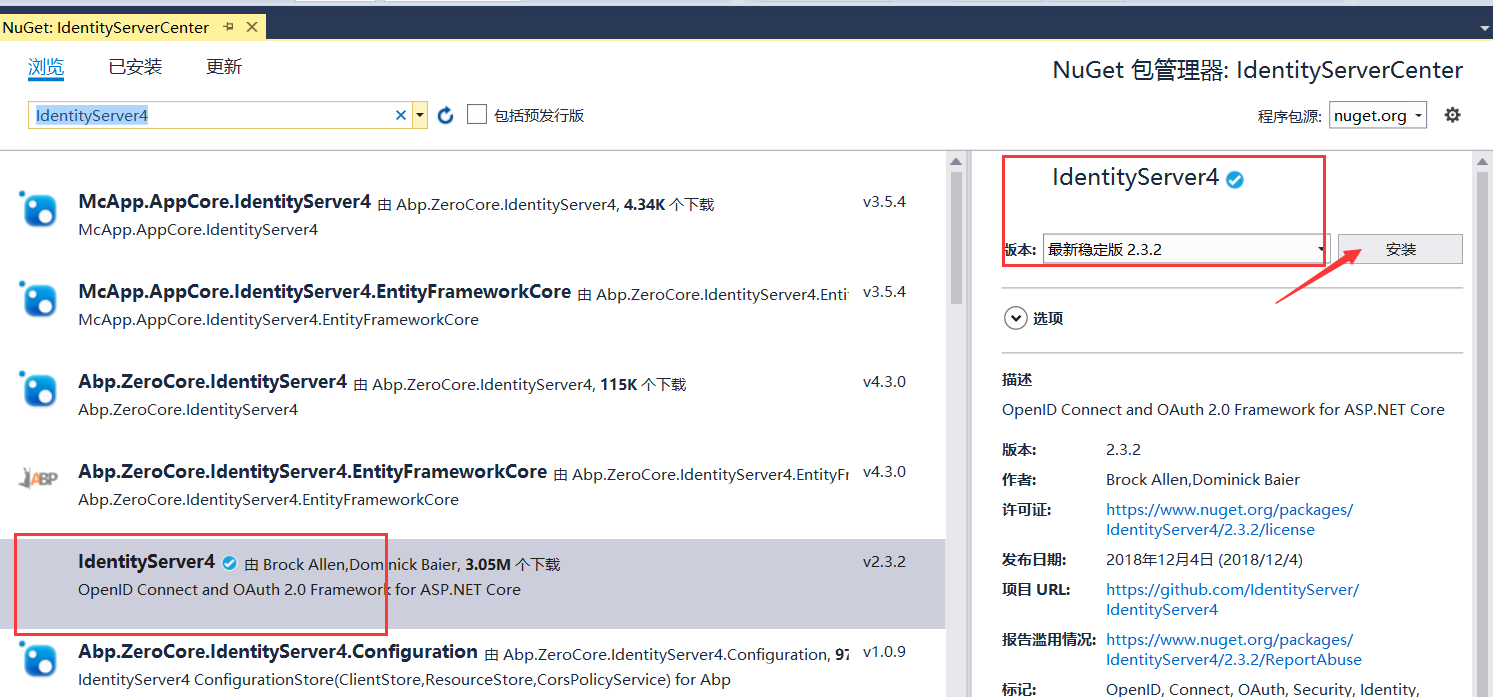
添加Nuget包
Nuget安装包:IdentityServer4
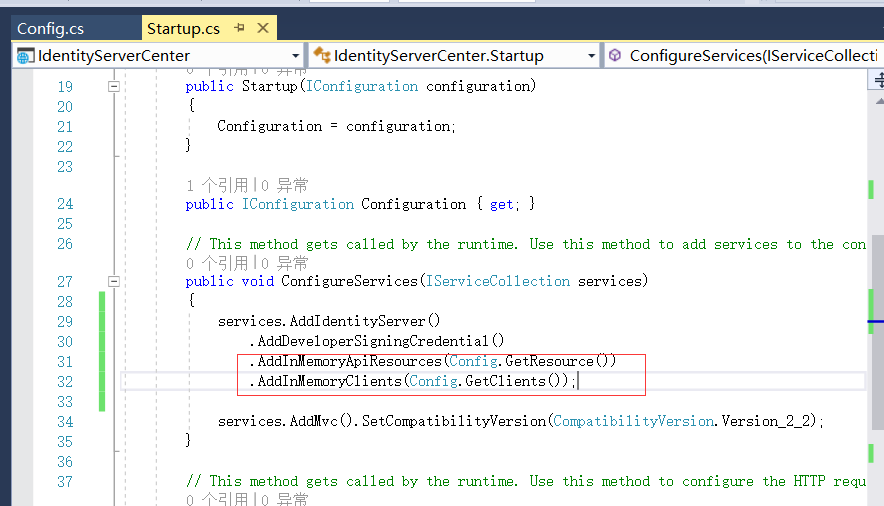
添加StartUp配置
在MVC以前添加service配置
引入命名空间 using IdentityServer4;
配置添加到依赖注入里面
services.AddIdentityServer()
.AddDeveloperSigningCredential();

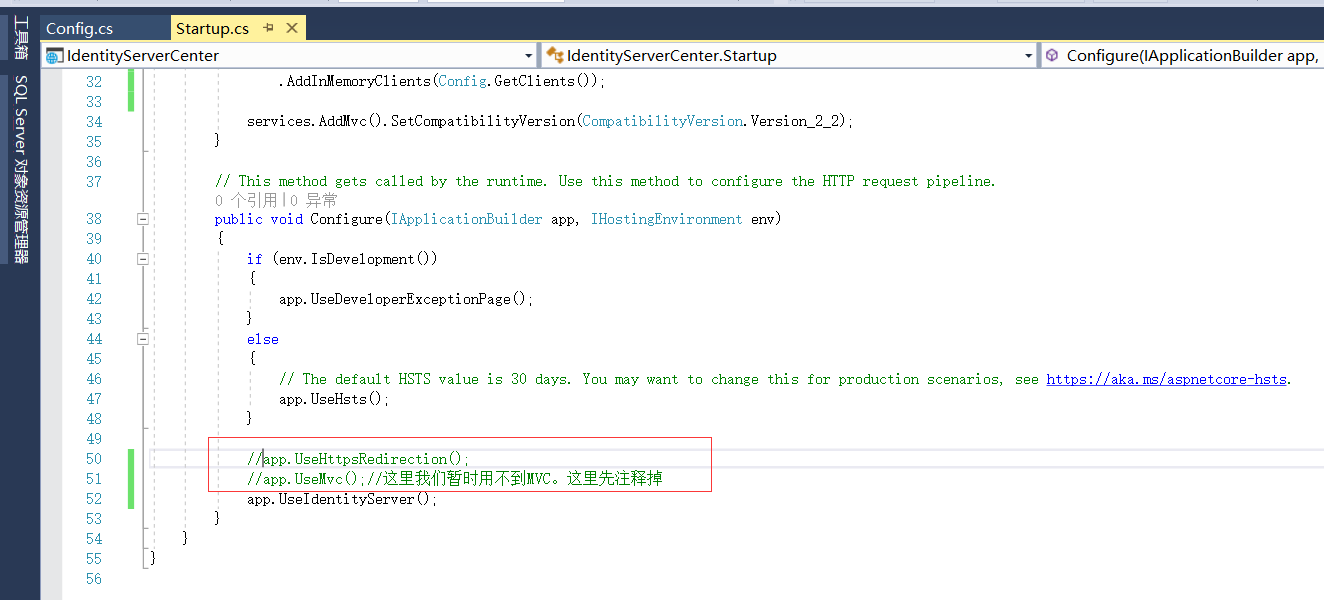
添加完依赖注入以后,要使用这个Identity
 //app.UseMvc();//这里我们暂时用不到MVC。这里先注释掉
 app.UseIdentityServer();

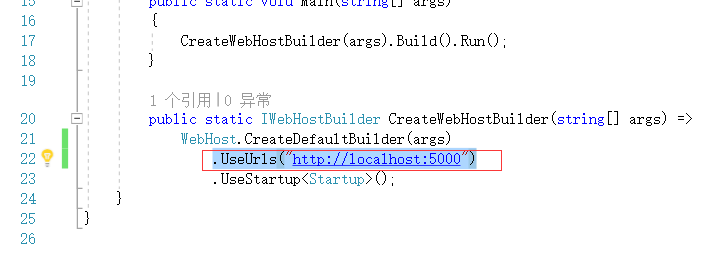
然后我们在Program.cs里面
设置启动地方为5000端口
.UseUrls("http://localhost:5000")
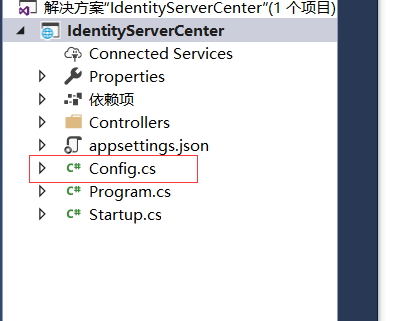
Config.cs类
在根目录下创建 Config.cs文件
这个类是我们暂时用来初始化IdentityServer的
类里面我们会写一些静态方法
这里返回一个Resource
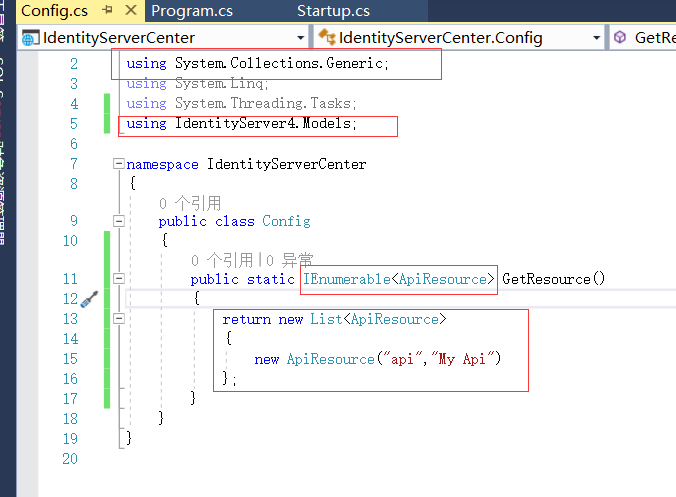
接下来定义Client客户端
在给一个可以访问Resource,就是这个Client呢可以访问我们那些Resource


using System; using System.Collections.Generic; using System.Linq; using System.Threading.Tasks; using IdentityServer4.Models; namespace IdentityServerCenter
{
public class Config
{
public static IEnumerable<ApiResource> GetResource()
{
return new List<ApiResource>
{
new ApiResource("api","My Api")
};
}
public static IEnumerable<Client> GetClients()
{
return new List<Client>()
{
new Client()
{
ClientId="client",
AllowedGrantTypes=GrantTypes.ClientCredentials,//最简单的模式
ClientSecrets={
new Secret("secret".Sha256())
},
AllowedScopes={ "api"}
}
};
}}}
把我们的ApiResoure加入进来
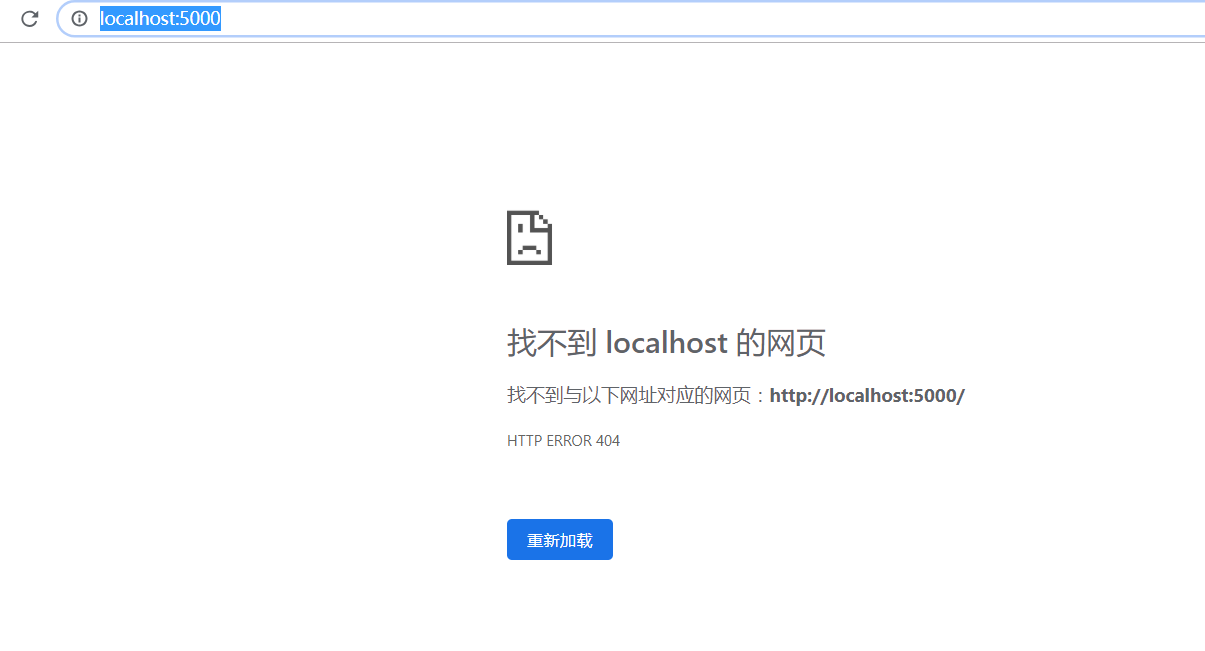
运行程序
这里我先都注释掉
这里没有添加mvc的管道也没有添加webapi
webapi和mvc实际上一个管道。
打开地址,什么也看不到
http://localhost:5000/
identityServer给我提供一个固定的地址:
http://localhost:5000/.well-known/openid-configuration
这里给我们一些基本的配置,基本的信息
{
    "issuer": "http://localhost:5000",
    "jwks_uri": "http://localhost:5000/.well-known/openid-configuration/jwks",
    "authorization_endpoint": "http://localhost:5000/connect/authorize",
    "token_endpoint": "http://localhost:5000/connect/token",
    "userinfo_endpoint": "http://localhost:5000/connect/userinfo",
    "end_session_endpoint": "http://localhost:5000/connect/endsession",
    "check_session_iframe": "http://localhost:5000/connect/checksession",
    "revocation_endpoint": "http://localhost:5000/connect/revocation",
    "introspection_endpoint": "http://localhost:5000/connect/introspect",
    "device_authorization_endpoint": "http://localhost:5000/connect/deviceauthorization",
    "frontchannel_logout_supported": true,
    "frontchannel_logout_session_supported": true,
    "backchannel_logout_supported": true,
    "backchannel_logout_session_supported": true,
    "scopes_supported": [
        "api",
        "offline_access"
    ],
    "claims_supported": [],
    "grant_types_supported": [
        "authorization_code",
        "client_credentials",
        "refresh_token",
        "implicit",
        "urn:ietf:params:oauth:grant-type:device_code"
    ],
    "response_types_supported": [
        "code",
        "token",
        "id_token",
        "id_token token",
        "code id_token",
        "code token",
        "code id_token token"
    ],
    "response_modes_supported": [
        "form_post",
        "query",
        "fragment"
    ],
    "token_endpoint_auth_methods_supported": [
        "client_secret_basic",
        "client_secret_post"
    ],
    "subject_types_supported": [
        "public"
    ],
    "id_token_signing_alg_values_supported": [
        "RS256"
    ],
    "code_challenge_methods_supported": [
        "plain",
        "S256"
    ]
}
这里是支持的几种模式

这里是加密的方式

会暴露一些endpoint

下一节课 我们要实现Resource。写一个API
如果您觉得阅读本文对您有帮助,请点一下“推荐”按钮,您的“推荐”将是我最大的写作动力!欢迎各位转载,但是未经作者本人同意,转载文章之后必须在文章页面明显位置给出作者和原文连接,否则保留追究法律责任的权利。
- 推荐文章
- Debian终端乱码解决办法
- Angular回顾(1)
- Git仓库分支管理
- VirtualBox创建的Debian虚拟机与Windows宿主共享文件
- Rasa学习记录 01
- Manjaro18+kde 更换壁纸重启失效
- win10双系统安装 linux(manjaro)记录
- C语言--第0次作业
- pytest -- 中文文档
- 12、pytest -- 缓存:记录执行的状态
- 二、从零开始搭建自己的静态博客 -- 主题篇
- 一、从零开始搭建自己的静态博客 -- 基础篇
- 11、pytest -- 测试的参数化
- 10、pytest -- skip和xfail标记
- 9、pytest -- 集成文档测试
- 8、pytest -- 捕获告警信息
- 7、pytest -- 捕获标准输出和标准错误输出
- 使用docker-compose部署nginx+gunicorn+mariadb的django应用
- 6、pytest -- 临时目录和文件
- 5、pytest -- 猴子补丁
- 4、pytest -- fixtures:明确的、模块化的和可扩展的
- CentOS -- 新建用户并使能密钥登录
- 3、pytest -- 编写断言
- 2、pytest -- 使用和调用
- 1、pytest -- 安装和入门
- 《Fluent Python》 -- 一个关于memoryview例子的理解过程
- SecureCRT 连接 Centos7.0 (NAT模式),且能连接公网。
- SecureCRT 连接 Centos7.0 (桥接模式),且能连接公网。
- Centos7.0 三种网络适配器
- Centos 7.0 界面