环境要求:
CentOS6以上版本
2G内存
16G存储
1.安装snmp:
 yum install -y net-snmp net-snmp-devel net-snmp-utils
 yum install -y gcc gcc-c++  libtool*
配置snmp:
删除/etc/snmp/snmpd.conf配置文件中所有内容,粘贴如下内容到配置文件
com2sec notConfigUser  default       public

group   notConfigGroup v1           notConfigUser
group   notConfigGroup v2c           notConfigUser

view mib2   included  .iso.org.dod.internet.mgmt.mib-2 fc


view    systemview    included   .1.3.6.1.2.1.1
view    systemview    included   .1.3.6.1.2.1.2
view    systemview    included   .1.3.6.1.2.1.25.1.1

access  notConfigGroup ""      any       noauth    exact  mib2 none none

syslocation Unknown (edit /etc/snmp/snmpd.conf)

syscontact Root <root@localhost> (configure /etc/snmp/snmp.local.conf)
启动SNMP:

准备好安装包:

2.安装zlib:
[root@localhost software]# tar -zxf zlib-1.2.5.tar.gz
[root@localhost zlib-1.2.5]# ./configure --prefix=/usr/local/zlib
[root@localhost zlib-1.2.5]# make
[root@localhost zlib-1.2.5]# make install
3安装apache:
root@localhost httpd-2.2.9]# ./configure --prefix=/usr/local/apache --sysconfdir=/etc/httpd --enable-so --enable-usertrack --enable-rewrite --with-z=/usr/local/zlib


root@localhost httpd-2.2.9]# make && make install
配置apache:
修改配置文件中的ServerName 127.0.0.1

启动apache:
[root@localhost software]# /usr/local/apache/bin/apachectl -k restart
4.安装libpng:
[root@localhost software]# tar -zxf libpng-1.2.50.tar.gz
[root@localhost software]# cd libpng-1.2.50

[root@localhost libpng-1.2.50]# cp scripts/makefile.linux makefile
修改makefile指定的zlib的路径:

[root@localhost libpng-1.2.50]# make
[root@localhost libpng-1.2.50]# make install
5.安装freetype:
[root@localhost software]# tar -zxf freetype-2.1.10.tar.gz
[root@localhost software]# cd freetype-2.1.10
[root@localhost freetype-2.1.10]# mkdir -p /usr/local/freetype
[root@localhost freetype-2.1.10]# ./configure --prefix=/usr/local/freetype
[root@localhost freetype-2.1.10]# make
[root@localhost freetype-2.1.10]# make install
6.安装jpeg:
[root@localhost software]# tar -zxf jpegsrc.v6b.tar.gz
[root@localhost software]# cd jpeg-6b/
[root@localhost jpeg-6b]#
jpeg默认不会自动创建安装目录手动创建:
[root@localhost jpeg-6b]# mkdir -pv /usr/local/jpeg6/{,bin,lib,include,man/{,man1},man1}
mkdir: created directory `/usr/local/jpeg6/'
mkdir: created directory `/usr/local/jpeg6/bin'
mkdir: created directory `/usr/local/jpeg6/lib'
mkdir: created directory `/usr/local/jpeg6/include'
mkdir: created directory `/usr/local/jpeg6/man/'
mkdir: created directory `/usr/local/jpeg6/man/man1'
mkdir: created directory `/usr/local/jpeg6/man1'
[root@localhost jpeg-6b]#
[root@localhost jpeg-6b]# cp /usr/share/libtool/config/config.sub  /root/software/jpeg-6b/      #copy系统下libtool下的这两个文件覆盖jpeg下同
cp: overwrite `/root/software/jpeg-6b/config.sub'? y                                            #样的文件
[root@localhost jpeg-6b]# cp /usr/share/libtool/config/config.guess  /root/software/jpeg-6b/
cp: overwrite `/root/software/jpeg-6b/config.guess'? y
[root@localhost jpeg-6b]#
[root@localhost jpeg-6b]# ./configure  --prefix=/usr/local/jpeg6/ --enable-shared --enable-static
[root@localhost jpeg-6b]# make

[root@localhost jpeg-6b]# make install
7.安装libxml2:
[root@localhost software]# tar -zxf libxml2-2.6.30.tar.gz
[root@localhost software]# cd libxml2-2.6.30
[root@localhost libxml2-2.6.30]# mkdir -p /usr/local/libxml2
[root@localhost libxml2-2.6.30]# ./configure  --prefix=/usr/local/libxml2
[root@localhost libxml2-2.6.30]# make
[root@localhost libxml2-2.6.30]# make install
8.安装gd:
[root@localhost gd-2.0.35]# tar -zxf gd-2.0.35.tar.gz
[root@localhost gd-2.0.35]# ./configure  --prefix=/usr/local/gd2 --with-png=/usr/local/lib --with-zlib=/usr/local/zlib --with-freetype=/usr/local/freetype --with-jpeg=/usr/local/jpeg6
[root@localhost gd-2.0.35]# make
[root@localhost gd-2.0.35]# make install
9.安装mrtg:
[root@localhost software]# tar -zxf mrtg-2.15.1.tar.gz
[root@localhost software]# cd mrtg-2.15.1
[root@localhost software]# mkdir /etc/mrtg
[root@localhost mrtg-2.15.1]# ./configure --prefix=/usr/local/mrtg --sysconfdir=/etc/mrtg --with-gd=/usr/local/gd2/include --with-gd-lib=/usr/local/gd2/lib --with-gd-inc=/usr/local/gd2/include  --with-png=/usr/local/include --with-png-lib=/usr/local/lib --with-png-inc=/usr/local/include --with-zlib=/usr/local/zlib/include --with-zlib-lib=/usr/local/zlib/lib  --with-zlib-inc=/usr/local/zlib/include
[root@localhost mrtg-2.15.1]# make
[root@localhost mrtg-2.15.1]# make install
[root@localhost ~]# /usr/local/mrtg/bin/cfgmaker public@localhost > /etc/mrtg/mrtg.cfg
--base: Get Device Info on public@localhost:
--base: Vendor Id:
--base: Populating confcache
--coca: populate confcache public@localhost:
--coca: store in confcache public@localhost_ Name lo --> 1
--coca: store in confcache public@localhost_ Name eth0 --> 2
--coca: store in confcache public@localhost_ Name eth1 --> 3
--coca: store in confcache public@localhost_ Descr lo --> 1
--coca: store in confcache public@localhost_ Descr eth0 --> 2
--coca: store in confcache public@localhost_ Descr eth1 --> 3
--coca: store in confcache public@localhost_ Type 24 --> 1
--coca: store in confcache public@localhost_ Type 6 --> 2
--coca: store in confcache public@localhost_ Type 6 --> 3 (duplicate)
--coca: store in confcache public@localhost_ Ip 127.0.0.1 --> 1
--coca: store in confcache public@localhost_ Ip 172.16.56.215 --> 2
--coca: store in confcache public@localhost_ Eth  --> 1
--coca: store in confcache public@localhost_ Eth 00-0c-29-a8-d9-94 --> 2
--coca: store in confcache public@localhost_ Eth 00-0c-29-a8-d9-9e --> 3
--base: Get Interface Info
--base: Walking ifIndex
--base: Walking ifType
--base: Walking ifAdminStatus
--base: Walking ifOperStatus
--base: Walking ifMtu
--base: Walking ifSpeed

[root@localhost ~]#
10.修改MRTG配置文件:
[root@localhost ~]# vi /etc/mrtg/mrtg.cfg

11.新建网页文件存放目录:
[root@localhost ~]# mkdir /usr/local/apache/htdocs/mrtg
12.生成网页文件:
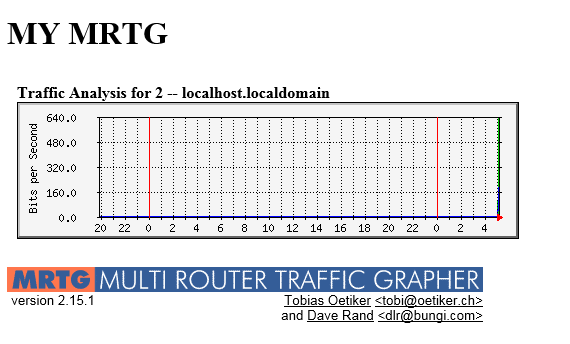
[root@localhost ~]# /usr/local/mrtg/bin/indexmaker /etc/mrtg/mrtg.cfg --output=/usr/local/apache/htdocs/mrtg/index.html --title="MY MRTG"
[root@localhost ~]#
[root@localhost ~]# cd /usr/local/apache/htdocs/mrtg/
[root@localhost mrtg]# ls
index.html

13.启动MRTG:
[root@localhost ~]# env LANG=C /usr/local/mrtg/bin/mrtg /etc/mrtg/mrtg.cfg
2013-12-24 05:04:27, Rateup WARNING: /usr/local/mrtg/bin/rateup could not read the primary log file for localhost_2
2013-12-24 05:04:27, Rateup WARNING: /usr/local/mrtg/bin/rateup The backup log file for localhost_2 was invalid as well
2013-12-24 05:04:27, Rateup WARNING: /usr/local/mrtg/bin/rateup Can't remove localhost_2.old updating log file
2013-12-24 05:04:27, Rateup WARNING: /usr/local/mrtg/bin/rateup Can't rename localhost_2.log to localhost_2.old updating log file
[root@localhost ~]# env LANG=C /usr/local/mrtg/bin/mrtg /etc/mrtg/mrtg.cfg
2013-12-24 05:04:32, Rateup WARNING: /usr/local/mrtg/bin/rateup Can't remove localhost_2.old updating log file
[root@localhost ~]# env LANG=C /usr/local/mrtg/bin/mrtg /etc/mrtg/mrtg.cfg
[root@localhost ~]#

PS:上面env LANG=C /usr/local/mrtg/bin/mrtg /etc/mrtg/mrtg.cfg 命令会有错误信息输出,忽略执行三次命令即可
因为mrtg生成的是静态html文件,不断刷新则需要加入计划任务:

重启计划任务:

访问mrtg:
在浏览器输入:http://x.x.x.x/mrtg
MRTG配置文件mrtg.cfg配置文件中参数说明:
mrtg.cfg 里面几个参数的意思.
Target:是要执行的脚本
Xsize:生成图表的横向宽度(最大600)
Ysize:生成图表的纵向高度(最大200)
Title:标题
kMG: Change the default multiplier prefixes
Ytics:纵向划分为几个块(格子)
MaxBytes:图表纵向数值的最大上限
PageTop:页面上面的提示
kilo:一般是写1024,如果需要的话,是1000在计算机里的单位
LegendI:从SHELL返回的数据中的第一个
LegendO:从SHELL返回的数据中的第二个
Options: growright,表示图表向右延展