cocos动画、碰撞、绘图
1、动画
层级关系:
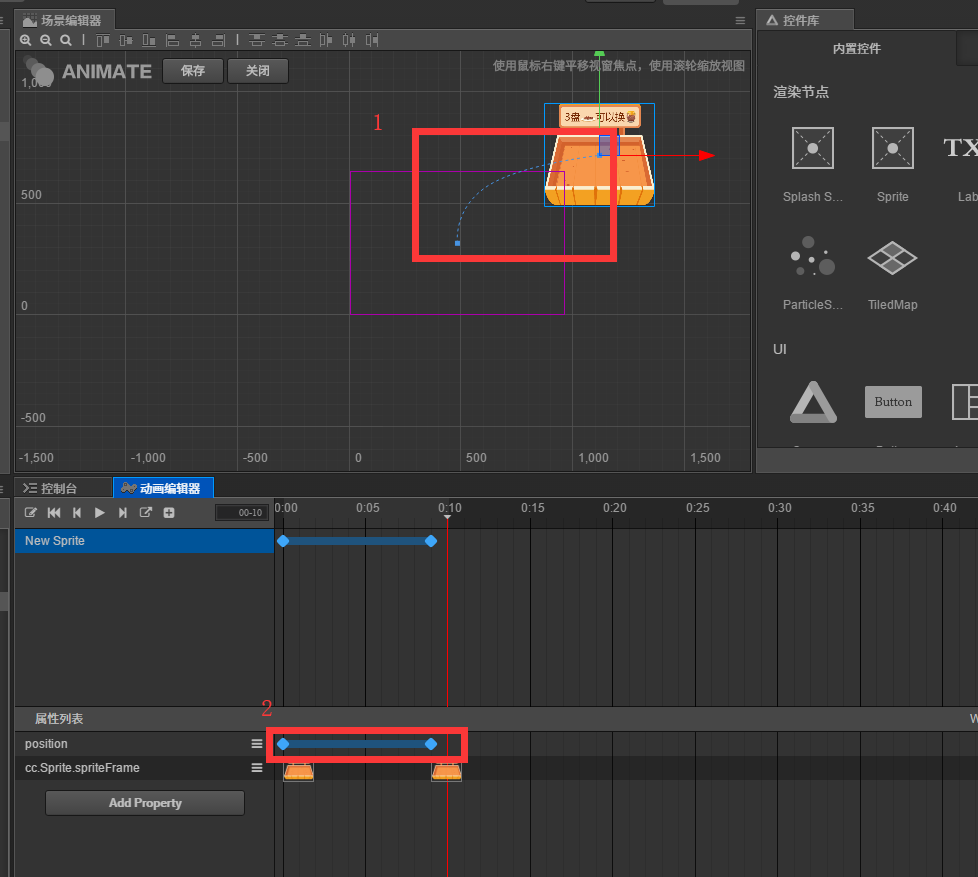
1节点、2动画(Animation)、3动画剪辑(Animation Clip)、4属性轨道、5动画帧
a. 动画(Animation)是节点上的一个组件.
b. 动画剪辑(Animation Clip)就是一份动画的声明数据,将它挂载到动画(Animation)上作为一个属性进行设置.
c. 动画剪辑(Animation Clip)上可添加多个属性轨道来控制不同属性.
d. 在一条属性轨道上创建多个动画帧(蓝色点),在这些动画帧上设置不同的属性值,实现从帧A渐变到帧B的过程(即动画)
属性:
包括基本属性和自定义的属性
基本属性:节点自带的基本属性,包括位置position、旋转rotation、缩放scale、锚点anchor、大小size、颜色color、透明度opacity、倾斜skew、节点的分组group.
自定义属性:根据动画所在节点上组件不同而增加不同的自定义属性,例如节点上有文字组件,则会增加自定义属性cc.Label.string、cc.Label.fontsize、cc.Label.enabled.
序列帧动画:
常用的序列帧动画就是在节点上添加了sprite组件,然后自定义属性里就会有cc.Sprite.spriteframe属性,然后在spriteframe属性轨道上添加帧图片,实现帧动画.
this.anima = this.node.getComponent(cc.Animation);
this.anima.play("down");
this.anima.play("run");
获取动画
let downAnimaState = this.anima.getAnimationState("down");
修改轨迹曲线 1、时间曲线 2的操作
动画的事件
1.在编辑器注册和触发事件onLastFrame
(1)选择第X帧,然后点击1位置按钮,然后双击2位置按钮

(2)在弹出的编辑器界面,单击+号,添加事件和参数

2.代码注册事件
 1 let runState = this.anima.getAnimationState("run");
 2 // 这种方式只能支持动画系统内置的事件
 3 runState.on("lastframe", this.onLastFrame, this);
 4 // 传参数
 5 runState.on("lastframe", this.onLastFrame.bind(this, 'hello', 0, true), this);
 6
 7 // 这种方式可以自定义事件
 8 // 动态创建 Animation Clip:
 9 var animation = this.node.getComponent(cc.Animation);
10 // frames 这是一个 SpriteFrame 的数组.
11 var clip = cc.AnimationClip.createWithSpriteFrames(frames, 17);
12 clip.name = "anim_run";
13 clip.warpMode = cc.WarpMode.Loop;
14
15 // 添加帧事件
16 clip.events.push({
17     frame: 1, // 准确的时间,以秒为单位。这里表示将在动画播放到 1s 时触发事件
18     func: "onLastFrame", // 回调函数名称
19     params: [1, "hello"] // 回调参数
20 });
21
22 animation.addClip(clip);
23 animation.play('anim_run');
24
25
26 onLastFrame : function(str, num, bool){
27     console.log("===========called on last frame", str, num, bool);
28 }
2、碰撞(1.5版本以后被Box2D物理游戏引擎取代)
BoxCollider 矩形碰撞组件 不能修改形状,1个物体可以添加多个BoxCollider,组成复杂的碰撞体
CircleCollider 圆形碰撞组件
PolyganCollider 可以修改形状、多边形
属性
world : {
aabb,
points,
}
world.aabb // 正好包围碰撞体的矩形框,不会旋转和缩放
aabb : {
preaabb, // 上一个位置的aabb
}
 1 // 用脚本控制碰撞
 2 let manager = cc.director.getCollisionManager(); // 获取碰撞管理器
 3 manager.enabled = true;
 4 manager.enabledDebugDraw = true; // 画出碰撞形状
 5
 6 this.node.on('touchmove', function(e){
 7     this.node.position = this.node.parent.convertToNodeSpaceAR(e.getLocation());
 8 }, this);
 9 this.getComponent('cc.BoxCollider'); // 或者this.getComponent(cc.BoxCollider)
10
11 onCollisionEnter : function(other, self){
12     console.log("=========enter");
13 },
14 onCollisionStay : function(other, self){
15     console.log("=========Stay");
16 },
17 onCollisionExit : function(other, self){
18     console.log("=========Exit");
19 },
3、绘图
1.可以使用绘图系统ccc.raphael
2.使用绘图接口
 1 propoties : {
 2     graphics : cc.Graphics // 开放接口的方式
 3 }
 4
 5 let ctx = this.getComponent(cc.Graphics);
 6
 7 this.graphics.circle(0, 0, 50); // 现在的00是组件的左下角,如果想放到锚点,需要以下转化
 8 let offset = cc.v2(this.node.width * this.node.anchorX, this.node.height * this.node.anchorY);
 9 this.graphics.circle(0 + offset.x, 0 + offset.y, 50);
10
11 this.graphics.ellipse(100, 100, 100, 200);
12 this.graphics.moveTo(-200, -200);
13 this.graphics.lineTo(200, 200);
14 this.graphics.fill();