一、GC agent安装
下面介绍GC agent的push和pull两种安装方法
1、push(推送)安装GC agent方法
1)、打开EMGC home page:https://even.oracle.com:7799/em/
登录EMGC 密码/账号:sysman/oracle12
Click "Deployments" - >
-> Click Agent Installation "Install Agent" - >
-> Click "Fresh Install" - >
-> Source Shiphome Directory = "Default, from Management Server location."->
-> Version = "11.1.0.1.0" - > "
-> Platform = "Linux x86" - >"
-> Provide Host List = "odd.oracle.com" - >
-> Username = oracle - >
-> Password = **** ->
-> Deselect "Run root.sh" (待完成后手工执行) ->
-> Installation Base Directory = "/u01/app/oracle/middleware" -> 注: 安装时将自动建立此目录
-> Port = 3872 - >
-> Management Server Registration Password = **** -> (本例: oracle12)
-> Confirm Password = **** ->
-> Click "Continue" - >
-> Deselect "I wish to receive security updates via My Oracle Support."->
-> Click "Submit" - >
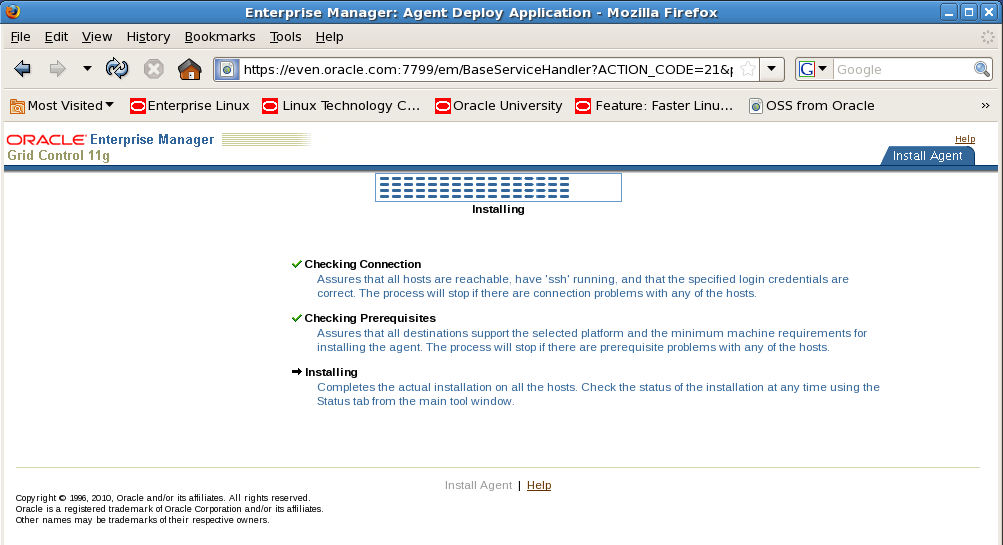
-> Click "Yes" ->
-> wait for installation completed -> Click "Done"
2)、root用户执行以下脚本
/u01/app/oracle/middleware/agent11g/root.sh
3)、agent安装完成之后,可以查看各个target的状态。
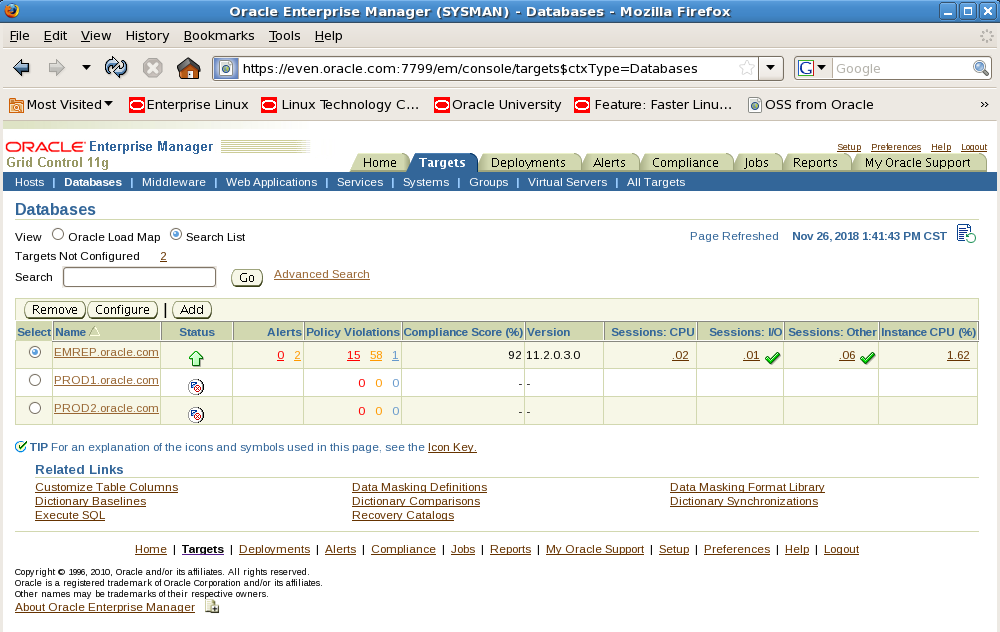
可以看到DB PROD1和PROD2的status显示为未知,这里需要我们手工配置。

2、pull(拉)安装GC agent
$wget --no-check-certificate https://even.oracle.com:7799/agent_download/11.1.0.1.0/linux/agentDownload.linux
给agentDownload.linux文件添加执行权限
chmod 775 agentDownload.linux
安装GC agent,-b指定安装目录,-y表示默认为yes,密码为安装EMGC时设置的密码。
./agentDownload.linux -b /u01/app/oracle/middleware -y
agent安装完成后,查看agent状态
[oracle@odd- stage]$ emctl status agent
Oracle Enterprise Manager 11g Release 1 Grid Control 11.1.0.1.0
Copyright (c) 1996, 2010 Oracle Corporation. All rights reserved.
---------------------------------------------------------------
Agent Version : 11.1.0.1.0
OMS Version : 11.1.0.1.0
Protocol Version : 11.1.0.0.0
Agent Home : /u01/app/oracle/middleware/agent11g
Agent binaries : /u01/app/oracle/middleware/agent11g
Agent Process ID : 1747
Parent Process ID : 1693
Agent URL : https://odd.oracle.com:3872/emd/main/
Repository URL : https://even.oracle.com:4900/em/upload
Started at : 2018-11-26 15:31:52
Started by user : oracle
Last Reload : 2018-11-26 15:31:52
Last successful upload : (none)
Last attempted upload : (none)
Total Megabytes of XML files uploaded so far : 0.00
Number of XML files pending upload : 19
Size of XML files pending upload(MB) : 18.02
Available disk space on upload filesystem : 73.15%
Last successful heartbeat to OMS : 2018-11-26 15:32:00
---------------------------------------------------------------
Agent is Running and Ready
root用户执行脚本:/u01/app/oracle/middleware/agent11g/root.sh
agent安装文成。
二、GC agent卸载
1、停止运行GC agent
[oracle@odd- bin]$ emctl stop agent
Oracle Enterprise Manager 11g Release 1 Grid Control 11.1.0.1.0
Copyright (c) 1996, 2010 Oracle Corporation. All rights reserved.
Stopping agent ... stopped.
[oracle@odd- bin]$ emctl status agent
Oracle Enterprise Manager 11g Release 1 Grid Control 11.1.0.1.0
Copyright (c) 1996, 2010 Oracle Corporation. All rights reserved.
---------------------------------------------------------------
Agent is Not Running
2、在EMGC删掉所有关于client host的target
EMGC home page ---> targets ---> all targets
按以下 Target Type 次序(不按次序将有错误提示), 逐个 remove client 相关的全部 target。
Listener
Database Instance
+ASM, High Availability Service(HAS)
Host
Agent
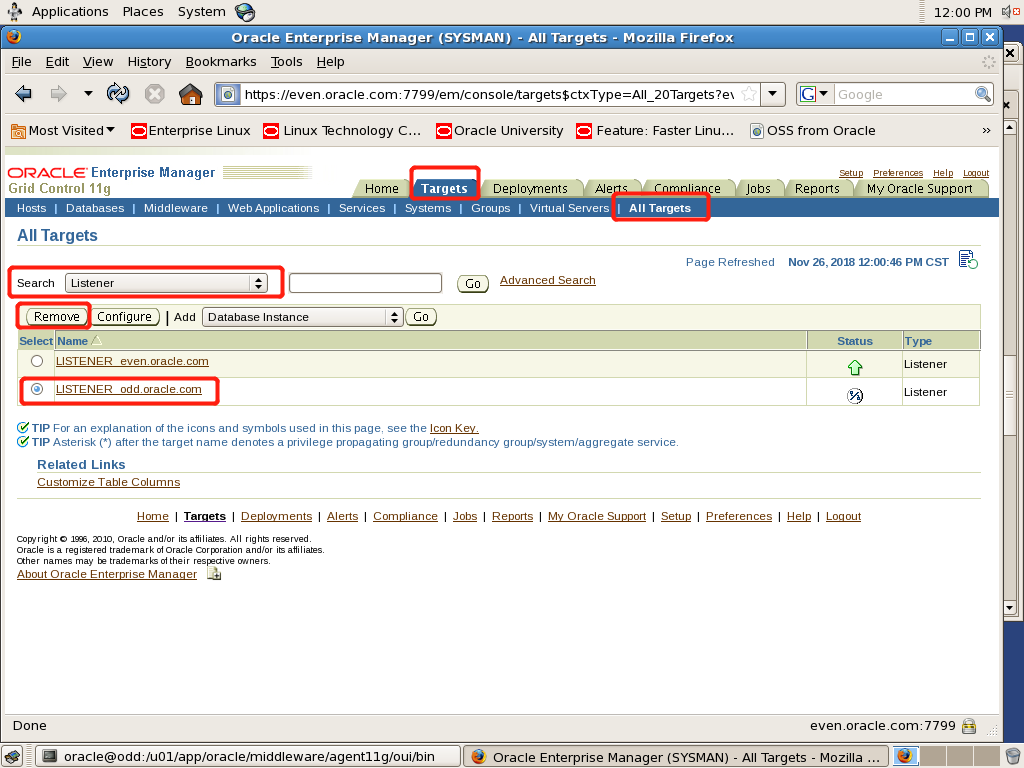
以上为listener target的删除示范,按照这个方法将其余关于client host的target全部删掉。
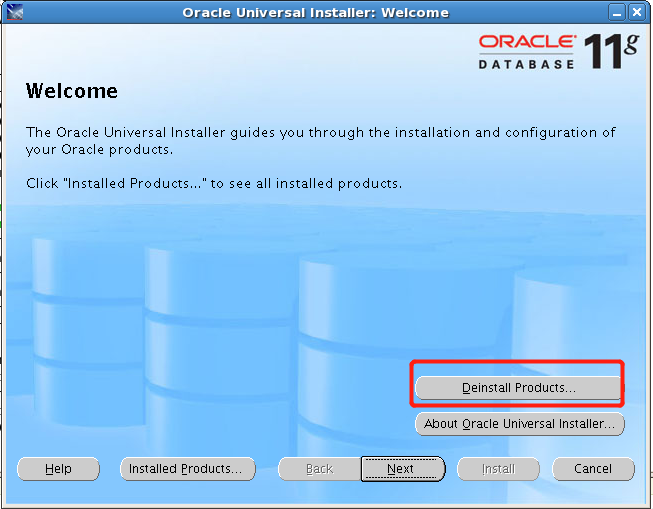
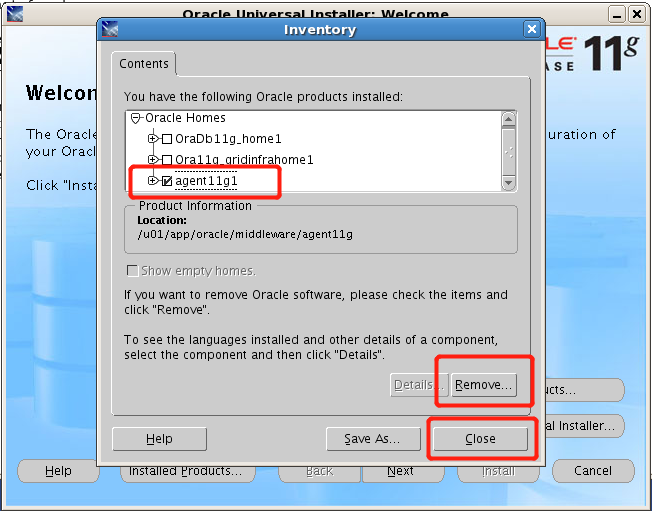
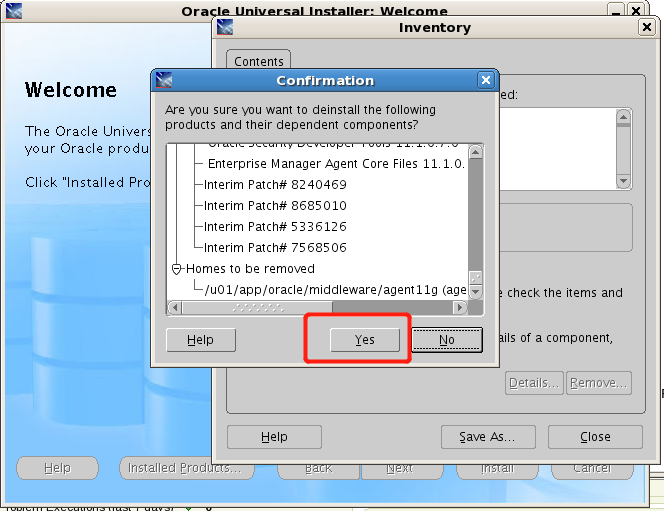
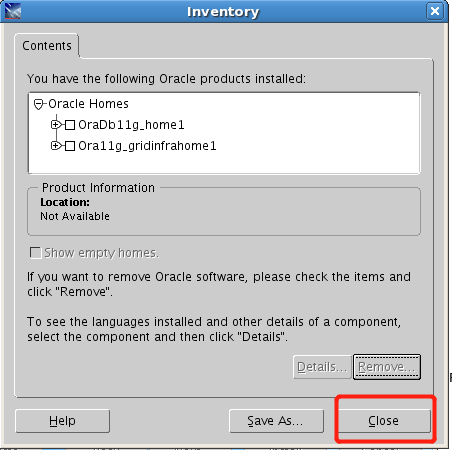
3、运行卸载程序
target全部删掉之后即可运行GC agent的卸载程序
$ /u01/app/oracle/middleware/agent11g/oui/bin/runInstaller

4、删除GC agent环境
#vi /etc/oratab
*:/u01/app/oracle/middleware/agent11g:N
PROD2:/u01/app/oracle/product/11.2.0/dbhome_1:N # line added by Agent
PROD1:/u01/app/oracle/product/11.2.0/dbhome_1:N # line added by Agent
将红色字体的agent相关信息删去。
5、删除agent的安装目录
rm -rf $AGENT_HOME
至此agent删除完成。