官网:Jenkins.io
Jenkins是一个开源软件项目,是基于Java开发的一种持续集成工具,用于监控持续重复的工作,皆在提供一个开放易用的软件平台,使软件的持续集成变成可能
Jenkins是开源CI&CD软件领导者, 提供超过1000个插件来支持构建、部署、自动化, 满足任何项目的需要。
jenkins安装
#jenkins是java写的,需要java环境
[root@jenkins ~]# yum -y install java-1.8.0-openjdk java-1.8.0-openjdk-devel
#下载jenkins安装包
[root@jenkins ~]# wget https://pkg.jenkins.io/redhat-stable/jenkins-2.107.1-1.1.noarch.rpm
#安装jenkins
[root@jenkins ~]# rpm -ivh jenkins-2.107.1-1.1.noarch.rpm
#修改管理用户
[root@k8s-node01 ~]# vim /etc/sysconfig/jenkins
JENKINS_USER="root"
#启动jenkins
[root@jenkins ~]# systemctl start jenkins
#jenkins端口是8080
[root@jenkins ~]# netstat -lntup
Active Internet connections (only servers)
Proto Recv-Q Send-Q Local Address           Foreign Address         State       PID/Program name
tcp        0      0 0.0.0.0:22              0.0.0.0:*               LISTEN      1185/sshd
tcp        0      0 127.0.0.1:25            0.0.0.0:*               LISTEN      1284/master
tcp6       0      0 :::8080                 :::*                    LISTEN      2093/java
tcp6       0      0 :::22                   :::*                    LISTEN      1185/sshd
tcp6       0      0 ::1:25                  :::*                    LISTEN      1284/master
[root@jenkins ~]#

#如果启动一直加载则修改一些文件
[root@jenkins jenkins]# vim /var/lib/jenkins/updates/default.json
把 "connectionCheckUrl":"http://www.google.com/" 改为 "connectionCheckUrl":"http://www.baidu.com/"
jenkins主要目录
[root@jenkins ~]# rpm -ql jenkins
/etc/init.d/jenkins         	# 启动文件
/etc/logrotate.d/jenkins    	# 日志分割配置文件
/etc/sysconfig/jenkins      	# jenkins主配置文件
/usr/lib/jenkins            	# 存放war包目录
/usr/lib/jenkins/jenkins.war	# war 包
/usr/sbin/rcjenkins         	# 命令
/var/cache/jenkins          	# war包解压目录 jenkins网页代码目录
/var/lib/jenkins            	# jenkins 工作目录
/var/log/jenkins             	# 日志
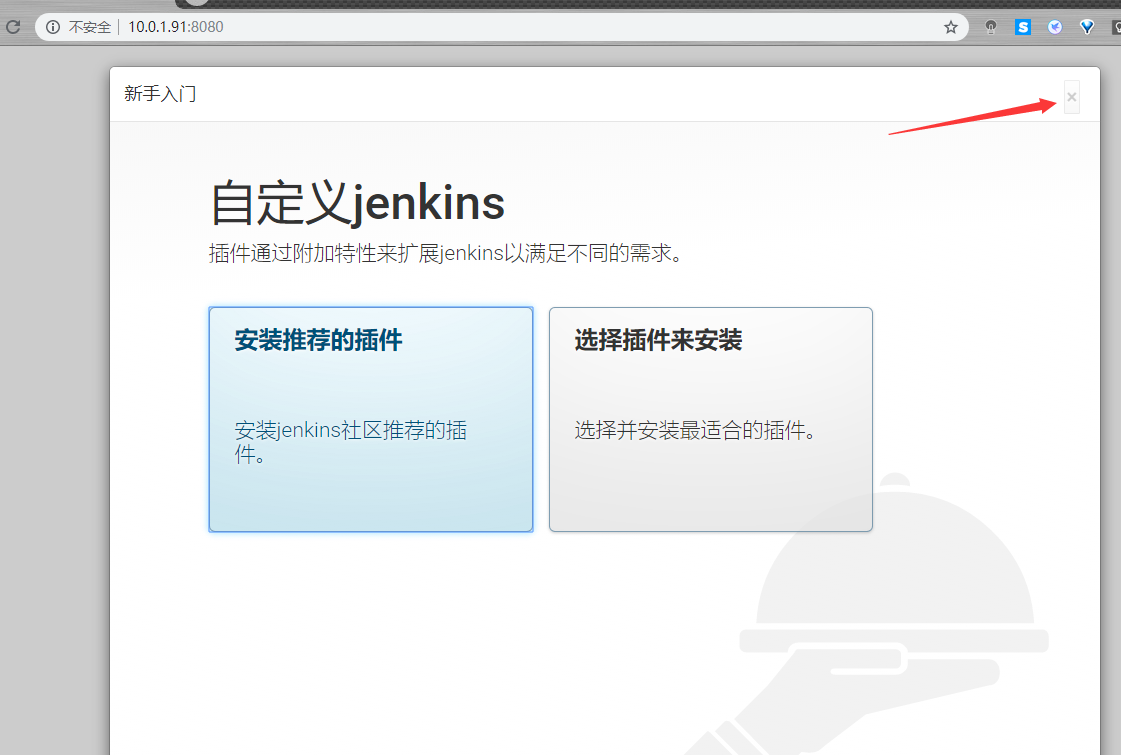
jenkins的web界面安装

解锁jenkins
[root@jenkins jenkins]# cat /var/lib/jenkins/secrets/initialAdminPassword
bc26ac11763e4347ac7d9de640aeb971
[root@jenkins jenkins]#


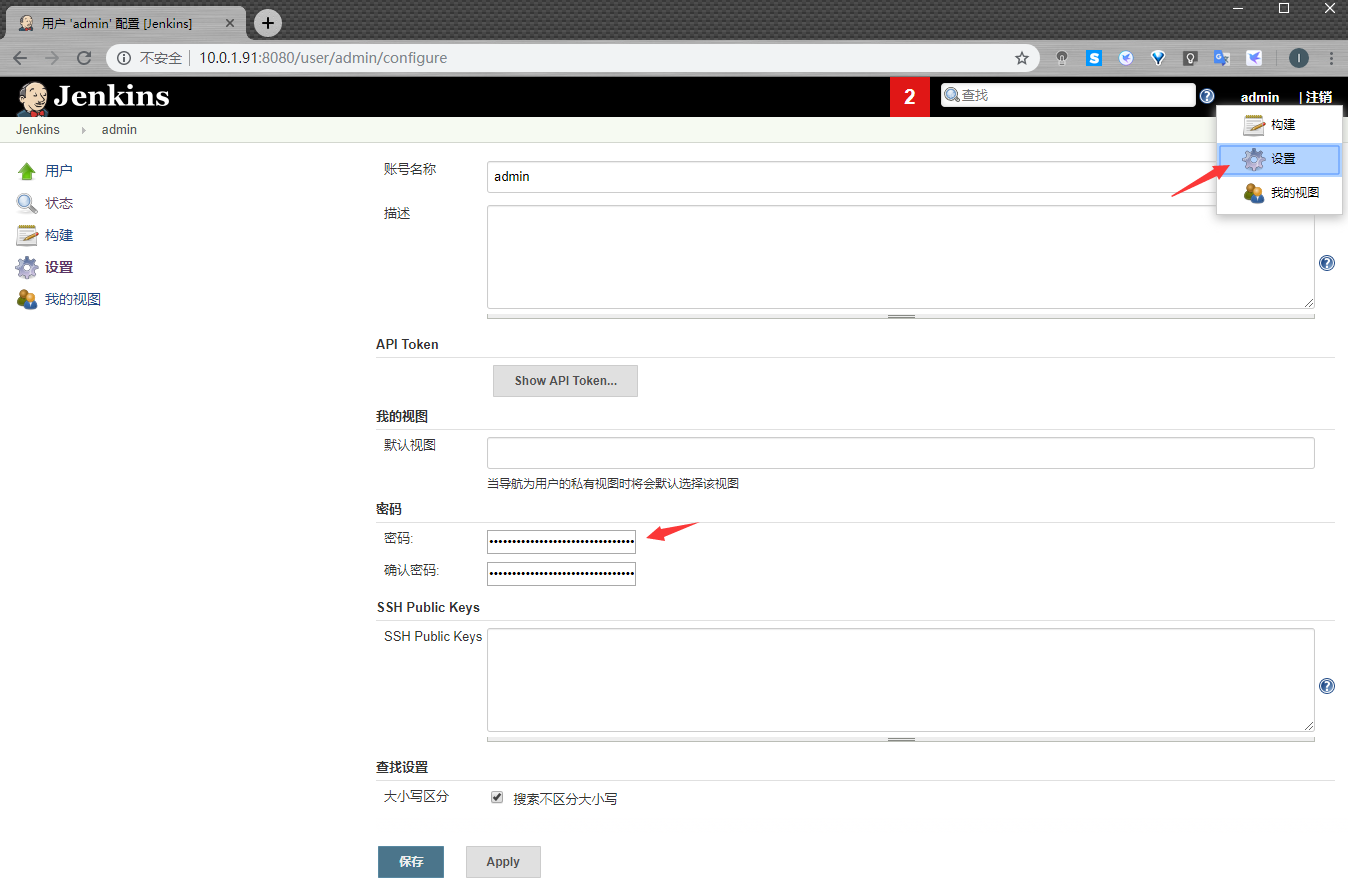
更改密码
安装插件
[root@jenkins ~]# tar xf plugins.tar.gz

[root@jenkins ~]# cd /var/lib/jenkins/plugins/
[root@jenkins plugins]# mv ~/plugins/* .
[root@jenkins plugins]# systemctl restart jenkins.service
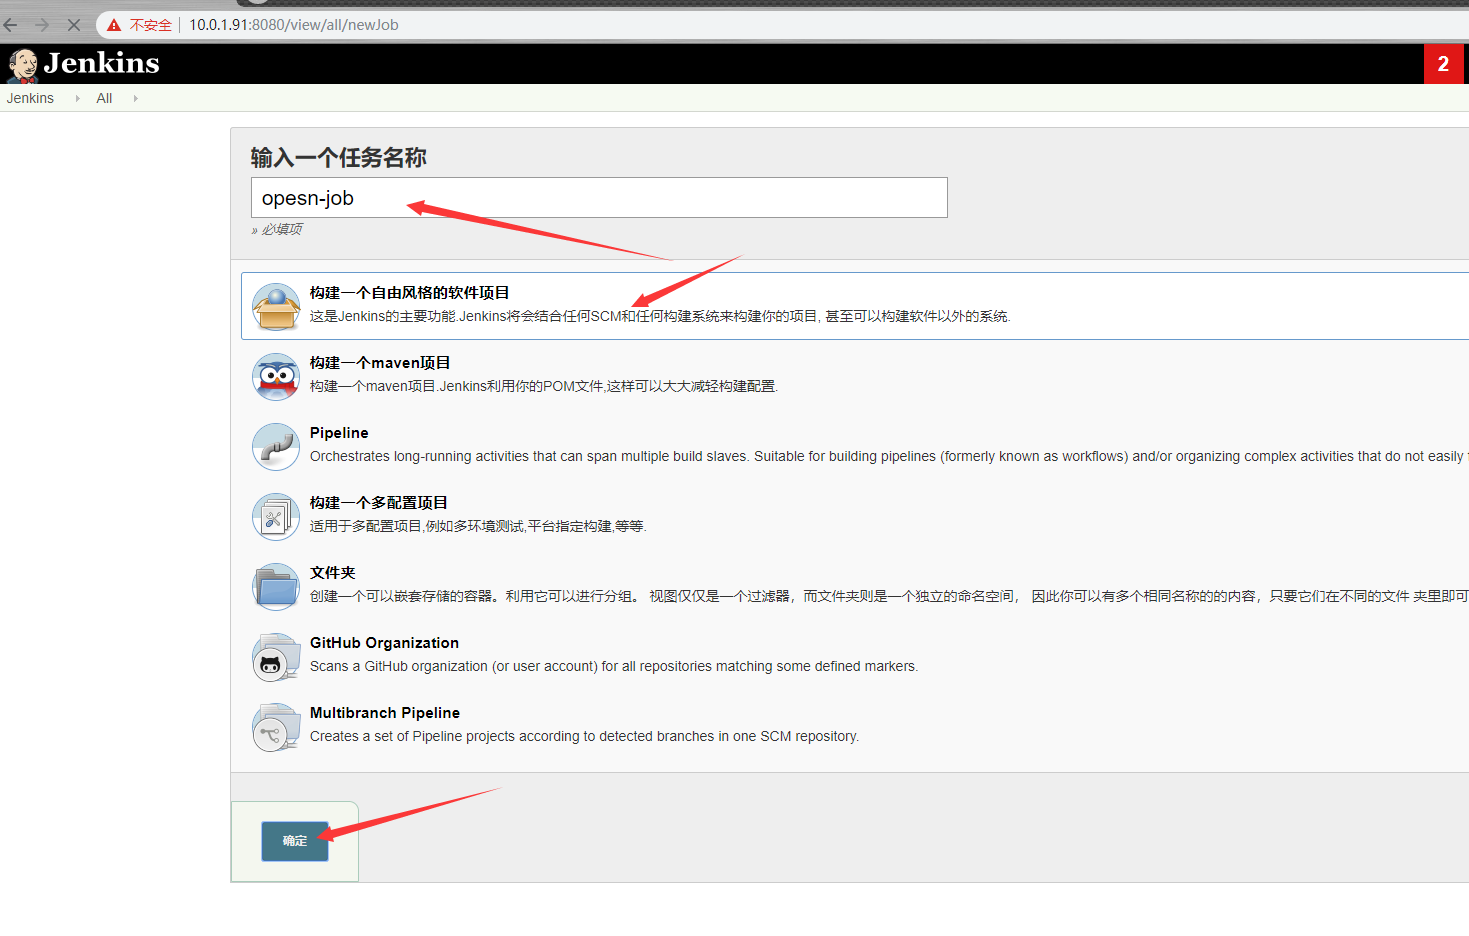
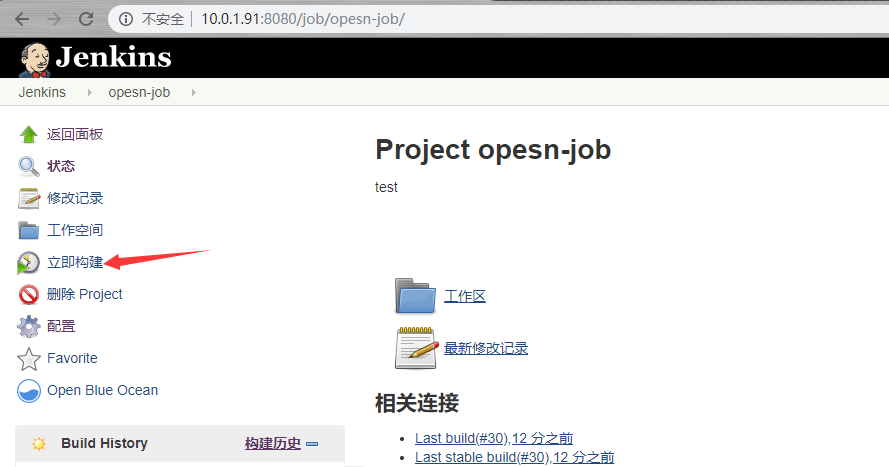
jenkins创建项目


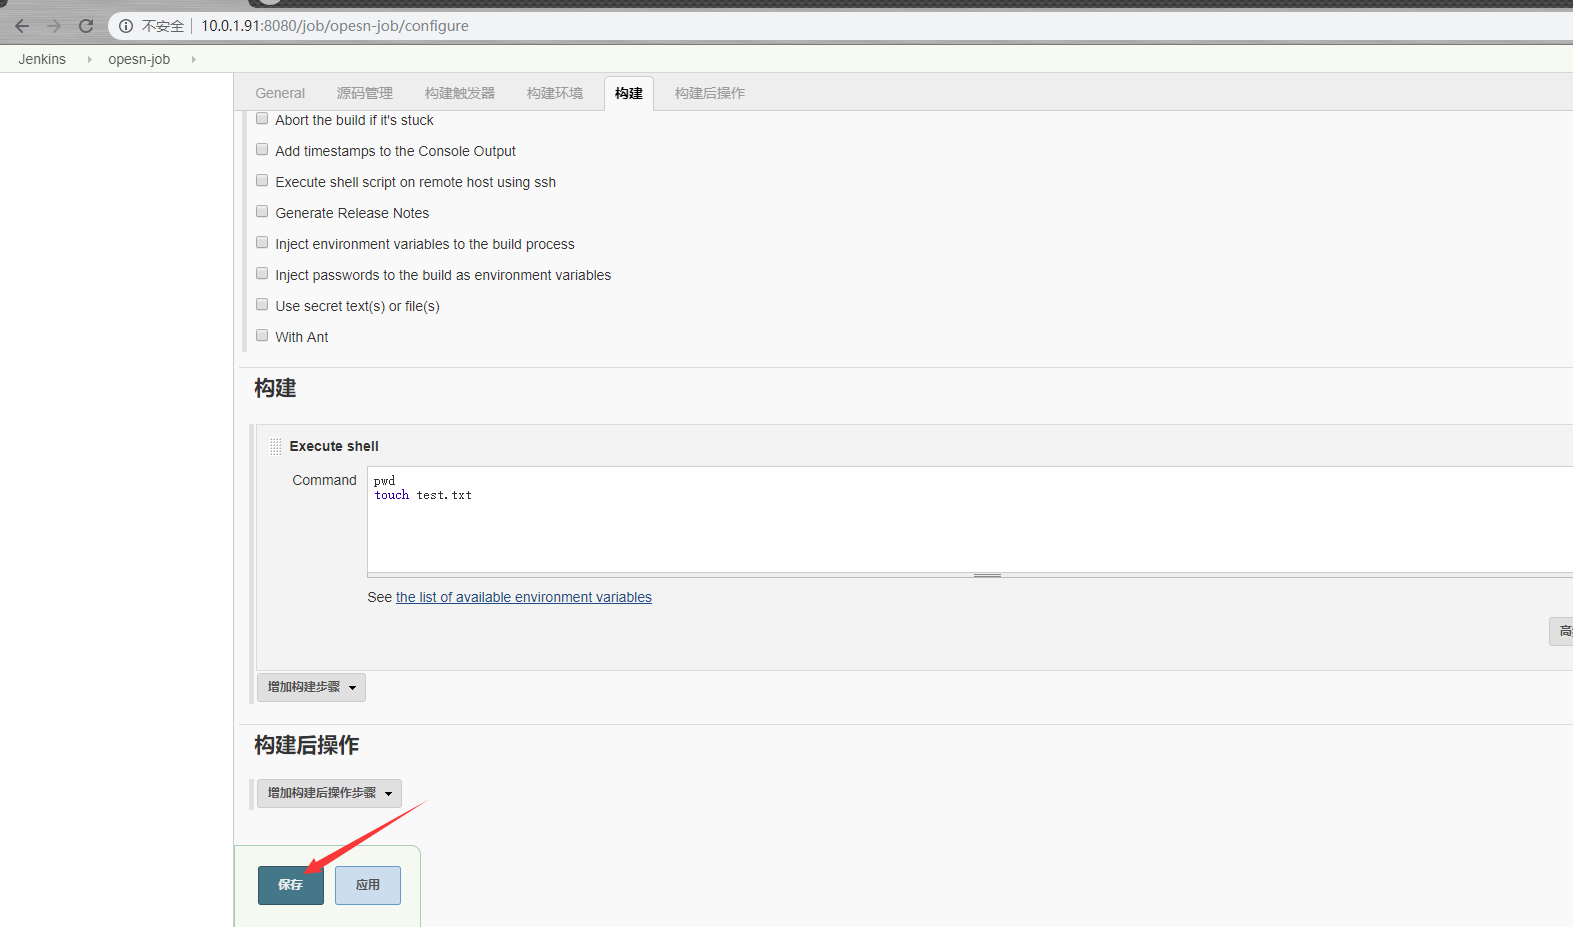
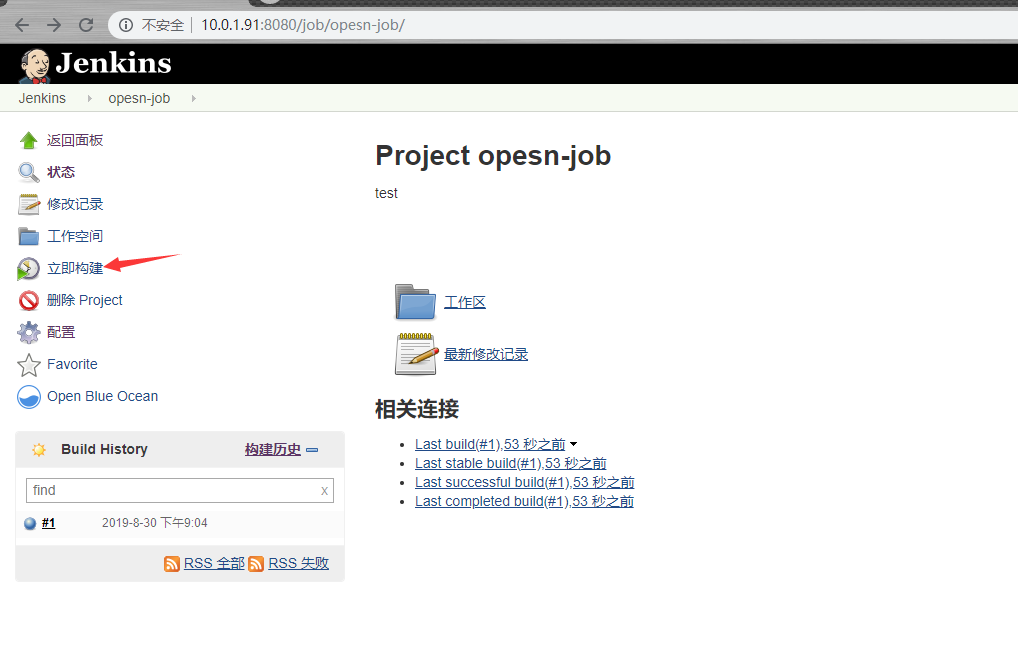
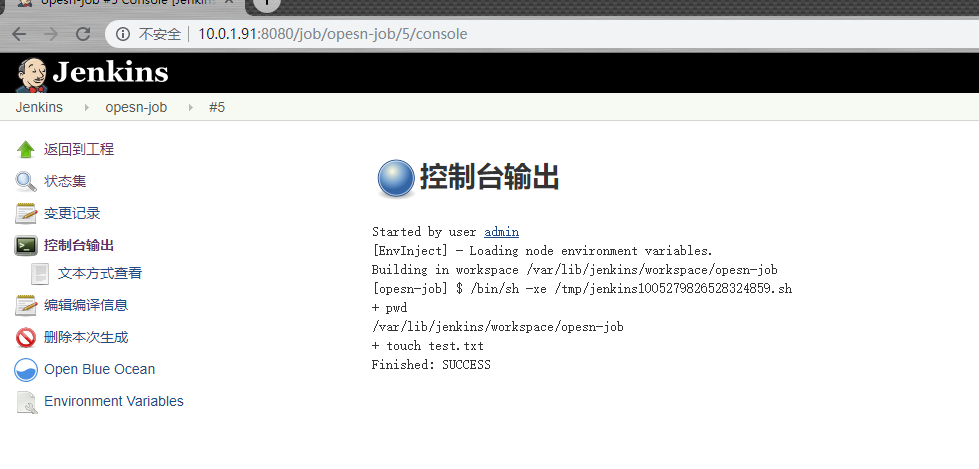
[root@jenkins jenkins]# ll /var/lib/jenkins/workspace/opesn-job/
total 0
-rw-r--r-- 1 jenkins jenkins 0 Aug 30 21:11 test.txt
[root@jenkins jenkins]#
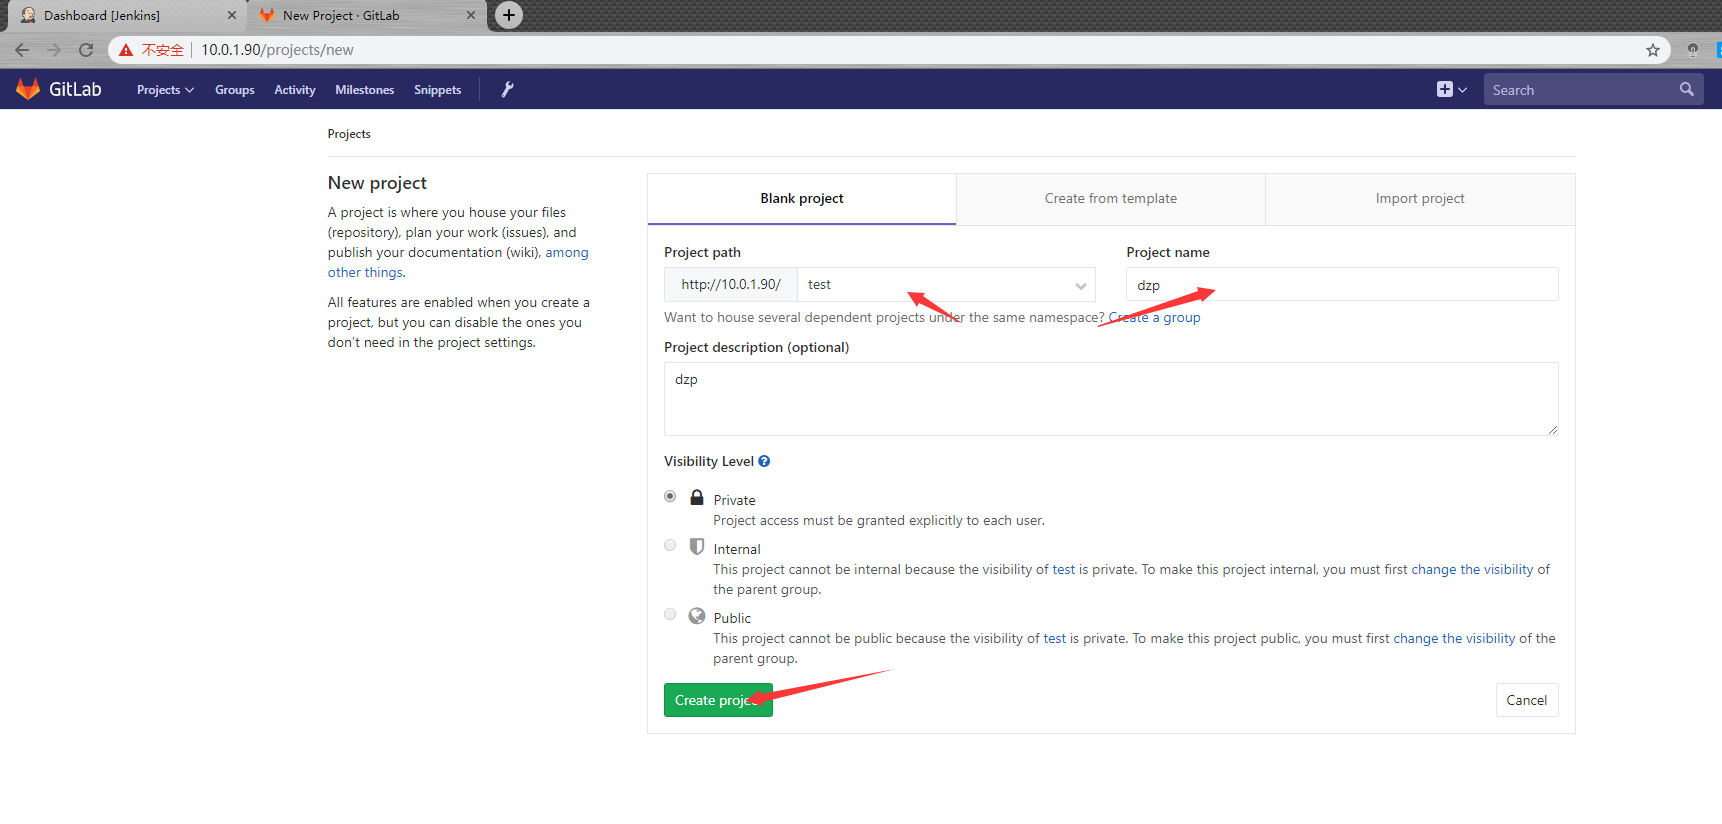
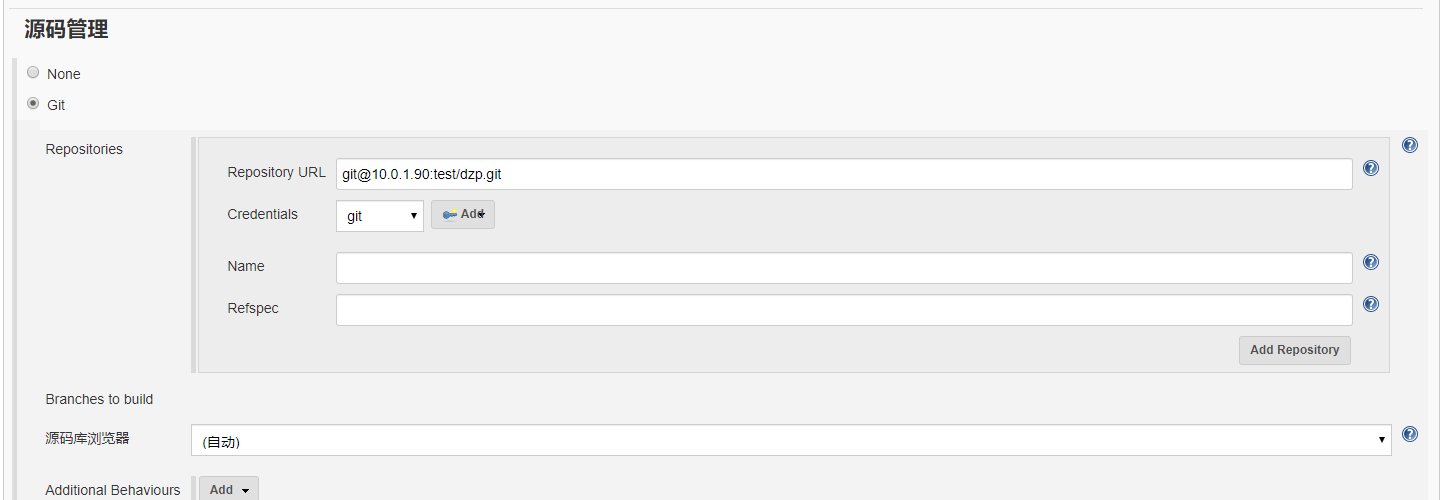
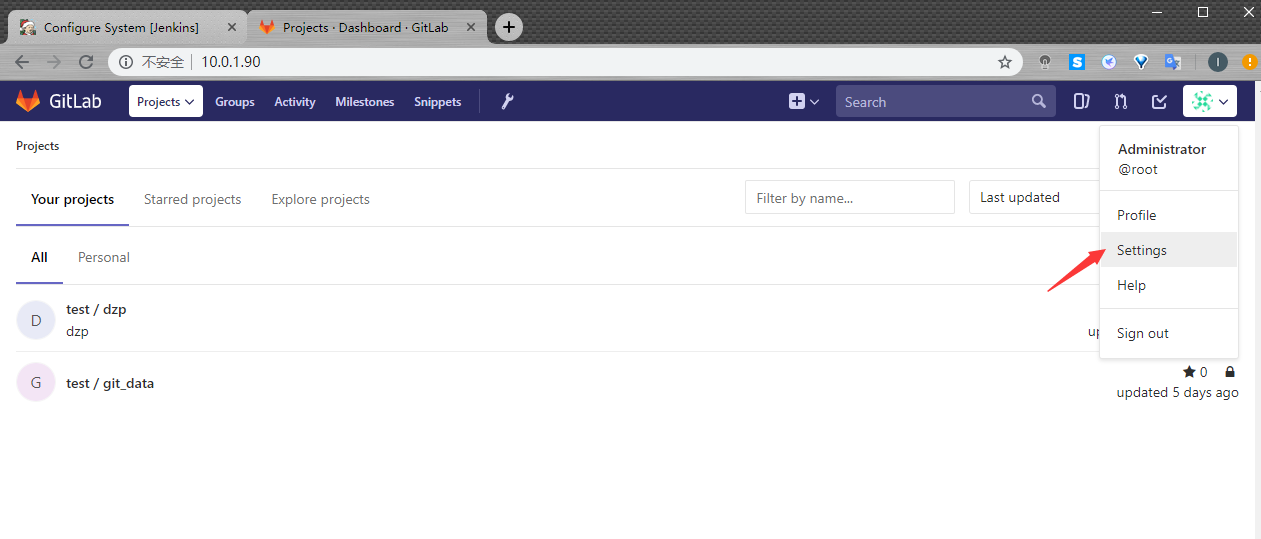
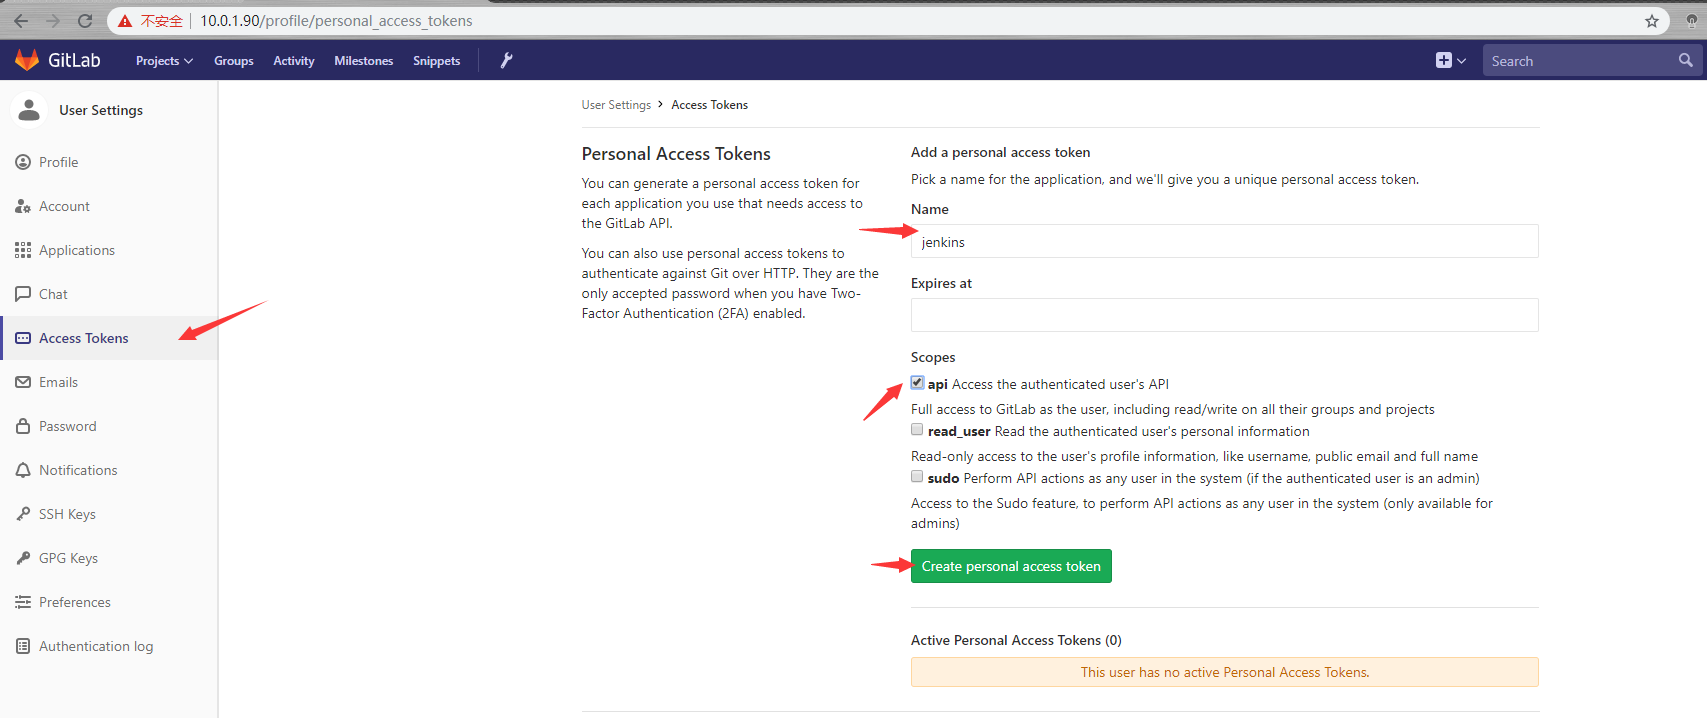
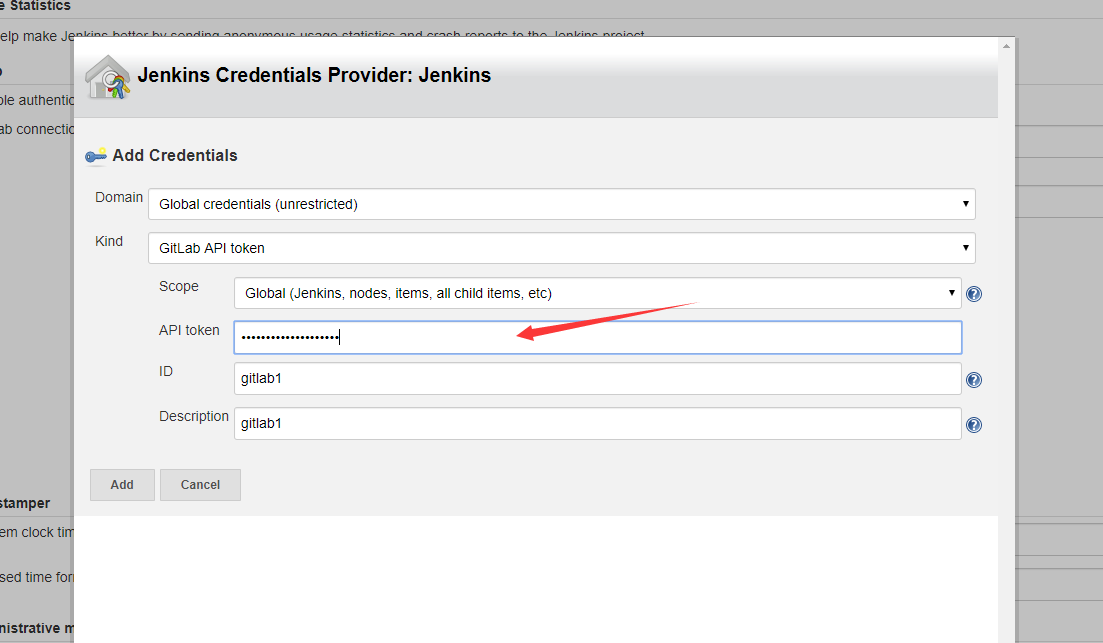
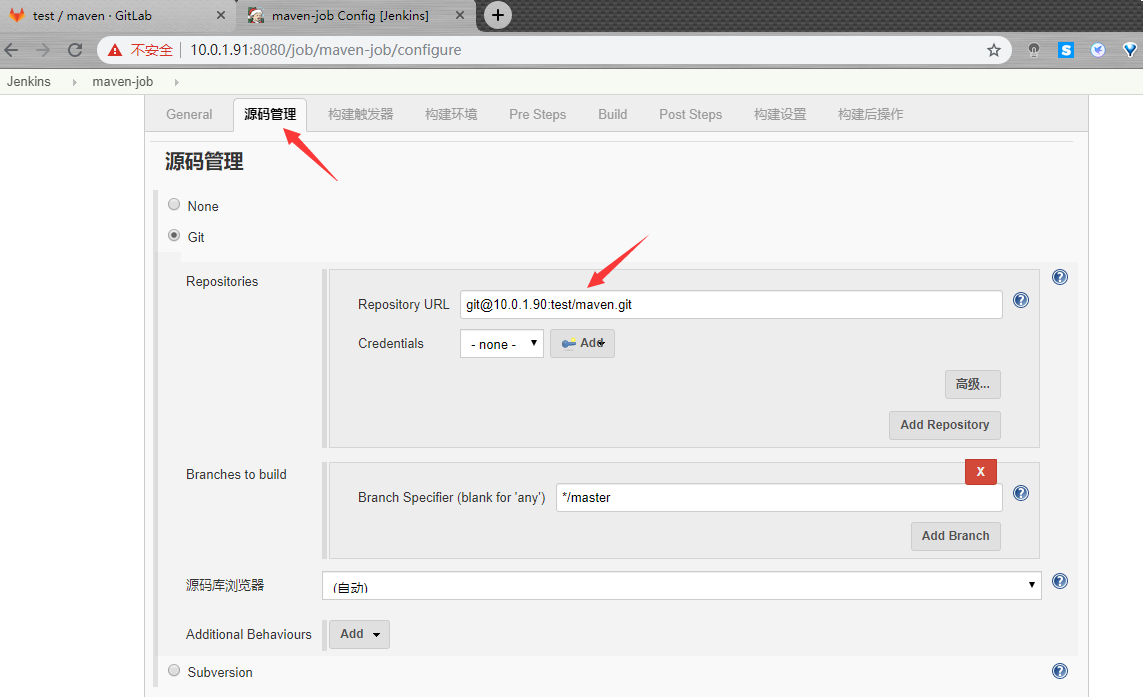
jenkins与gitlab连接
gitlab服务器
[root@git ~]# git clone https://gitee.com/kangjie1209/monitor.git
[root@git dzp]# mv monitor dzp
[root@git dzp]# git init
[root@git dzp]# git remote add origi git@10.0.1.90:test/dzp.git
[root@git dzp]# git add .
[root@git dzp]# git commit -m "Initial commit"
[root@git dzp]# git push origi master
[root@git dzp]#

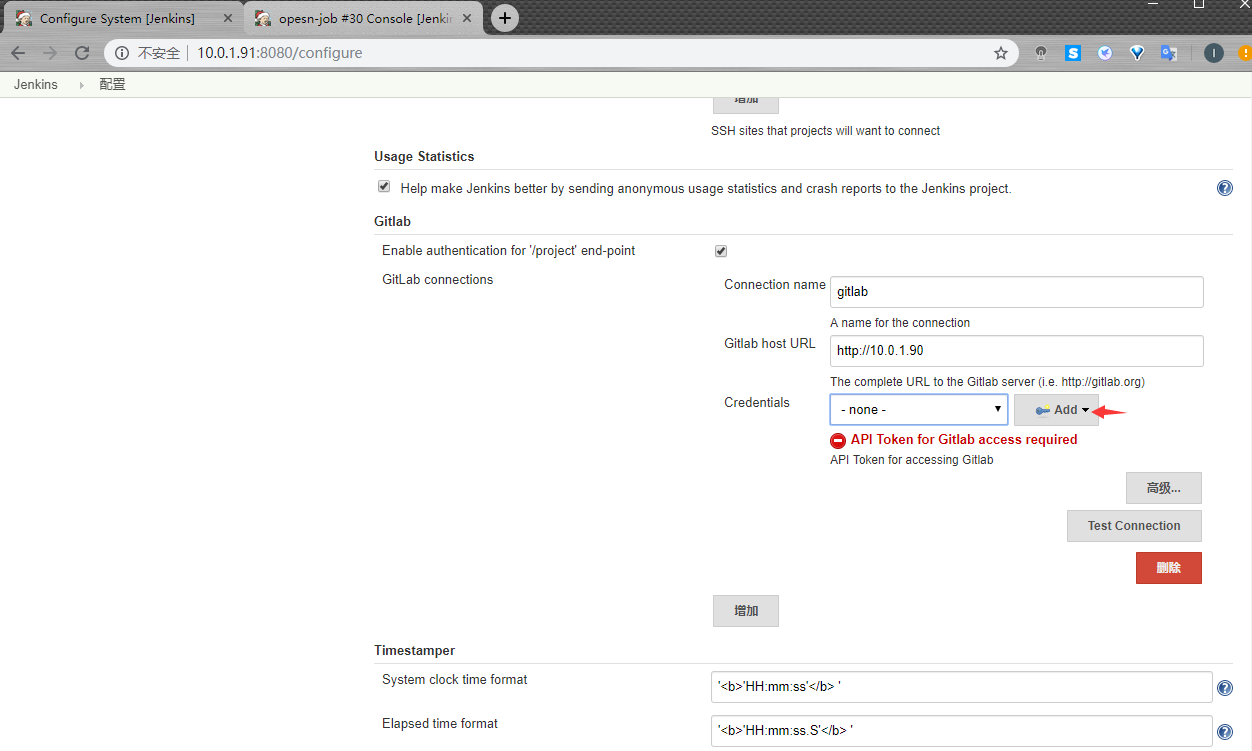
Jenkins服务器
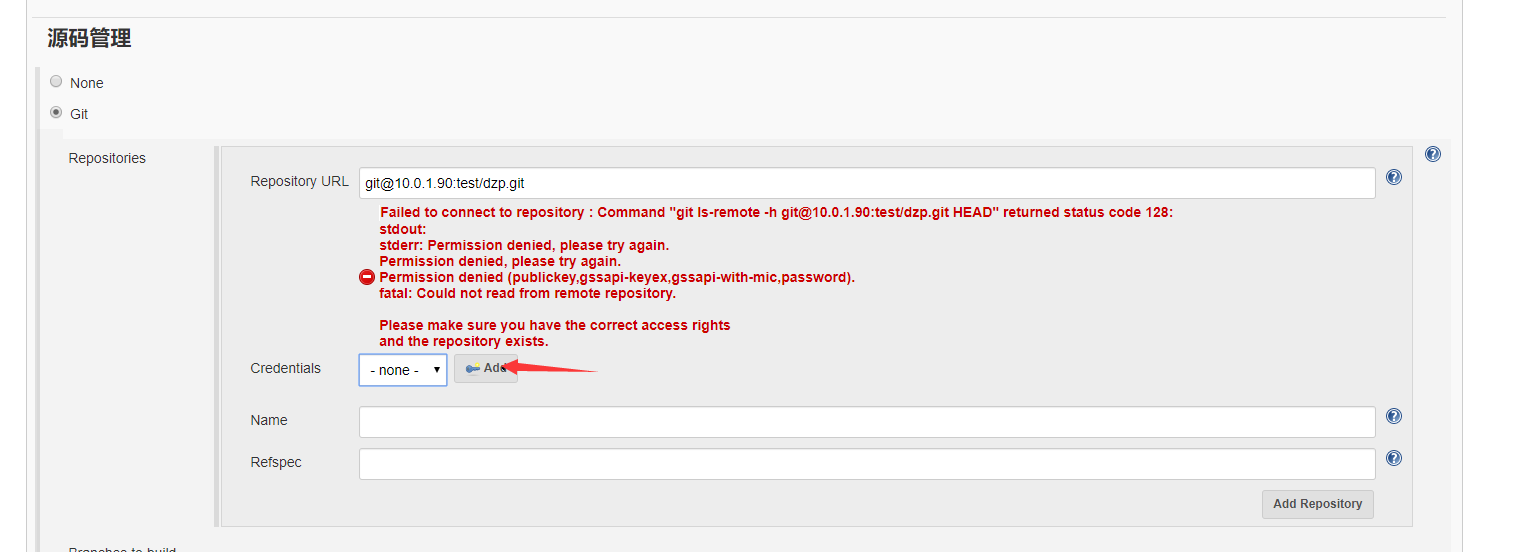
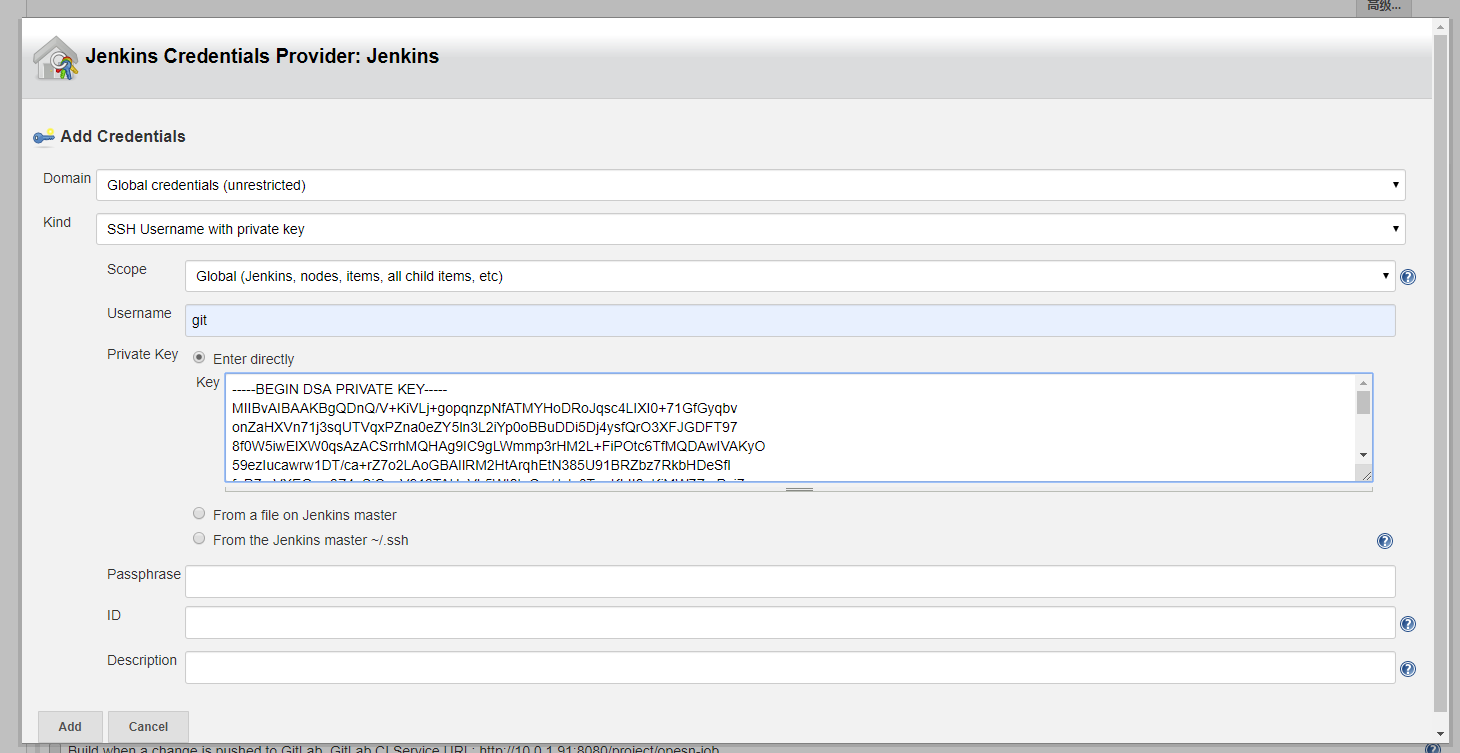
选择SSH密钥和证书,然后选择直接输入,将私钥复制到下框中即可
添加完成后,点击保存
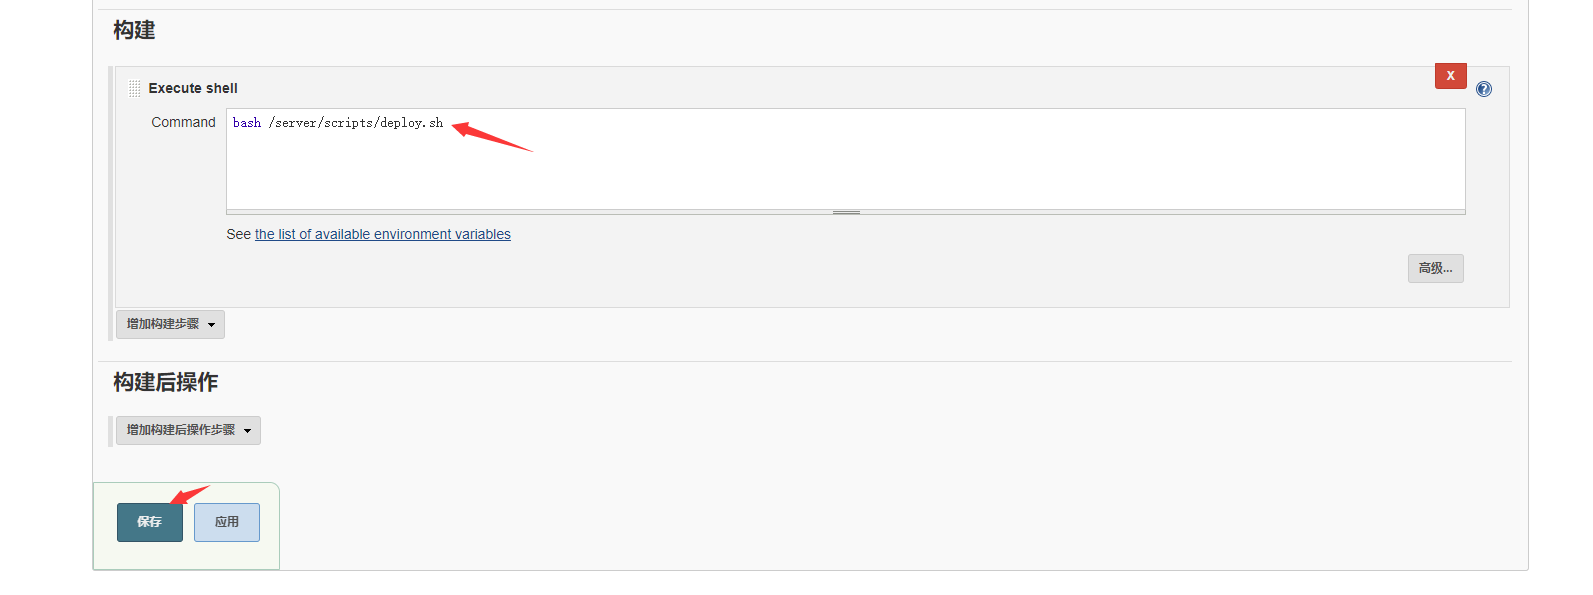
使用脚本推送到web服务器
[root@jenkins scripts]# vim deploy.sh
#!/bin/bash

code_dir=/var/lib/jenkins/workspace/opesn-job/
TIME=$(date +%F-%H-%M-%S)
web_dir=/usr/share/nginx/html
ip=10.0.1.7
cd $code_dir && tar -zcf /tmp/web-${TIME}.tar.gz ./*
scp /tmp/web-${TIME}.tar.gz ${ip}:${web_dir}
ssh root@$ip "cd ${web_dir} && tar xf web-${TIME}.tar.gz"


自动构建方式
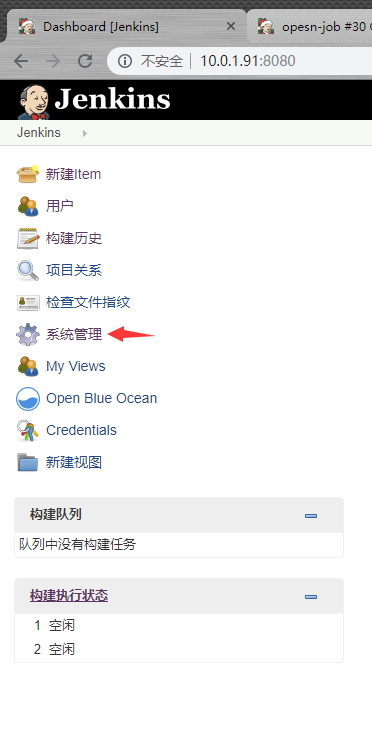
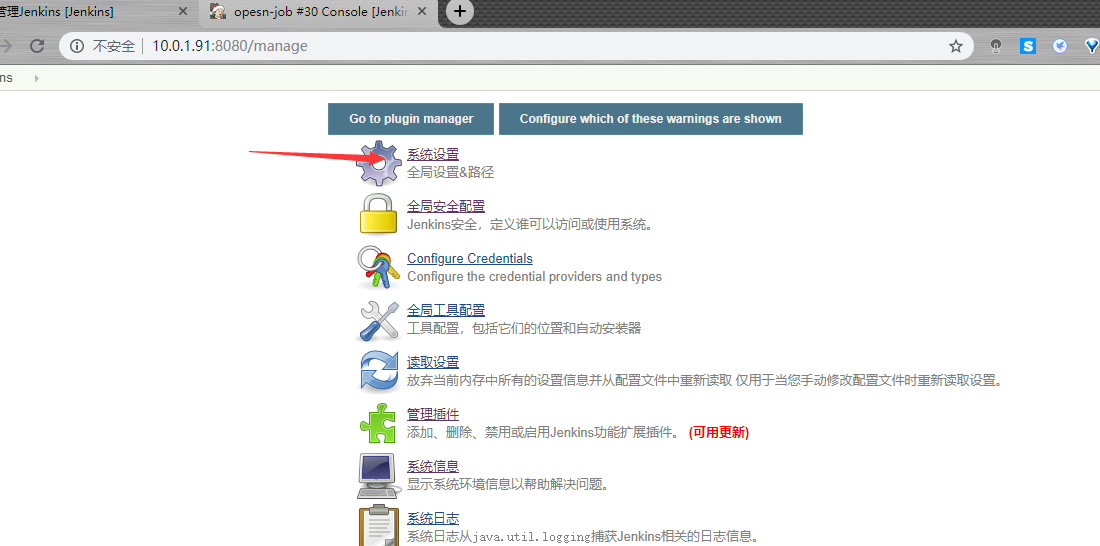
Jenkins的web界面
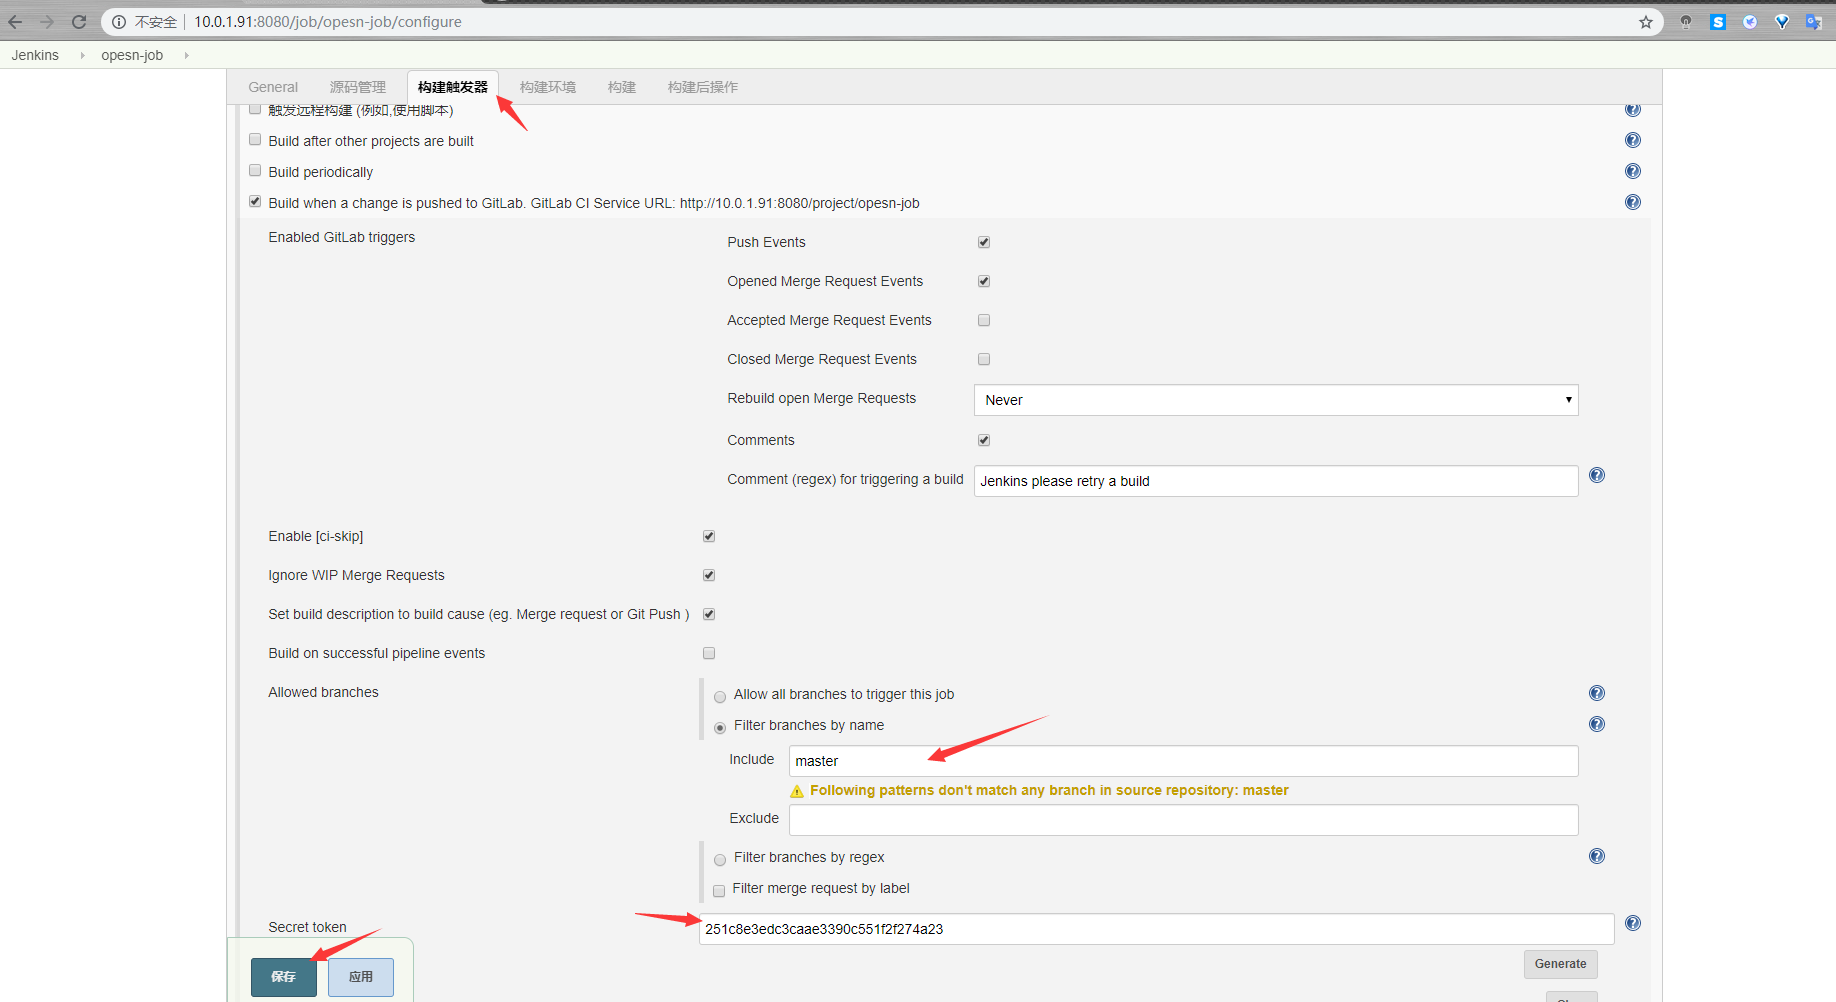
gitlab的web界面
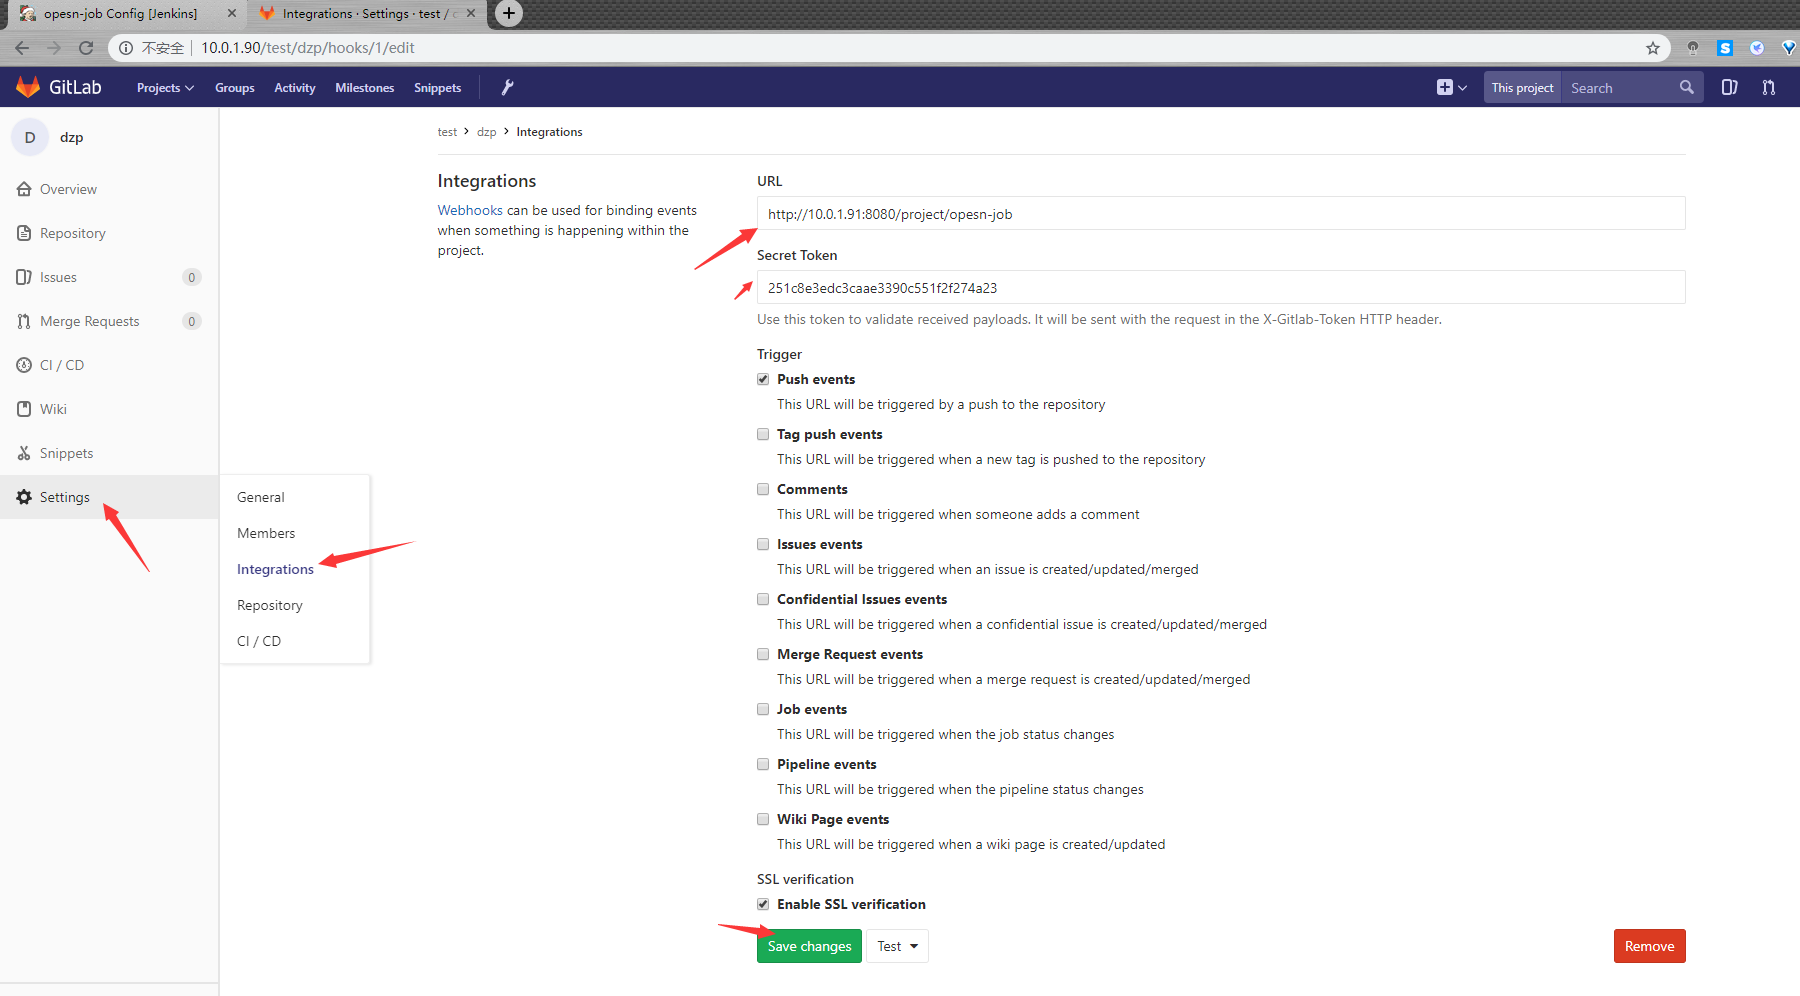
将构建状态返回给gitlab


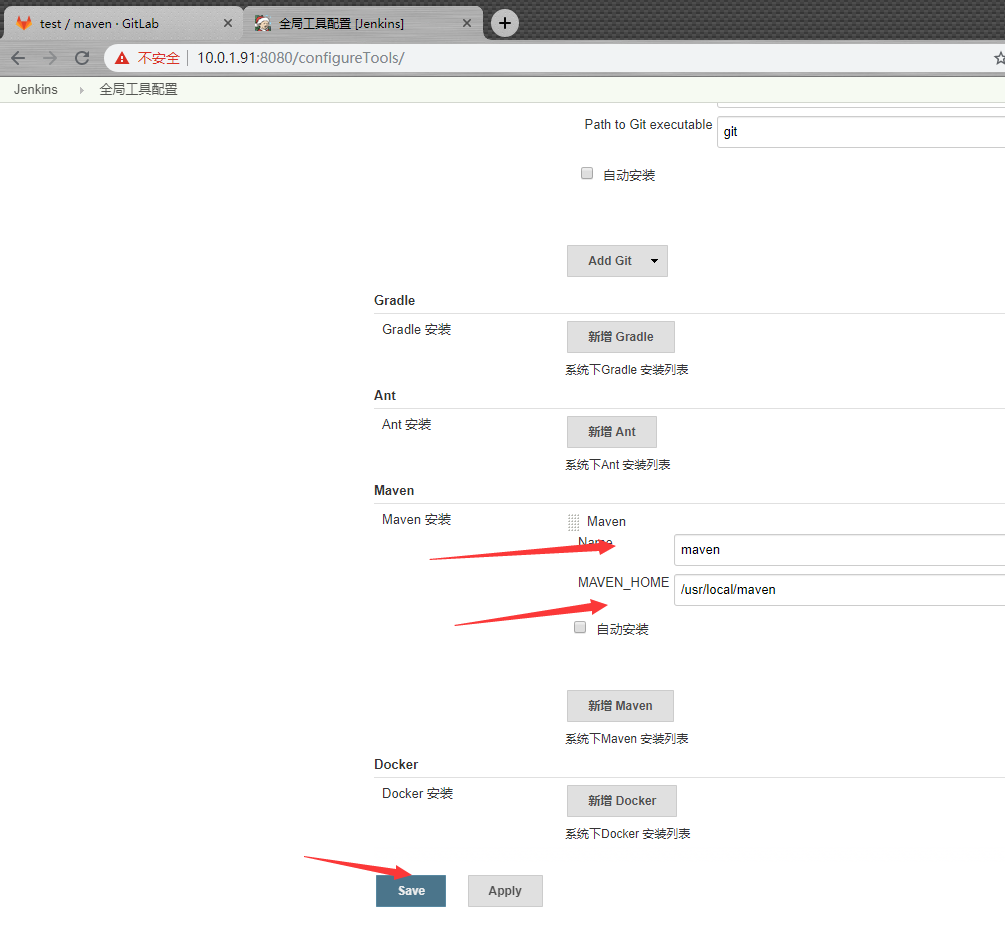
Maven
Maven是一个项目管理和综合工具。Maven提供给开发人员构建一个完整的生命周期框架。
开发团队可以自动完成该项目的基础设施建设,Maven使用标准的目录结构和默认构建生命周期。
Apache的开源项目主要服务于JAVA平台的构建、依赖管理、项目管理。
Project Object Model,项目对象模型。通过xml格式保存的pom.xml文件。该文件用于管理:源代码、配置文
件、开发者的信息和角色、问题追踪系统、组织信息、项目授权、项目的url、项目的依赖关系等等。该文件是由开
发维护,我们运维人员可以不用去关心。
1、下载Maven 3安装包
官网:http://maven.apache.org/download.cgi
清华镜像:https://mirrors.tuna.tsinghua.edu.cn/apache/maven/
maven安装
[root@jenkins ~]# tar xf apache-maven-3.3.9-bin.tar.gz
[root@jenkins ~]# mv apache-maven-3.3.9 /usr/local/
[root@jenkins ~]# cd /usr/local/
[root@jenkins local]# ln -s apache-maven-3.3.9 maven
[root@jenkins bin]# echo 'export PATH=/usr/local/maven/bin/:$PATH' >>/etc/profile
[root@jenkins bin]# source /etc/profile
[root@jenkins bin]#
[root@jenkins ~]# mvn -v
Apache Maven 3.3.9 (bb52d8502b132ec0a5a3f4c09453c07478323dc5; 2015-11-11T00:41:47+08:00)
Maven home: /usr/local/maven
Java version: 1.8.0_222, vendor: Oracle Corporation
Java home: /usr/lib/jvm/java-1.8.0-openjdk-1.8.0.222.b10-0.el7_6.x86_64/jre
Default locale: en_US, platform encoding: UTF-8
OS name: "linux", version: "3.10.0-693.el7.x86_64", arch: "amd64", family: "unix"
[root@jenkins ~]#
上传一个简单的java项目包
#进入目录执行打包命令
validate(验证): 验证项目正确,并且所有必要信息可用。
compile(编译): 编译项目源码
test(测试): 使用合适的单元测试框架测试编译后的源码。
package(打包): 源码编译之后,使用合适的格式(例如JAR格式)对编译后的源码进行打包。
integration‐test(集成测试): 如果有需要,把包处理并部署到可以运行集成测试的环境中去。
verify(验证): 进行各种测试来验证包是否有效并且符合质量标准。
install(安装): 把包安装到本地仓库,使该包可以作为其他本地项目的依赖。
deploy(部署): 在集成或发布环境中完成,将最终软件包复制到远程存储库,以与其他开发人员和项目共享。
mvn clean (清除) : 清除上次编译的结果
[root@jenkins ~]# tar xf hello-world.tar.gz
[root@jenkins ~]# cd hello-world/
[root@jenkins hello-world]# mvn package
[root@jenkins hello-world]# cd target/
[root@jenkins target]# ll
total 8
drwxr-xr-x 3 root root   17 Aug 31 23:26 classes
-rw-r--r-- 1 root root 3131 Aug 31 23:31 hello-world-1.0-SNAPSHOT.jar
drwxr-xr-x 2 root root   28 Aug 31 23:29 maven-archiver
drwxr-xr-x 3 root root   35 Aug 31 23:26 maven-status
-rw-r--r-- 1 root root 2873 Aug 31 23:29 original-hello-world-1.0-SNAPSHOT.jar
drwxr-xr-x 2 root root  125 Aug 31 23:27 surefire-reports
drwxr-xr-x 3 root root   17 Aug 31 23:26 test-classes
[root@jenkins target]#
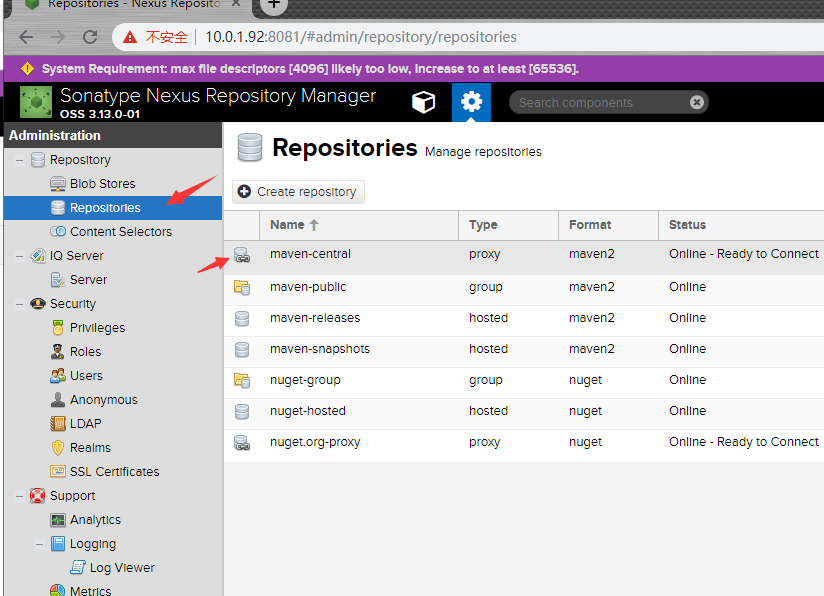
创建maven私服
创建maven的阿里云私服
[root@jenkins target]# cd /usr/local/maven/conf/
[root@jenkins conf]# cp settings.xml{,.bak}
[root@jenkins conf]# vim settings.xml
159     <mirror>
160       <id>nexus-aliyun</id>
161       <mirrorOf>*</mirrorOf>
162       <name>Nexus aliyun</name>
163       <url>http://maven.aliyun.com/nexus/content/groups/public</url>
164     </mirror>
创建maven的nexus私服
| 主机名 | ip地址 |
|---|---|
| nexus | 10.0.1.92 |
| jenkins | 10.0.1.91 |
部署私服 xenus 下载https://www.sonatype.com/download‐oss‐sonatype
配置仓库两个选项
1、项目下的pom.xml配置、只生效当前的项目
2、在maven配置全局所有项目生效
上传JDK和nexus安装包
#nexus服务器
[root@nexus ~]# ll
-rw-r--r--  1 root root 170023183 Aug 14  2018 jdk-8u181-linux-x64.rpm
-rw-r--r--  1 root root 122904706 Aug 22  2018 nexus-3.13.0-01-unix.tar.gz
[root@nexus ~]# rpm -ivh jdk-8u181-linux-x64.rpm
[root@nexus ~]# tar xf nexus-3.13.0-01-unix.tar.gz
[root@nexus ~]# mv nexus-3.13.0-01 /usr/local/
[root@nexus ~]# cd /usr/local/
[root@nexus local]# ln -s nexus-3.13.0-01/ nexus
[root@nexus local]# cd nexus/bin/
[root@nexus bin]# ./nexus start
WARNING: ************************************************************
WARNING: Detected execution as "root" user.  This is NOT recommended!
WARNING: ************************************************************
Starting nexus
[root@nexus bin]#
[root@nexus bin]# ./nexus status
WARNING: ************************************************************
WARNING: Detected execution as "root" user.  This is NOT recommended!
WARNING: ************************************************************
nexus is running.
[root@nexus bin]#
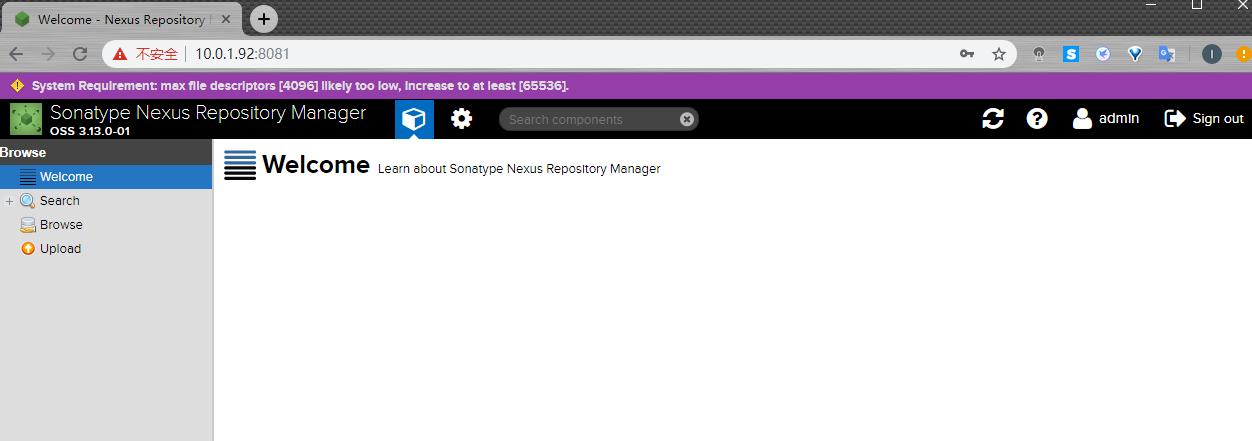
浏览器访问:http://10.0.1.92:8081/
用户:admin 密码:admin123

#jenkins服务器
[root@jenkins ~]# cd /usr/local/maven/conf/
[root@jenkins conf]# vim settings.xml
133     <server>
134       <id>my-nexus-releases</id>
135       <username>admin</username>
136       <password>admin123</password>
137     </server>
138     <server>
139       <id>my-nexus-snapshot</id>
140       <username>admin</username>
141       <password>admin123</password>
142     </server>

169     <mirror>
170       <!--This sends everything else to /public -->
171       <id>nexus</id>
172       <mirrorOf>*</mirrorOf>
173       <url>http://10.0.1.92:8081/repository/maven-public/</url>
174     </mirror>
175  </mirrors>

263 <profile>
264   <id>nexus</id>
265   <!--Enable snapshots for the built in central repo to direct -->
266   <!--all requests to nexus via the mirror -->
267   <repositories>
268     <repository>
269       <id>central</id>
270       <url>http://10.0.1.92:8081/repository/maven-public/</url>
271       <releases><enabled>true</enabled></releases>
272       <snapshots><enabled>true</enabled></snapshots>
273     </repository>
274   </repositories>
275  <pluginRepositories>
276     <pluginRepository>
277       <id>central</id>
278       <url>http://10.0.1.92:8081/repository/maven-public/</url>
279       <releases><enabled>true</enabled></releases>
280       <snapshots><enabled>true</enabled></snapshots>
281     </pluginRepository>
282   </pluginRepositories>
283 </profile>

294 <activeProfiles>
295   <!--make the profile active all the time -->
296   <activeProfile>nexus</activeProfile>
297 </activeProfiles>
java代码上线
将压缩包解压
[root@git ~]# tar xf jeesns.tar.gz
[root@git ~]#
gitlab新建项目
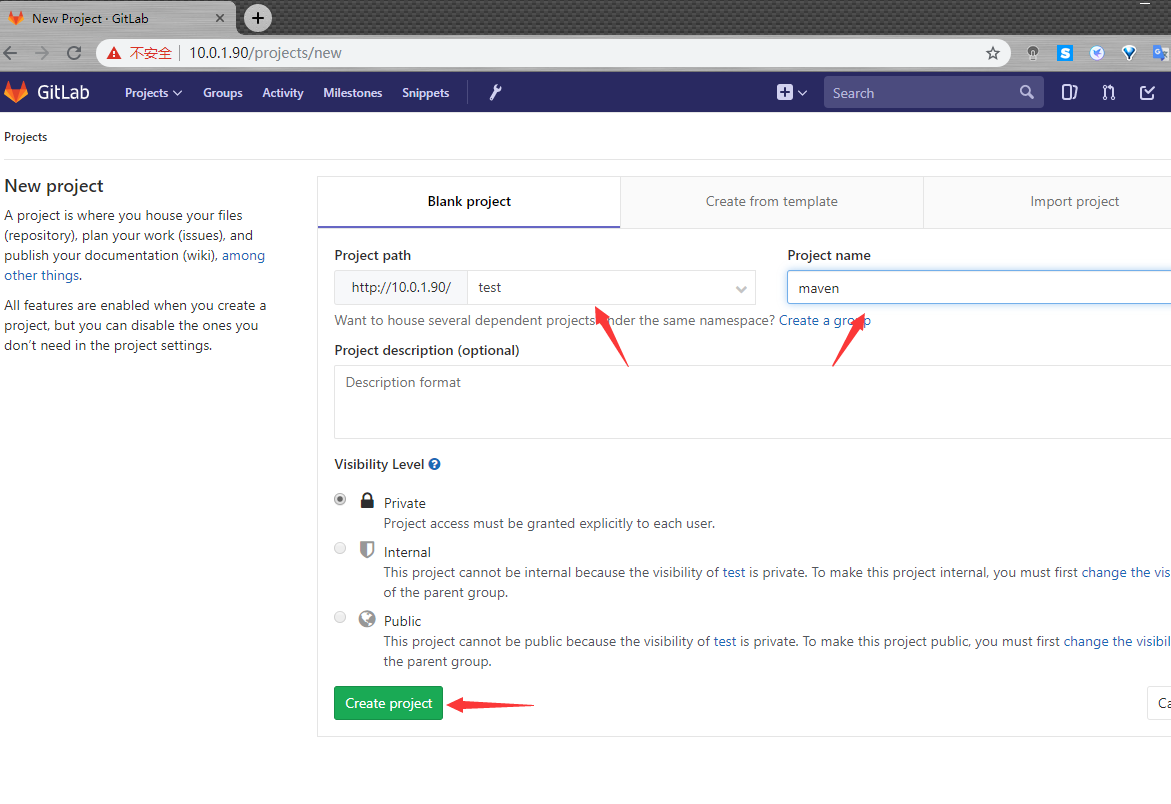
[root@git jeesns]# git init
Reinitialized existing Git repository in /root/jeesns/.git/
[root@git jeesns]# git remote add origin git@10.0.1.90:test/maven.git
[root@git jeesns]# git add .
[root@git jeesns]# git commit -m "Initial commit"
# On branch master
nothing to commit, working directory clean
[root@git jeesns]# git push -u origin master
Counting objects: 1946, done.
Compressing objects: 100% (1862/1862), done.
Writing objects: 100% (1946/1946), 7.09 MiB | 7.22 MiB/s, done.
Total 1946 (delta 285), reused 0 (delta 0)
remote: Resolving deltas: 100% (285/285), done.
To git@10.0.1.90:test/maven.git
 * [new branch]      master -> master
Branch master set up to track remote branch master from origin.
[root@git jeesns]#
jenkins拉取maven代码


部署tomcat服务器和数据库
[root@web01 ~]# rpm -ivh jdk-8u181-linux-x64.rpm
[root@web01 ~]# tar xf apache-tomcat-8.0.27.tar.gz
[root@web01 ~]# mkdir /application
[root@web01 ~]# mv apache-tomcat-8.0.27 /application/
[root@web01 ~]# ln -s /application/apache-tomcat-8.0.27/ /application/tomcat
#配置tomcat启动加速
[root@web01 ~]# vim /usr/java/jdk1.8.0_181-amd64/jre/lib/security/java.security
 117 securerandom.source=file:/dev/urandom
#启动tomcat
[root@web01 ~]# /application/tomcat/bin/startup.sh
#安装数据库
[root@web01 ~]# yum -y install mariadb-server
[root@web01 ~]# systemctl start mariadb
[root@web01 ~]# mysqladmin -uroot password 'root'
[root@web01 ~]#
[root@web01 ~]# mysql -uroot -proot -e "create database jeesns;"
jenkins服务器配置
[root@jenkins ~]# cd /var/lib/jenkins/workspace/maven-job/jeesns-web/database/
[root@jenkins database]# scp jeesns.sql 10.0.1.7
[root@jenkins database]# scp jeesns.sql 10.0.1.7:/root
tomcat服务器
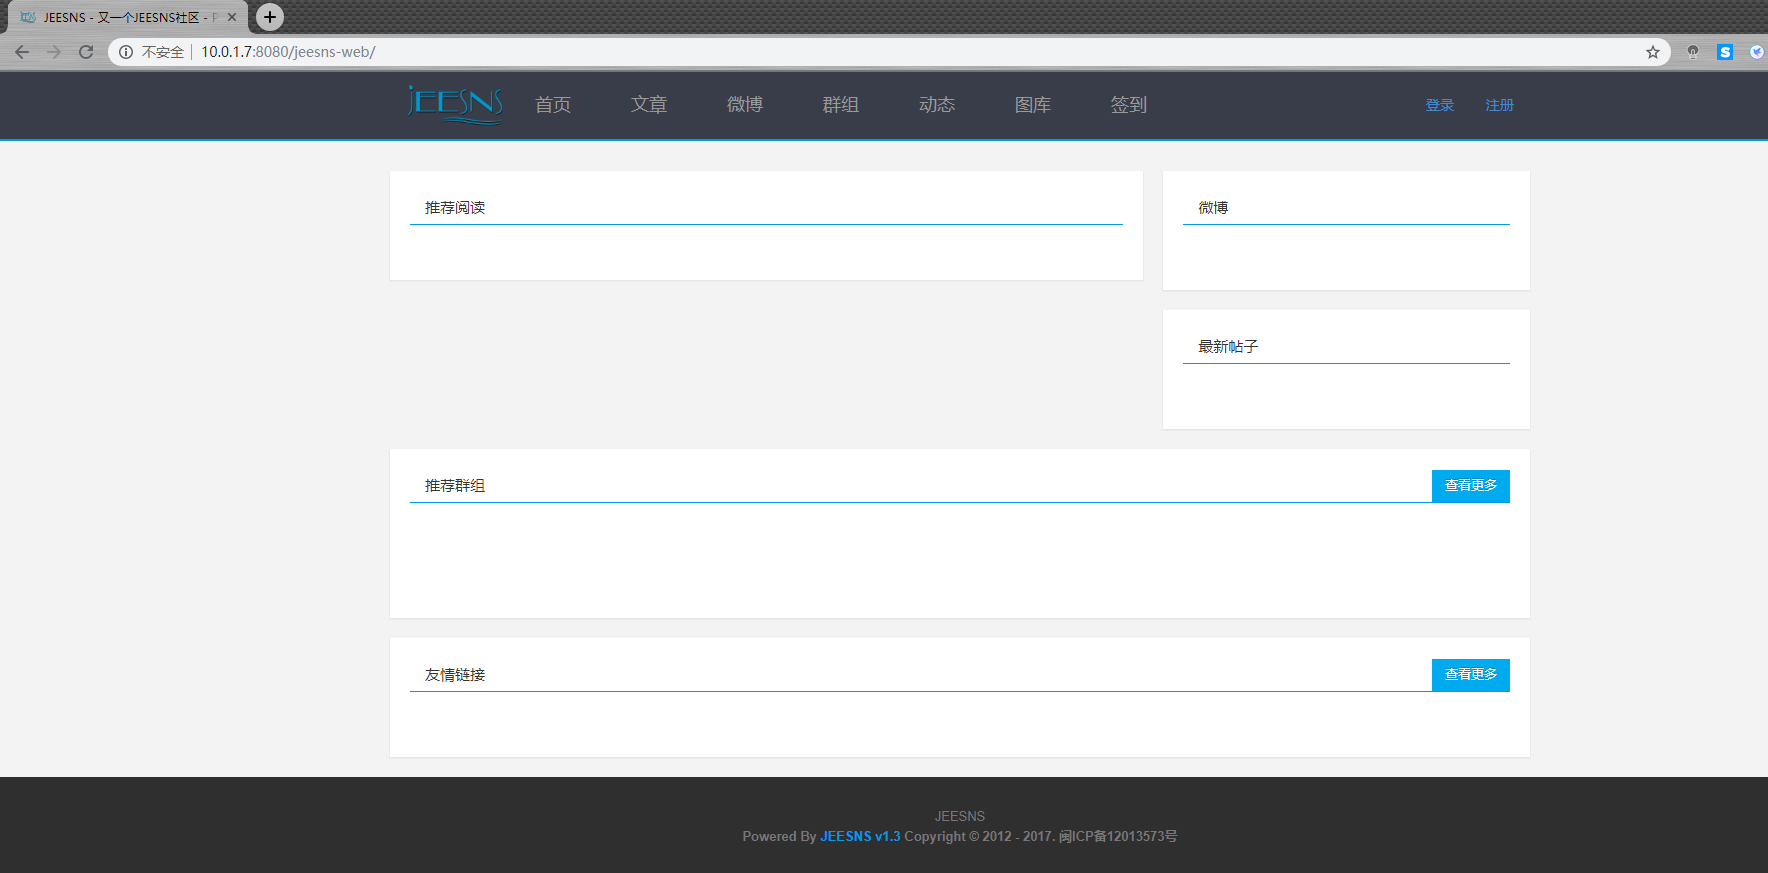
[root@web01 ~]# mysql -uroot -proot jeesns < jeesns.sql
远程推送
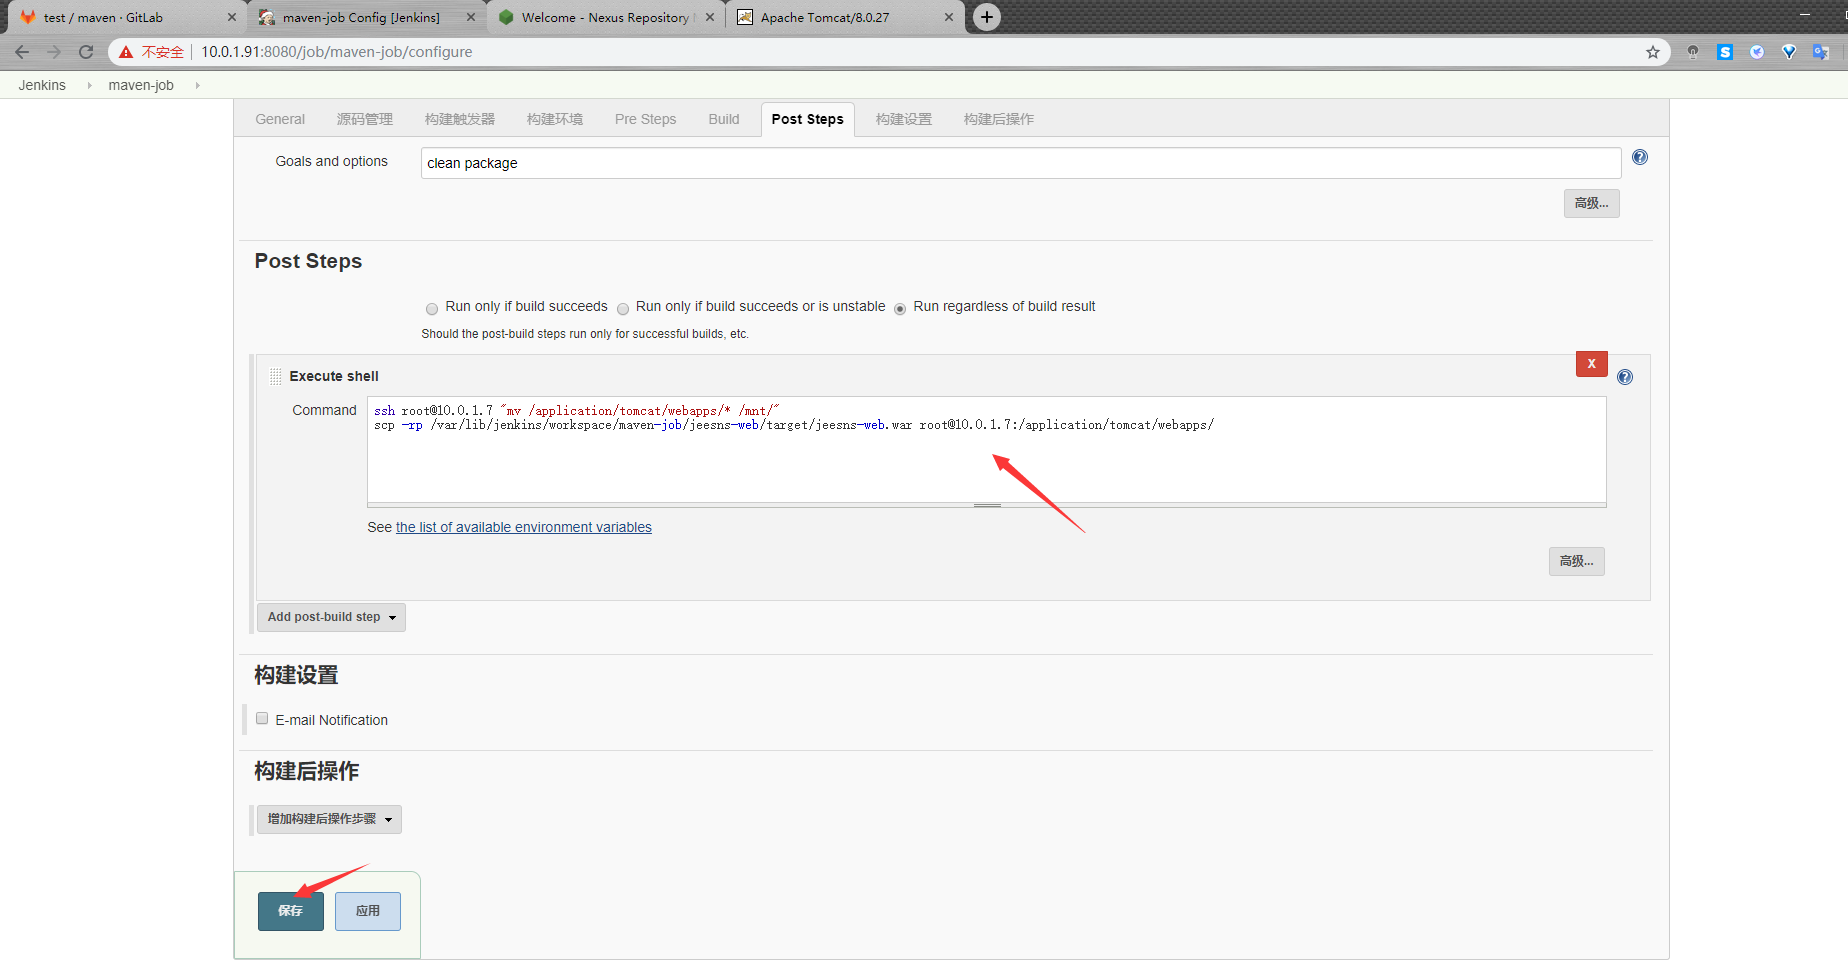
ssh root@10.0.1.7 "mv /application/tomcat/webapps/* /mnt/"
scp -rp /var/lib/jenkins/workspace/maven-job/jeesns-web/target/jeesns-web.war root@10.0.1.7:/application/tomcat/webapps/

pipeline
什么是pipeline
Jenkins 2.0的精髓是Pipeline as Code,是帮助Jenkins实现CI到CD转变的重要角色。什么是Pipeline,简单
来说,就是一套运行于Jenkins上的工作流框架,将原本独立运行于单个或者多个节点的任务连接起来,实现单个任务难以完成的复杂发布流程。Pipeline的实现方式是一套Groovy DSL,任何发布流程都可以表述为一段Groovy脚本,并且Jenkins支持从代码库直接读取脚本,从而实现了Pipeline as Code的理念。
Pipeline 概念
Pipeline 是一个用户定义的 CD 流水线模式。Pipeline 代码定义了通常包含构建、测试和发布步骤的完整的构
建过程。
Node
node 是一个机器,它是 Jenkins 环境的一部分,并且能够执行 Pipeline。同时,node 代码块也是脚本式
Pipeline 语法的关键特性。
Stage
Stage 块定义了在整个 Pipeline 中执行的概念上不同的任务子集(例如“构建”,“测试”和“部署”阶段),
许多插件使用它来可视化或呈现 Jenkins 管道状态/进度。
Step
一项任务。从根本上讲,一个步骤告诉 Jenkins 在特定时间点(或过程中的“步骤”)要做什么。例如,使用sh step:sh 'make' 可以执行 make 这个 shell 命令。
pipeline配置
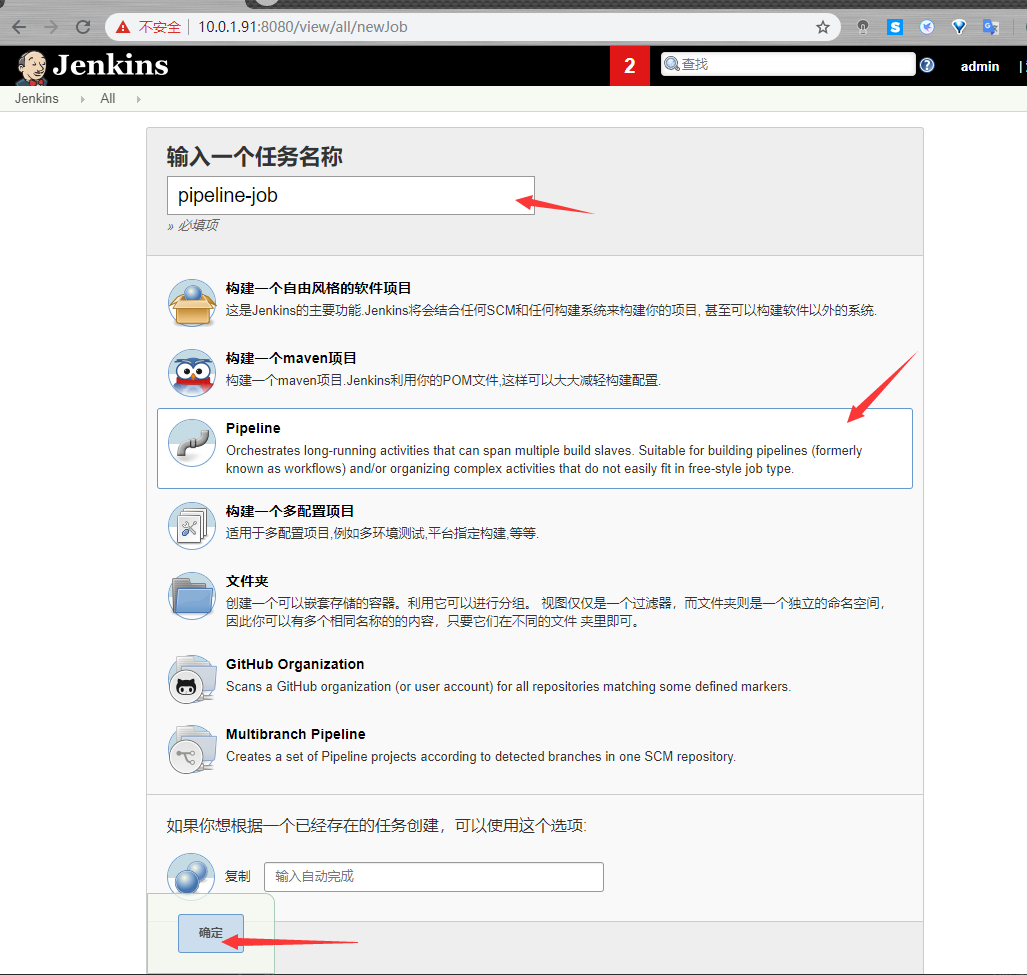
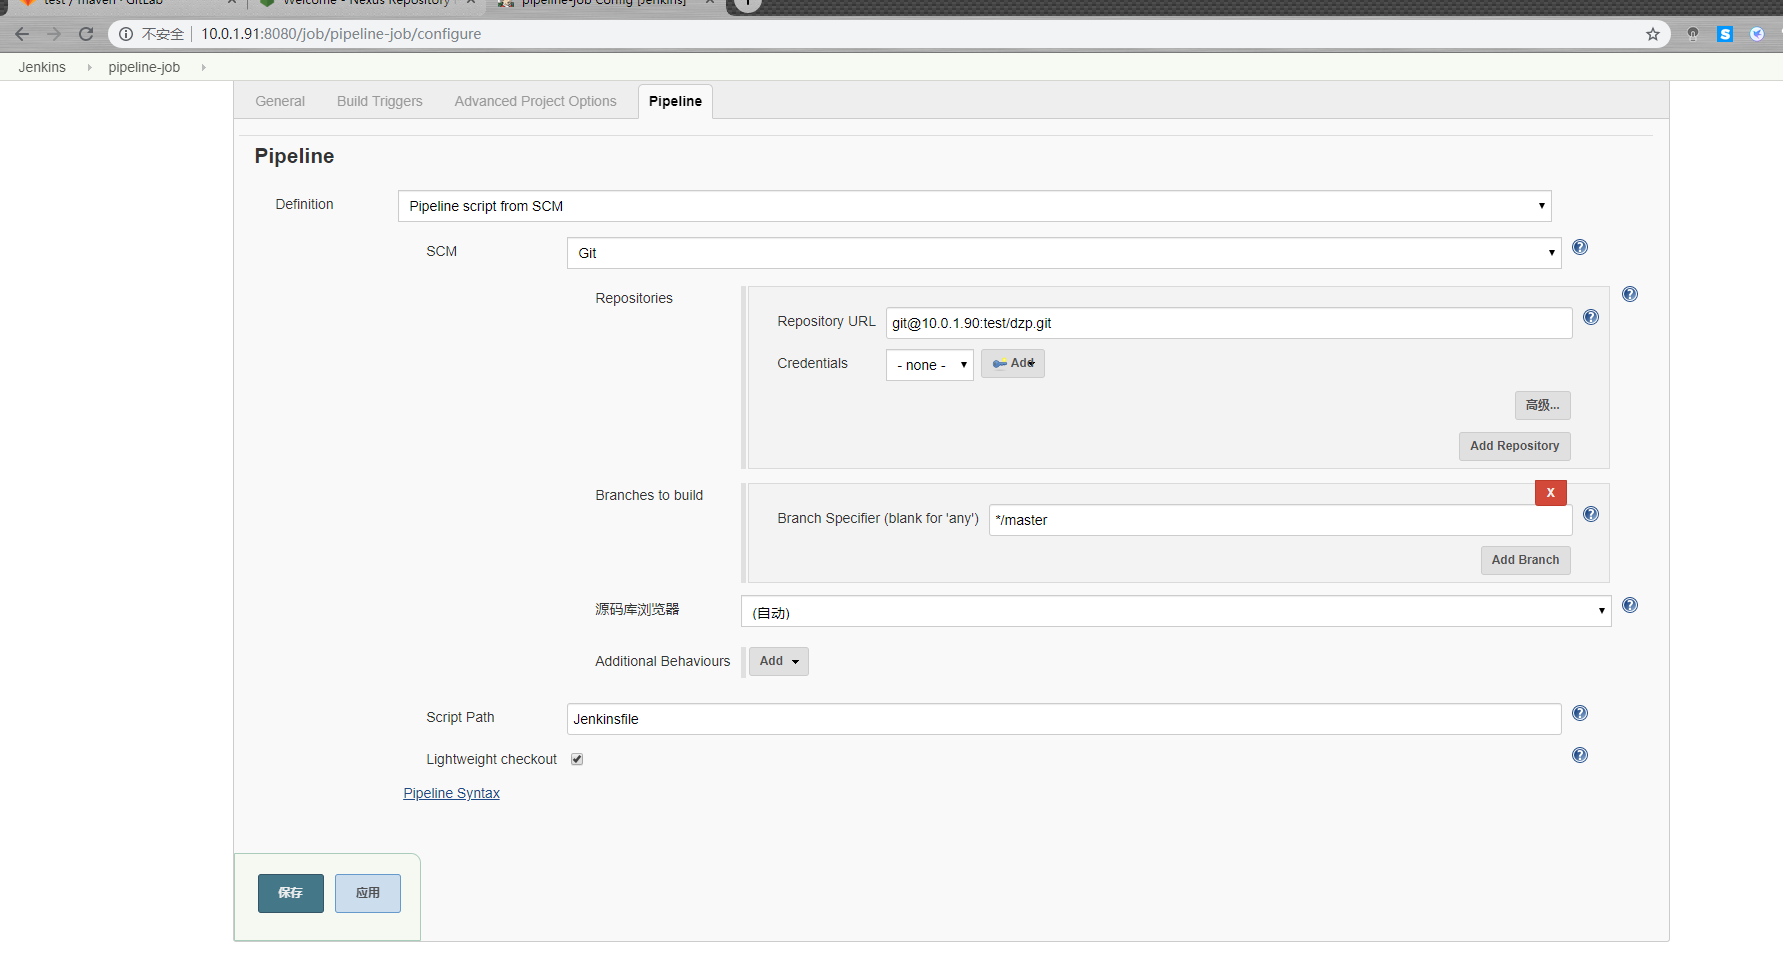


#pipeline语法
pipeline{
agent any
stages{
stage("get code"){
steps{
echo "get code"
}
}
stage("unit test"){
steps{
echo "unit test"
}
}
stage("package"){
steps{
sh 'tar zcf /opt/web-${BUILD_ID}.tar.gz ./* --exclude=./git --exclude=jenkinsfile'
}
}
stage("deploy"){
steps{
sh 'ssh 10.0.1.7 "cd /usr/share/nginx && mkdir web-${BUILD_ID}"'
sh 'scp /opt/web-${BUILD_ID}.tar.gz 10.0.1.7:/usr/share/nginx/web-${BUILD_ID}'
sh 'ssh 10.0.1.7 "cd /usr/share/nginx/web-${BUILD_ID} && tar xf web-${BUILD_ID}.tar.gz && rm -rf web-${BUILD_ID}.tar.gz"'
sh 'ssh 10.0.1.7 "cd /usr/share/nginx && rm -rf html && ln -s web-${BUILD_ID}/usr/share/nginx/html"'
}
}
}
}