关于Jmeter的持续集成,首先先谈谈Jmeter+Maven的集成。
1、使用idea或者eclipse创建一个maven项目
2、在test下创建一个Jmeter目录
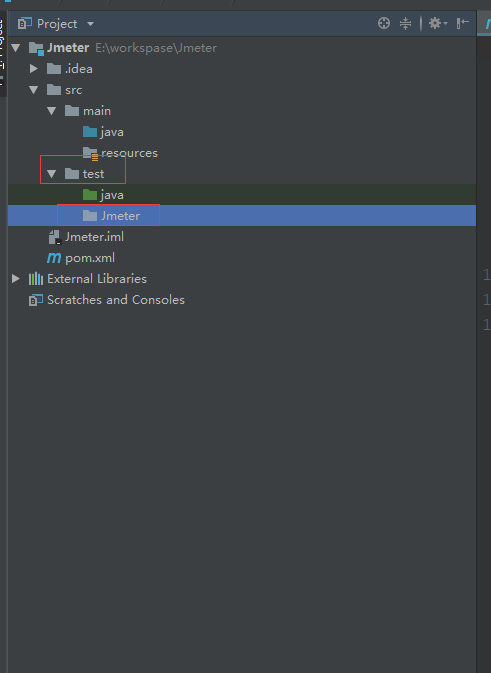
3、将jmeter脚本放入jmeter这个目录下
4、把本地的jmeter属性文件放入到jmeter目录下,这里需注意,需要修改一些属性
(1)jmeter.save.saveservice.output_format=xml
(2)将以下地方修改将会在报告中显示更多东西
jmeter.save.saveservice.data_type=true
jmeter.save.saveservice.label=true
jmeter.save.saveservice.response_code=true
# response_data is not currently supported for CSV output
jmeter.save.saveservice.response_data=true
# Save ResponseData for failed samples
jmeter.save.saveservice.response_data.on_error=false
jmeter.save.saveservice.response_message=true
jmeter.save.saveservice.successful=true
jmeter.save.saveservice.thread_name=true
jmeter.save.saveservice.time=true
jmeter.save.saveservice.subresults=true
jmeter.save.saveservice.assertions=true
jmeter.save.saveservice.latency=true
jmeter.save.saveservice.connect_time=true
jmeter.save.saveservice.samplerData=true
jmeter.save.saveservice.responseHeaders=true
jmeter.save.saveservice.requestHeaders=true
jmeter.save.saveservice.encoding=false
jmeter.save.saveservice.bytes=true
jmeter.save.saveservice.url=true
jmeter.save.saveservice.filename=true
jmeter.save.saveservice.hostname=true
jmeter.save.saveservice.thread_counts=true
jmeter.save.saveservice.sample_count=true
jmeter.save.saveservice.idle_time=true
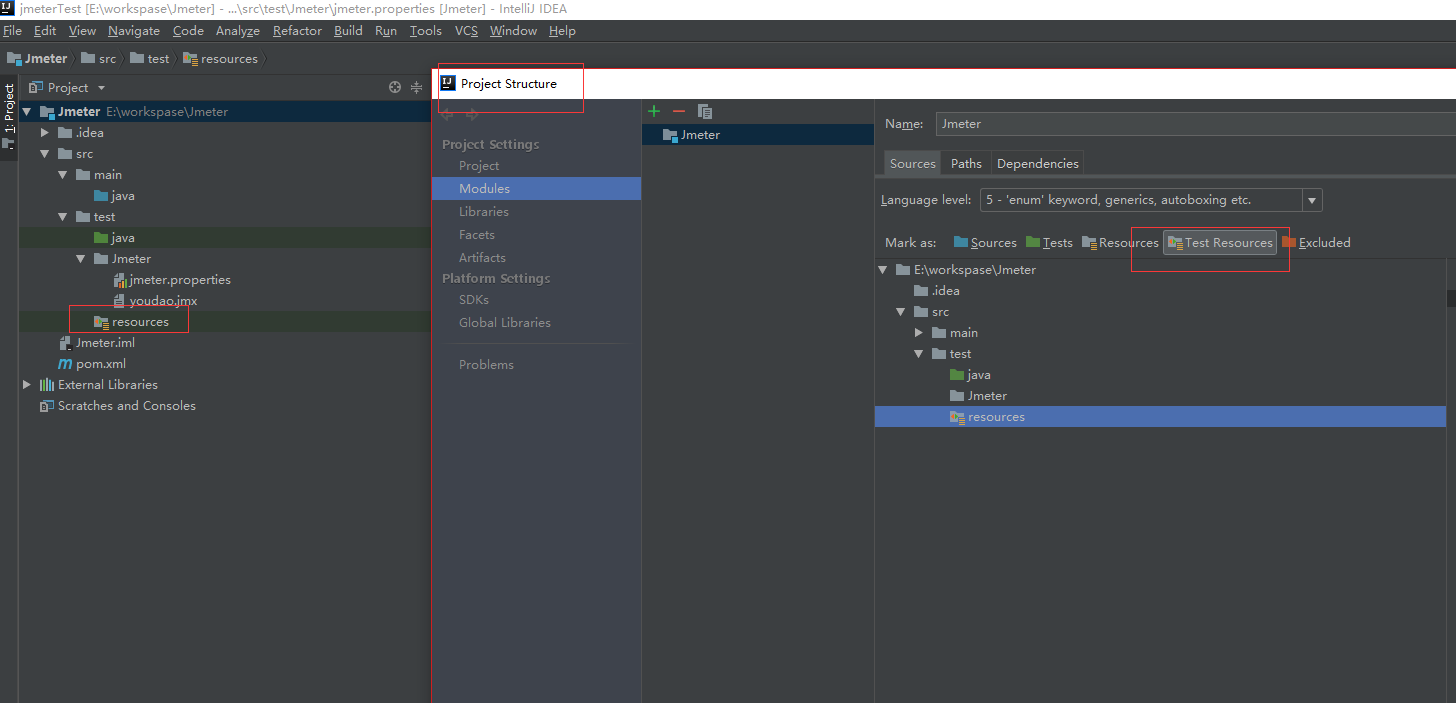
5、在test文件下创建一个resources文件,并将它在项目属性中设置为Test resources,在将xsl报告放入进去
6、设置Maven的pom文件
<!--设置报告生成的路径-->
<properties>
<project.build.sourceEncoding>UTF-8</project.build.sourceEncoding>
<jmeter.result.jtl.dir>${project.build.directory}jmeter esults</jmeter.result.jtl.dir>
<jmeter.result.html.dir>${project.build.directory}jmeterhtml</jmeter.result.html.dir>
</properties>
<build>
<plugins>
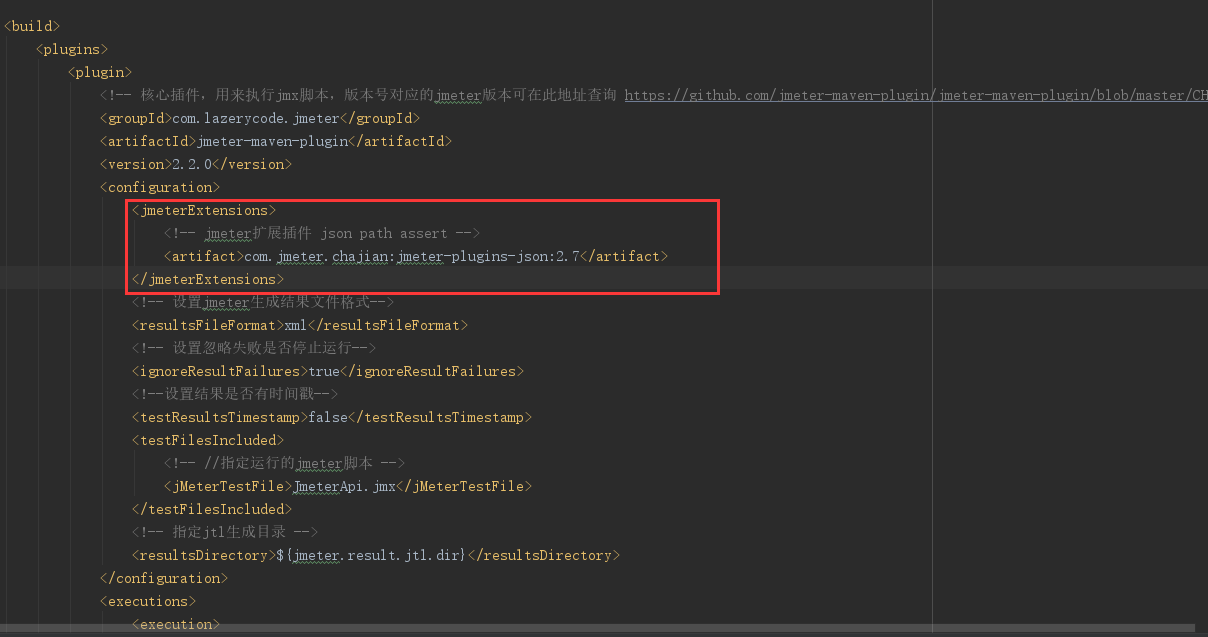
<plugin>
<!-- 核心插件,用来执行jmx脚本,版本号对应的jmeter版本可在此地址查询 https://github.com/jmeter-maven-plugin/jmeter-maven-plugin/blob/master/CHANGELOG.md-->
<groupId>com.lazerycode.jmeter</groupId>
<artifactId>jmeter-maven-plugin</artifactId>
<version>2.2.0</version>
<configuration>
<!-- 设置jmeter生成结果文件格式-->
<resultsFileFormat>xml</resultsFileFormat>
<!-- 设置忽略失败是否停止运行-->
<ignoreResultFailures>true</ignoreResultFailures>
<!--设置结果是否有时间戳-->
<testResultsTimestamp>false</testResultsTimestamp>
<testFilesIncluded>
<!-- //指定运行的jmeter脚本 -->
<jMeterTestFile>youdao.jmx</jMeterTestFile>
</testFilesIncluded>
<!-- 指定jtl生成目录 -->
<resultsDirectory>${jmeter.result.jtl.dir}</resultsDirectory>
</configuration>
<executions>
<execution>
<id>jmeter-tests</id>
<phase>verify</phase>
<!--脚本所在的文件夹 -->
<goals>
<goal>jmeter</goal>
</goals>
</execution>
</executions>
</plugin>
<plugin>
<!--根据xsl模版把jtl文件转换成html-->
<groupId>org.codehaus.mojo</groupId>
<artifactId>xml-maven-plugin</artifactId>
<version>1.0-beta-3</version>
<executions>
<execution>
<phase>verify</phase>
<goals>
<goal>transform</goal>
</goals>
</execution>
</executions>
<configuration>
<transformationSets>
<transformationSet>
<dir>${jmeter.result.jtl.dir}</dir>
<stylesheet>src est esourcesjmeter.results.shanhe.me.xsl</stylesheet>
<outputDir>${jmeter.result.html.dir}</outputDir>
<!-- 把jtl格式转传承html -->
<fileMappers>
<fileMapper
implementation="org.codehaus.plexus.components.io.filemappers.FileExtensionMapper">
<targetExtension>html</targetExtension>
</fileMapper>
</fileMappers>
</transformationSet>
</transformationSets>
</configuration>
<!-- using XSLT 2.0 -->
<dependencies>
<dependency>
<groupId>net.sf.saxon</groupId>
<artifactId>saxon</artifactId>
<version>8.7</version>
</dependency>
</dependencies>
</plugin>
</plugins>
</build>
备注:这里遇到过几个问题
1、如果jmeter4.0版本是无法转换HTML报告的,使用jmeter-maven-plugin插件无法修改jmeter的属性文件,目前还没有找到解决办法,所以我使用的是3.3版本
2、如果提示xsl文件未找到,那就是找不到启动的脚本,需查看
这里如果运行的话,运行的是jmeter目录下的youdao.jmx文件

7、idea中运行maven,找到顶部的运行配置


点击+号找到maven后添加,在Command line:下输入verify保存即可

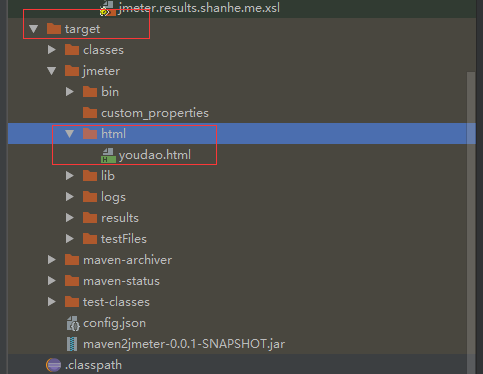
8、点击运行,会生成一个target文件,运行后的html结果在此目录下,此目录是可以自己在pom文件里添加的
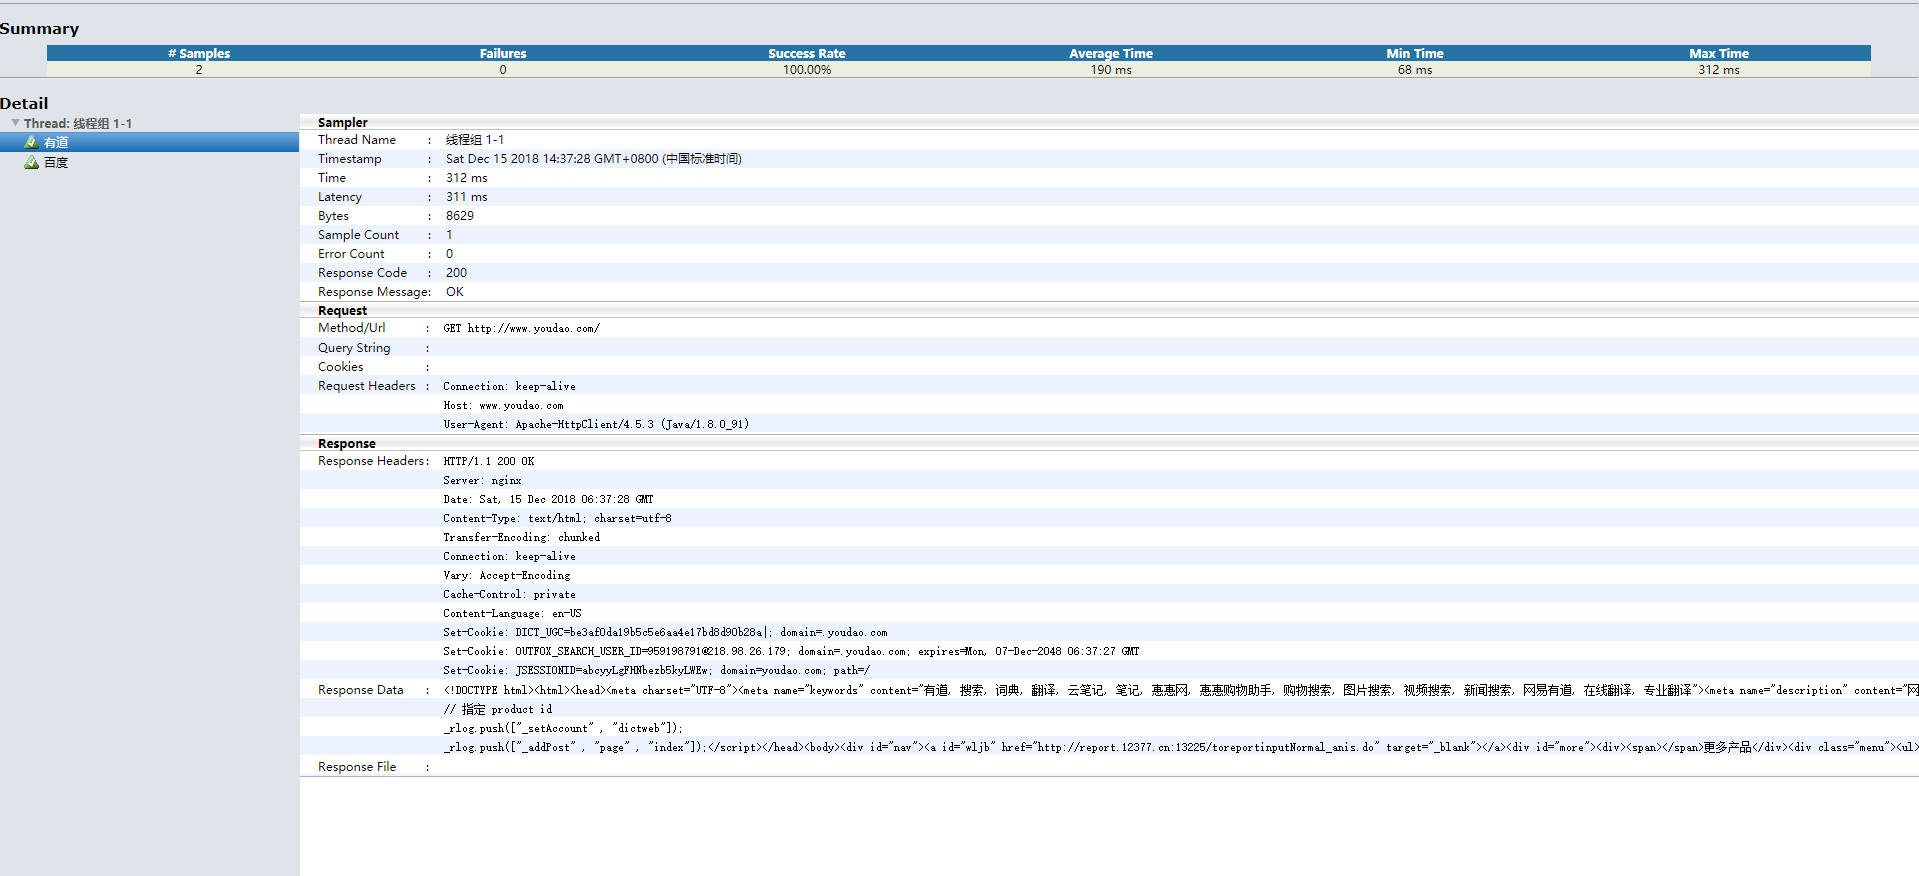
9、结果展示,此报告也可以二次重写
10、jenkins相关配置:
首先先安装jenkins,在全局工具中配置maven环境

设置maven项目路径

在jenkins中安装HTML Publisher插件,并使用
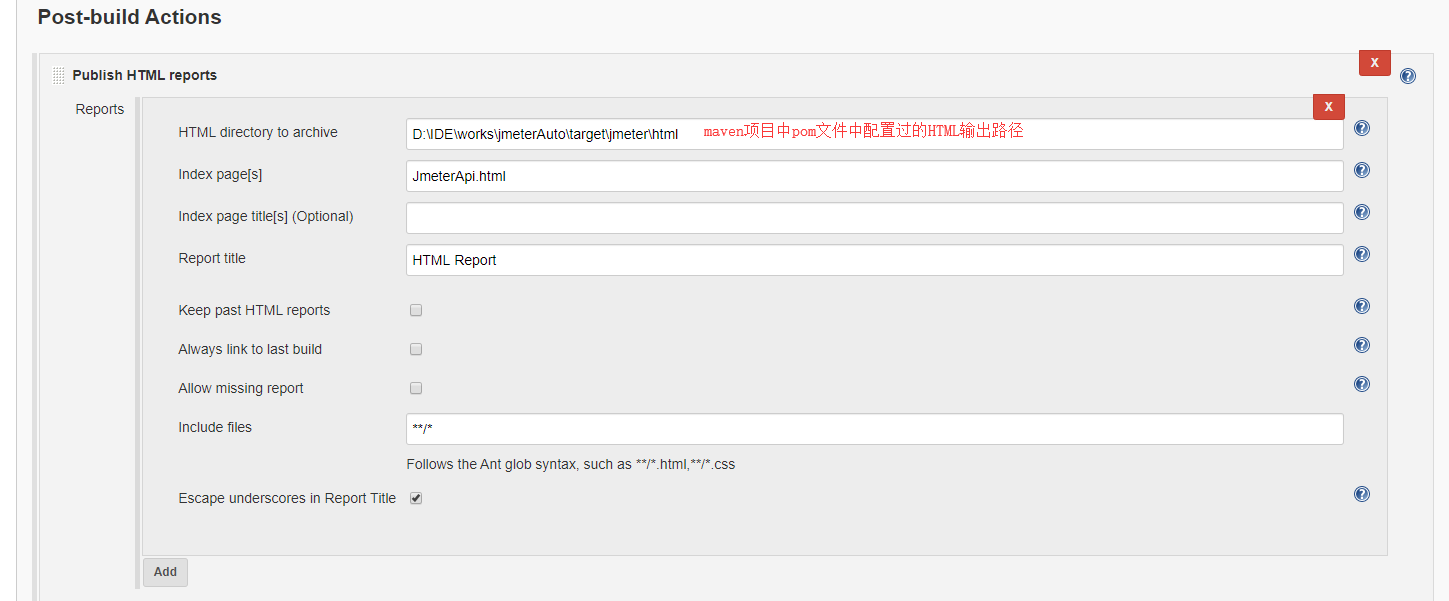
安装Email Extension插件,并在系统设置中配置发件人邮箱信息

接收邮件人以及邮件模版
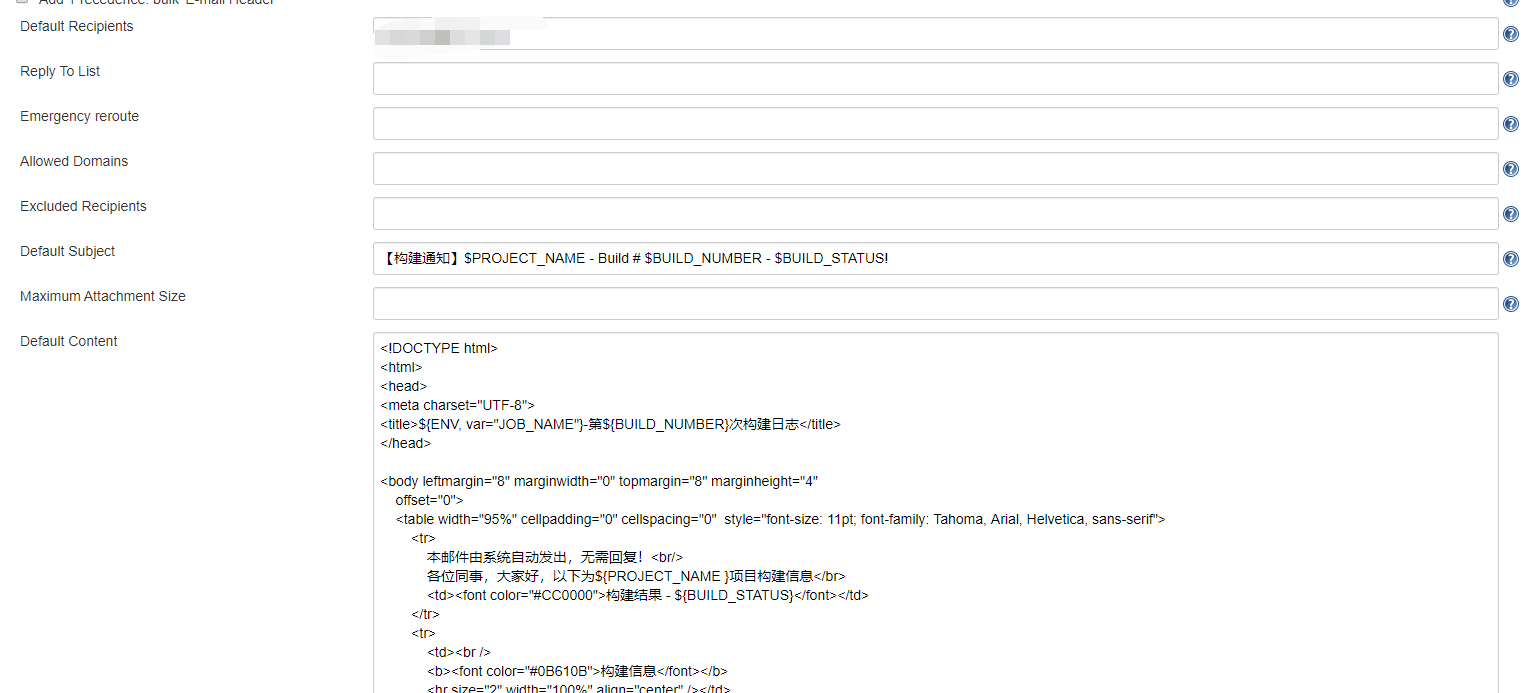
简单的模版配置:
<!DOCTYPE html>
<html>
<head>
<meta charset="UTF-8">
<title>${ENV, var="JOB_NAME"}-第${BUILD_NUMBER}次构建日志</title>
</head>
<body leftmargin="8" marginwidth="0" topmargin="8" marginheight="4"
offset="0">
<table width="95%" cellpadding="0" cellspacing="0" style="font-size: 11pt; font-family: Tahoma, Arial, Helvetica, sans-serif">
<tr>
本邮件由系统自动发出,无需回复!<br/>
各位同事,大家好,以下为${PROJECT_NAME }项目构建信息</br>
<td><font color="#CC0000">构建结果 - ${BUILD_STATUS}</font></td>
</tr>
<tr>
<td><br />
<b><font color="#0B610B">构建信息</font></b>
<hr size="2" width="100%" align="center" /></td>
</tr>
<tr>
<td>
<ul>
<li>项目名称 : ${PROJECT_NAME}</li>
<li>构建编号 : 第${BUILD_NUMBER}次构建</li>
<li>触发原因: ${CAUSE}</li>
<li>构建状态: ${BUILD_STATUS}</li>
<li>构建日志: <a href="${BUILD_URL}console">${BUILD_URL}console</a></li>
<li>构建 Url : <a href="${BUILD_URL}">${BUILD_URL}</a></li>
<li>工作目录 : <a href="${PROJECT_URL}ws">${PROJECT_URL}ws</a></li>
<li>项目 Url : <a href="${PROJECT_URL}">${PROJECT_URL}</a></li>
</ul>
<h4><font color="#0B610B">失败用例</font></h4>
<hr size="2" width="100%" />
$FAILED_TESTS<br/>
<h4><font color="#0B610B">最近提交(#$SVN_REVISION)</font></h4>
<hr size="2" width="100%" />
<ul>
${CHANGES_SINCE_LAST_SUCCESS, reverse=true, format="%c", changesFormat="<li>%d [%a] %m</li>"}
</ul>
详细提交: <a href="${PROJECT_URL}changes">${PROJECT_URL}changes</a><br/>
</td>
</tr>
</table>
</body>
</html>
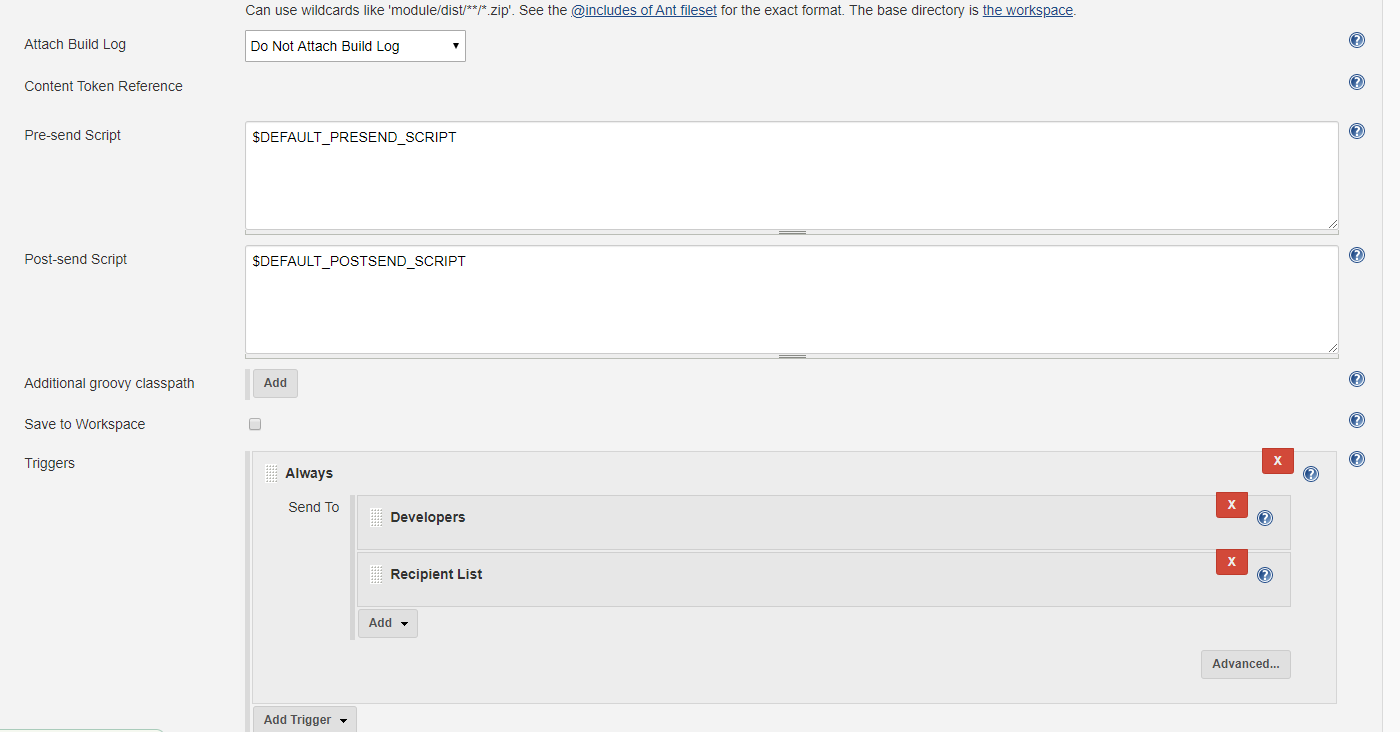
在回到刚才创建的项目中,在构建后添加一个邮件相关的配置,就可构建后发送邮件了

备注:
1、如果jmeter中使用了第三方插件,如果不在maven中配置的话,是会报错的,具体我的操作步骤是
(1)将jmeter的第三方插件的jar包上传到本地的maven里
(2)在项目的pom文件中调用即可
2、HTML报告在jenkins中显示不出来样式的问题
具体看这个文章吧https://testerhome.com/topics/9476,思路就是修改一个显示CSS样式的配置,永久修改的话是利用插件做成每次重启后打jenkins都会去跑那个设置CSS样式的项目,这样就不会因为重启的问题把CSS配置恢复了