案例环境:
| 系统类型 | IP地址 | 主机名 | 所需软件 |
| Centos 6.5 | 192.168.100.150 | www.linuxfan.cn | nginx-1.6.2.tar.gz |
一、Nginx隐藏版本号
方式一:修改配置文件
配置版本号隐藏
[root@www ~]# curl -I http://www.linuxfan.cn            ##选项为-i
HTTP/1.1 200 OK
Server: nginx/1.6.2
Date: Wed, 11 Jul 2018 16:43:05 GMT
Content-Type: text/html
Content-Length: 612
Last-Modified: Wed, 11 Jul 2018 16:40:55 GMT
Connection: keep-alive
ETag: "5b463317-264"
Accept-Ranges: bytes
[root@www ~]# vi  /usr/local/nginx/conf/nginx.conf          ##在http{}内添加即可
     20     server_tokens off;
:wq
[root@www ~]# nginx -t                   ##检查nginx配置文件语法
nginx: the configuration file /usr/local/nginx/conf/nginx.conf syntax is ok
nginx: configuration file /usr/local/nginx/conf/nginx.conf test is successful
[root@www ~]# killall  -9  nginx
[root@www ~]# nginx
[root@www ~]# curl -I http://www.linuxfan.cn
HTTP/1.1 200 OK
Server: nginx                           ##版本已经隐藏
Date: Fri, 08 Dec 2017 22:56:00 GMT
Content-Type: text/html
Content-Length: 612
Last-Modified: Fri, 08 Dec 2017 22:47:50 GMT
Connection: keep-alive
ETag: "5a2b1696-264"
Accept-Ranges: bytes
方式二:修改源码包
[root@localhost ~]# yum -y install pcre-devel zlib-devel popt-devel openssl-*
[root@localhost ~]# useradd -M -s /sbin/nologin nginx
[root@localhost ~]# tar zxf nginx-1.6.2.tar.gz -C /usr/src/
[root@localhost ~]# cd /usr/src/nginx-1.6.2/
[root@localhost nginx-1.6.2]# vim src/core/nginx.h           ##修改源代码实现隐藏版本
 13 #define NGINX_VERSION      "6.6.6"
 14 #define NGINX_VER          "linuxfan.cn/" NGINX_VERSION
 15
 16 #define NGINX_VAR          "linuxfan.cn"
:wq
[root@localhost nginx-1.6.2]# ./configure --prefix=/usr/local/nginx --user=nginx --group=nginx --with-file-aio --with-http_stub_status_module --with-http_gzip_static_module --with-http_flv_module --with-http_ssl_module --with-pcre && make && make install
[root@localhost nginx-1.6.2]# cd
[root@localhost ~]# ln -s /usr/local/nginx/sbin/nginx /usr/local/sbin/
[root@localhost ~]# nginx
[root@localhost ~]# curl  -I  http://www.linuxfan.cn
HTTP/1.1 200 OK
Server: linuxfan.cn/6.6.6
Date: Fri, 08 Dec 2017 23:06:20 GMT
Content-Type: text/html
Content-Length: 612
Last-Modified: Fri, 08 Dec 2017 23:05:45 GMT
Connection: keep-alive
ETag: "5a2b1ac9-264"
Accept-Ranges: bytes
二、网页缓存、连接超时、网页压缩传输
1.网页缓存:
作用:页面缓存一般针对静态网页进行设置,对动态网页不用设置缓存时间。方便客户端在日后进行相同内容的请求时直接返回,以避免重复请求,加快了访问速度
配置nginx缓存:
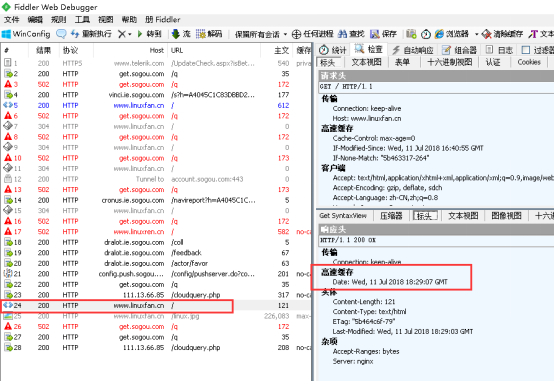
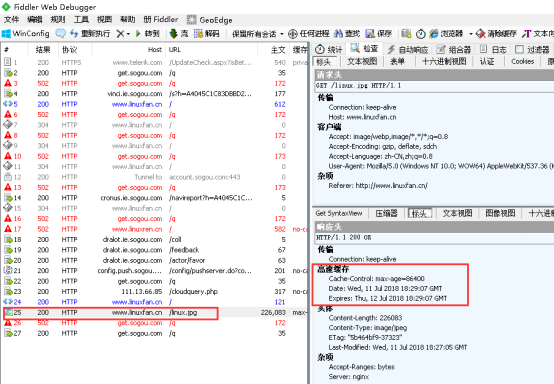
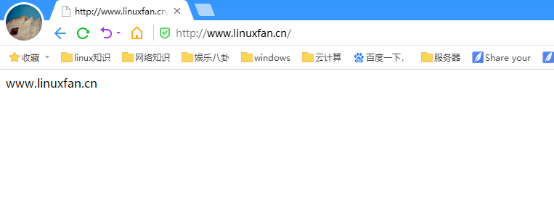
[root@www ~]# cat <<END >/usr/local/nginx/html/index.html
<html>
<head>
<title>www.linuxfan.cn</title>
</head>
<body>
www.linuxfan.cn
<img src="./linux.jpg"/>
</body>
</html>
END
[root@www ~]# ls /usr/local/nginx/html/
index.html  linux.jpg
[root@www ~]# vi /usr/local/nginx/conf/nginx.conf
     55         location  ~  .(gif|jpg|jpeg|png|bmp|ico)$   {
     56             expires 1d;
     57         }
     58         location  ~  .*.(js|css)$   {
     59             expires 1h;
     60         }
:wq
[root@www ~]# nginx -t
nginx: the configuration file /usr/local/nginx/conf/nginx.conf syntax is ok
nginx: configuration file /usr/local/nginx/conf/nginx.conf test is successful
[root@www ~]# killall  -9  nginx
[root@www ~]# nginx
客户端访问验证:

2.连接超时:
作用:在企业网站中,为了避免同一个客户长时间占用连接,造成服务器资源浪费,可以设置相应的连接超时参数,实现控制连接访问时间
配置项:
| keepalived_timeout | 设置连接保持超时时间,一般可只设置该参数,默认为 65 秒,可根据网站的情况设置,或者关闭,可在 http 段、 server 段、或者 location 段设置 |
| client_header_timeout | 指定等待客户端发送请求头的超时时间 |
| client_body_timeout | 设置请求体读取超时时间 |
注意: 若出现超时,会返回 408 报错
[root@www ~]# vi /usr/local/nginx/conf/nginx.conf
     32     keepalive_timeout  65;
     33     client_header_timeout 60;
     34     client_body_timeout 60;
:wq
[root@www ~]# killall  -9  nginx
[root@www ~]# nginx -t
nginx: the configuration file /usr/local/nginx/conf/nginx.conf syntax is ok
nginx: configuration file /usr/local/nginx/conf/nginx.conf test is successful
[root@www ~]# nginx
3.网页压缩传输:
作用:将服务端传输的网页文件压缩传输,使其更加快速、减少带宽的占用
配置:
[root@www ~]# vi /usr/local/nginx/conf/nginx.conf
     37     gzip on;              ##开启 gzip 压缩输出
     38     gzip_min_length 1k;             ##用于设置允许压缩的页面最小字节数
     39     gzip_buffers 4 16k;             ##表示申请4 个单位为 16k 的内存作为压缩结果流缓存,默认值是申请与原始数据大小相同的内存空间来储存 gzip 压缩结果
     40     gzip_http_version 1.1;            # #设置识别 http 协议版本,默认是 1.1
     41     gzip_comp_level 2;             ##gzip 压缩比, 1-9 等级
     42   gzip_types text/plain text/javascript application/x-javascript text/css text/xml application/xml application/xml+rss;         ##压缩类型,是就对哪些网页文档启用压缩功能
[root@www ~]# nginx -t
nginx: the configuration file /usr/local/nginx/conf/nginx.conf syntax is ok
nginx: configuration file /usr/local/nginx/conf/nginx.conf test is successful
[root@www ~]# killall nginx
[root@www ~]# nginx
三、访问控制、定义错误页面、自动索引、目录别名
1.访问控制:
作用:限制访问网站资源
配置项:
| auth_basic "Nginx Status"; | 认证提示文字 |
| auth_basic_user_file /usr/local/nginx/conf/user.conf; | 认证用户文件,可以使用apache提供的htpasswd命令来生成文件 |
| allow 192.168.100.1; | 允许客户端ip地址 |
| deny 192.168.100.0/24; | 拒绝的网段 |
配置:
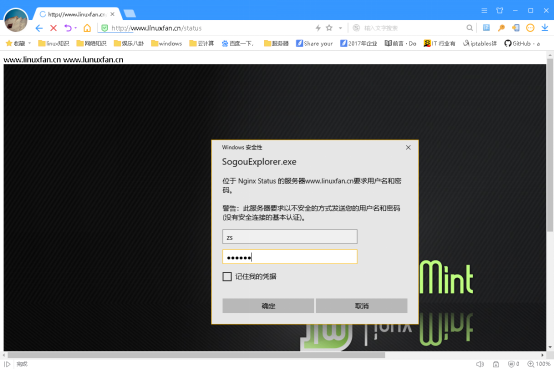
[root@www ~]# yum -y install httpd-tools
[root@www ~]# htpasswd -c /usr/local/nginx/conf/user.conf zs
[root@www ~]# cat /usr/local/nginx/conf/user.conf
zs:VJVdQdVHEIvZo
[root@www ~]# vi /usr/local/nginx/conf/nginx.conf
     70         location /status        {
     71                 stub_status on;
     72                 access_log off;
     73                 auth_basic "Nginx Status";
     74                 auth_basic_user_file /usr/local/nginx/conf/user.conf;
     75                 allow 192.168.100.1;
     76                 deny 192.168.100.0/24;
     77         }
[root@ www ~]# killall -9 nginx
[root@ www ~]# nginx
客户端访问验证:
2.定义错误页面:
作用:根据客户端的访问网站的返回状态码,为其指定到特定的错误页面
配置:
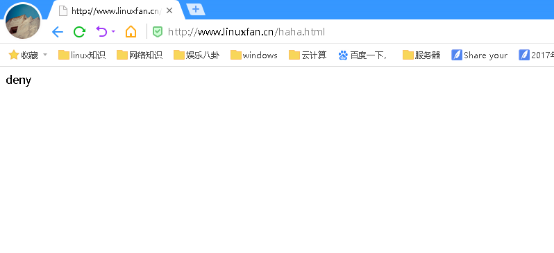
[root@ www ~]# vi /usr/local/nginx/conf/nginx.conf
     78         error_page 403 404 /404.html;
     79         location = /404.html {
     80         root html;
     81         }
[root@ www ~]# echo "deny" >>/usr/local/nginx/html/404.html
[root@ www ~]# killall -9 nginx
[root@www ~]# nginx
客户端访问验证:
3.自动索引:
作用:将网站转化为类似ftp的站点,作为共享文件的工具
配置:
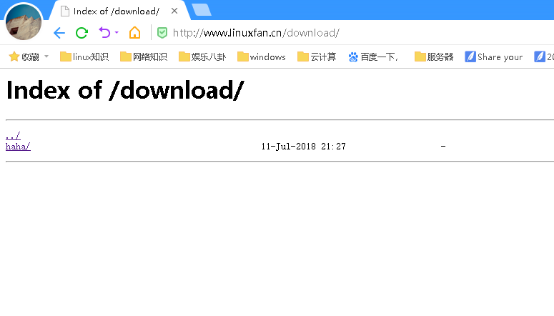
[root@www ~]# mkdir  -p  /usr/local/nginx/html/download/haha/
[root@www ~]# touch /usr/local/nginx/html/download/haha/{1..10}.txt
[root@www ~]# vi /usr/local/nginx/conf/nginx.conf
     82         location /download {
     83                 autoindex on;
     84         }
[root@www ~]# killall -9 nginx
[root@www ~]# nginx
客户端访问测试:
4.目录别名:
作用:将域名后缀的路径设置一个别名,通过多种方式访问
配置:
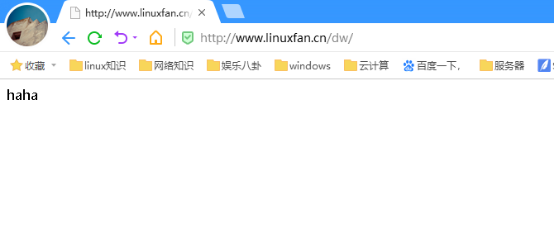
[root@www ~]# vi /usr/local/nginx/conf/nginx.conf
     85         location /dw {
     86                 alias /usr/local/nginx/html/haha/;
     87         }
[root@www ~]# mkdir /usr/local/nginx/html/haha
[root@www ~]# echo "haha" >/usr/local/nginx/html/haha/index.html
[root@www ~]# killall -9 nginx
[root@www ~]# nginx
客户端访问测试:

四、日志分割
方式:脚本方式
技术要点:
a.剪切日志后,使用kill -USR1发送信号重新生成日志文件,同时还不影响网站请求处理进程。
b.错误时通过echo和tee -a命令将错误显示的同时写入到日志文件/var/log/messages。
[root@www ~]# vi /root/cut_nginx_log.sh
#!/bin/bash
# by www.linuxfan.cn cut_nginx_log.sh
datetime=$(date -d "-1 day" "+%Y%m%d")
log_path="/usr/local/nginx/logs"
pid_path="/usr/local/nginx/logs/nginx.pid"
mkdir -p $log_path/backup
if [ -f $pid_path ]
then
mv $log_path/access.log $log_path/backup/access.log-$datetime
kill -USR1 $(cat $pid_path)  ##USR1通常被用来告知应用程序重载配置文件;
find $log_path/backup -mtime +30 | xargs rm -f
else
echo "Error,Nginx is not working!"  >> /var/log/messages
fi
:wq
[root@www ~]# chmod +x /root/cut_nginx_log.sh
[root@www ~]# echo "0 0 * * * /root/cut_nginx_log.sh" >>/var/spool/cron/root
[root@www ~]# crontab -l
0 0 * * * /root/cut_nginx_log.sh
[root@www ~]# sh -x /root/cut_nginx_log.sh
[root@www ~]# ls /usr/local/nginx/logs/
access.log  backup  error.log  nginx.pid
[root@www ~]# ls /usr/local/nginx/logs/backup/
access.log-20171208
五、防盗链
作用:防盗链就是防止别人盗用服务器中的图片、文件、视频等相关资源。防盗链:是通过location + rewrite实现的
应用举例:
location ~* .(wma|wmv|asf|mp3|mmf|zip|rar|jpg|gif|png|swf|flv)$ {
valid_referers none blocked *.linuxfan.cn linuxfan.cn;
if ($invalid_referer) {
rewrite ^/ http://www.linuxfan.cn/error.jpg;
第一行: wma|wmv|asf|mp3|mmf|zip|rar|jpg|gif|png|swf|flv 表示对这些后缀的文件进行防盗链。
第二行:valid_referers表示被允许的URL,none表示浏览器中 referer(Referer 是 header 的一部分,当浏览器向 web 服务器发送请求的时候,一般会带上 Referer,告诉服务器我是从哪个页面链接过来的,服务器基此可以获得一些信息用于处理) 为空的情况,就直接在浏览器访问图片,blocked referer 不为空的情况,但是值被代理或防火墙删除了,这些值不以http://或 https://开头,*.linuxfan是匹配URL的域名。
第三行:if{}判断如果是来自于invalid_referer(不被允许的URL)链接,即不是来自第二行指定的URL,就强制跳转到错误页面,当然直接返回 404 (return 404)也是可以的,也可以是图片。
注意:防盗链测试时,不要和expires配置一起使用。
案例环境:
| 系统类型 | IP地址 | 主机名 | 所需软件 |
| Centos 6.5 | 192.168.100.150 | www.linuxfan.cn | nginx-1.6.2.tar.gz |
| Centos 6.5 | 192.168.100.151 | www.linuxren.cn | nginx-1.6.2.tar.gz |
1.搭建并配置www.linuxfan.cn
[root@linuxfan ~]# yum -y install pcre-devel zlib-devel popt-devel openssl-devel openssl
[root@linuxfan ~]# useradd -M -s /sbin/nologin nginx
[root@linuxfan ~]# tar zxvf nginx-1.6.2.tar.gz -C /usr/src/
[root@linuxfan ~]# cd /usr/src/nginx-1.6.2/
[root@linuxfan nginx-1.6.2]#  ./configure --prefix=/usr/local/nginx --user=nginx --group=nginx --with-file-aio --with-http_stub_status_module --with-http_gzip_static_module --with-http_flv_module --with-http_ssl_module --with-pcre && make && make install
[root@linuxfan nginx-1.6.2]# cd
[root@linuxfan ~]# ln -s /usr/local/nginx/sbin/nginx /usr/local/sbin/
[root@linuxfan ~]# nginx
[root@linuxfan ~]# netstat -utlpn |grep 80
tcp        0      0 0.0.0.0:80                  0.0.0.0:*                   LISTEN      5618/nginx
[root@linuxfan ~]# vi /usr/local/nginx/html/index.html
<html>
<head>
<title>www.linuxfan.cn</title>
</head>
<body>
www.lunuxfan.cn
<img src="./linux.jpg"/>
</body>
</html>
[root@linuxfan ~]# ls /usr/local/nginx/html/
index.html  linux.jpg
客户端访问测试:

2.搭建并配置www.linuxren.cn
[root@linuxren ~]# yum -y install pcre-devel zlib-devel popt-devel openssl-devel openssl
[root@linuxren ~]# useradd -M -s /sbin/nologin nginx
[root@linuxren ~]# tar zxvf nginx-1.6.2.tar.gz -C /usr/src/
[root@linuxren ~]# cd /usr/src/nginx-1.6.2/
[root@linuxren nginx-1.6.2]#  ./configure --prefix=/usr/local/nginx --user=nginx --group=nginx --with-file-aio --with-http_stub_status_module --with-http_gzip_static_module --with-http_flv_module --with-http_ssl_module --with-pcre && make && make install
[root@linuxren nginx-1.6.2]# cd
[root@linuxren ~]# ln -s /usr/local/nginx/sbin/nginx /usr/local/sbin/
[root@linuxren ~]# nginx
[root@linuxren ~]# netstat -utlpn |grep 80
tcp        0      0 0.0.0.0:80                  0.0.0.0:*                   LISTEN      5618/nginx
[root@linuxren ~]# vi /usr/local/nginx/html/index.html
<html>
<head>
<title>www.linuxren.cn</title>
</head>
<body>
www.linuxren.cn
<img src="http://www.linuxfan.cn/linux.jpg"/>
</body>
</html>
客户端访问测试:

3.为linuxfan主机设置防盗链
[root@linuxfan ~]# vi /usr/local/nginx/conf/nginx.conf
      location ~* .(wma|wmv|asf|mp3|mmf|zip|rar|jpg|gif|png|swf|flv|jpeg) {
                  valid_referers nonde blocked  *.linuxfan.cn  linuxfan.cn;
                  if  ($invalid_referer){
                          rewrite  ^/  http://www.linuxfan.cn/error.jpg;
                      }
              }
##注意:不得存在以下配置:
     55         location  ~  .(gif|jpg|jpeg|png|bmp|ico)$   {
     56             expires 1d;
     57         }
[root@linuxfan ~]# killall -9 nginx
[root@ linuxfan ~]# nginx
4.清空浏览器的缓存,再次访问网站测试

六、虚拟主机
作用:在同一台服务器上部署多个网站,减免资源的占用
实现方式:
1.不同IP,不同域名,相同端口
2.相同IP,相同域名,不同端口
3.相同IP,相同端口,不同域名
案例环境:
| 系统类型 | IP地址 | 主机名 | 所需软件 |
| Centos 6.5 | 192.168.100.151 | www.linuxren.cn | nginx-1.6.2.tar.gz |
方式一:不同IP,不同域名,相同端口
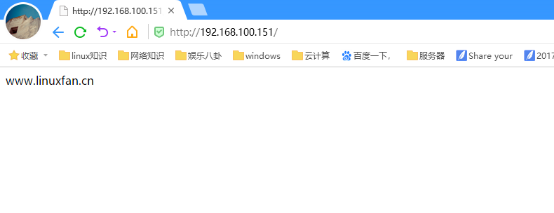
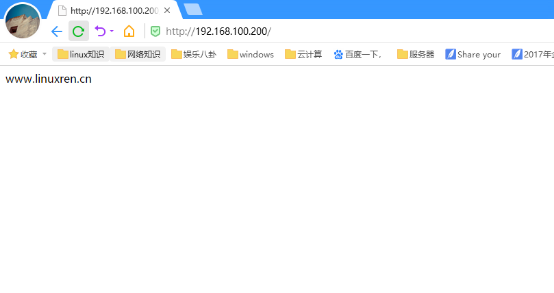
[root@linuxren ~]# ip a |grep 192.168.100
    inet 192.168.100.151/24 brd 192.168.100.255 scope global eth0
    inet 192.168.100.200/24 brd 192.168.100.255 scope global secondary eth0:0
[root@linuxren ~]# vi /usr/local/nginx/conf/nginx.conf
worker_processes 1;
        events {
           use epoll;
           worker_connections 4096;
                }
http {
        include mime.types;
        default_type application/octet-stream;
        log_format main '$remote_addr -$remote_user [$time_local] "$request"'
                        '$status $body_bytes_sent "$http_referer" '
                        '"$http_user_agent" "$http_x_forwarded_for" ';
        access_log logs/access.log main;
        sendfile  on;
        keepalive_timeout 65;
  server {
    listen 192.168.100.151:80;
    server_name www.linuxfan.cn;
    charset utf-8;
    access_log logs/linuxfan.access.log main;
    location / {
     root /var/www/linuxfan/;
     index index.html index.php;
       }
     }
  server {
    listen 192.168.100.200:80;
    server_name www.linuxren.cn;
    charset utf-8;
    access_log logs/linuxren.access.log main;
    location / {
     root  /var/www/linuxren/;
     index index.html index.php;
       }
     }
  }
[root@linuxren ~]# mkdir -p /var/www/linuxfan
[root@linuxren ~]# mkdir -p /var/www/linuxren
[root@linuxren ~]# echo "www.linuxfan.cn" >/var/www/linuxfan/index.html
[root@linuxren ~]# echo "www.linuxren.cn" >/var/www/linuxren/index.html
[root@linuxren ~]# killall -9 nginx
[root@linuxren ~]# nginx
客户端访问测试:
方式二:相同IP,不同域名,相同端口
[root@linuxren ~]# vi /usr/local/nginx/conf/nginx.conf
worker_processes 1;
        events {
           use epoll;
           worker_connections 4096;
                }
http {
        include mime.types;
        default_type application/octet-stream;
        log_format main '$remote_addr -$remote_user [$time_local] "$request"'
                        '$status $body_bytes_sent "$http_referer" '
                        '"$http_user_agent" "$http_x_forwarded_for" ';
        access_log logs/access.log main;
        sendfile  on;
        keepalive_timeout 65;
  server {
    listen 192.168.100.151:80;
    server_name www.linuxfan.cn;
    charset utf-8;
    access_log logs/linuxfan.access.log main;
    location / {
     root /var/www/linuxfan/;
     index index.html index.php;
       }
     }
  server {
    listen 192.168.100.151:80;
    server_name www.linuxren.cn;
    charset utf-8;
    access_log logs/linuxren.access.log main;
    location / {
     root  /var/www/linuxren/;
     index index.html index.php;
       }
     }
  }
[root@linuxren ~]# killall -9 nginx
[root@linuxren ~]# nginx
客户端访问测试:


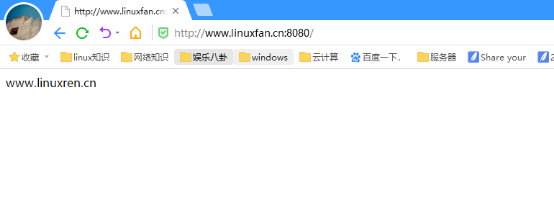
方式三:相同IP,不同端口,相同域名
[root@linuxren ~]# vi /usr/local/nginx/conf/nginx.conf
worker_processes 1;
        events {
           use epoll;
           worker_connections 4096;
                }
http {
        include mime.types;
        default_type application/octet-stream;
        log_format main '$remote_addr -$remote_user [$time_local] "$request"'
                        '$status $body_bytes_sent "$http_referer" '
                        '"$http_user_agent" "$http_x_forwarded_for" ';
        access_log logs/access.log main;
        sendfile  on;
        keepalive_timeout 65;
  server {
    listen 192.168.100.151:80;
    server_name www.linuxfan.cn;
    charset utf-8;
    access_log logs/linuxfan.access.log main;
    location / {
     root /var/www/linuxfan/;
     index index.html index.php;
       }
     }
  server {
    listen 192.168.100.151:8080;
    server_name www.linuxfan.cn;
    charset utf-8;
    access_log logs/linuxren.access.log main;
    location / {
     root  /var/www/linuxren/;
     index index.html index.php;
       }
     }
  }
[root@linuxren ~]# killall -9 nginx
[root@linuxren ~]# nginx
客户端访问测试:
七、平滑升级
原理:
1.Nginx 的主进程( master process)启动后完成配置加载和端口绑定等动作, fork 出指定数量的工作进程( worker process),这些子进程会持有监听端口的文件描述符( fd),并通过在该描述符上添加监听事件来接受连接( accept)
2.Nginx 主进程在启动完成后会进入等待状态,负责响应各类系统消息,如 SIGCHLD、 SIGHUP、SIGUSR2 等
3.主进程支持的信号:
TERM, INT: 立刻退出; QUIT: 等待工作进程结束后再退出
KILL: 强制终止进程; HUP: 重新加载配置文件,使用新的配置启动工作进程,并逐步关闭旧进程。
USR1: 重新打开日志文件; USR2: 启动新的主进程,实现热升级
WINCH: 逐步关闭工作进程及工作进程支持的信号;
过程:
1.查看旧版 nginx 的编译参数;
2.编译新版本 Nginx 源码包,安装路径需与旧版一致,注意:不要执行 make install;
3.备份二进制文件,用新版本的替换;
4.确保配置文件无报错;
5.发送 USR2 信号:向主进程( master)发送 USR2 信号, Nginx 会启动一个新版本的 master 进程和对应工作进程,和旧版一起处理请求;
6.发送 WINCH 信号:向旧的 Nginx 主进程( master)发送 WINCH 信号,它会逐步关闭自己的工作进程(主进程不退出),这时所有请求都会由新版 Nginx 处理;
7.发送 QUIT 信号:升级完毕,可向旧的 Nginx 主进程( master)发送( QUIT、 TERM、或者 KILL)信号,使旧的主进程退出;
8.验证 nginx 版本号,并访问测试;
配置:
准备软件包并查看旧版安装选项
[root@linuxren ~]# ls nginx-1.*
nginx-1.12.0.tar.gz  nginx-1.6.2.tar.gz
[root@linuxren ~]# nginx -V
nginx version: nginx/1.6.2
built by gcc 4.4.7 20120313 (Red Hat 4.4.7-4) (GCC)
TLS SNI support enabled
configure arguments: --prefix=/usr/local/nginx --user=nginx --group=nginx --with-file-aio --with-http_stub_status_module --with-http_gzip_static_module --with-http_flv_module --with-http_ssl_module --with-pcre
安装新版本Nginx
[root@linuxren ~]# tar zxvf nginx-1.12.0.tar.gz -C /usr/src/
[root@linuxren ~]# cd /usr/src/nginx-1.12.0/
[root@linuxren nginx-1.12.0]# ./configure --prefix=/usr/local/nginx --user=nginx --group=nginx --with-file-aio --with-http_stub_status_module --with-http_gzip_static_module --with-http_flv_module --with-http_ssl_module --with-pcre && make        ##不能加make install,如若添加,则覆盖了
[root@linuxren nginx-1.12.0]# mv /usr/local/nginx/sbin/nginx   /usr/local/nginx/sbin/nginx.old
[root@linuxren nginx-1.12.0]# cp objs/nginx /usr/local/nginx/sbin/
[root@linuxren nginx-1.12.0]# nginx -t
nginx: the configuration file /usr/local/nginx/conf/nginx.conf syntax is ok
nginx: configuration file /usr/local/nginx/conf/nginx.conf test is successful
使用信号实现热升级
[root@linuxren ~]# ps aux |grep nginx  |grep -v grep
root       6059(老版本主进程)  0.0  0.2  45000  1032 ?        Ss   13:03   0:00 nginx: master process nginx
nginx      6060  0.0  0.3  45432  1624 ?        S    13:03   0:00 nginx: worker process
[root@linuxren ~]# kill -USR2 6059                   ##发送 USR2 信号:向主进程( master)发送 USR2 信号, Nginx 会启动一个新版本的 master 进程和对应工作进程,和旧版一起处理请求。
[root@linuxren ~]# kill -WINCH $(cat /usr/local/nginx/logs/nginx.pid)            ##关闭老版本的worker进程
[root@linuxren ~]# kill -QUIT $(cat /usr/local/nginx/logs/nginx.pid)            ##关闭老版本的master进程
[root@linuxren ~]# /usr/local/nginx/sbin/nginx                    ##重新加载新版本的命令
[root@linuxren ~]# ps aux |grep nginx |grep -v grep
root      3864  0.0  0.2  45192  1188 ?        Ss   03:24   0:00 nginx: master process /usr/local/nginx/sbin/nginx
nginx     3865  0.0  0.6  46904  3052 ?        S    03:24   0:00 nginx: worker process
[root@linuxren ~]# nginx -V
nginx version: nginx/1.12.0
built by gcc 4.4.7 20120313 (Red Hat 4.4.7-4) (GCC)
built with OpenSSL 1.0.1e-fips 11 Feb 2013
TLS SNI support enabled
configure arguments: --prefix=/usr/local/nginx --user=nginx --group=nginx --with-file-aio --with-http_stub_status_module --with-http_gzip_static_module --with-http_flv_module --with-http_ssl_module --with-pcre
八、UA实现手机电脑页面分离、拒绝http客户端测试、拒绝恶意请求
作用:网站适配PC和手机设备,首先要能做出准确的判断。HTTP请求的Header中的User-Agent可以区分客户端的浏览器类型,可以通过User-Agent来判断客户端的设备
配置:
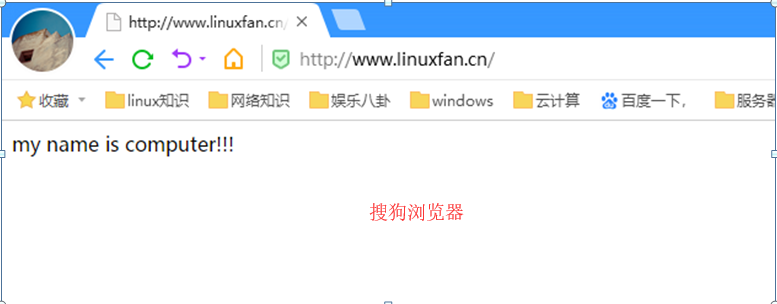
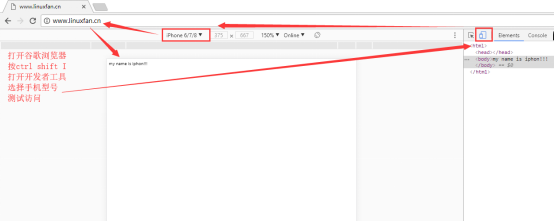
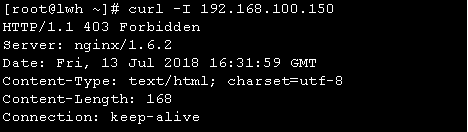
[root@linuxfan ~]# mkdir -p /var/www/shouji
[root@linuxfan ~]# mkdir -p /var/www/diannao
[root@linuxfan ~]# cat <<END >>/var/www/shouji/index.html
my name is iphone!!!
END
[root@linuxfan ~]# cat <<END >>/var/www/diannao/index.html
my name is computer!!!
END
[root@linuxfan ~]# vi /usr/local/nginx/conf/nginx.conf
worker_processes 1;
        events {
           use epoll;
           worker_connections 4096;
                }
http {
        include mime.types;
        default_type application/octet-stream;
        log_format main '$remote_addr -$remote_user [$time_local] "$request"'
                        '$status $body_bytes_sent "$http_referer" '
                        '"$http_user_agent" "$http_x_forwarded_for" ';
        access_log logs/access.log main;
        sendfile  on;
        keepalive_timeout 65;
  server {
    listen 192.168.100.150:80;
    server_name www.linuxfan.cn;
    charset utf-8;
    access_log logs/linuxfan.access.log main;

#禁止Scrapy等工具的抓取
if ($http_user_agent ~* (Scrapy|Curl|HttpClient)) {
  return 403;
}
#禁止指定UA及UA为空的访问
if ($http_user_agent ~ "FeedDemon|JikeSpider|Indy Library|Alexa Toolbar|AskTbFXTV|AhrefsBot|CrawlDaddy|CoolpadWebkit|Java|Feedly|UniversalFeedParser|ApacheBench|Microsoft URL Control|Swiftbot|ZmEu|oBot|jaunty|Python-urllib|lightDeckReports Bot|YYSpider|DigExt|YisouSpider|HttpClient|MJ12bot|heritrix|EasouSpider|LinkpadBot|Ezooms|^$" )
{
  return 403;
}
#禁止非GET|HEAD|POST方式的抓取
if ($request_method !~ ^(GET|HEAD|POST)$) {
  return 403;
}

##配置UA页面移动端和PC端页面分离;
    set $mobile_rewrite do_not_perform;

if ($http_user_agent ~* "(android|bbd+|meego).+mobile|avantgo|bada/|blackberry|blazer|compal|elaine|fennec|hiptop|iemobile|ip(hone|od)|iris|kindle|lge|maemo|midp|mmp|mobile.+firefox|netfront|operam(ob|in)i|palm(os)?|phone|p(ixi|re)/|plucker|pocket|psp|series(4|6)0|symbian|treo|up.(browser|link)|vodafone|wap|windows ce|xda|xiino") {
  set $mobile_rewrite perform;
}

if ($http_user_agent ~* "^(1207|6310|6590|3gso|4thp|50[1-6]i|770s|802s|a wa|abac|ac(er|oo|s-)|ai(ko|rn)|al(av|ca|co)|amoi|an(ex|ny|yw)|aptu|ar(ch|go)|as(te|us)|attw|au(di|-m|r|s )|avan|be(ck|ll|nq)|bi(lb|rd)|bl(ac|az)|br(e|v)w|bumb|bw-(n|u)|c55/|capi|ccwa|cdm-|cell|chtm|cldc|cmd-|co(mp|nd)|craw|da(it|ll|ng)|dbte|dc-s|devi|dica|dmob|do(c|p)o|ds(12|-d)|el(49|ai)|em(l2|ul)|er(ic|k0)|esl8|ez([4-7]0|os|wa|ze)|fetc|fly(-|_)|g1 u|g560|gene|gf-5|g-mo|go(.w|od)|gr(ad|un)|haie|hcit|hd-(m|p|t)|hei-|hi(pt|ta)|hp( i|ip)|hs-c|ht(c(-||_|a|g|p|s|t)|tp)|hu(aw|tc)|i-(20|go|ma)|i230|iac( |-|/)|ibro|idea|ig01|ikom|im1k|inno|ipaq|iris|ja(t|v)a|jbro|jemu|jigs|kddi|keji|kgt(|/)|klon|kpt|kwc-|kyo(c|k)|le(no|xi)|lg( g|/(k|l|u)|50|54|-[a-w])|libw|lynx|m1-w|m3ga|m50/|ma(te|ui|xo)|mc(01|21|ca)|m-cr|me(rc|ri)|mi(o8|oa|ts)|mmef|mo(01|02|bi|de|do|t(-||o|v)|zz)|mt(50|p1|v )|mwbp|mywa|n10[0-2]|n20[2-3]|n30(0|2)|n50(0|2|5)|n7(0(0|1)|10)|ne((c|m)-|on|tf|wf|wg|wt)|nok(6|i)|nzph|o2im|op(ti|wv)|oran|owg1|p800|pan(a|d|t)|pdxg|pg(13|-([1-8]|c))|phil|pire|pl(ay|uc)|pn-2|po(ck|rt|se)|prox|psio|pt-g|qa-a|qc(07|12|21|32|60|-[2-7]|i-)|qtek|r380|r600|raks|rim9|ro(ve|zo)|s55/|sa(ge|ma|mm|ms|ny|va)|sc(01|h-|oo|p-)|sdk/|se(c(-|0|1)|47|mc|nd|ri)|sgh-|shar|sie(-|m)|sk-0|sl(45|id)|sm(al|ar|b3|it|t5)|so(ft|ny)|sp(01|h-|v-|v )|sy(01|mb)|t2(18|50)|t6(00|10|18)|ta(gt|lk)|tcl-|tdg-|tel(i|m)|tim-|t-mo|to(pl|sh)|ts(70|m-|m3|m5)|tx-9|up(.b|g1|si)|utst|v400|v750|veri|vi(rg|te)|vk(40|5[0-3]|-v)|vm40|voda|vulc|vx(52|53|60|61|70|80|81|83|85|98)|w3c(-|)|webc|whit|wi(g|nc|nw)|wmlb|wonu|x700|yas-|your|zeto|zte-)") {
  set $mobile_rewrite perform;
}
    location / {
     root /var/www/diannao/;
     index index.html index.php;
        if ($mobile_rewrite = perform) {
                root /var/www/shouji/;
        }
     }
  }
}
[root@linuxfan ~]# killall -9 nginx
[root@linuxfan ~]# nginx
客户端访问测试:
九、加载第三方模块
第三方模块下载地址:https://www.nginx.com/resources/wiki/modules/
模块一:echo-nginx-module-0.60.tar.gz
[root@linuxfan ~]# ls
echo-nginx-module-0.60.tar.gz  nginx-1.6.2.tar.gz
[root@linuxfan ~]# tar zxvf echo-nginx-module-0.60.tar.gz -C /usr/src/
[root@linuxfan ~]# tar zxvf nginx-1.6.2.tar.gz -C /usr/src/
[root@linuxfan ~]# cd /usr/src/nginx-1.6.2/
[root@linuxfan nginx-1.6.2# ./configure --prefix=/usr/local/nginx --user=nginx --group=nginx --with-file-aio --with-http_stub_status_module --with-http_gzip_static_module --with-http_flv_module --with-http_ssl_module --with-pcre --add-module=/usr/src/echo-nginx-module-0.60/  &&make &&make install
[root@linuxfan nginx-1.6.2# cd
[root@linuxfan ~]# ln -s /usr/local/nginx/sbin/* /usr/local/sbin/
[root@linuxfan ~] # vi /usr/local/nginx/conf/nginx.conf
worker_processes 1;
        events {
           use epoll;
           worker_connections 4096;
                }
http {
        include mime.types;
        default_type application/octet-stream;
        log_format main '$remote_addr -$remote_user [$time_local] "$request"'
                        '$status $body_bytes_sent "$http_referer" '
                        '"$http_user_agent" "$http_x_forwarded_for" ';
        access_log logs/access.log main;
        sendfile  on;
        keepalive_timeout 65;
  server {
    listen 192.168.100.150:80;
    server_name www.linuxfan.cn;
    charset utf-8;
    access_log logs/linuxfan.access.log main;

    location / {
        echo "nginx";
  }
 }
}
[root@linuxfan ~]# killall -9 nginx
[root@linuxfan ~]# nginx
[root@linuxfan ~]# curl 192.168.100.150
nginx
[root@linuxfan ~]# curl -I 192.168.100.150
HTTP/1.1 200 OK
Server: nginx/1.6.2
Date: Fri, 13 Jul 2018 18:06:42 GMT
Content-Type: application/octet-stream
Connection: keep-alive