很久之前学习过一段时间的OpenCV,当时没有做什么笔记,但是代码都还在,这里把它贴出来做个记录。
代码放在码云上,地址在这里https://gitee.com/solym/OpenCVTest/tree/master/OpenCVTest
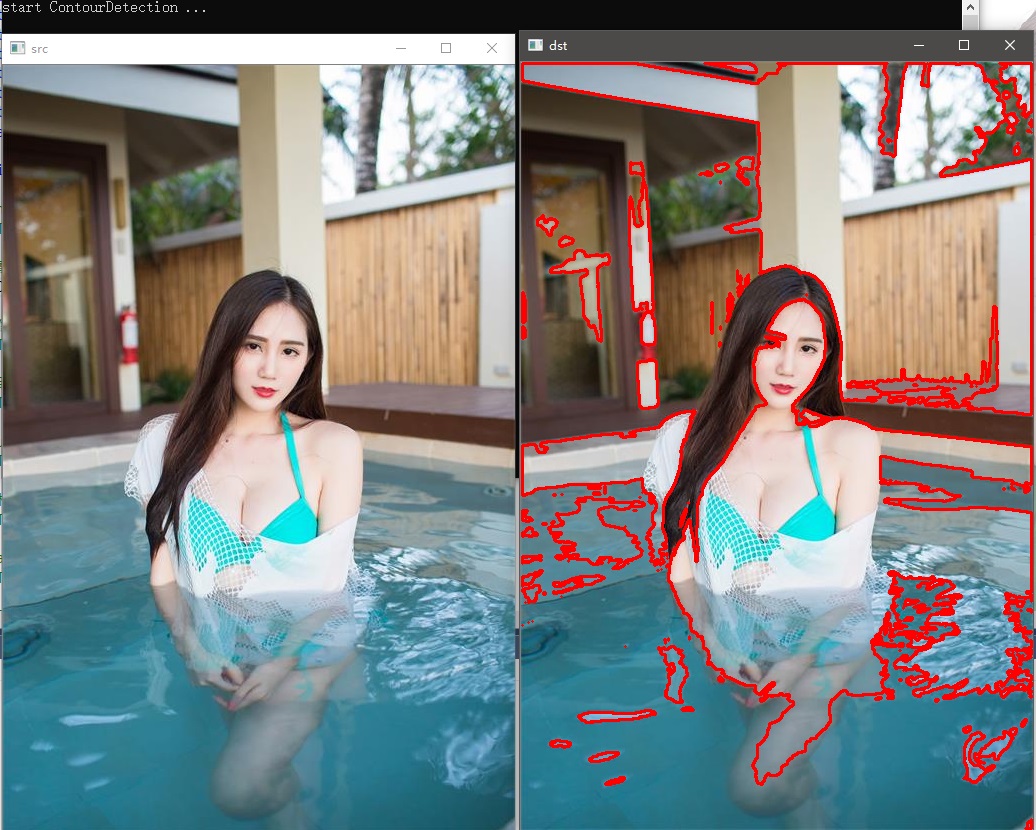
效果
代码
#include <opencv2/core/core.hpp>
#include <opencv2/highgui/highgui.hpp>
#include <opencv2/imgproc/imgproc.hpp>	// cvtColor

int contours_test();

int ContourDetection()
{

	//return contours_test();
	cv::Mat	image;	// 加载原始图片
	cv::Mat	gary;	// 存储灰度图像
	cv::Mat	dstimg;	// 绘制轮廓目标图片

	// 创建两个窗口
	cv::namedWindow("src");	// 原始图片显示窗口
	cv::namedWindow("dst");	// 轮廓图片显示窗口

	// 载入原始图片
	image = cv::imread("../Image/sisy.jpg");
	if (image.empty()) {
		puts("图片加载失败");
		return -1;
	}
	cv::imshow("src", image);	// 显示原始图片

	gary.create(image.size(), CV_8U);	// 申请灰度图存储空间
	cv::cvtColor(image, gary, CV_BGR2GRAY);	// 转换原始图为灰度图
	cv::threshold(gary, gary, 128, 255, cv::THRESH_BINARY);	// 转换为二值图

	std::vector<std::vector<cv::Point> >	contours;	// 检测的轮廓数组
	std::vector<cv::Vec4i>					hierarchy;	//
	int	mode = CV_RETR_EXTERNAL;	// 轮廓检测模式
	//mode表示轮廓的检索模式
	//	CV_RETR_EXTERNAL表示只检测外轮廓
	//	CV_RETR_LIST检测的轮廓不建立等级关系
	//	CV_RETR_CCOMP建立两个等级的轮廓,上面的一层为外边界,里面的一层为内孔的边界信息。如果内孔内还有一个连通物体,这个物体的边界也在顶层。
	//	CV_RETR_TREE建立一个等级树结构的轮廓。具体参考contours.c这个demo

	int method = CV_CHAIN_APPROX_SIMPLE;
	//method为轮廓的近似办法
	//	CV_CHAIN_APPROX_NONE存储所有的轮廓点,相邻的两个点的像素位置差不超过1,即max(abs(x1 - x2),abs(y2 - y1)) == 1
	//	CV_CHAIN_APPROX_SIMPLE压缩水平方向,垂直方向,对角线方向的元素,只保留该方向的终点坐标,例如一个矩形轮廓只需4个点来保存轮廓信息
	//	CV_CHAIN_APPROX_TC89_L1,CV_CHAIN_APPROX_TC89_KCOS使用teh-Chinl chain 近似算法


	// 查找contour
	cv::findContours(gary/*输入图像(必须为一个2值单通道图像)*/,
		contours/*, hierarchy*/, mode, method);


	// 为轮廓显示图片申请空间
	dstimg = cv::Mat(image.size(), CV_8UC3); // 3通道图像,以便彩色显示
	image.copyTo(dstimg);					 // 拷贝源图像

	// 将轮廓画出
	cv::drawContours(dstimg/*目标图像*/,
		contours/*输入的轮廓组*/,
		-1 /*指明画第几个轮廓(负值表示全部轮廓)*/,
		cv::Scalar(0,0,255)/*轮廓颜色BGR(此处以红色绘制)*/,
		2 /*轮廓线宽*/,
		8 /*轮廓线型*/,
		cv::noArray()/*轮廓结构信息*/);


	// 显示轮廓图片
	cv::imshow("dst", dstimg);

	// 等待按键
	cv::waitKey();
}

int contours_test()
{
	std::string image_name = "../Image/sisy.jpg";

	cv::Mat src = cv::imread(image_name);
	cv::imshow("src", src);

	cv::Mat gray(src.size(), CV_8U);
	cv::cvtColor(src, gray, CV_BGR2GRAY);//转换成灰度图

	cv::imshow("gray", gray);

	cv::threshold(gray, gray, 128, 255, cv::THRESH_BINARY);//转换成2值图像
	cv::imshow("binary", gray);

	/////////////////////////////////////////////////////////////////////
	std::vector<std::vector<cv::Point>> contours;
	cv::findContours(gray,
		contours, // a vector of contours
		CV_RETR_EXTERNAL, // retrieve the external contours
		CV_CHAIN_APPROX_NONE); // retrieve all pixels of each contours

							   // Print contours' length
	// std::cout << "Contours: " << contours.size() << std::endl;
	std::vector<std::vector<cv::Point>>::const_iterator itContours = contours.begin();
	for (; itContours != contours.end(); ++itContours)
	{

		//std::cout << "Size: " << itContours->size() << std::endl;
	}

	// draw black contours on white image
	cv::Mat result(gray.size(), CV_8U, cv::Scalar(255));
	cv::drawContours(result, contours,
		-1, // draw all contours
		cv::Scalar(0), // in black
		2); // with a thickness of 2

	cv::namedWindow("Contours");
	cv::imshow("Contours", result);


	// draw contours on the original image
	cv::Mat original = cv::imread(image_name);
	cv::drawContours(original, contours,
		-1, // draw all contours
		cv::Scalar(255, 255, 255), // in white
		-1); // with a thickness of 2

	cv::namedWindow("Contours on Animals");
	cv::imshow("Contours on Animals", original);

	// Let's now draw black contours on white image
	result.setTo(cv::Scalar(255));
	cv::drawContours(result, contours,
		-1, // draw all contours
		cv::Scalar(0), // in black
		-1); // with a thickness of 1
			 //image= cv::imread("test.png",0);


	cv::waitKey(0);

	return 0;
}