版本
NX9+VS2012
1.怎么往VS软件里添加VC,C#,VB向导模板
先到NX安装目录下UGOPEN文件夹里找到这三个文件夹
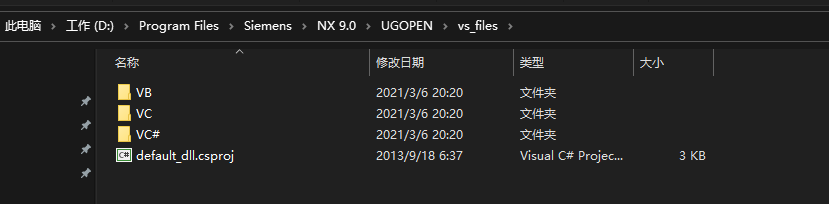
拷贝到VS的安装目录下

这里有几个注意事项,VS2017,VS2019以下的版本这样操作没问题,
VS2017和VS2019微软调整了VC文件夹的目录,换位置了,所以你加过去发现打开VS里面没有C++的向导模板。
去你的VS2017或者VS2019安装目录下找到Common7IDE文件夹目录,把VC向导模板放进去。
下面我们新建项目,使用NX向导模板

两个向导模板使用哪个都可以的,
向导模板是为我们提供的一个现成的NX二次开发模板框架,有C++模板,C模板,C#模板,VB模板,开发环境都是自动配置好的,可直接调用UFUN和NXOPEN,省去了我们自己配置开发环境的时间,
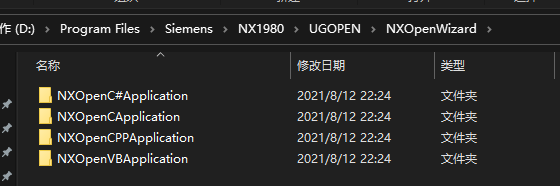
我还发现从NX1980开始,UGOPEN目录里还加入了开发向导的差劲,不需要手动在考文件了,直接双击插件,就可直接安装开发向导。
插件就是和这种VS外挂插件一样
放一张我之前安装NX1980的时候截的图,现在已经卸载掉了。

一组新旧对比图片

在放一张西门子官网的介绍说明
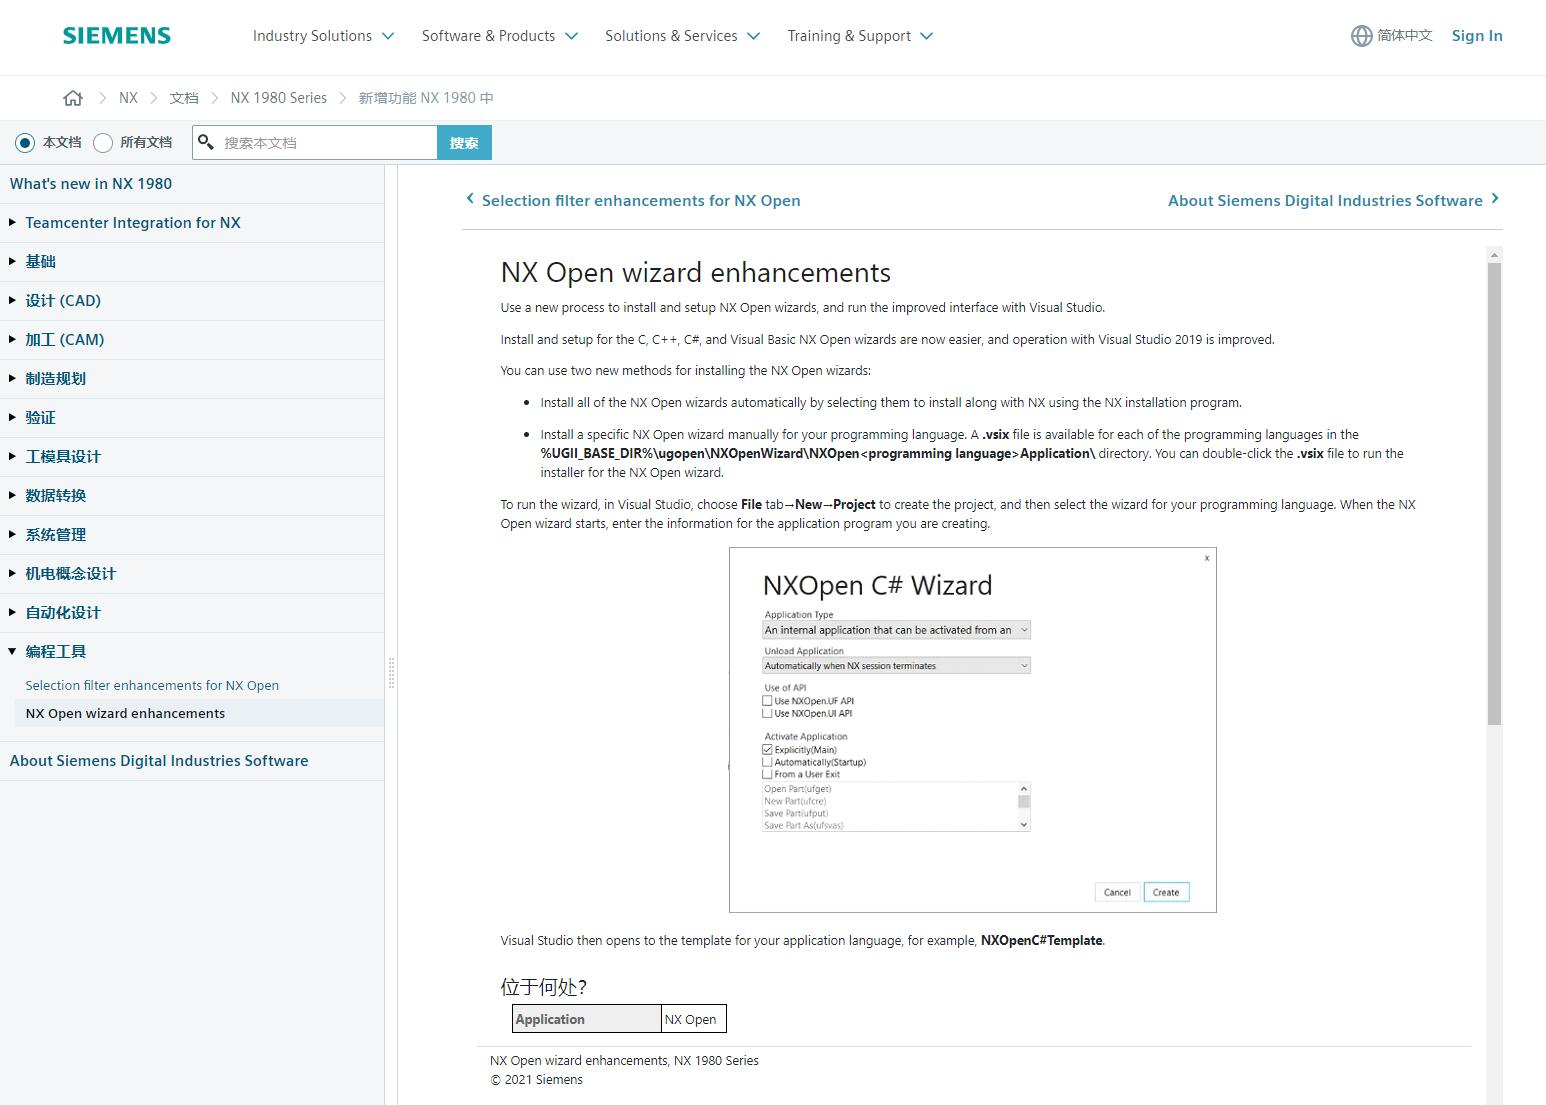
有点类似微软基础类库MFC,除了是一个C++类库外,还提供一个应用程序框架。给开发者使用。
这里有几个要注意的事项,在NX8.5和NX9中,不安装大补丁小布丁,默认应该是没有NXOPENCPP向导模板的,
一定要安装补丁才会有NXOPENCPP的向导模板,NX8.5以下的版本,我就不知道有没有NXOPENCPP模板了,没用过。
不过没用的话,自己手动也能改个出来的,向导模板里的内容也可以自己更改。https://www.cnblogs.com/nxopen2018/p/15221264.html
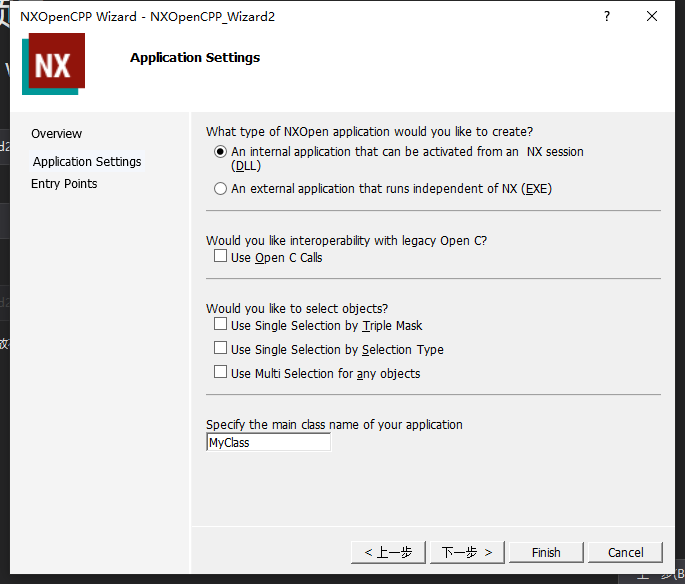
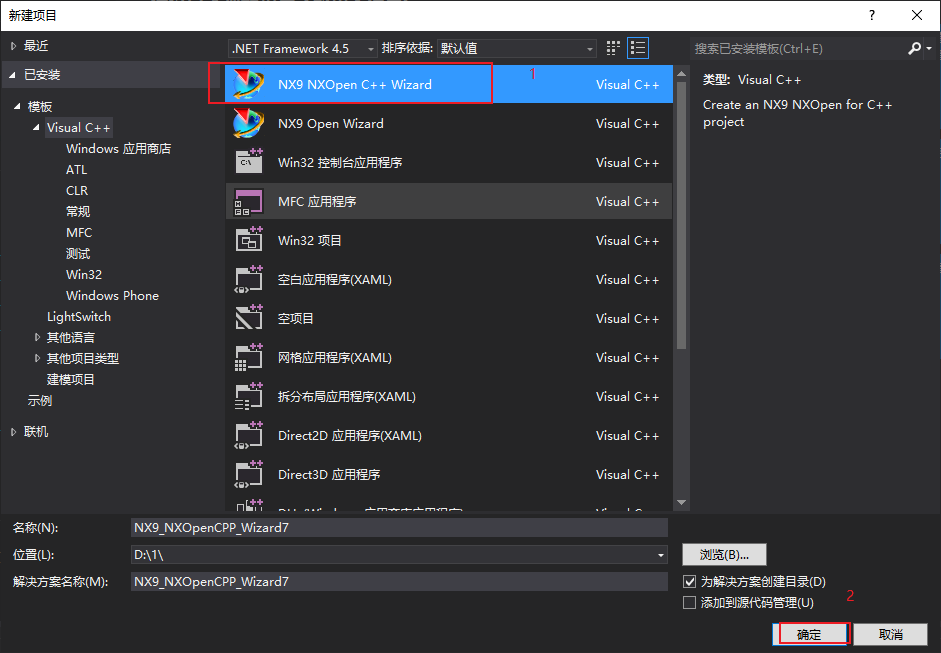
回到正题,我们选择向导模板,进入项目
先选NXOPENCPP项目模板,这是一个用C++类面向对象方式的一个模板

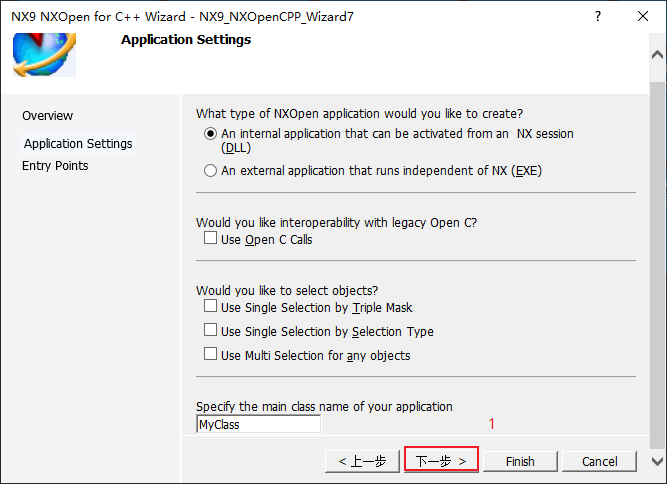
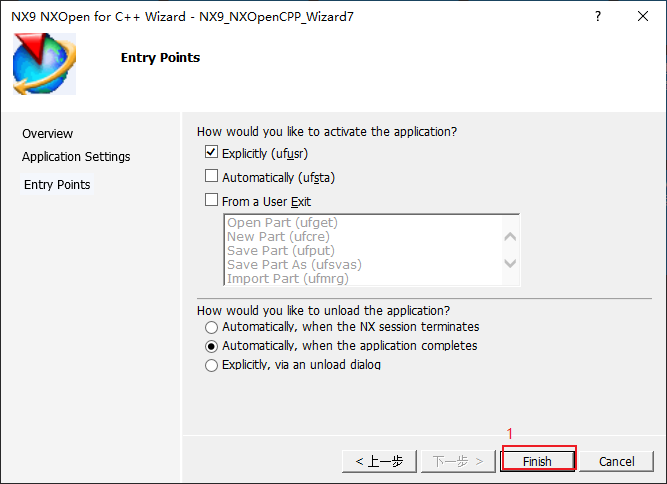
默认下一步
编译成功,这就是一个C++的模板框架
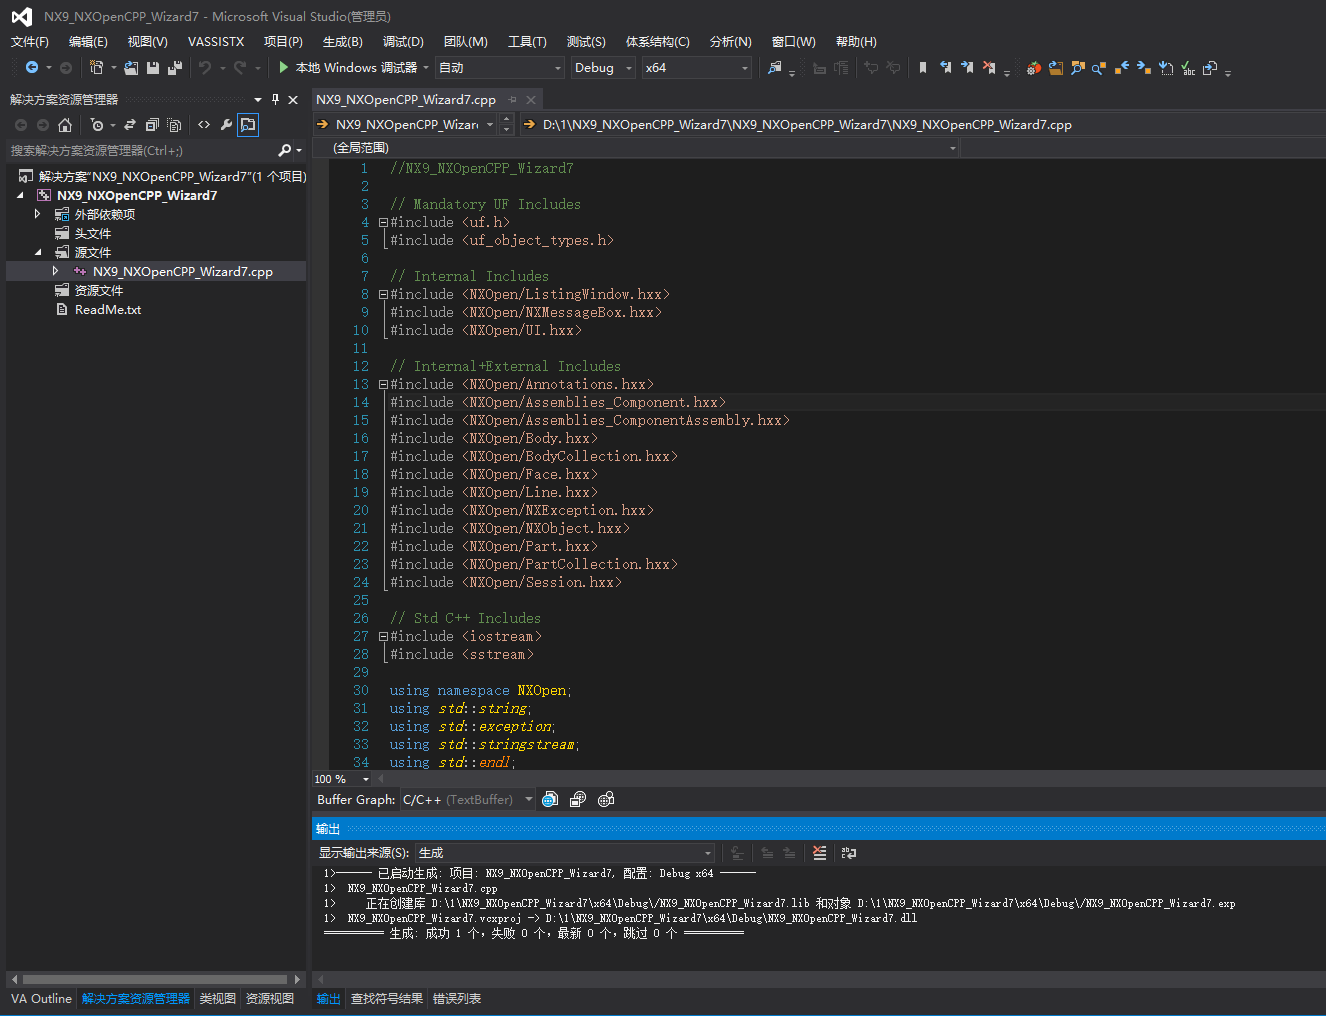
//NX9_NXOpenCPP_Wizard7

// Mandatory UF Includes
#include <uf.h>
#include <uf_object_types.h>

// Internal Includes
#include <NXOpen/ListingWindow.hxx>
#include <NXOpen/NXMessageBox.hxx>
#include <NXOpen/UI.hxx>

// Internal+External Includes
#include <NXOpen/Annotations.hxx>
#include <NXOpen/Assemblies_Component.hxx>
#include <NXOpen/Assemblies_ComponentAssembly.hxx>
#include <NXOpen/Body.hxx>
#include <NXOpen/BodyCollection.hxx>
#include <NXOpen/Face.hxx>
#include <NXOpen/Line.hxx>
#include <NXOpen/NXException.hxx>
#include <NXOpen/NXObject.hxx>
#include <NXOpen/Part.hxx>
#include <NXOpen/PartCollection.hxx>
#include <NXOpen/Session.hxx>

// Std C++ Includes
#include <iostream>
#include <sstream>

using namespace NXOpen;
using std::string;
using std::exception;
using std::stringstream;
using std::endl;
using std::cout;
using std::cerr;


//------------------------------------------------------------------------------
// NXOpen c++ test class
//------------------------------------------------------------------------------
class MyClass
{
    // class members
public:
    static Session *theSession;
    static UI *theUI;

    MyClass();
    ~MyClass();

    void do_it();
    void print(const NXString &);
    void print(const string &);
    void print(const char*);

private:
    Part *workPart, *displayPart;
    NXMessageBox *mb;
    ListingWindow *lw;
    LogFile *lf;
};

//------------------------------------------------------------------------------
// Initialize static variables
//------------------------------------------------------------------------------
Session *(MyClass::theSession) = NULL;
UI *(MyClass::theUI) = NULL;

//------------------------------------------------------------------------------
// Constructor
//------------------------------------------------------------------------------
MyClass::MyClass()
{

    // Initialize the NX Open C++ API environment
    MyClass::theSession = NXOpen::Session::GetSession();
    MyClass::theUI = UI::GetUI();
    mb = theUI->NXMessageBox();
    lw = theSession->ListingWindow();
    lf = theSession->LogFile();

    workPart = theSession->Parts()->Work();
    displayPart = theSession->Parts()->Display();

}

//------------------------------------------------------------------------------
// Destructor
//------------------------------------------------------------------------------
MyClass::~MyClass()
{
}

//------------------------------------------------------------------------------
// Print string to listing window or stdout
//------------------------------------------------------------------------------
void MyClass::print(const NXString &msg)
{
    if(! lw->IsOpen() ) lw->Open();
    lw->WriteLine(msg);
}
void MyClass::print(const string &msg)
{
    if(! lw->IsOpen() ) lw->Open();
    lw->WriteLine(msg);
}
void MyClass::print(const char * msg)
{
    if(! lw->IsOpen() ) lw->Open();
    lw->WriteLine(msg);
}


//------------------------------------------------------------------------------
// Do something
//------------------------------------------------------------------------------
void MyClass::do_it()
{

    // TODO: add your code here

}

//------------------------------------------------------------------------------
// Entry point(s) for unmanaged internal NXOpen C/C++ programs
//------------------------------------------------------------------------------
//  Explicit Execution
extern "C" DllExport void ufusr( char *parm, int *returnCode, int rlen )
{
    try
    {
        // Create NXOpen C++ class instance
        MyClass *theMyClass;
        theMyClass = new MyClass();
        theMyClass->do_it();
        delete theMyClass;
    }
    catch (const NXException& e1)
    {
        UI::GetUI()->NXMessageBox()->Show("NXException", NXOpen::NXMessageBox::DialogTypeError, e1.Message());
    }
    catch (const exception& e2)
    {
        UI::GetUI()->NXMessageBox()->Show("Exception", NXOpen::NXMessageBox::DialogTypeError, e2.what());
    }
    catch (...)
    {
        UI::GetUI()->NXMessageBox()->Show("Exception", NXOpen::NXMessageBox::DialogTypeError, "Unknown Exception.");
    }
}


//------------------------------------------------------------------------------
// Unload Handler
//------------------------------------------------------------------------------
extern "C" DllExport int ufusr_ask_unload()
{
    return (int)NXOpen::Session::LibraryUnloadOptionImmediately;
}
自己的代码写到void MyClass::do_it()里,
演示一下,怎么加代码,怎么ctrl+u执行。
在来看看OPEN C的向导模板。


这里还是选C++吧,我觉得没必要选C了,选C没办法用NXOPEN C++那些,只能用纯C的UFUN。

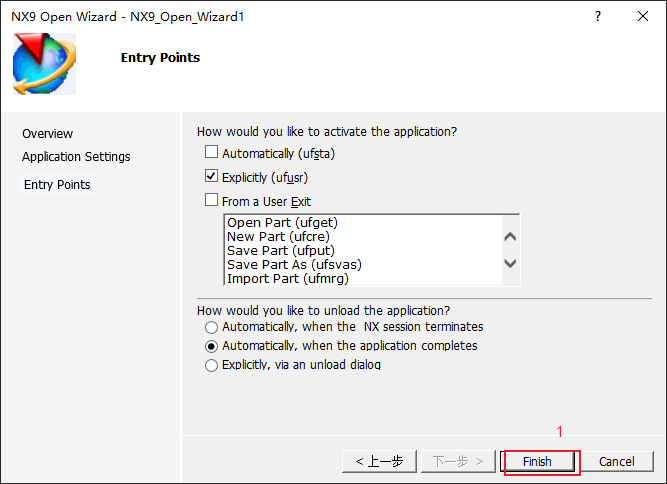
编译成功

/*****************************************************************************
**
** NX9_Open_Wizard1.cpp
**
** Description:
**     Contains Unigraphics entry points for the application.
**
*****************************************************************************/

/* Include files */
#include <stdarg.h>
#include <strstream>
#include <iostream>
using std::ostrstream;
using std::endl;
using std::ends;
using std::cerr;
#include <uf.h>
#include <uf_ui.h>
#include <uf_exit.h>

static void ECHO(char *format, ...)
{
    char msg[1025];
    va_list args;
    va_start(args, format);
    vsnprintf_s(msg, sizeof(msg), 1024, format, args);
    va_end(args);
    UF_UI_open_listing_window();
    UF_UI_write_listing_window(msg);
    UF_print_syslog(msg, FALSE);
}

#define UF_CALL(X) (report_error( __FILE__, __LINE__, #X, (X)))

static int report_error( char *file, int line, char *call, int irc)
{
    if (irc)
    {
        char err[133];

        UF_get_fail_message(irc, err);
        ECHO("*** ERROR code %d at line %d in %s:
",
            irc, line, file);
        ECHO("+++ %s
", err);
        ECHO("%s;
", call);
    }

    return(irc);
}


/*****************************************************************************
**  Activation Methods
*****************************************************************************/
/*  Explicit Activation
**      This entry point is used to activate the application explicitly, as in
**      "File->Execute UG/Open->User Function..." */
extern DllExport void ufusr( char *parm, int *returnCode, int rlen )
{
    /* Initialize the API environment */
    if( UF_CALL(UF_initialize()) )
    {
        /* Failed to initialize */
        return;
    }

    /* TODO: Add your application code here */

    /* Terminate the API environment */
    UF_CALL(UF_terminate());
}

/*****************************************************************************
**  Utilities
*****************************************************************************/

/* Unload Handler
**     This function specifies when to unload your application from Unigraphics.
**     If your application registers a callback (from a MenuScript item or a
**     User Defined Object for example), this function MUST return
**     "UF_UNLOAD_UG_TERMINATE". */
extern int ufusr_ask_unload( void )
{
    return( UF_UNLOAD_IMMEDIATELY );
}
我们来看看模板的代码,也是可以用C++语言,但是是基于面向过程的。没按面向对象去生成模板。
这个代码写到/* TODO: Add your application code here */就行了,我就不演示了。
至于附加依赖性,附加库目录,预处理,那些就都不用管了,向导自动给设置好了。我们只要专注写代码开发就行了。
结尾到最后,无论哪种项目,建议设置字符集为多字节。

本来还想在写一下怎么查看帮助手册,找UFUN函数和NXOPEN的,但是一看23.26了,有点晚了。
该准备睡觉了,要不然一会又该失眠焦虑症了。一晚上睡不着。怎么查看帮助那部分内容就放到后面单独在开一篇
博客文章。
阿飞
2021年9月2日