一年前我写过一个C#反编译dll查看代码系列
NX二次开发-C#使用DllImport调用libufun.dll里的UF函数(反编译.net.dll)调用loop等UF函数(三部曲1)
NX二次开发-C#使用DllImport调用libufun.dll里的UF函数学习方法及tag转handle例子(三部曲2)
NX二次开发-C#使用DllImport调用libugui.dll里的内部函数自动将NX标题设置为prt路径例子(三部曲3)
今天写一下C++反编译dll查看代码系列
也是准备的三部曲,这是三部曲1
NX二次开发-C++使用IDA Pro反编译dll,查看里面使用的API函数(三部曲1)
- 演示版本:
NX9+VS2012
- 操作步骤
1.自己在VS里用NX开发向导写一份代码(简单例子)
//NX9_NXOpenCPP_Wizard2

// Mandatory UF Includes
#include <uf.h>
#include <uf_object_types.h>

// Internal Includes
#include <NXOpen/ListingWindow.hxx>
#include <NXOpen/NXMessageBox.hxx>
#include <NXOpen/UI.hxx>

// Internal+External Includes
#include <NXOpen/Annotations.hxx>
#include <NXOpen/Assemblies_Component.hxx>
#include <NXOpen/Assemblies_ComponentAssembly.hxx>
#include <NXOpen/Body.hxx>
#include <NXOpen/BodyCollection.hxx>
#include <NXOpen/Face.hxx>
#include <NXOpen/Line.hxx>
#include <NXOpen/NXException.hxx>
#include <NXOpen/NXObject.hxx>
#include <NXOpen/Part.hxx>
#include <NXOpen/PartCollection.hxx>
#include <NXOpen/Session.hxx>


#include <uf.h>
#include <uf_modl.h>
#include <uf_obj.h>


// Std C++ Includes
#include <iostream>
#include <sstream>

using namespace NXOpen;
using std::string;
using std::exception;
using std::stringstream;
using std::endl;
using std::cout;
using std::cerr;


//------------------------------------------------------------------------------
// NXOpen c++ test class
//------------------------------------------------------------------------------
class MyClass
{
    // class members
public:
    static Session *theSession;
    static UI *theUI;

    MyClass();
    ~MyClass();

    void do_it();
    void print(const NXString &);
    void print(const string &);
    void print(const char*);

private:
    Part *workPart, *displayPart;
    NXMessageBox *mb;
    ListingWindow *lw;
    LogFile *lf;
};

//------------------------------------------------------------------------------
// Initialize static variables
//------------------------------------------------------------------------------
Session *(MyClass::theSession) = NULL;
UI *(MyClass::theUI) = NULL;

//------------------------------------------------------------------------------
// Constructor
//------------------------------------------------------------------------------
MyClass::MyClass()
{

    // Initialize the NX Open C++ API environment
    MyClass::theSession = NXOpen::Session::GetSession();
    MyClass::theUI = UI::GetUI();
    mb = theUI->NXMessageBox();
    lw = theSession->ListingWindow();
    lf = theSession->LogFile();

    workPart = theSession->Parts()->Work();
    displayPart = theSession->Parts()->Display();

}

//------------------------------------------------------------------------------
// Destructor
//------------------------------------------------------------------------------
MyClass::~MyClass()
{
}

//------------------------------------------------------------------------------
// Print string to listing window or stdout
//------------------------------------------------------------------------------
void MyClass::print(const NXString &msg)
{
    if(! lw->IsOpen() ) lw->Open();
    lw->WriteLine(msg);
}
void MyClass::print(const string &msg)
{
    if(! lw->IsOpen() ) lw->Open();
    lw->WriteLine(msg);
}
void MyClass::print(const char * msg)
{
    if(! lw->IsOpen() ) lw->Open();
    lw->WriteLine(msg);
}


void MyTest()
{
    UF_initialize();

    //创建块
    UF_FEATURE_SIGN Sign = UF_NULLSIGN;//设置布尔
    double Corner_pt[3] = { 0.0, 0.0, 0.0 };//设置原点
    char *Edge_Len[3] = { "100", "100", "100" };//设置长宽高
    tag_t BlkTag = NULL_TAG;
    UF_MODL_create_block1(Sign, Corner_pt, Edge_Len, &BlkTag);

    //特征找体
    tag_t body_tag = NULL_TAG;
    UF_MODL_ask_feat_body(BlkTag, &body_tag);

    //设置颜色
    UF_OBJ_set_color(body_tag, 186);

    UF_terminate();

}


//------------------------------------------------------------------------------
// Do something
//------------------------------------------------------------------------------
void MyClass::do_it()
{

    // TODO: add your code here

    MyTest();

}

//------------------------------------------------------------------------------
// Entry point(s) for unmanaged internal NXOpen C/C++ programs
//------------------------------------------------------------------------------
//  Explicit Execution
extern "C" DllExport void ufusr( char *parm, int *returnCode, int rlen )
{
    try
    {
        // Create NXOpen C++ class instance
        MyClass *theMyClass;
        theMyClass = new MyClass();
        theMyClass->do_it();
        delete theMyClass;
    }
    catch (const NXException& e1)
    {
        UI::GetUI()->NXMessageBox()->Show("NXException", NXOpen::NXMessageBox::DialogTypeError, e1.Message());
    }
    catch (const exception& e2)
    {
        UI::GetUI()->NXMessageBox()->Show("Exception", NXOpen::NXMessageBox::DialogTypeError, e2.what());
    }
    catch (...)
    {
        UI::GetUI()->NXMessageBox()->Show("Exception", NXOpen::NXMessageBox::DialogTypeError, "Unknown Exception.");
    }
}


//------------------------------------------------------------------------------
// Unload Handler
//------------------------------------------------------------------------------
extern "C" DllExport int ufusr_ask_unload()
{
    return (int)NXOpen::Session::LibraryUnloadOptionImmediately;
}
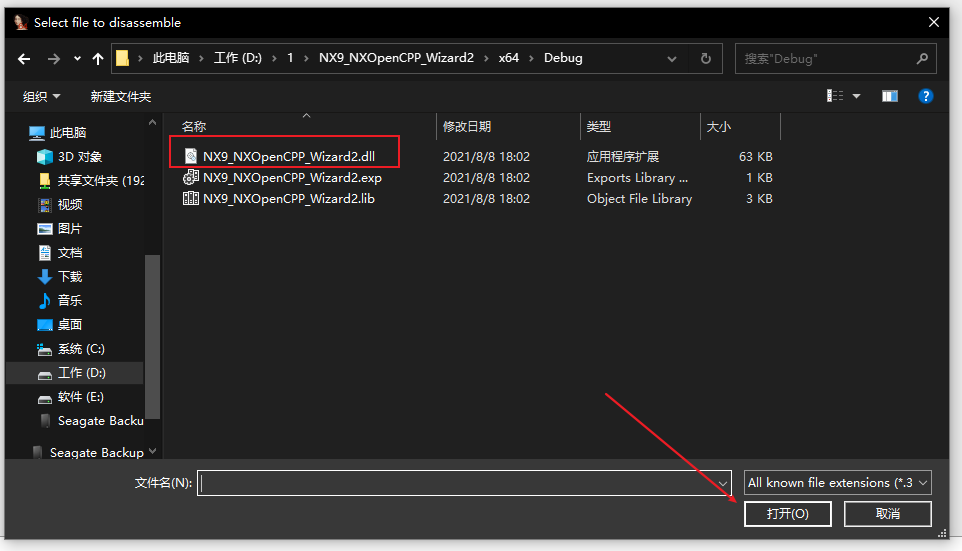
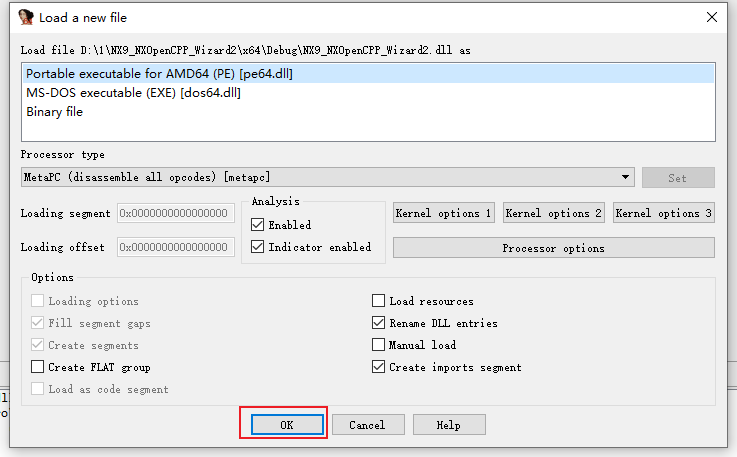
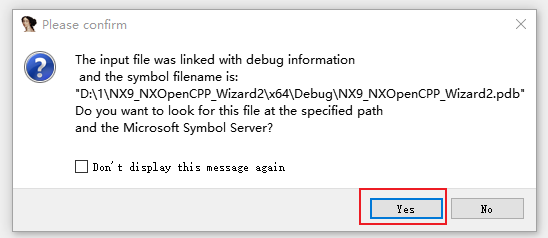
2.打开IDA Pro,选择上面代码编译生成的C++ dll开始反编译

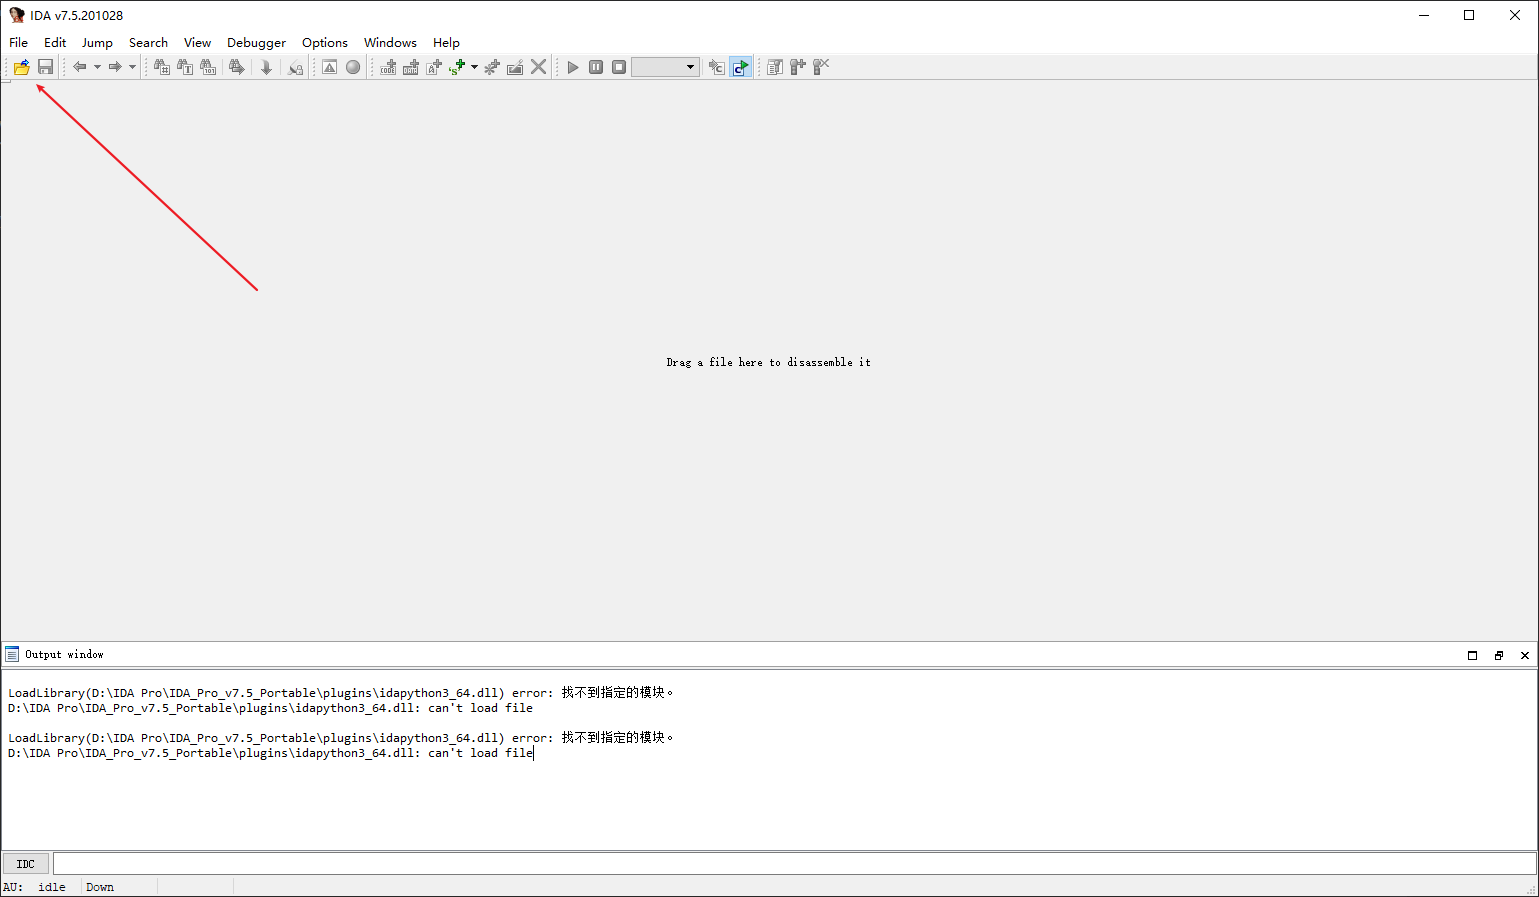
打开界面如下

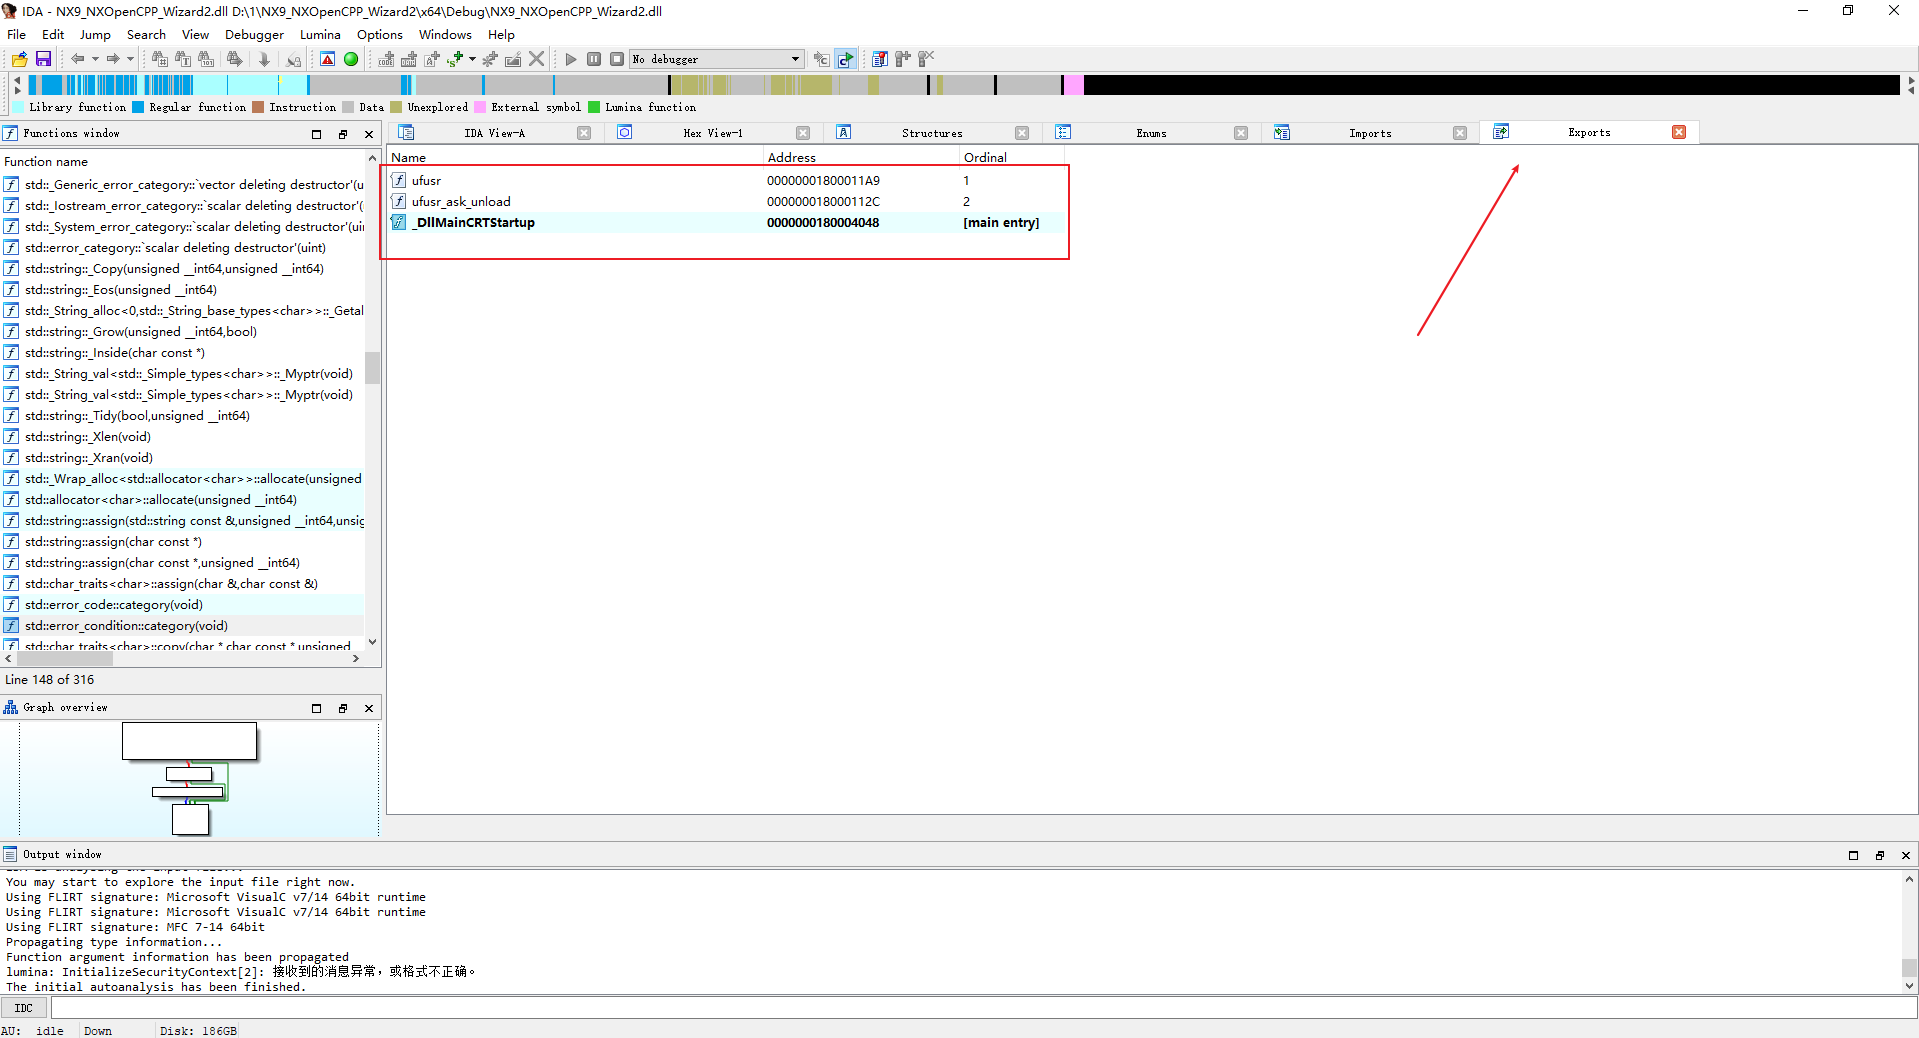
点击Exports
我们可以查看到ufusr这个入口函数
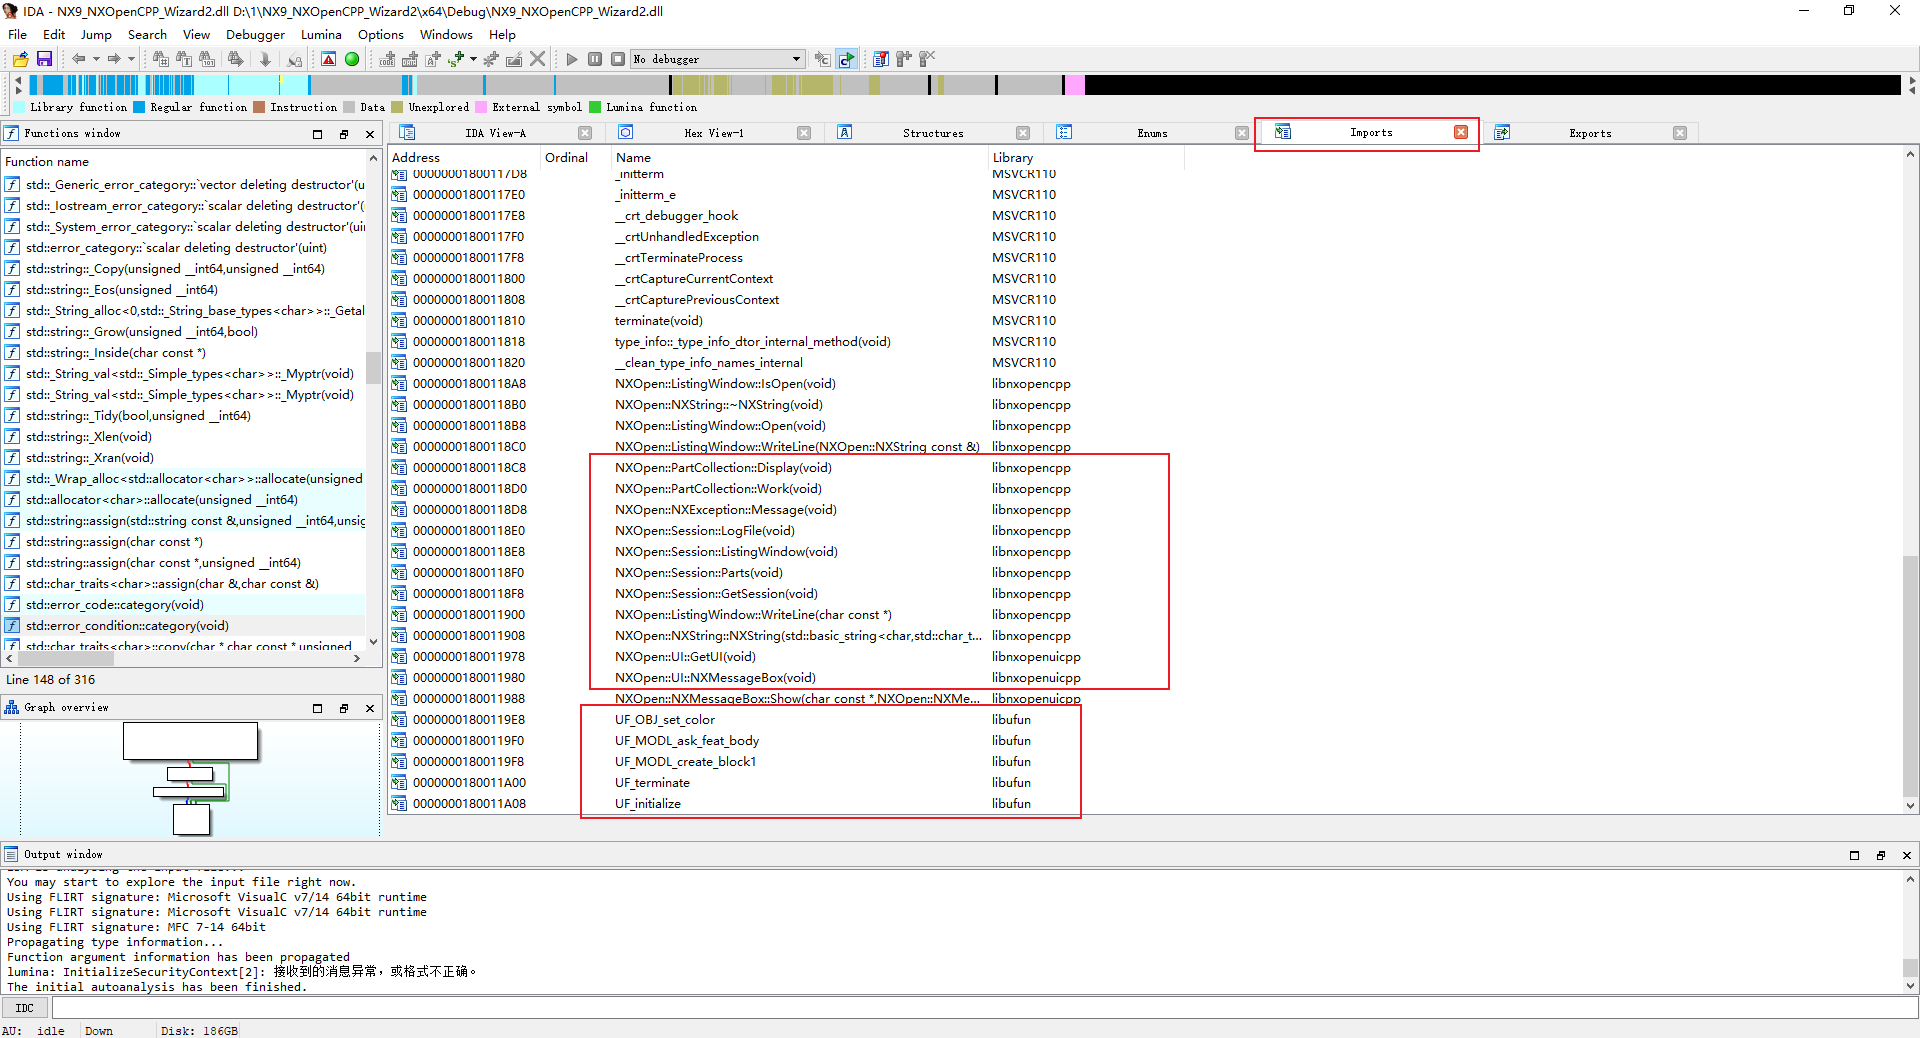
点击Import
我们可以查看到当前这个dll里所调用的所有UFUN函数和NXOPEN方法,以及这个UFUN函数出自哪个.dll里
下面我们开始根据逻辑流程去反编译代码
我们都知道nx二次开发的dll都是由ufusr这个入口函数开始加载的
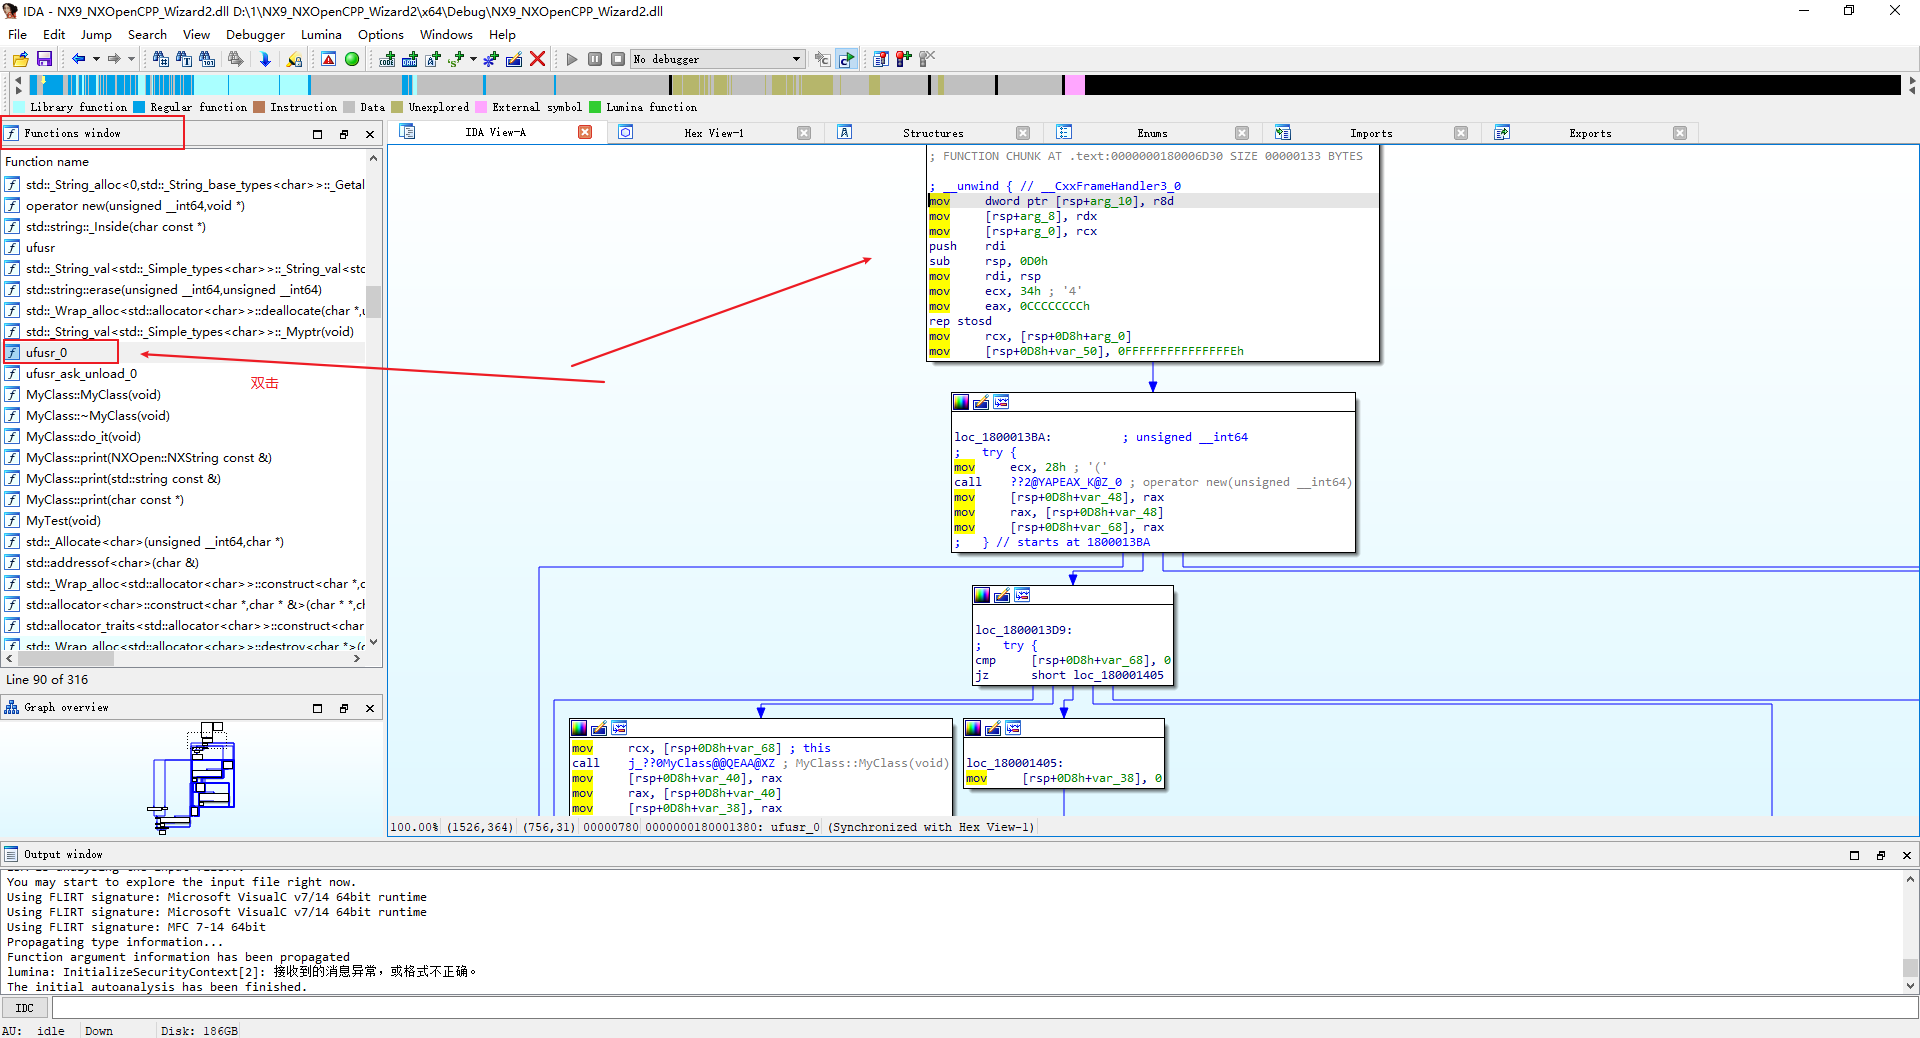
我们先去函数窗口中找到ufusr_0这个函数,双击打开它,右侧弹出代码逻辑流程图
下面开始解析介绍怎么看流程
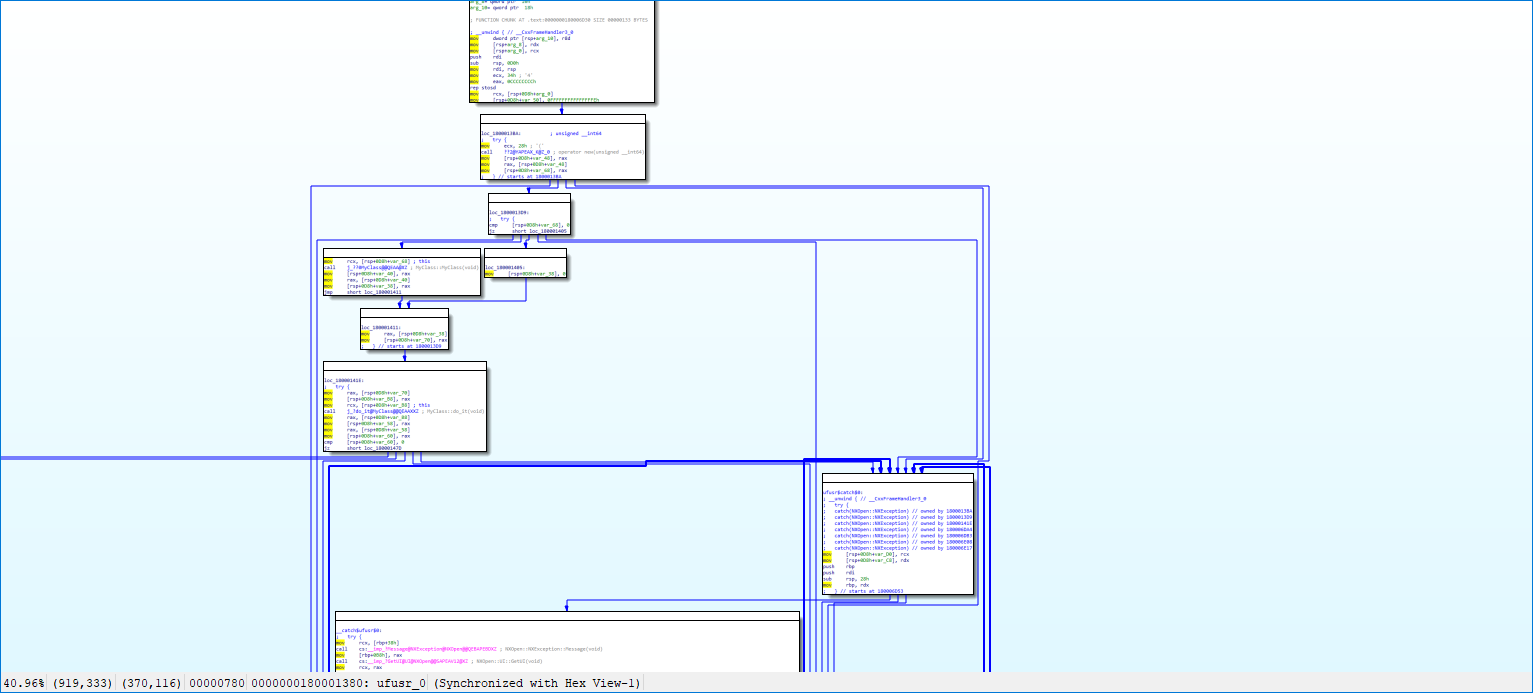
鼠标缩小拖动找到最上面的块,从ufusr开始看

然后顺着箭头往下找,我们找到了try 找到了new,在往下 我们就看到了MyClass::MyClass(void),是不是很熟悉,刚好这里和我们写的代码对应上了。

//------------------------------------------------------------------------------
// Entry point(s) for unmanaged internal NXOpen C/C++ programs
//------------------------------------------------------------------------------
//  Explicit Execution
extern "C" DllExport void ufusr( char *parm, int *returnCode, int rlen )
{
    try
    {
        // Create NXOpen C++ class instance
        MyClass *theMyClass;
        theMyClass = new MyClass();
        theMyClass->do_it();
        delete theMyClass;
    }
    catch (const NXException& e1)
    {
        UI::GetUI()->NXMessageBox()->Show("NXException", NXOpen::NXMessageBox::DialogTypeError, e1.Message());
    }
    catch (const exception& e2)
    {
        UI::GetUI()->NXMessageBox()->Show("Exception", NXOpen::NXMessageBox::DialogTypeError, e2.what());
    }
    catch (...)
    {
        UI::GetUI()->NXMessageBox()->Show("Exception", NXOpen::NXMessageBox::DialogTypeError, "Unknown Exception.");
    }
}
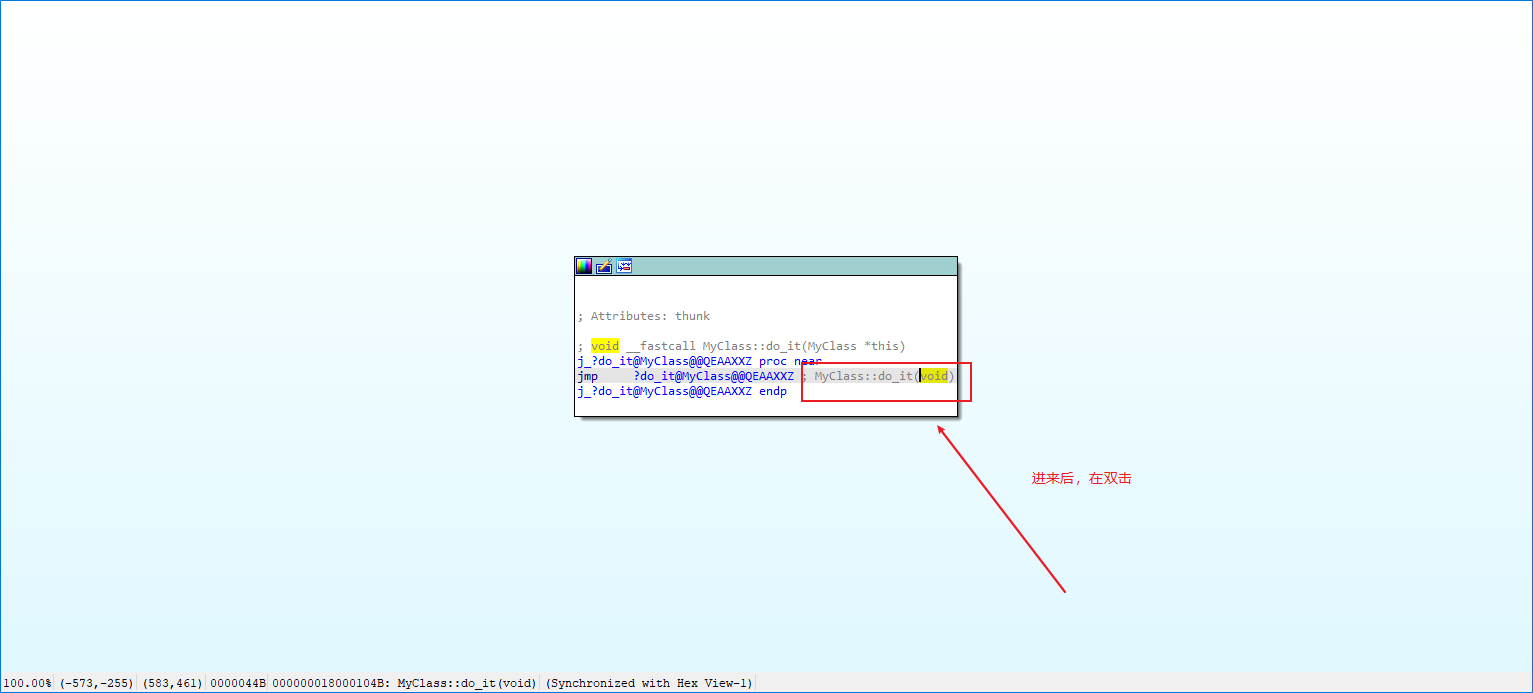
看到这里,我们在往下找,找到了do_it,我们知道一般用NX C++向导模板写代码就是往do_it处写的。

这里我们直接双击点击do_it

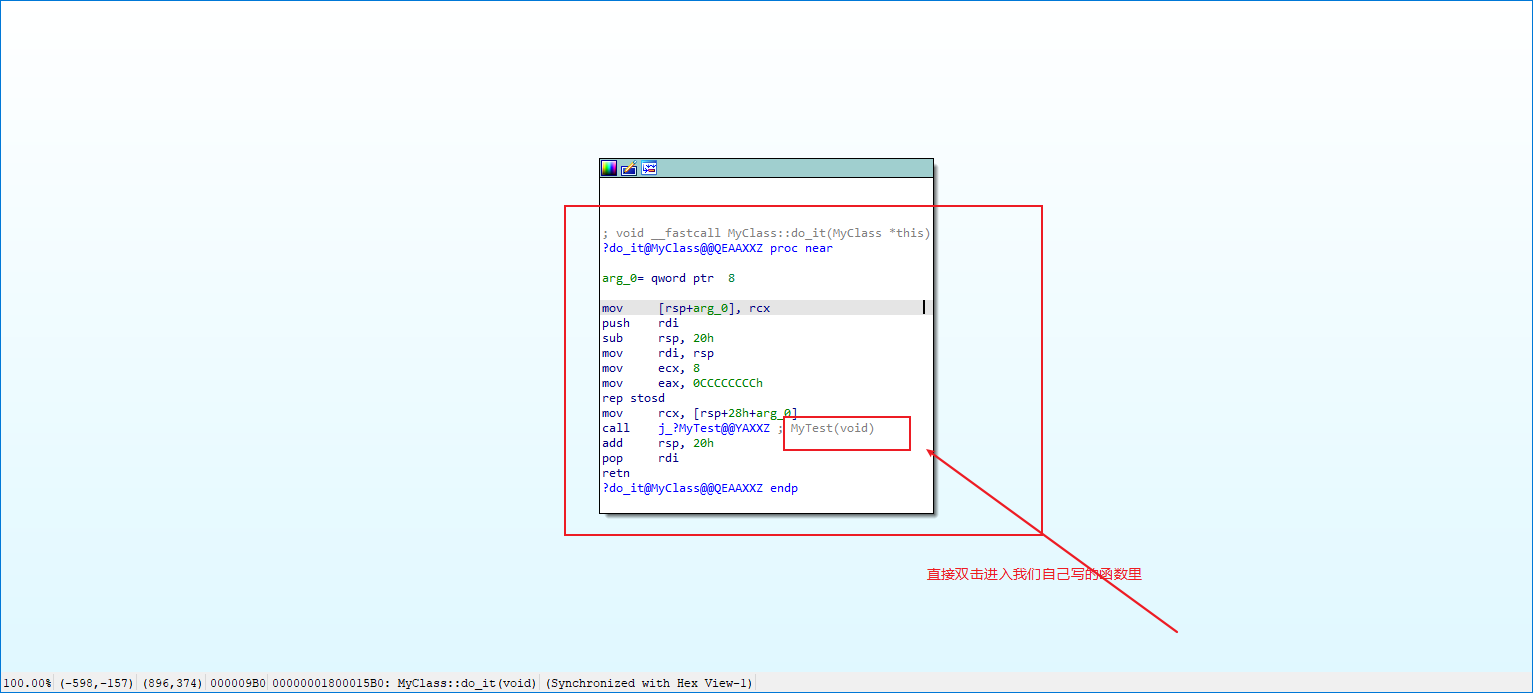


看到这里是不是就一目了然了,这就是我们平时最熟悉的ufun函数了,直接就可以看到自己写的这个函数里到底用了哪些API函数了。
然后在根据函数和for if对应的流程结构图来推算功能的逻辑算法,自己就可以重写复制功能了。
我们在回到一开始的总流程图里,点ufusr_0,我们可以找到对应的NXOPEN的方法,所有的东西都在流程图上,自己点击去慢慢看

IDA Pro更多用法
https://www.jianshu.com/p/d425140c6561
https://blog.csdn.net/larry_zeng1/article/details/89349542
https://blog.csdn.net/fuhanghang/article/details/99115071
阿飞
2021年8月8日