SRichViewEdit 表格默认的表格边框,是有表格边框和单元格边框,并且表格边框与单元格边框有2点的边距,单元格与单元格之间也有2点的边距,看起来是双线的,如下图:

我平常习惯用单细线边框的表格,为此,对SRichViewEdit插入表格的默认格式进行调整,直接修改RichViewActions.pas单元里表格默认属性默认值,打开RichViewActions.pas,找到constructor TrvActionInsertTable.Create,代码如下:
constructor TrvActionInsertTable.Create(AOwner: TComponent);
begin
inherited;
RowCount := 2;
ColCount := 2;
TableOptions := RVTABLEDEFAULTOPTIONS;
TablePrintOptions := RVTABLEDEFAULTPRINTOPTIONS;
Color := clNone;
BorderWidth := 0; //表格边框,原值为1
BorderColor := clWindowText;
BorderLightColor := clBtnHighlight;
BorderStyle := rvtbColor;
BorderVSpacing := 2;
BorderHSpacing := 2;
CellBorderWidth := 1;
CellBorderColor := clWindowText;
CellBorderLightColor := clBtnHighlight;
CellPadding := 2;
CellBorderStyle := rvtbColor;
VRuleColor := clWindowText;
HRuleColor := clWindowText;
CellVSpacing := -1; //单元格垂直边距,原值为2
CellHSpacing := -1; //单元格水平边距,原值为2
FMessageID := rvam_act_InsertTable;
end;
将三处值修改一下,一是表格边框BorderWidth,原值为1,改为0,取消使用表格边框线;
二是将单元格垂直边距,原值为2,修改为-1,原来为2,就产生了单元格垂直边距之间的间隙,让单元格垂直边距之间看起来是双线,如果设为1,单元格相邻边线重叠为2点的线,要变为1点的线,改为-1即可;
三是单元格水平边距,原值为2,修改为-1,原来为2,就产生了单元格水平边距之间的间隙,让单元格水平边距之间看起来是双线,如果设为1,单元格相邻边线重叠为2点的线,要变为1点的线,改为-1即可;
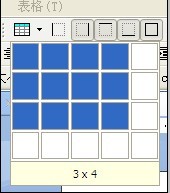
这是点SRichViewEdit的表格图标弹出“插入表格”时的默认值,如果点表格图标旁边的下三角形下拉的单元格自选行列来手入表格时:
需要修改另一处代码的默认值,打开RichViewActions.pas,找到代码部分:
// Border around the table:
property BorderWidth: TRVStyleLength read FBorderWidth write FBorderWidth default 0; //表格边框,原值为1
property BorderColor: TColor read FBorderColor write FBorderColor default clWindowText;
property BorderLightColor: TColor read FBorderLightColor write FBorderLightColor default clBtnHighlight;
property BorderStyle: TRVTableBorderStyle read FBorderStyle write FBorderStyle default rvtbColor;
property BorderVSpacing: TRVStyleLength read FBorderVSpacing write FBorderVSpacing default 2;
property BorderHSpacing: TRVStyleLength read FBorderHSpacing write FBorderHSpacing default 2;
// Cells:
property CellBorderWidth: TRVStyleLength read FCellBorderWidth write FCellBorderWidth default 1;
property CellBorderColor: TColor read FCellBorderColor write FCellBorderColor default clWindowText;
property CellBorderLightColor: TColor read FCellBorderLightColor write FCellBorderLightColor default clBtnHighlight;
property CellPadding: TRVStyleLength read FCellPadding write FCellPadding default 2;
property CellBorderStyle: TRVTableBorderStyle read FCellBorderStyle write FCellBorderStyle default rvtbColor;
// Between cells:
property VRuleWidth: TRVStyleLength read FVRuleWidth write FVRuleWidth default 0;
property VRuleColor: TColor read FVRuleColor write FVRuleColor default clWindowText;
property HRuleWidth: TRVStyleLength read FHRuleWidth write FHRuleWidth default 0;
property HRuleColor: TColor read FHRuleColor write FHRuleColor default clWindowText;
property CellVSpacing: TRVStyleLength read FCellVSpacing write FCellVSpacing default -1; //单元格垂直边距,原值为2
property CellHSpacing: TRVStyleLength read FCellHSpacing write FCellHSpacing default -1; //单元格水平边距,原值为2
property VOutermostRule: Boolean read FVOutermostRule write FVOutermostRule default False;
property HOutermostRule: Boolean read FHOutermostRule write FHOutermostRule default False;
同样将代码中标示的三处进行修改,保存,重新编译,运行程序在SRichViewEdit里,插入表格时就自动为细线的边框表格线了,如图:
