Migragtion的命令,左边是手动命令,右边是代码方式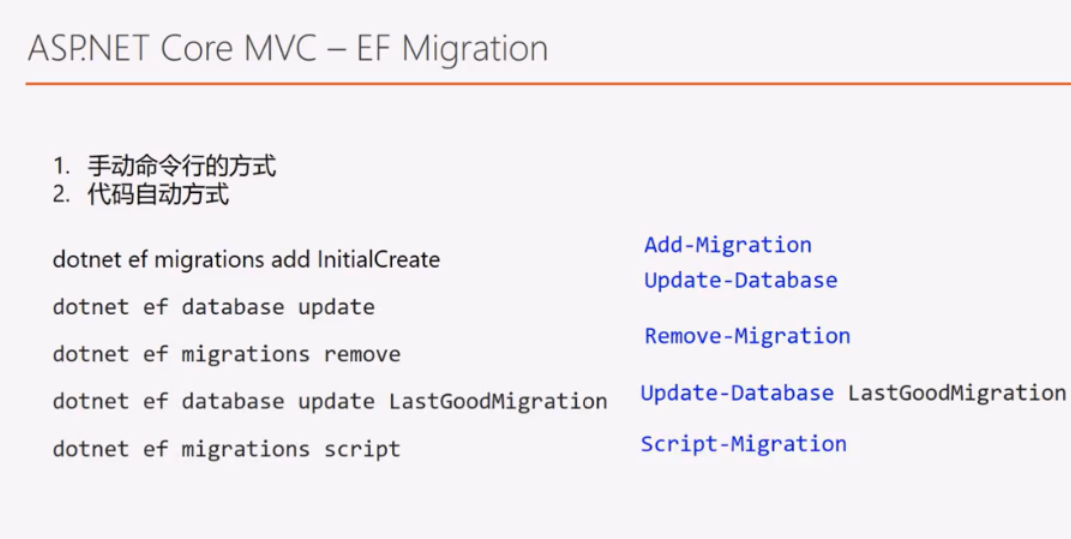
首先来看命令方式:
创建一个mvc项目,默认已经集成了EF包
创建的项目包含了Microsoft.AspNetCore.Identity.EntityFramewordCore包,这将使用Entity Framework Core通过SQL Server来储存身份识别的数据和表信息。
添加Sql连接字符串:
{
  "Logging": {
    "LogLevel": {
      "Default": "Warning"
    }
  },
  "AllowedHosts": "*",
  "ConnectionStrings": {
    "conn": "Data Source=pc;User ID=sa;Password=12;database=CoreDb;Connect Timeout=30;Encrypt=False;
TrustServerCertificate=False;ApplicationIntent=ReadWrite;MultiSubnetFailover=False"
  }
}
注意这个:ConnectionStrings 是必须要这样写的,默认是根据这个名字读取,后面会说
Net Core 身份 Identity 允许向应用中添加登陆功能。用户可创建一个账户并进行登陆,登陆时可使用用户名、密码
Server数据库存储用户名字、密码和配置文件数据。另外,你可使用其他已有的存储空间存储数据
创建ApplicationUser, ApplicationRole 分别继承IdentityRole IdentityUser
using System;
using System.Collections.Generic;
using System.Linq;
using System.Threading.Tasks;
using Microsoft.AspNetCore.Identity;

namespace IdentityDemo.Models
{
    public class ApplicationRole:IdentityRole
    {
    }
}
using Microsoft.AspNetCore.Identity;

namespace IdentityDemo.Models
{
    public class ApplicationUser : IdentityUser
    {
    }
}
创建上下文类:
using IdentityDemo.Models;
using Microsoft.AspNetCore.Identity.EntityFrameworkCore;
using Microsoft.EntityFrameworkCore;

namespace IdentityDemo.Date
{

    public class ApplicationDbContext : IdentityDbContext<ApplicationUser>
    {
        public ApplicationDbContext(DbContextOptions<ApplicationDbContext> options) : base(options)
        {
        }
    }
}
ConfigureServices 中注册服务
public void ConfigureServices(IServiceCollection services)
        {
            services.Configure<CookiePolicyOptions>(options =>
            {
                // This lambda determines whether user consent for non-essential cookies is needed for a given request.
                options.CheckConsentNeeded = context => true;
                options.MinimumSameSitePolicy = SameSiteMode.None;
            });


            services.AddAuthentication(CookieAuthenticationDefaults.AuthenticationScheme)
                .AddCookie(options =>
                {
                    options.LoginPath = "/Login";
                });

            services.AddDbContext<ApplicationDbContext>(options =>
            {
                //配置文件前面必须是;ConnectionStrings
                //因为默认是:GetSection("ConnectionStrings")[name].
                options.UseSqlServer(Configuration.GetConnectionString("conn"));
                //options.UseSqlServer(Configuration["Data:DefaultConnection:ConnectionString"]));
            });

            services.AddIdentity<ApplicationUser, ApplicationRole>()
                .AddEntityFrameworkStores<ApplicationDbContext>()
                .AddDefaultTokenProviders();

            //配置密码注册方式
            services.Configure<IdentityOptions>(options =>
            {
                options.Password.RequireLowercase = false;
                options.Password.RequireNonAlphanumeric = false;
                options.Password.RequireUppercase = false;
                options.Password.RequiredLength = 1;
            });

            services.AddMvc().SetCompatibilityVersion(CompatibilityVersion.Version_2_2);
        }
我这里用了Cookie验证,所以应该添加中间件 app.UseAuthentication();
创建用户:通过依赖注入: UserManager 和 SignInManager 依赖:Microsoft.AspNetCore.Identity;
 private readonly UserManager<ApplicationUser> _userManager;
        private readonly SignInManager<ApplicationUser> _signinManager;
        public LoginController(UserManager<ApplicationUser> userManager, SignInManager<ApplicationUser> signinManager)
        {
            _userManager = userManager;
            _signinManager = signinManager;
        }
注册代码
[HttpPost]
        public async Task<IActionResult> Registe(LoginViewModel model)
        {
            var identityUser = new ApplicationUser
            {
                UserName = model.UserName,
                PasswordHash = model.PassWorld,
                NormalizedEmail = model.UserName
            };

            var identityResult = await _userManager.CreateAsync(identityUser, model.PassWorld);
            if (identityResult.Succeeded)
            {
                return RedirectToAction("Index", "Home");
            }
            return View();
        }
注册之前,我们先通过命令生成数据库
命令依赖于:Microsoft.EntityFrameworkCore.Tools包,不过默认也有了
可以输入dotnet ef migrations --help 看看帮助

输入后命令:dotnet ef migrations add identity

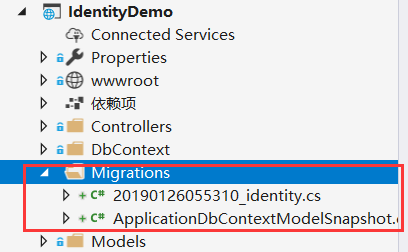
项目中会生成一个Migrations的文件夹和文件
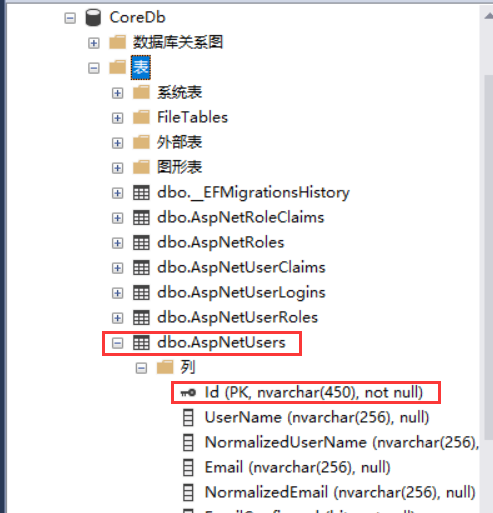
然后更新数据库:dotnet ef migrations update
可以看到生成了数据库和表,但AspNetUsers表的组建ID默认是字符串类型的,一连串GUID,待会会说改成常用的int类型
好了。现在注册一个看看

看看默认的:
接下来我们修改默认的主键为int类型。只需要改成:IdentityUser<int> ,IdentityRole<int>
上下文改成:

因为是重新生成数据库,需要删除数据库,并且把Migrations的文件都删除,或者直接删除Migrations文件夹
可以执行命令删除库:dotnet ef database drop
否则EF会当作升级和降级处理,不会重新生成数据库
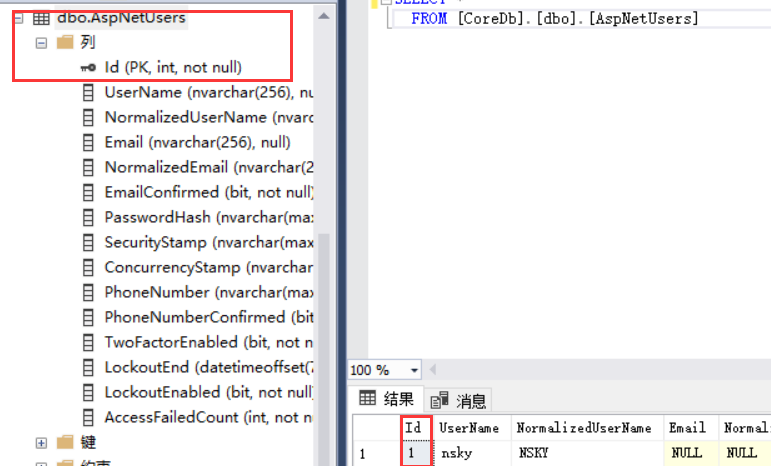
然后重新migragins add ,update 注册看看,已经是int类型了
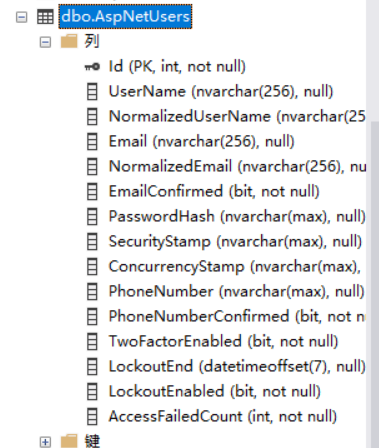
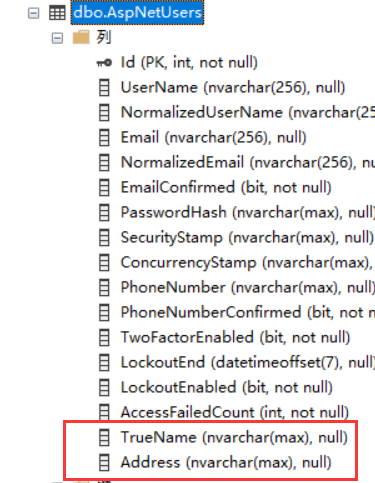
然后给表升级,在用户表添加一列 TrueName,首先看用户名表。默认是没有该列的
我们在ApplicationUser类新增字段
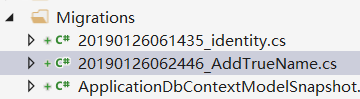
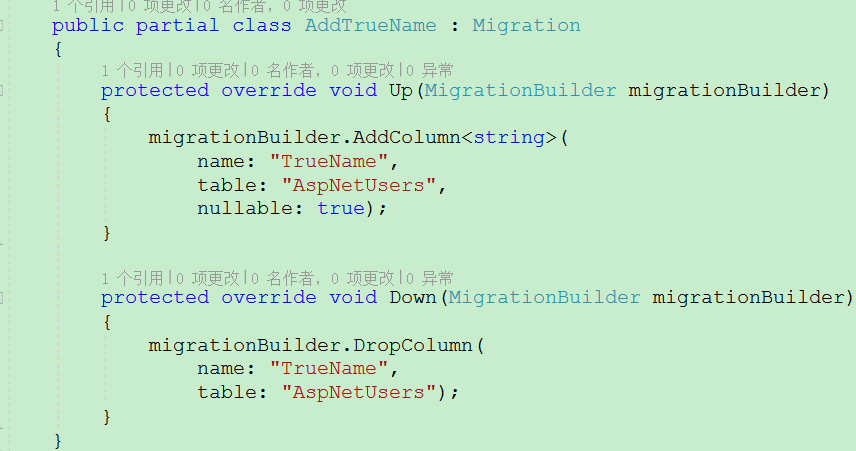
然后命令:dotnet ef migrations add AddTrueName //AddTrueName名字是任意取的
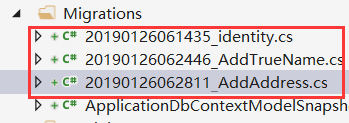
此时在Migrations文件夹生成了对呀的类
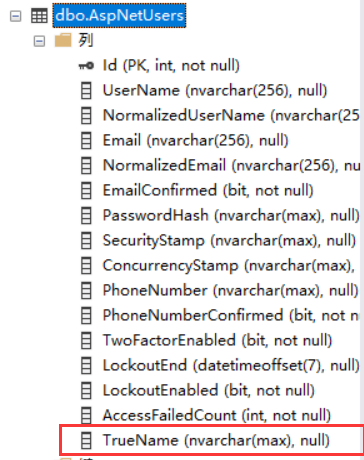
然后update,这里的update只会找最新的migrations 这里的最新的migrations就是20190126061435_identity
数据库已经有了
比如我们在添加一个Address列,然后在还原到只有TrueName的状态
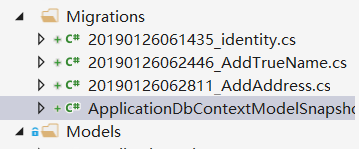
现在Migrations有3个Migration
然后我们通过update回滚
dotnet ef database update 回滚的migration
我们这里回滚到AddTrueName 那么命令就是:dotnet ef database update AddTrueName
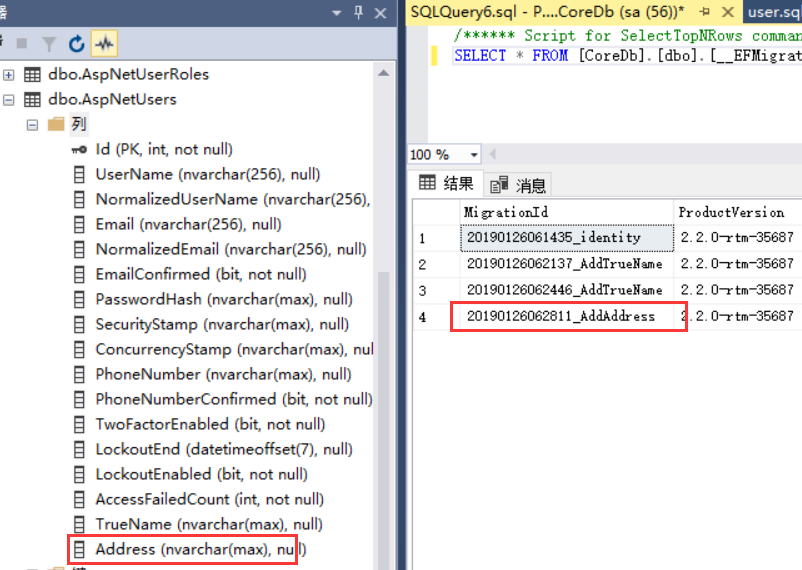
回滚之后。表也更新了

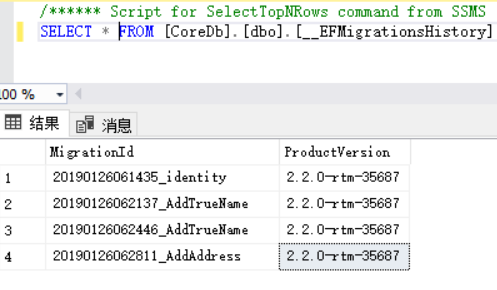
其实__EFMigrationsHistory表是保存了当前所有的Migration
回滚前
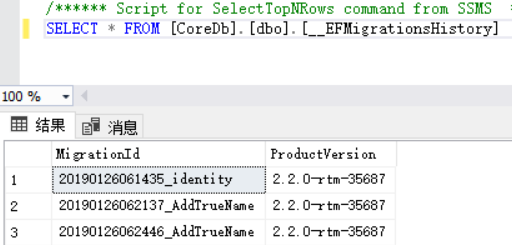
回滚后
这里有两个AddTrueName是因为我add了两次,可以不用管
主要是对比之前和之后,AddAddress没有了
然后看:dotnet ef migrations script 生成脚本
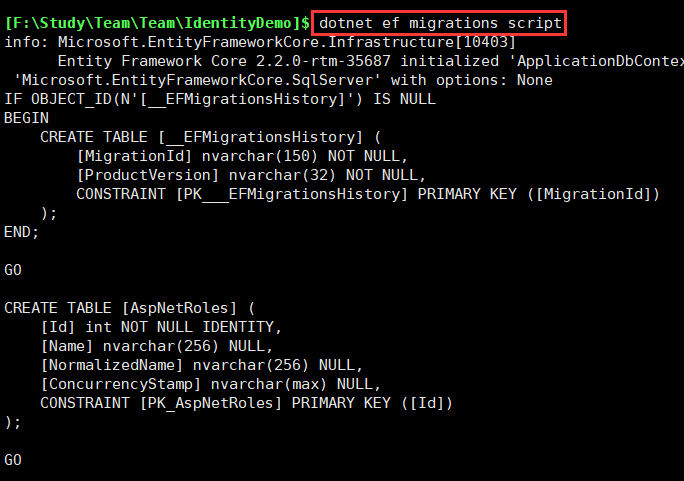
生成脚本在屏幕中,还得拷贝出来,多不友好,看看--help,是可以指定路径的

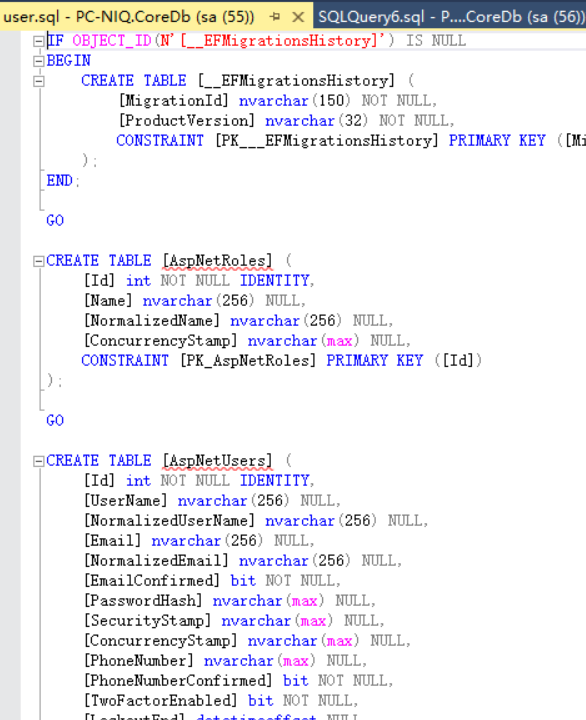
执行: dotnet ef migrations script -o d:scriptuser.sql


打开生成的文件看看
dotnet ef migratoins remove 是移除最新的一个migration,remove一次就移除一次,
前提是该migration没有update到database,如果细心你会发现,当你add migration时候,会提示,可以remove 移除
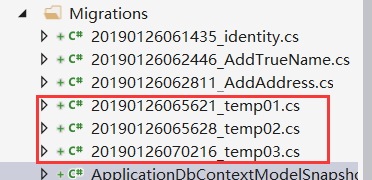
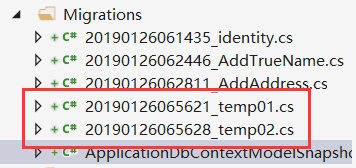
我们添加3个 migration 分别是 temp01,temp02,temp03
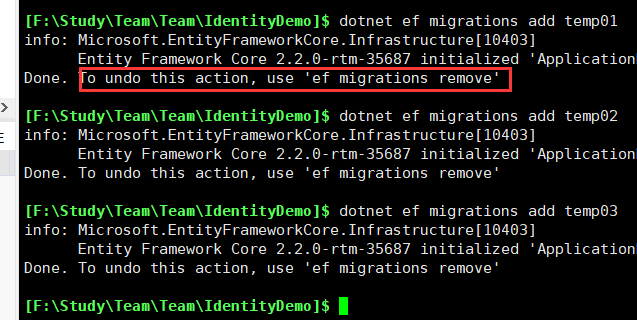
此时已经添加了3个测试的
记住,我这里都没有执行update的,所以在__EFMigrationsHistory也不会记录。该表记录的是已经update到database的migration

我们执行一次命令:dotnet ef migrations remove
因为temp03是最后添加的,所以先删除,是不是像入栈出栈
在remove一次,按照上面说的,应该是移除temp02

就不一一测试了
来看看,如果update 后。能不能remove,上面已经还原到了TrueName
我们先升级到Address
执行命令:dotnet ef database update Addaddress
表字段和历史纪录也都有了
然后我们执行命令:dotnet ef migrations remove
这里要注意一点,我们是加了Adress后,我为了测试,又加了temp01,02,03,上面测试只remove了03,02
如果你没有remove01的话,现在remove是remove的01,注意下就好了
现在我们默认01,02,03都已经remove了。最新的肯定就是address了
好了,有点啰嗦。执行命令:dotnet ef migrations remove

info提示该migratin已经udate到database
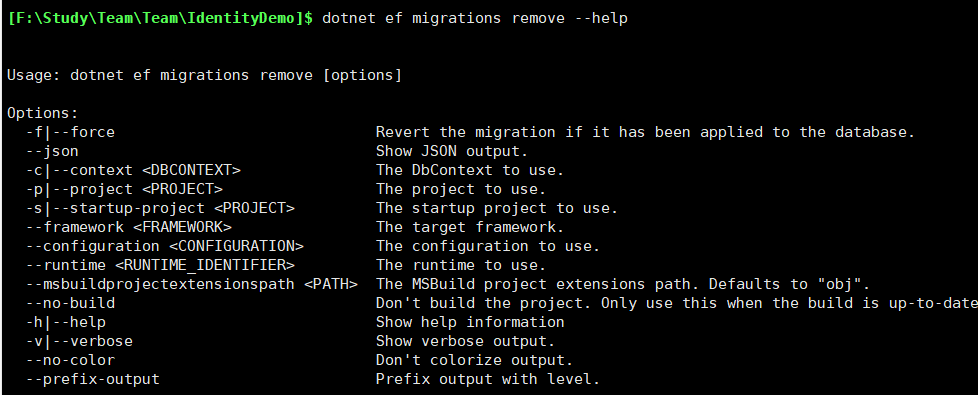
通过dotnet ef migrations remove --help
可以看到有其他选项,有兴趣的可以自行研究
上面都是手动执行命令,我们来看看在代码里面怎么做
在程序初始化的时候,添加一个默认管理员的账号,实例代码如下
创建一个ApplicationDbContextSeed类,用于创建默认用户
using IdentityDemo.Models;
using Microsoft.AspNetCore.Identity;
using Microsoft.Extensions.DependencyInjection;
using System;
using System.Linq;
using System.Threading.Tasks;
using Microsoft.Extensions.Logging;

namespace IdentityDemo.Date
{
    public class ApplicationDbContextSeed
    {
        private UserManager<ApplicationUser> _userManger;

        /// <summary>
        ///
        /// </summary>
        /// <param name="context">上下文</param>
        /// <param name="server">依赖注入的容器,这里可以获取依赖注入</param>
        /// <returns></returns>
        public async Task AsyncSpeed(ApplicationDbContext context, IServiceProvider server)
        {
            try
            {
                _userManger = server.GetRequiredService<UserManager<ApplicationUser>>();
                var logger = server.GetRequiredService<ILogger<ApplicationDbContext>>();
                logger.LogInformation("speed Init");

                //如果没有用户,则创建一个
                if (!_userManger.Users.Any())
                {
                    var defaultUser = new ApplicationUser
                    {
                        UserName = "Admin",
                        dEmail = "cnblogs@163.com"
                    };
                    var userResult = await _userManger.CreateAsync(defaultUser, "123456");
                    if(!userResult.Succeeded)
                    {
                        logger.LogError("创建失败");
                        //logger.LogInformation("初始化用户失败");
                        userResult.Errors.ToList().ForEach(e => {
                            logger.LogError(e.Description);
                        });
                    }
                }
            }
            catch (Exception ex)
            {
                throw new Exception("初始化用户失败");
            }
        }
    }
}
添加一个对IWebHost扩展的类:
using Microsoft.AspNetCore.Hosting;
using Microsoft.EntityFrameworkCore;
using Microsoft.Extensions.DependencyInjection;
using Microsoft.Extensions.Logging;
using System;
namespace IdentityDemo.Date
{
    public static class WebHostMigrationExtensions
    {
        public static IWebHost MigrationDbContext<TContext>(this IWebHost host, Action<TContext, IServiceProvider> sedder) where TContext : DbContext
        {
            using (var scope = host.Services.CreateScope())
            {
                //拿到依赖注入容器
                var servers = scope.ServiceProvider;
                //var logger = servers.GetRequiredService<ILogger<TContext>>();
                var logger = servers.GetService<ILogger<TContext>>();
                var context = servers.GetService<TContext>();

                try
                {
                    context.Database.Migrate();
                    sedder(context, servers);
                    logger.LogInformation($"执行DbContex{typeof(TContext).Name}seed方法成功");
                }
                catch (Exception ex)
                {
                    logger.LogError(ex, $"执行DbContex{typeof(TContext).Name}seed方法失败");
                }
            }
            return host;
        }
    }
}
这样就可以在Program.cs的main方法中调用
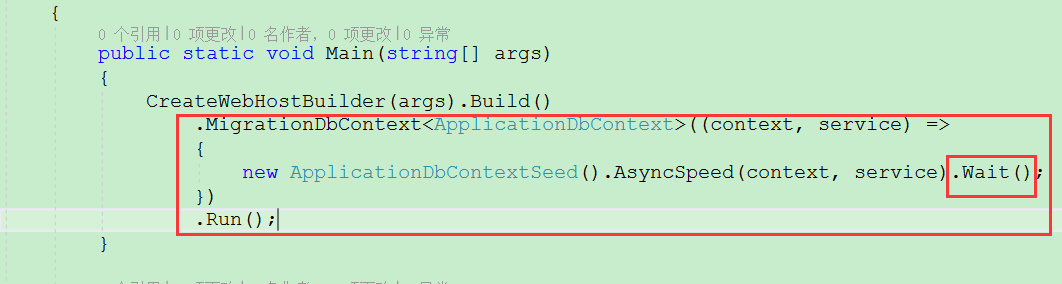
因为方法是异步方法,所以用Wait()方法改为同步的
然后删除Migration中的所有文件,重新add,可以 不update,因为代码会:context.Database.Migrate();
然后数据库已经初始化了

通过var user = _userManager.FindByEmailAsync("cnblogs@163.com").Result;可以查找用户,
 [HttpPost]
        public IActionResult Login(LoginViewModel model)
        {
           var user =  _userManager.FindByEmailAsync(model.Email).Result;

            if (user!=null)
            {
                var claims = new List<Claim> {
                    new Claim("name",model.UserName)
                };
                var claimsIdentity = new ClaimsIdentity(claims, CookieAuthenticationDefaults.AuthenticationScheme);

                var cliamsPrincipal = new ClaimsPrincipal(claimsIdentity);

                HttpContext.SignInAsync(CookieAuthenticationDefaults.AuthenticationScheme, cliamsPrincipal);

                return RedirectToAction("Index", "Home");
            }
            return RedirectToAction("Index");
        }
本文主要讲了magration的操作和identity身份的验证
源码:https://github.com/byniqing/AspNetCore-identity
参考资料
https://docs.microsoft.com/en-us/aspnet/core/migration/proper-to-2x/?view=aspnetcore-2.2
https://www.cnblogs.com/jqdy/p/5941248.html
https://docs.microsoft.com/zh-cn/ef/core/miscellaneous/cli/dotnet#dotnet-ef-migrations-remove