1、adb install强制安装在SD卡
因为盒子/data/空间不够了。而默认apk就安装在了/data/目录下。因此需要更改默认安装位置
命令参照
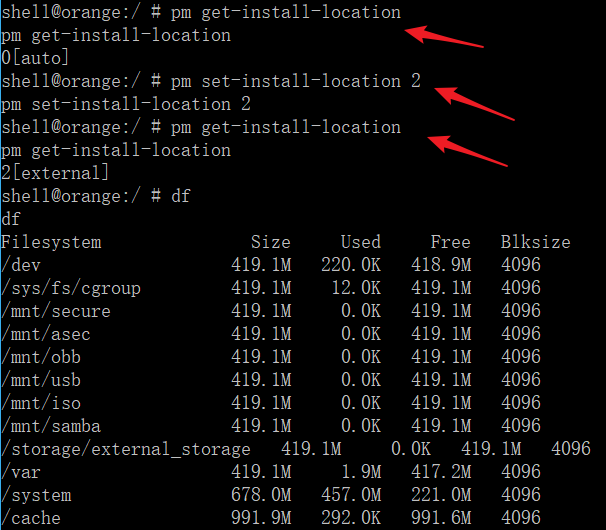
进入adb shell

$adb shell
$pm set-install-location 0
pm set-install-location 0 由app自行决定软件能否安装在sd卡
pm set-install-location 1 强制全部app安装在rom内
pm set-install-location 2 强制全部app安装在sd卡

同时可以用pm set-install-location获取当前安装地址的信息,返回0,1,2描述同上
然而我发现实际机顶盒安装的时候依然是安装到了本机存储上,而不是sd卡上
关于指定安装路径这一部分,我又找了一些参考的。问题和我一样,后面有机会可以测试下,这里我没测试
参考地址
https://www.cnblogs.com/eustoma/p/4059542.html
实例:如何在海信2.2 STB上将APK安装到U盘中:
首先尝试使用:
pm set-install-location 2
之后安装之,没有用。

后来做如下尝试:
在其它设置->存储设备->制定默认存储设备中选择U盘为默认存储设备。
# pm install -s xxxx.apk

就可以成功。
2、adb安装apk报错Failure [INSTALL_FAILED_INVALID_URI]
很可能原因是包不存在,或者路径写错了。
我这里是包因为垃圾清理时删除了。然后没注意到,执行安装报了这个错误
shell@orange:/ # cd /mnt/usb/
cd /mnt/usb/
shell@orange:/mnt/usb # pm install zyqp-release.apk
pm install zyqp-release.apk
        pkg: zyqp-release.apk
Failure [INSTALL_FAILED_INVALID_URI]
shell@orange:/mnt/usb # pm install /mnt/usb/zyqp-release.apk
pm install /mnt/usb/zyqp-release.apk
        pkg: /mnt/usb/zyqp-release.apk
Failure [INSTALL_FAILED_INVALID_URI]
3、盒子存储空间不够
导致安装报如下错误
Failure [INSTALL_FAILED_INSUFFICIENT_STORAGE]
这里因为默认都是安装到了/data/目录下的,空间不够导致失败
shell@orange:/mnt/usb # pm install zyqp-release.apk
pm install zyqp-release.apk
        pkg: zyqp-release.apk
Failure [INSTALL_FAILED_INSUFFICIENT_STORAGE]
shell@orange:/mnt/usb # df
df
Filesystem               Size     Used     Free   Blksize
/dev                   419.1M   220.0K   418.9M   4096
/sys/fs/cgroup         419.1M    12.0K   419.1M   4096
/mnt/secure            419.1M     0.0K   419.1M   4096
/mnt/asec              419.1M     0.0K   419.1M   4096
/mnt/obb               419.1M     0.0K   419.1M   4096
/mnt/usb               419.1M    14.2M   404.9M   4096
/mnt/iso               419.1M     0.0K   419.1M   4096
/mnt/samba             419.1M     0.0K   419.1M   4096
/storage/external_storage   419.1M     0.0K   419.1M   4096
/var                   419.1M     3.1M   416.0M   4096
/system                678.0M   457.0M   221.0M   4096
/cache                 991.9M   292.0K   991.6M   4096
/data                  495.9M   422.9M    73.1M   4096
/tvservice              55.0M    18.5M    36.6M   4096
/tvconfig                5.8M     2.7M     3.1M   4096
/tvdatabase              3.9M   304.0K     3.6M   4096
/tvcustomer             11.7M    40.0K    11.7M   4096
/flashdata              15.7M    56.0K    15.6M   4096
/mnt/shell/emulated    495.9M   422.9M    73.1M   4096
/data/vmtmp              4.0M    24.0K     4.0M   4096
/mnt/media_rw/sdcard0     1.8G     1.6G   262.4M   32768
以下空间可以清理
除了卸载不必要的APP以及整理照片、视频,还可以手动删除一些系统文件。
比如在/data/local/目录,其中的tmp就是缓存文件,将它们全部删除。
另外在/data/dalvik-cache中则是系统缓存文件和卸载程序后留下来的无用记录文件,可以放心全部删除。(删除后可能会提醒部分APP停止运行,不必担心)系统所需文件重启后就能自动生成。
这个报错的特殊情况(我没遇到过,别人遇到的)
Failure [INSTALL_FAILED_INSUFFICIENT_STORAGE]

其实,在应用第一次安装的时候,APK 文件会被保存在如下路径中:

/data/app/<package-name>-1.apk
当这个 APK 文件更新,需要重新安装之后, APK 会重新被保存在相同的目录中,但是文件的序号会相应增加。然后之前一个版本的 APK -1.apk文件会被删除。

/data/app/<package-name>-2.apk
如果这时又有了一个新版本的 APK 需要安装,那么这个文件又会被保存为 -1.apk, 相应的,-2.apk 也会被删除。以此类推,如果又有新的 APK, 那么这个逻辑会一直交替下去。

而 INSTALL_FAILED_INSUFFICIENT_STORAGE 错误发生的情况中,大部分是因为 APK 更新之后, /data/app/ 里的文件删除失败, -1.apk 和 -2.apk 残留导致的。

解决办法

所以,很简单,在安装之前先清除 /data/app/ 下对应包名的文件就好了。解决方法如下:

adb shell pm uninstall <full.packge.name>
adb shell rm -rf /data/app/<full.package.name>-*

作者:_Ryeeeeee
链接:https://www.jianshu.com/p/4eb025c13a48
來源:简书
著作权归作者所有。商业转载请联系作者获得授权,非商业转载请注明出处。
4、adb模式下pm命令详解
pm install 安装应用

pm unitall 卸载应用

pm clear 清除应用缓存
介绍adb shell中一个很重要的命令——pm(Package Manager),这个命令主要用于获取和安装在 Android 设备上的应用信息。
安装APK:
pm install [-l] [-r] [-t] [-i INSTALLER_PACKAGE_NAME] [-s] [-f] PATH

PATH 指 APK文件绝对路径和文件名。

例如:
pm install /data/3dijoy_fane.apk

这几个参数很有用:
-r: 安装一个已经安装的APK,保持其数据不变。
-i:指定安装的包名。(没试出来)
-s: 安装到SDCard上。
-f: 安装到内部Flash上。


卸载APK:
pm uninstall 包名。
例如:
pm uninstall com.TDiJoy.fane
关于pm命令的用法解析。命令行下输入adb shell pm即可获得关于pm的用法帮助,如下所示:
usage: pm list packages [-f] [-d] [-e] [-s] [-3] [-i] [-u] [--user USER_ID] [FILTER]
       pm list permission-groups
       pm list permissions [-g] [-f] [-d] [-u] [GROUP]
       pm list instrumentation [-f] [TARGET-PACKAGE]
       pm list features
       pm list libraries
       pm list users
       pm path PACKAGE
       pm dump PACKAGE
       pm install [-lrtsfd] [-i PACKAGE] [PATH]
       pm install-create [-lrtsfdp] [-i PACKAGE] [-S BYTES]
       pm install-write [-S BYTES] SESSION_ID SPLIT_NAME [PATH]
       pm install-commit SESSION_ID
       pm install-abandon SESSION_ID
       pm uninstall [-k] [--user USER_ID] PACKAGE
       pm set-installer PACKAGE INSTALLER
       pm clear [--user USER_ID] PACKAGE
       pm enable [--user USER_ID] PACKAGE_OR_COMPONENT
       pm disable [--user USER_ID] PACKAGE_OR_COMPONENT
       pm disable-user [--user USER_ID] PACKAGE_OR_COMPONENT
       pm disable-until-used [--user USER_ID] PACKAGE_OR_COMPONENT
       pm hide [--user USER_ID] PACKAGE_OR_COMPONENT
       pm unhide [--user USER_ID] PACKAGE_OR_COMPONENT
       pm grant PACKAGE PERMISSION
       pm revoke PACKAGE PERMISSION
       pm set-install-location [0/auto] [1/internal] [2/external]
       pm get-install-location
       pm set-permission-enforced PERMISSION [true|false]
       pm trim-caches DESIRED_FREE_SPACE
       pm create-user [--profileOf USER_ID] [--managed] USER_NAME

       pm remove-user USER_ID
       pm get-max-users

pm list packages: prints all packages, optionally only
  those whose package name contains the text in FILTER.  Options:
    -f: see their associated file.
    -d: filter to only show disbled packages.
    -e: filter to only show enabled packages.
    -s: filter to only show system packages.
    -3: filter to only show third party packages.
    -i: see the installer for the packages.
    -u: also include uninstalled packages.

pm list permission-groups: prints all known permission groups.

pm list permissions: prints all known permissions, optionally only
  those in GROUP.  Options:
    -g: organize by group.
    -f: print all information.
    -s: short summary.
    -d: only list dangerous permissions.
    -u: list only the permissions users will see.

pm list instrumentation: use to list all test packages; optionally
  supply <TARGET-PACKAGE> to list the test packages for a particular
  application.  Options:
    -f: list the .apk file for the test package.

pm list features: prints all features of the system.

pm list users: prints all users on the system.

pm path: print the path to the .apk of the given PACKAGE.

pm dump: print system state associated with the given PACKAGE.

pm install: install a single legacy package
pm install-create: create an install session
    -l: forward lock application
    -r: replace existing application
    -t: allow test packages
    -i: specify the installer package name
    -s: install application on sdcard
    -f: install application on internal flash
    -d: allow version code downgrade
    -p: partial application install
    -S: size in bytes of entire session

pm install-write: write a package into existing session; path may
  be '-' to read from stdin
    -S: size in bytes of package, required for stdin

pm install-commit: perform install of fully staged session
pm install-abandon: abandon session

pm set-installer: set installer package name

pm uninstall: removes a package from the system. Options:
    -k: keep the data and cache directories around after package removal.

pm clear: deletes all data associated with a package.

pm enable, disable, disable-user, disable-until-used: these commands
  change the enabled state of a given package or component (written
  as "package/class").

pm grant, revoke: these commands either grant or revoke permissions
  to applications.  Only optional permissions the application has
  declared can be granted or revoked.

pm get-install-location: returns the current install location.
    0 [auto]: Let system decide the best location
    1 [internal]: Install on internal device storage
    2 [external]: Install on external media

pm set-install-location: changes the default install location.
  NOTE: this is only intended for debugging; using this can cause
  applications to break and other undersireable behavior.
    0 [auto]: Let system decide the best location
    1 [internal]: Install on internal device storage
    2 [external]: Install on external media

pm trim-caches: trim cache files to reach the given free space.

pm create-user: create a new user with the given USER_NAME,
  printing the new user identifier of the user.

pm remove-user: remove the user with the given USER_IDENTIFIER,
  deleting all data associated with that user
5、常用命令
进入终端:adb shell 安装APK:adb push xxx(apk所在的路径) xxx(apk将要安装的路径下,即目的地路径) 或adb install xxx(apk所在的路径) xxx(apk将要安装的路径下,即目的地路径); 移除APK:rm xxx.apk 或 rm -rf xxx.apk 连接盒子:adb connect 192.168.160.1(盒子的ip地址,这个得换成自己盒子得ip) 断开盒子:adb disconnect 192.168.160.1(盒子的ip地址,这个得换成自己盒子得ip) 修改系统读写权限:adb remount 或mount -o remount /system 杀死服务:adb kill-server 查看设备信息:adb devices 打印log信息:adb logcat 重启:adb reboot 展示内容列表:ll 或 ls 终端拷贝文件:copy xxx(源文件路径) xxx(目的地路径)
6、adb 命令提示设备offline
参考地址
https://www.cnblogs.com/mgzc-1508873480/p/6994597.html
adb devices 提示offline

问题原因:adb版本太旧,旧版本不支持4.2.2以上系统或小米V5

解决方法:更新adb版本

操作步骤:

1)  检查adb版本:adb version;

2)  更新到1.0.31或以上版本:sudo find / -name adb

3)  拔掉usb线,重新连接

4)  如果adb版本已更新到1.0.31,但仍存在offline问题,则更新platform tool到16.0.1以上版本;

5)  重启手机,重新连接。