1、ubuntu部署
1.1 安装Zabbix仓库
#ubuntu版本为1804
root@ubuntu-40:~# wget https://repo.zabbix.com/zabbix/4.0/ubuntu/pool/main/z/zabbix-release/zabbix-release_4.0-3+bionic_all.deb
root@ubuntu-40:~# dpkg -i zabbix-release_4.0-3+bionic_all.deb
#默认仓库在国外,可能较慢,建议替换为阿里云仓库
root@ubuntu-40:~# sed -in 's#repo.zabbix.com#mirrors.aliyun.com/zabbix#' /etc/apt/sources.list.d/zabbix.list
root@ubuntu-40:~# apt update
root@ubuntu-40:~# apt -y install zabbix-server-mysql zabbix-frontend-php zabbix-agent
1.3 创建初始数据库
数据库可以直接安装在zabbix服务本机,也可安装在远程主机上,建议安装在远程主机上。
root@ubuntu-40:~# mysql
#创建zabbix数据库
MariaDB [(none)]> create database zabbix character set utf8 collate utf8_bin;
Query OK, 1 row affected (0.00 sec)
#创建用户及授权
#注意:一步创建用户及授权只支持在mariaDB和mysql5版本;mysql8.0以后的版本需分步授权
MariaDB [(none)]> grant all privileges on zabbix.* to zabbix@"localhost" identified by '123456';
Query OK, 0 rows affected (0.00 sec)

#mysql8.0版本创建用户及授权
MariaDB [(none)]> create user zabbix@localhost identified by '123456';
MariaDB [(none)]> grant all privileges on zabbix.* to zabbix@localhost;

#导入初始架构和数据
oot@ubuntu-40:~# zcat /usr/share/doc/zabbix-server-mysql*/create.sql.gz | mysql -uzabbix -p123456 zabbix

#查看生成的表
root@ubuntu-40:/data# mysql -uzabbix -p
Enter password:
Welcome to the MariaDB monitor.  Commands end with ; or g.
Your MariaDB connection id is 43
Server version: 10.1.47-MariaDB-0ubuntu0.18.04.1 Ubuntu 18.04

Copyright (c) 2000, 2018, Oracle, MariaDB Corporation Ab and others.

Type 'help;' or 'h' for help. Type 'c' to clear the current input statement.

MariaDB [(none)]> show databases;
+--------------------+
| Database           |
+--------------------+
| information_schema |
| zabbix             |
+--------------------+
2 rows in set (0.00 sec)

MariaDB [(none)]> use zabbix;
Reading table information for completion of table and column names
You can turn off this feature to get a quicker startup with -A

Database changed
MariaDB [zabbix]> show tables;
+----------------------------+
| Tables_in_zabbix           |
+----------------------------+
| acknowledges               |
| actions                    |
| alerts                     |
| application_discovery      |
| application_prototype      |
| application_template       |
....

144 rows in set (0.01 sec)
1.4 编辑zabbix server配置文件
root@ubuntu-40:~# vim /etc/zabbix/zabbix_server.conf

#由于初始化数据库时的数据库名和官网一致,所以我们只需要更改DBPassword这一项。
root@ubuntu-40:~# grep '^[a-Z]' /etc/zabbix/zabbix_server.conf
LogFile=/var/log/zabbix/zabbix_server.log
LogFileSize=0
PidFile=/var/run/zabbix/zabbix_server.pid
SocketDir=/var/run/zabbix
#此项如果你的数据库不是在本机,应将此行取消注释,并修改为远程数据库的IP地址
# DBHost=localhost
DBName=zabbix  #初始化数据库时所设置的
DBUser=zabbix  #初始化数据库时所设置的
DBPassword=123456 #初始化数据库时所设置的
SNMPTrapperFile=/var/log/snmptrap/snmptrap.log
Timeout=4
AlertScriptsPath=/usr/lib/zabbix/alertscripts
ExternalScripts=/usr/lib/zabbix/externalscripts
FpingLocation=/usr/bin/fping
Fping6Location=/usr/bin/fping6
LogSlowQueries=3000
1.5 修改时区
#编辑配置文件 /etc/zabbix/apache.conf,将时区改为亚洲上海
#需根据安装的php版本来配置,5版本的php就在IfModule mod_php5.c下配置,7版本的php就在fModule mod_php7.c下配置。
root@ubuntu-40:~# vim /etc/zabbix/apache.conf
php_value date.timezone Asia/Shanghai
1.6 启动zabbix服务
root@ubuntu-40:~# systemctl restart zabbix-server zabbix-agent apache2
2、centos7部署
2.1 安装zabbix仓库
[root@centos7-100 ~]# rpm -Uvh https://repo.zabbix.com/zabbix/4.0/rhel/7/x86_64/zabbix-release-4.0-2.el7.noarch.rpm
#将仓库更改为阿里云的仓库
[root@centos7-100 ~]# sed -in 's#repo.zabbix.com#mirrors.aliyun.com/zabbix#' /etc/yum.repos.d/zabbix.repo
[root@centos7-100 ~]# yum clean all
2.2 安装Zabbix server,Web前端,agent
[root@centos7-100 ~]# yum install zabbix-server-mysql zabbix-web-mysql zabbix-agent
2.3 创建初始数据库
数据库可以直接安装在zabbix服务本机,也可安装在远程主机上,建议安装在远程主机上。
[root@centos7-100 ~]# mysql
#创建zabbix数据库
MariaDB [(none)]> create database zabbix character set utf8 collate utf8_bin;
Query OK, 1 row affected (0.00 sec)
#创建用户及授权
#注意:一步创建用户及授权只支持在mariaDB和mysql5版本;mysql8.0以后的版本需分步授权
MariaDB [(none)]> grant all privileges on zabbix.* to zabbix@"localhost" identified by '123456';
Query OK, 0 rows affected (0.00 sec)

#mysql8.0版本创建用户及授权
# create user zabbix@localhost identified by '123456';
# grant all privileges on zabbix.* to zabbix@localhost;

#导入初始架构和数据
oot@ubuntu-40:~# zcat /usr/share/doc/zabbix-server-mysql*/create.sql.gz | mysql -uzabbix -p123456 zabbix

#查看生成的表
root@ubuntu-40:/data# mysql -uzabbix -p
Enter password:
Welcome to the MariaDB monitor.  Commands end with ; or g.
Your MariaDB connection id is 43
Server version: 10.1.47-MariaDB-0ubuntu0.18.04.1 Ubuntu 18.04

Copyright (c) 2000, 2018, Oracle, MariaDB Corporation Ab and others.

Type 'help;' or 'h' for help. Type 'c' to clear the current input statement.

MariaDB [(none)]> show databases;
+--------------------+
| Database           |
+--------------------+
| information_schema |
| zabbix             |
+--------------------+
2 rows in set (0.00 sec)

MariaDB [(none)]> use zabbix;
Reading table information for completion of table and column names
You can turn off this feature to get a quicker startup with -A

Database changed
MariaDB [zabbix]> show tables;
+----------------------------+
| Tables_in_zabbix           |
+----------------------------+
| acknowledges               |
| actions                    |
| alerts                     |
| application_discovery      |
| application_prototype      |
| application_template       |
....
144 rows in set (0.01 sec)
2.4 修改配置文件
[root@centos7-100 ~]# vim /etc/zabbix/zabbix_server.conf

#由于初始化数据库时的数据库名和官网一致,所以我们只需要更改DBPassword这一项。
root@ubuntu-40:~# grep '^[a-Z]' /etc/zabbix/zabbix_server.conf
LogFile=/var/log/zabbix/zabbix_server.log
LogFileSize=0
PidFile=/var/run/zabbix/zabbix_server.pid
SocketDir=/var/run/zabbix
#此项如果你的数据库不是在本机,应将此行取消注释,并修改为远程数据库的IP地址
# DBHost=localhost
DBName=zabbix  #初始化数据库时所设置的
DBUser=zabbix  #初始化数据库时所设置的
DBPassword=123456 #初始化数据库时所设置的
SNMPTrapperFile=/var/log/snmptrap/snmptrap.log
Timeout=4
AlertScriptsPath=/usr/lib/zabbix/alertscripts
ExternalScripts=/usr/lib/zabbix/externalscripts
FpingLocation=/usr/bin/fping
Fping6Location=/usr/bin/fping6
LogSlowQueries=3000
2.5 修改时区
#编辑配置文件 /etc/httpd/conf.d/zabbix.conf,将时区改为亚洲上海
#需根据安装的php版本来配置,5版本的php就在IfModule mod_php5.c下配置,7版本的php就在fModule mod_php7.c下配置。centos7默认安装的Php版本为5,所以需在IfModule mod_php5.c下进行配置。
[root@centos7-100 ~]# vim /etc/httpd/conf.d/zabbix.conf
php_value date.timezone Asia/Shanghai
2.6 启动zabbix服务
[root@centos7-100 ~]# systemctl restart zabbix-server zabbix-agent httpd
[root@centos7-100 ~]# systemctl enable zabbix-server zabbix-agent httpd
二、编译安装zabbix
1 下载源码包及编译准备
下载地址:https://jaist.dl.sourceforge.net/project/zabbix/ZABBIX%20Latest%20Stable
#创建zabbix用户和组
root@ubuntu-30:~# groupadd -g 2020 zabbix
root@ubuntu-30:~# useradd -u 2020 -g 2020 zabbix
root@ubuntu-30:~# id zabbix
uid=2020(zabbix) gid=2020(zabbix) groups=2020(zabbix)

#下载源码包
root@ubuntu-30:~# weget https://jaist.dl.sourceforge.net/project/zabbix/ZABBIX%20Latest%20Stable/4.0.19/zabbix-4.0.19.tar.gz
root@ubuntu-30:~# tar xf zabbix-4.0.19.tar.gz -C /usr/local/
root@ubuntu-30:~# cd /usr/local/zabbix-4.0.19/
2 解决依赖关系
centos
# yum -y install gcc libxml2-devel net-snmp net-snmp-devel curl curl-devel php php-bcmath php-mbstring mariadb mariadb-devel
ubuntu
# apt update
# apt -y install apache2 apache2-bin apache2-data apache2-utils fontconfig-config
 fonts-dejavu-core fping libapache2-mod-php libapache2-mod-php7.2 libapr1 libaprutil1
 libaprutil1-dbd-sqlite3 libaprutil1-ldap libfontconfig1 libgd3 libiksemel3 libjbig0
 libjpeg-turbo8 libjpeg8 liblua5.2-0 libodbc1 libopenipmi0 libsensors4 libsnmp-base
 libsnmp30 libsodium23 libssh2-1 libtiff5 libwebp6 libxpm4 php-bcmath php-common
 php-gd php-ldap php-mbstring php-mysql php-xml php7.2-bcmath php7.2-cli php7.2-common
 php7.2-gd php7.2-json php7.2-ldap php7.2-mbstring php7.2-mysql php7.2-opcache php7.2-readline
 php7.2-xml snmpd ssl-cert ttf-dejavu-core libmysqlclient-dev libxml2-dev libxml2 snmp
 libsnmp-dev libevent-dev openjdk-8-jdk curl libcurl4-openssl-dev snmpd libsnmp-dev
3 编译安装
# ./configure --prefix=/apps/zabbix_server --enable-server --enable-agent --with-mysql --with-net-snmp --with-libcurl --with-libxml2 --enable-java
# make install
4 准备数据库
# apt -y install mysql-server mysql-client
root@ubuntu-30:~# mysql
#创建zabbix数据库
mysql> create database zabbix character set utf8 collate utf8_bin;
Query OK, 1 row affected (0.00 sec)
#创建用户及授权
#注意:一步创建用户及授权只支持在mariaDB和mysql5版本;mysql8.0以后的版本需分步授权
mysql> grant all privileges on zabbix.* to zabbix@"localhost" identified by '123456';
Query OK, 0 rows affected, 1 warning (0.00 sec)

#mysql8.0版本创建用户及授权
# create user zabbix@localhost identified by '123456';
# grant all privileges on zabbix.* to zabbix@localhost;
5 导入初始化数据库
root@ubuntu-30:/usr/local/zabbix-4.0.19# cd database/mysql/
root@ubuntu-30:/usr/local/zabbix-4.0.19/database/mysql# pwd
/usr/local/zabbix-4.0.19/database/mysql
root@ubuntu-30:/usr/local/zabbix-4.0.19/database/mysql# mysql -uzabbix -p123456 zabbix < schema.sql
root@ubuntu-30:/usr/local/zabbix-4.0.19/database/mysql# mysql -uzabbix -p123456 zabbix < images.sql
root@ubuntu-30:/usr/local/zabbix-4.0.19/database/mysql# mysql -uzabbix -p123456 zabbix < data.sql
6 验证数据库
root@ubuntu-30:~# mysql -uzabbix -p123456
mysql> use zabbix;
mysql> show tables;
+----------------------------+
| Tables_in_zabbix           |
+----------------------------+
| acknowledges               |
| actions                    |
| alerts                     |
| application_discovery      |
| application_prototype      |
....
144 rows in set (0.00 sec)
7 编辑zabbix server配置文件
root@ubuntu-30:~# vim /apps/zabbix_server/etc/zabbix_server.conf
root@ubuntu-30:~# grep "^[a-Z]" /apps/zabbix_server/etc/zabbix_server.conf
LogFile=/tmp/zabbix_server.log
#此项如果你的数据库不是在本机,应将此行取消注释,并修改为远程数据库的IP地址
# DBHost=localhost
DBName=zabbix    #初始化数据库时设置的
DBUser=zabbix    #初始化数据库时设置的
DBPassword=123456    #初始化数据库时设置的
Timeout=4
LogSlowQueries=3000
8 配置web界面
root@ubuntu-30:~# mkdir /var/www/html/zabbix
root@ubuntu-30:~# cd /usr/local/zabbix-4.0.19/frontends/php/
root@ubuntu-30:/usr/local/zabbix-4.0.19/frontends/php# cp -a . /var/www/html/zabbix/
9 配置服务文件并启动zabbix
#zabbix-server服务文件
root@ubuntu-30:~# cat /lib/systemd/system/zabbix-server.service
[Unit]
Description=Zabbix Server
After=syslog.target
After=network.target

[Service]
Environment="CONFFILE=/apps/zabbix_server/etc/zabbix_server.conf"
EnvironmentFile=-/etc/default/zabbix-server
Type=forking
Restart=on-failure
PIDFile=/apps/zabbix_server/run/zabbix_server.pid #此行如修改,需在配置文件中修改
KillMode=control-group
ExecStart=/apps/zabbix_server/sbin/zabbix_server -c $CONFFILE
ExecStop=/bin/kill -SIGTERM $MAINPID
RestartSec=10s
TimeoutSec=infinity

[Install]
WantedBy=multi-user.target
#zabbix-agent服务文件
root@ubuntu-30:~# cat /lib/systemd/system/zabbix-agent.service
[Unit]
Description=Zabbix Agent
After=syslog.target
After=network.target

[Service]
Environment="CONFFILE=apps/zabbix_server/etc/zabbix_agentd.conf"
EnvironmentFile=-/etc/default/zabbix-agent
Type=forking
Restart=on-failure
PIDFile=/apps/zabbix_server/run/zabbix_agentd.pid #此行如修改,需在配置文件中修改
KillMode=control-group
ExecStart=/apps/zabbix_server/sbin/zabbix_agentd -c $CONFFILE
ExecStop=/bin/kill -SIGTERM $MAINPID
RestartSec=10s
User=zabbix
Group=zabbix

[Install]
WantedBy=multi-user.target
#启动zabbix-server和zabbix-agent
# systemctl start zabbix-agent.service zabbix-server.service
#设置为开机启动
# systemctl enable zabbix-agent.service zabbix-server.service
10 初始化页面报错解决
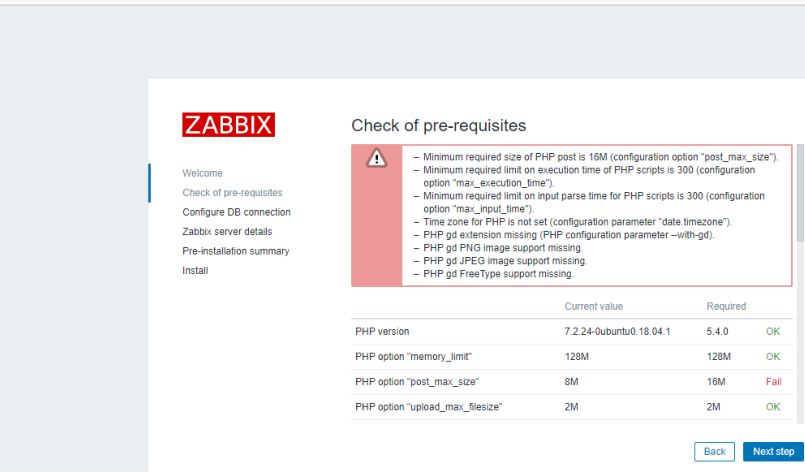
#按照页面报错的配置项编辑/etc/php/7.2/apache2/php.ini文件
post_max_size = 16M
max_execution_time = 300
max_input_time = 300
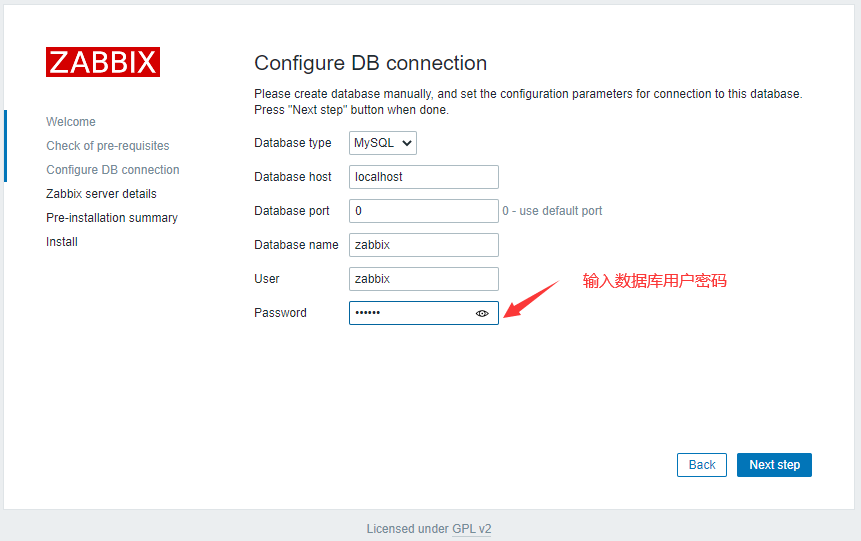
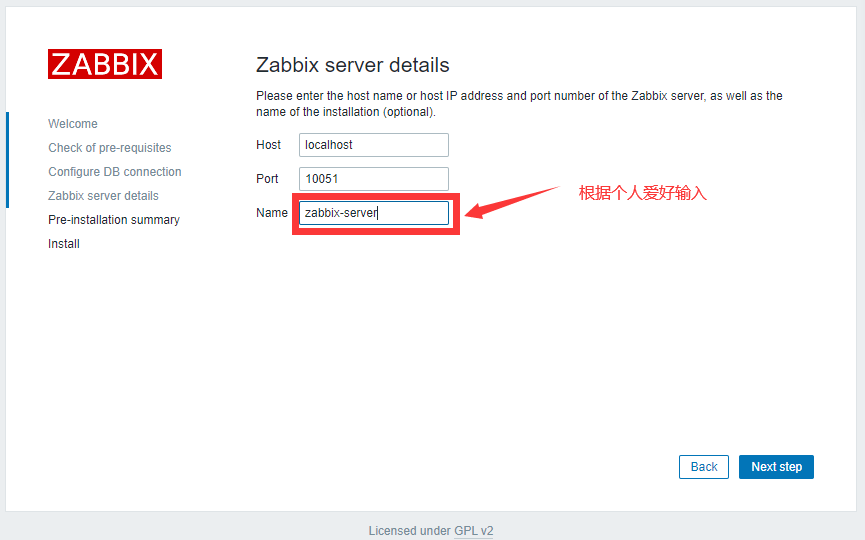
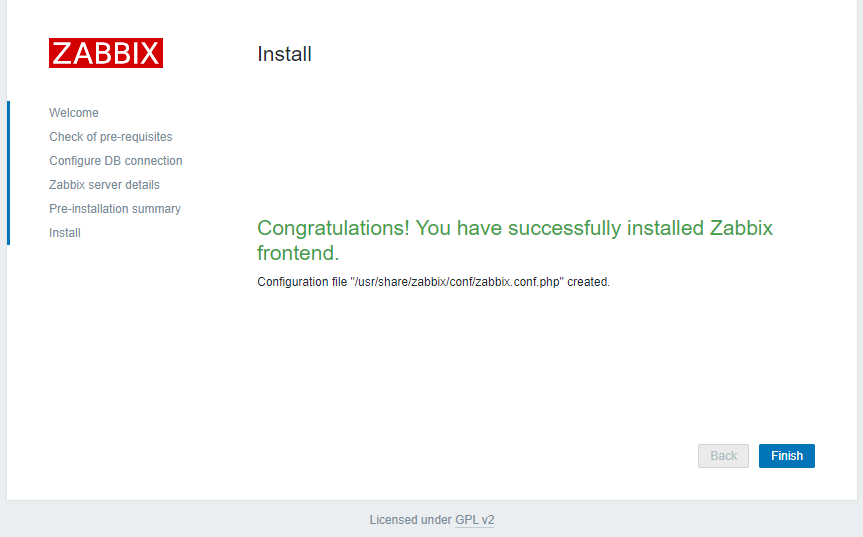
三、初始话web页面


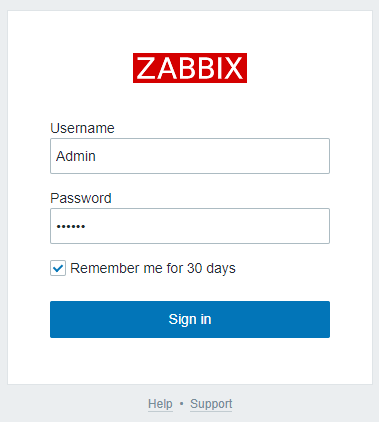
四、登陆
用户:Admin
初始化密码:zabbix
五、配置zabbix支持中文
#安装简体中文语言环境
root@ubuntu-30:~# sudo apt-get install language-pack-zh*

#增加中文语言环境变量
root@ubuntu-30:~# sudo vim /etc/environment
PATH="/usr/local/sbin:/usr/local/bin:/usr/sbin:/usr/bin:/sbin:/bin:/usr/games:/usr/local/games"
LANG="zh_CN.UTF-8"

#重新设置本地配置
sudo dpkg-reconfigure locales


#重启apache服务
# systemctl restart apache2

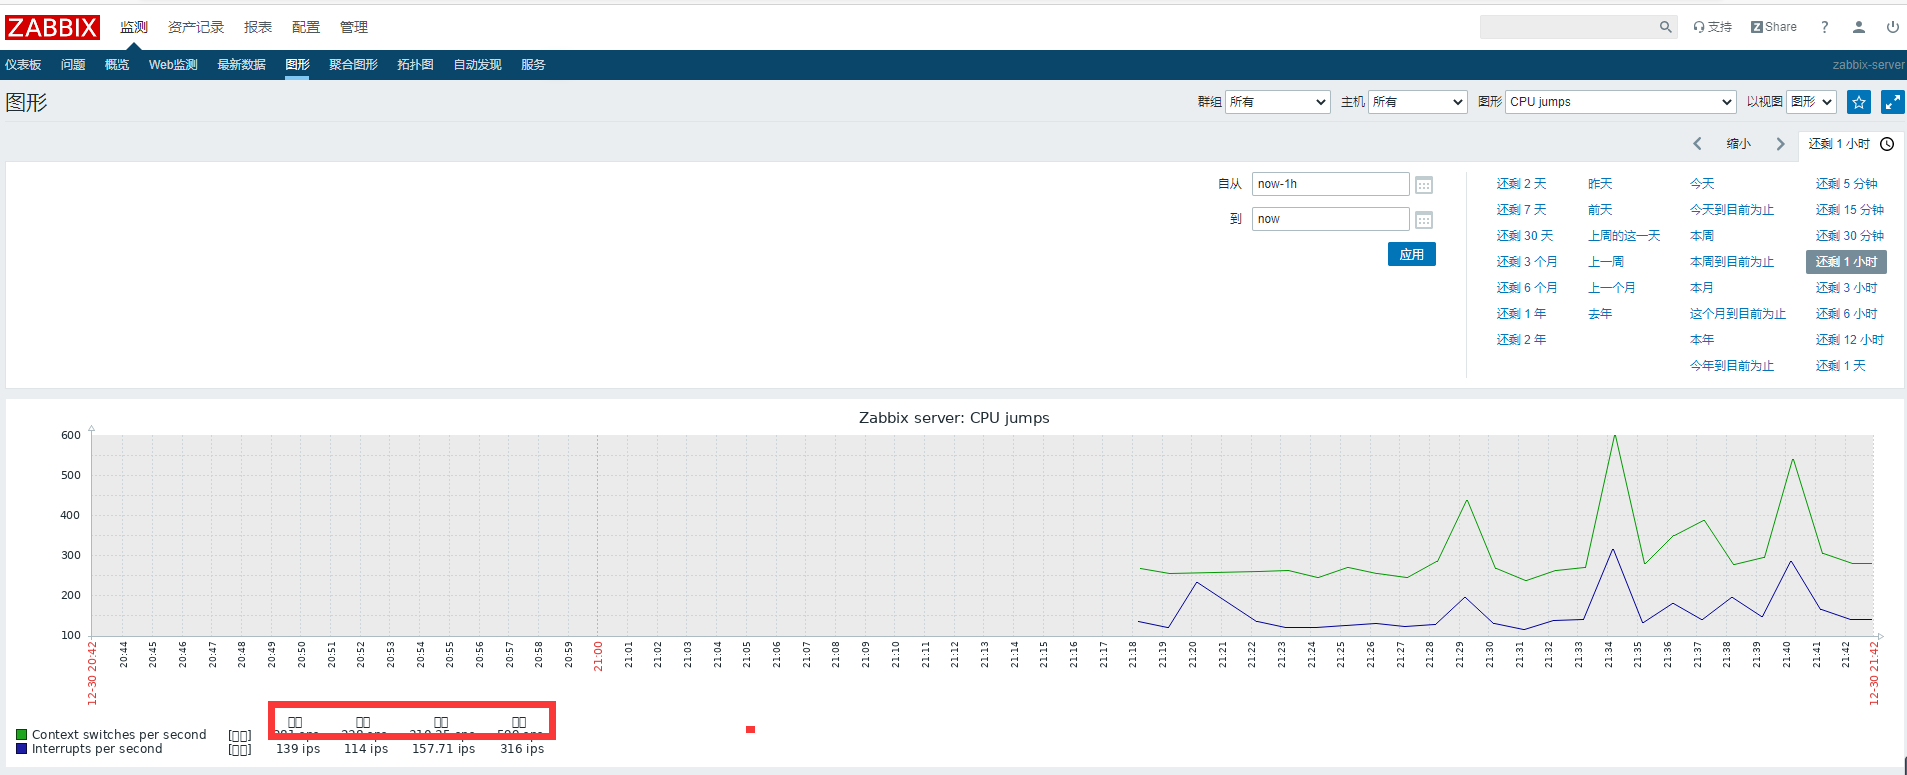
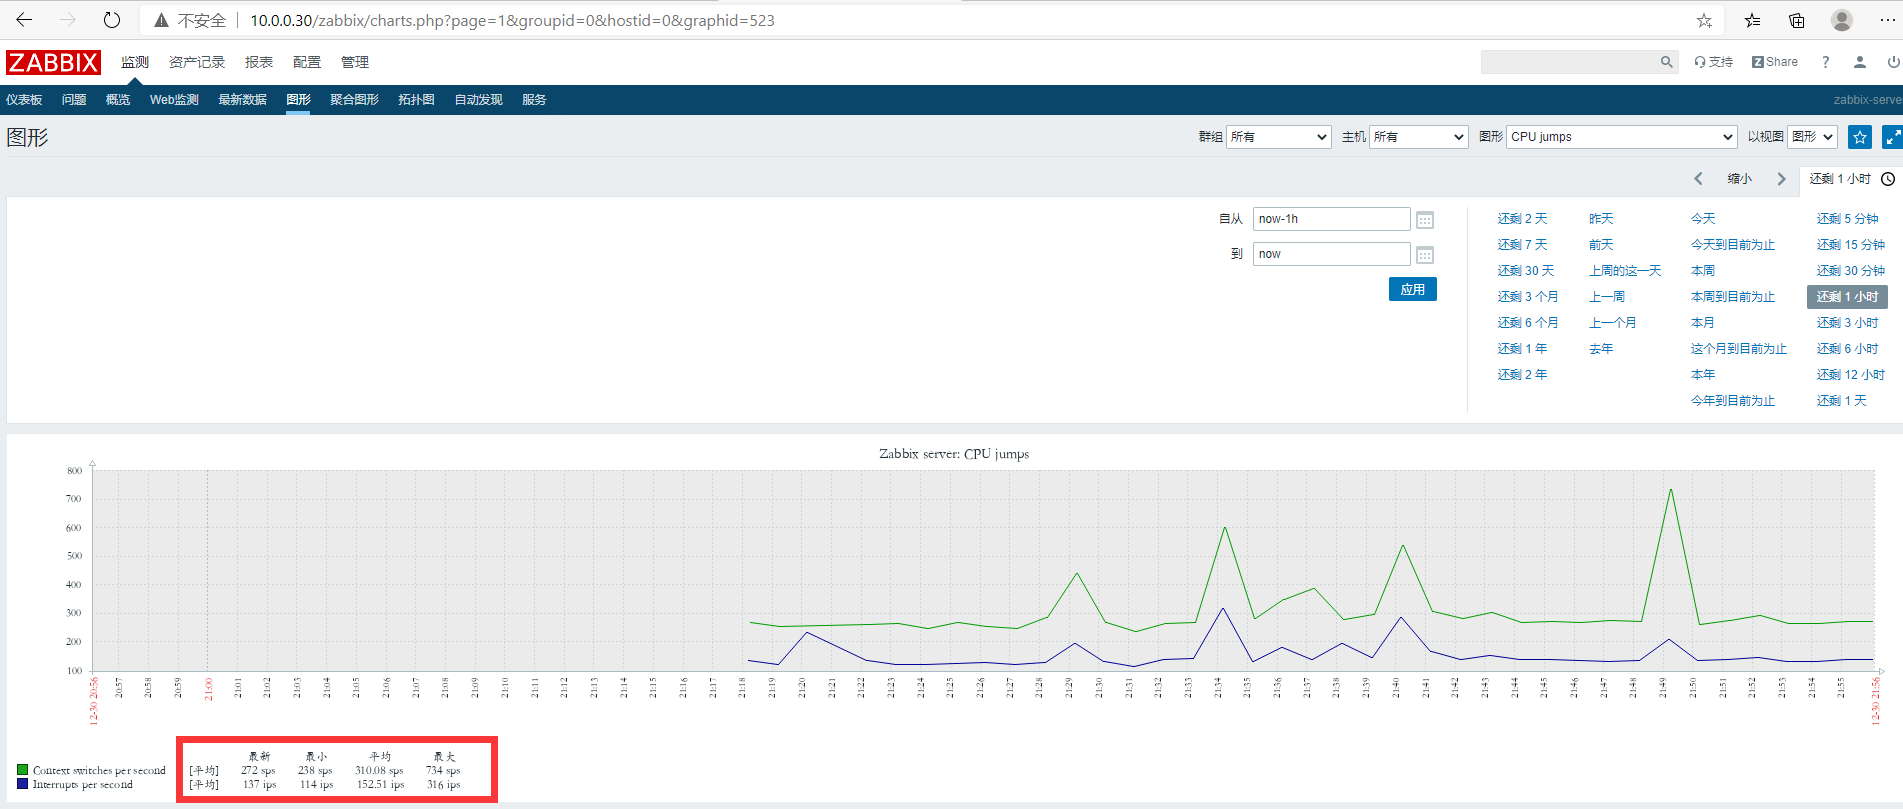
六、中文图形字体乱码解决
当前系统有些监控项部分显示有乱码,使由于web界面显示为中文但是系统没有相关字体支持,因此需要相关字体 的支持才能正常显示,如下:

1 将window的字体文件上传到zabbix服务器上

#在windows中选择一个喜欢的字体上传到/var/www/html/zabbix/assets/fonts目录下
root@ubuntu-30:~# cd /var/www/html/zabbix/assets/fonts
root@ubuntu-30:/var/www/html/zabbix/assets/fonts# chown zabbix.zabbix ./*
root@ubuntu-30:/var/www/html/zabbix/assets/fonts# ll
total 13188
drwxr-xr-x 2   1001   1001     4096 Dec 30 13:48 ./
drwxr-xr-x 5   1001   1001     4096 Mar 23  2020 ../
-rw-r--r-- 1 zabbix zabbix   756072 Mar 23  2020 DejaVuSans.ttf
-rw-r--r-- 1 zabbix zabbix 12736196 Sep 29  2012 stkaiti.ttf
ubuntu目录:/var/www/html/zabbix/assets/fonts
centos目录:/usr/share/zabbix/assets/fonts
2 修改zabbix文件调用新字体
ubuntu目录:/var/www/html/zabbix/include/defines.inc.php
entos目录:/usr/share/zabbix/include/defines.inc.php
root@ubuntu-30:~# vim /var/www/html/zabbix/include/defines.inc.php
root@ubuntu-30:~# sed -i 's#graphfont#stkaiti#g' /usr/share/zabbix/include/defines.inc.php
#修改第70行和第112行
#define('ZBX_GRAPH_FONT_NAME', 'DejaVuSans'); // font file name
define('ZBX_GRAPH_FONT_NAME', 'stkaiti'); // font file name
#define('ZBX_FONT_NAME', 'DejaVuSans');
define('ZBX_FONT_NAME', 'stkaiti');
3 验证字体是否生效
通常不需要重启zabbix及apache,修改后的字体文件即可直接生效。