本篇将结合这个系列的例子的基础上演示在Asp.Net Core里如何使用XUnit结合Moq进行单元测试,同时对整个项目进行集成测试。
第一部分、XUnit
修改 Project.json 文件内容,增加XUnit相关的nuget包引用,并修改部分配置。
 1 {
 2   "version": "1.0.0-*",
 3   "testRunner": "xunit",  // 设置测试工具为xunit
 4
 5   "buildOptions": {
 6     "debugType": "portable",
 7     "emitEntryPoint": true
 8   },
 9   "dependencies": {
10     "Microsoft.NETCore.App": {
11       "type": "platform",
12       "version": "1.0.0"
13     },
14     "Microsoft.AspNetCore.Server.Kestrel": "1.0.0",
15     "Microsoft.AspNetCore.Mvc": "1.0.0",
16     "Microsoft.Extensions.Logging": "1.0.0",
17     "Microsoft.Extensions.Logging.Console": "1.0.0",
18     "Microsoft.Extensions.Logging.Debug": "1.0.0",
19     "Microsoft.Extensions.Logging.Filter": "1.0.0",
20     "NLog.Extensions.Logging": "1.0.0-rtm-alpha2",
21     "Autofac.Extensions.DependencyInjection": "4.0.0-rc3-309",
22     "Microsoft.Extensions.Configuration": "1.0.0",
23     "Microsoft.Extensions.Configuration.FileExtensions": "1.0.0",
24     "Microsoft.Extensions.Configuration.Json": "1.0.0",
25     "Microsoft.Extensions.Options.ConfigurationExtensions": "1.0.0",
26     "xunit": "2.2.0-beta2-build3300",
27     "dotnet-test-xunit": "2.2.0-preview2-build1029"
28   },
29   "frameworks": {
30     "netcoreapp1.0": {
31       // 设置兼容框架
32       "imports": [
33         "dotnet54",
34         "portable-net45+win8"
35       ]
36     }
37   }
38 }
增加一个Demo类和一个测试类
 1 namespace WebApiFrame
 2 {
 3     public class DemoModel
 4     {
 5         public int Add(int a, int b)
 6         {
 7             return a + b;
 8         }
 9
10         public bool IsOdd(int num)
11         {
12             return num % 2 == 1;
13         }
14     }
15 }
 1 using Xunit;
 2
 3 namespace WebApiFrame.Test
 4 {
 5     public class DemoModelTest
 6     {
 7         private readonly DemoModel _demo;
 8
 9         public DemoModelTest()
10         {
11             _demo = new DemoModel();
12         }
13
14         [Fact]
15         public void AddTest()
16         {
17             int result = _demo.Add(1, 2);
18             Assert.Equal(3, result);
19         }
20     }
21 }
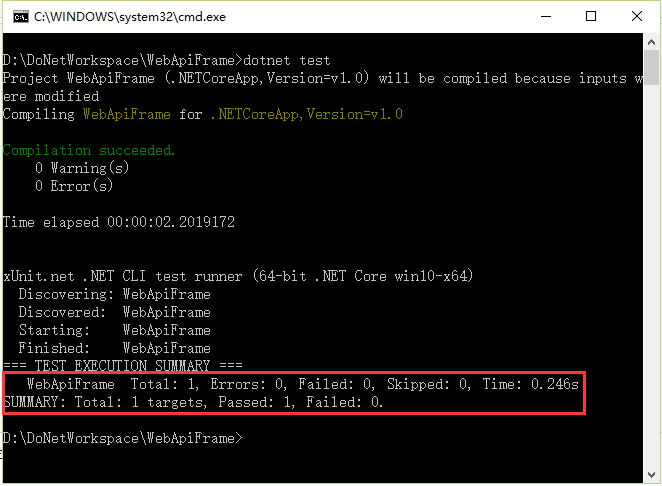
打开cmd窗口,进入到项目根目录,输入命令 dotnet test ,将启动单元测试,可以在输出查看测试结果
再对另外一个方法添加单元测试代码
1         [Theory]
2         [InlineData(1)]
3         [InlineData(2)]
4         [InlineData(3)]
5         public void IsOdd(int num)
6         {
7             bool result = _demo.IsOdd(num);
8             Assert.True(result, $"{num} is not odd.");
9         }
再次启动单元测试,查看测试结果

结果显示执行了四个单元测试用例,有一个失败了。
通过比较上面两个测试方法可以发现使用的特性标识不同,测试方法的参数列表也不相同。
[Face]特性标识表示固定输入的测试用例,而[Theory]特性标识表示可以指定多个输入的测试用例,结合InlineData特性标识使用。在上面的例子里,总共使用了三次InlineData特性标识,每次设定的值都不同,在执行单元测试时,设定的值会被测试框架赋值到对应的测试方法的参数里。
第二部分、Moq
在之前的例子里已经定义了如下接口和类


 1 using System.Collections.Generic;
 2 using WebApiFrame.Models;
 3
 4 namespace WebApiFrame.Repositories
 5 {
 6     public interface IUserRepository
 7     {
 8         IEnumerable<User> GetAll();
 9
10         User GetById(int id);
11     }
12 }
 1 using System;
 2 using Microsoft.AspNetCore.Mvc;
 3 using WebApiFrame.Models;
 4 using WebApiFrame.Repositories;
 5
 6 namespace WebApiFrame.Controllers
 7 {
 8     [Route("api/[controller]")]
 9     public class UsersController : Controller
10     {
11         private readonly IUserRepository userRepository;
12
13         public UsersController(IUserRepository userRepo)
14         {
15             userRepository = userRepo;
16         }
17
18         [HttpGet]
19         public IActionResult GetAll()
20         {
21             var list = userRepository.GetAll();
22             return new ObjectResult(list);
23         }
24
25         [HttpGet("{id}")]
26         public IActionResult Get(int id)
27         {
28             var user = userRepository.GetById(id);
29             return new ObjectResult(user);
30         }
31
32         #region 其他方法
33         // ......
34         #endregion
35     }
36 }
我们要对 UsersController.cs 的方法进行单元测试,同时UserRepository实例是通过构造函数依赖注入的,所以要借助Moq来模拟这个实例的生成。
在引入Moq包之前,先要修改NuGet.Config配置文件,增加package包源地址。
NuGet.Config配置文件路径: C:Users{user}AppDataRoamingNuGet
 1 <?xml version="1.0" encoding="utf-8"?>
 2 <configuration>
 3   <activePackageSource>
 4     <add key="nuget.org" value="https://www.nuget.org/api/v2/" />
 5   </activePackageSource>
 6   <packageSources>
 7     <add key="nuget.org" value="https://api.nuget.org/v3/index.json" protocolVersion="3" />
 8
 9     <!-- 增加的程序包源地址 -->
10     <add key="aspnet-contrib" value="https://www.myget.org/F/aspnet-contrib/api/v3/index.json" />
11   </packageSources>
12 </configuration>
引入Moq相关nuget包: "moq.netcore": "4.4.0-beta8"
添加单元测试类
 1 using System.Collections.Generic;
 2 using System.Linq;
 3 using Microsoft.AspNetCore.Mvc;
 4 using Moq;
 5 using WebApiFrame.Controllers;
 6 using WebApiFrame.Models;
 7 using WebApiFrame.Repositories;
 8 using Xunit;
 9
10 namespace WebApiFrame.Test
11 {
12     public class UsersControllerTest
13     {
14         private readonly UsersController _controller;
15
16         public UsersControllerTest()
17         {
18             var mockRepo = new Mock<IUserRepository>();
19             mockRepo.Setup(repo => repo.GetAll()).Returns(GetUsers());
20             _controller = new UsersController(mockRepo.Object);
21         }
22
23         [Fact]
24         public void GetAllTest()
25         {
26             IActionResult actionResult = _controller.GetAll();
27             var objectResult = Assert.IsType<ObjectResult>(actionResult);
28             var result = Assert.IsAssignableFrom<IEnumerable<User>>(objectResult.Value);
29             Assert.Equal(3, result.Count());
30         }
31
32         private IEnumerable<User> GetUsers()
33         {
34             return new List<User>()
35             {
36                 new User(){ Id = 1, Name = "name:1", Sex = "Male" },
37                 new User(){ Id = 2, Name = "name:2", Sex = "Female" },
38                 new User(){ Id = 3, Name = "name:3", Sex = "Male" },
39             };
40         }
41     }
42 }
在cmd窗口执行单元测试,查看测试结果
在一个分层结构清晰的项目里,各层之间依赖于事先约定好的接口。在多人协作开发时,大多数人都只会负责自己的那一部分模块功能,开发进度通常情况下也不一致。当某个开发人员需要对自己的模块进行单元测试而依赖的其他模块还没有开发完成时,则需要对依赖的接口通过Mock的方式提供模拟功能,从而达到在不实际依赖其他模块的具体功能的情况下完成自己模块的单元测试工作。
第三部分、集成测试
以上的例子只是对逻辑进行了单元测试。对于Asp.Net Core项目,还需要模拟在网站部署的情况下对各个请求入口进行测试。通常情况下可以借助Fiddler等工具完成,在.Net Core里也可以用编程的方式完成测试。
首先引入测试需要的nuget包。因为我们测试的是WebApi接口,响应内容都是json格式的字符串,所以还需要引用json序列化的nuget包。
    "Microsoft.AspNetCore.TestHost": "1.0.0",
    "Newtonsoft.Json": "9.0.1"
添加测试类
 1 using System.Collections.Generic;
 2 using System.Net.Http;
 3 using System.Threading.Tasks;
 4 using Microsoft.AspNetCore.Hosting;
 5 using Microsoft.AspNetCore.TestHost;
 6 using Newtonsoft.Json;
 7 using WebApiFrame.Models;
 8 using Xunit;
 9
10 namespace WebApiFrame.Test
11 {
12     public class WebApiFrameTest
13     {
14         private readonly TestServer _server;
15         private readonly HttpClient _client;
16
17         public WebApiFrameTest()
18         {
19             _server = new TestServer(new WebHostBuilder().UseStartup<Startup>());
20             _client = _server.CreateClient();
21         }
22
23         [Fact]
24         public async Task GetAllTest()
25         {
26             var response = await _client.GetAsync("/api/users");
27             response.EnsureSuccessStatusCode();
28
29             var responseString = await response.Content.ReadAsStringAsync();
30             IList<User> users = JsonConvert.DeserializeObject<IList<User>>(responseString);
31
32             Assert.Equal(3, users.Count);
33         }
34
35         [Theory]
36         [InlineData(1)]
37         [InlineData(2)]
38         [InlineData(3)]
39         public async Task GetTest(int id)
40         {
41             var response = await _client.GetAsync($"/api/users/{id}");
42             response.EnsureSuccessStatusCode();
43
44             var responseString = await response.Content.ReadAsStringAsync();
45             User user = JsonConvert.DeserializeObject<User>(responseString);
46
47             Assert.NotNull(user);
48         }
49     }
50 }
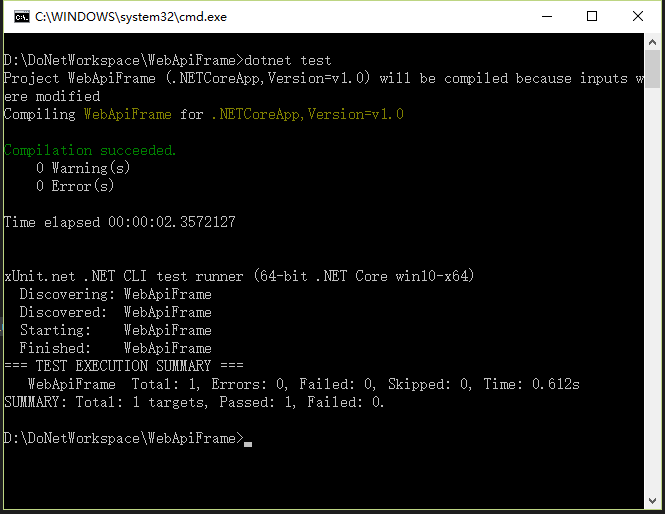
在cmd窗口执行单元测试,查看测试结果

在上面的例子里,通过在一个工程里同时模拟了服务端(TestServer)和客户端(HttpClient)的通信,从而达到了整体测试WebApi接口的目的。