一。JS操作
#1.js代码的调用
#execute_script 使用这个方法调用js代码
from selenium import webdriver
import time
driver=webdriver.Chrome()

driver.get("http:www.baidu.com")

driver.maximize_window()

element_baidu_input=driver.find_element_by_id("kw")
def set_attribute(e):
    '''
    execute_script - - >python中使用driver的这个方法调用js
    :param e:
    :return:
    '''
    a="e=document.getElementById('kw');"
      "e.value='商办网络';"
    driver.execute_script(a)

set_attribute(element_baidu_input)
#2.使用js修改时间格式的数据(格式中有readOnly只读属性)
# '''
# 在使用js修改元素的时候注意不同系统之间使用强制等待 等一下,js代码执行比较快如果浏览器渲染跟不上容易出问题;
# 在python中注意js数据的使用规范(readOnly在浏览器中是readonly,false是js的写法)
#在分开执行多个js代码时注意执行之间稍微等待一下防止出现意外
# '''
import time
from selenium import webdriver

driver=webdriver.Chrome()
driver.get("https://www.12306.cn/index/")
driver.maximize_window()
#不同系统之间项目等待
time.sleep(1)
js_data="e=document.getElementById('train_date');"
        "e.readOnly=false;"
        "e.value='2020-07-22';"
driver.execute_script(js_data)
#执行不同js代码时,避免错误率每个执行之间加时间间隔
js_code = """e = document.getElementById("train_date");"""
driver.execute_script(js_code)
time.sleep(0.2)
js_code = """e.readOnly = false;"""
driver.execute_script(js_code)
time.sleep(0.2)
js_code = """e.value = "2020-07-20";"""
driver.execute_script(js_code)
'''
3.使用js中的arguments方法,相当于python中的format
'''
import time

from selenium import webdriver
driver = webdriver.Chrome()

driver.get("https://www.12306.cn/index/")


# 使用强制等待
time.sleep(1)

# 使用 python 定位到元素, python 对象 elem
elem = driver.find_element_by_id("train_date")

# arguments[0] 相当于python format 占坑位
time.sleep(0.2)
js_code = """arguments[0].readOnly = false;"""
driver.execute_script(js_code, elem)

time.sleep(0.2)
js_code = """arguments[0].value = "2020-07-20";"""
driver.execute_script(js_code, elem)

4.不同系统之间一定要使用强制等待
#5.将元素移动到可视范围内
#使用 location_once_scrolled_into_view模块
from selenium import webdriver
driver=webdriver.Chrome()
driver.get("https://www.12306.cn/index/")
#先定位常见问题
element_cjwt=driver.find_element_by_xpath('//a[text()="常见问题"]')
element_cjwt.location_once_scrolled_into_view
element_cjwt.click()
#6.利用js代码滑动到页面最底部
#document.body.scrollHeight - - ->利用js代码获取元素的总高度
#window.scrollTo(x,y) - - ->把内容滚动到指定位置:x:横轴坐标;y:纵轴坐标.
import time
from selenium import webdriver
driver=webdriver.Chrome()
driver.get("https://www.12306.cn/index/")
#for i in range(3):
js_cript = 'window.scrollTo(0, document.body.scrollHeight);'
driver.execute_script(js_cript)
time.sleep(3)
二。文件上传
#1。input标签

#send_keys():输入文本;输入键盘位置;文件发送
import time
from selenium import webdriver
driver=webdriver.Chrome()
driver.get("http://localhost:63342/python29/class_36_js%E5%92%8C%E6%96%87%E4%BB%B6%E4%B8%8A%E4%BC%A0/%E6%96%87%E4%BB%B6%E4%B8%8A%E4%BC%A0.html?_ijt=a17p2ipk1kjrgo03tj591fq87s")
element_wjsc=driver.find_element_by_name("mfile")
element_wjsc.send_keys("E:\test.jpg")
time.sleep(2)
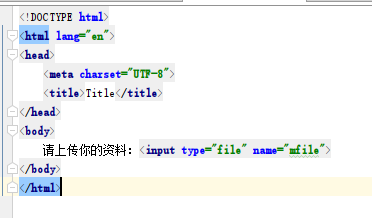
html源文件:
#2.input标签不是一个普通的标签或者其中有组件,无法使用senk_keys时。如果文件上传对于的是windown系统
#使用pywinauto库操作并输入值
#pip install pywinauto下载;pywinauto默认win32库作为支撑
import time
from selenium import webdriver
driver=webdriver.Chrome()
driver.get("http://localhost:63342/python29/class_36_js%E5%92%8C%E6%96%87%E4%BB%B6%E4%B8%8A%E4%BC%A0/%E6%96%87%E4%BB%B6%E4%B8%8A%E4%BC%A0.html?_ijt=a17p2ipk1kjrgo03tj591fq87s")
element_wjsc=driver.find_element_by_name("mfile")
element_wjsc.click()
from pywinauto import Desktop
win_click=Desktop()
win_dakai=win_click["打开"]
win_dakai["Edit"].type_keys("E:\test.jpg")
win_dakai["Button"].click()
#win_dakai["Button"].click()
time.sleep(2)
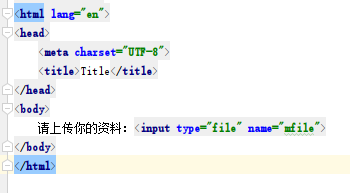
html中的代码:

#2.input标签不是一个普通的标签或者其中有组件,无法使用senk_keys时。如果文件上传对于的是windown系统
#使用pywinauto库操作并输入值
#pip install pywinauto下载;pywinauto默认win32库作为支撑
import time
from selenium import webdriver
driver=webdriver.Chrome()
driver.get("http://localhost:63342/python29/class_36_js%E5%92%8C%E6%96%87%E4%BB%B6%E4%B8%8A%E4%BC%A0/%E6%96%87%E4%BB%B6%E4%B8%8A%E4%BC%A0.html?_ijt=a17p2ipk1kjrgo03tj591fq87s")
element_wjsc=driver.find_element_by_name("mfile")
element_wjsc.click()
from pywinauto import  Desktop
win_click=Desktop()
win_dakai=win_click["打开"]
win_dakai["Edit"].type_keys("E:\test.jpg")
win_dakai["Button"].click()
#win_dakai["Button"].click()
time.sleep(2)
#3.如果出现多系统进行文件上传操作
#使用pyautogui - - >跨平台文件操作
import time
from selenium import webdriver
driver=webdriver.Chrome()
driver.get("http://localhost:63342/python29/class_36_js%E5%92%8C%E6%96%87%E4%BB%B6%E4%B8%8A%E4%BC%A0/%E6%96%87%E4%BB%B6%E4%B8%8A%E4%BC%A0.html?_ijt=a17p2ipk1kjrgo03tj591fq87s")
element_wjsc=driver.find_element_by_name("mfile")
element_wjsc.click()
#跨系统最好使用强制等待减少失误率
time.sleep(1)
#下载pyautogui库 - - -> pip3 install pyautogui 若安装错误下载源文件:https://pypi.org/project/PyAutoGUI
# 下载完成后放到python路径中使用python setup.py install进行安装
import pyautogui
# #方法一:
# #修改文件路径
# pyautogui.write("E:\test.jpg")
# #连续点两次回车键
# pyautogui.press('enter',presses=2)
# time.sleep(2)

#方法二,若无法使用修改路径的时候,就在输入框中进行copy文件路径
#复制pyperclip模块,copy方法
import pyautogui
import pyperclip
#copy文件路径
pyperclip.copy('E:\test.jpg')
time.sleep(2)
#在输入框中执行ctrl+v - - ->复制命令
pyautogui.hotkey('ctrl', 'v')
#连续点击两次回车键
pyautogui.press('enter', presses=2)
time.sleep(2)
html代码: