使用nginx 做负载均衡 memcached处理session共享
环境 windows 7 X64
java : jdk-7windows-x64.rar
nginx : http://nginx.org/en/download.html ,这里我们推荐下载稳定版(stable versions),本文采用nginx-1.8.0
tomcat:apache-tomcat-7.0.63
在同一台电脑上配置多个tomcat(本次采用两个tomcat来示范),修改 conf/server.xml 中的三个配置


安装memcached解压开,打开cmd 进入memcached解压到的路径D:memcached

memcached.exe –d install 回车安装windows服务
输入:memcached.exe –p 11211 –d start 回车启动memcached服务 -p 表示端口
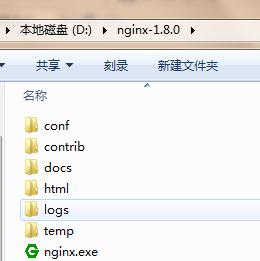
解压nginx-1.8.0到D盘

修改conf/nginx.conf文件
#user  nobody;
worker_processes  1;

#error_log  logs/error.log;
#error_log  logs/error.log  notice;
#error_log  logs/error.log  info;

#pid        logs/nginx.pid;


events {
    worker_connections  1024;
}


http {
    include       mime.types;
    default_type  application/octet-stream;

    #log_format  main  '$remote_addr - $remote_user [$time_local] "$request" '
    #                  '$status $body_bytes_sent "$http_referer" '
    #                  '"$http_user_agent" "$http_x_forwarded_for"';

    #access_log  logs/access.log  main;

    sendfile        on;
    #tcp_nopush     on;

    #keepalive_timeout  0;
    keepalive_timeout  65;

    #gzip  on;
	#设定负载均衡的服务器列表
	upstream 127.0.0.1 {

         #weigth参数表示权值,权值越高被分配到的几率越大

         server 127.0.0.1:8080 weight=1;

         server 127.0.0.1:8081 weight=1;

     }
    server {
        listen       80;
        server_name  localhost;

        #charset koi8-r;

        #access_log  logs/host.access.log  main;

        location / {
            root   html;
            index  index.html index.htm;
			proxy_pass http://127.0.0.1;
        }

        #error_page  404              /404.html;

        # redirect server error pages to the static page /50x.html
        #
        error_page   500 502 503 504  /50x.html;
        location = /50x.html {
            root   html;
        }

        # proxy the PHP scripts to Apache listening on 127.0.0.1:80
        #
        #location ~ .php$ {
        #    proxy_pass   http://127.0.0.1;
        #}

        # pass the PHP scripts to FastCGI server listening on 127.0.0.1:9000
        #
        #location ~ .php$ {
        #    root           html;
        #    fastcgi_pass   127.0.0.1:9000;
        #    fastcgi_index  index.php;
        #    fastcgi_param  SCRIPT_FILENAME  /scripts$fastcgi_script_name;
        #    include        fastcgi_params;
        #}

        # deny access to .htaccess files, if Apache's document root
        # concurs with nginx's one
        #
        #location ~ /.ht {
        #    deny  all;
        #}
    }


    # another virtual host using mix of IP-, name-, and port-based configuration
    #
    #server {
    #    listen       8000;
    #    listen       somename:8080;
    #    server_name  somename  alias  another.alias;

    #    location / {
    #        root   html;
    #        index  index.html index.htm;
    #    }
    #}


    # HTTPS server
    #
    #server {
    #    listen       443 ssl;
    #    server_name  localhost;

    #    ssl_certificate      cert.pem;
    #    ssl_certificate_key  cert.key;

    #    ssl_session_cache    shared:SSL:1m;
    #    ssl_session_timeout  5m;

    #    ssl_ciphers  HIGH:!aNULL:!MD5;
    #    ssl_prefer_server_ciphers  on;

    #    location / {
    #        root   html;
    #        index  index.html index.htm;
    #    }
    #}

}
session的共享
tomcat7下添加的jar包:

安装方法: 将这几个包放到两个tomcat7的lib里面
PS:利用memcache来保存tomcat的session会话
修改两个tomcat下的conf/context.xml
<?xml version='1.0' encoding='utf-8'?>
<!--
  Licensed to the Apache Software Foundation (ASF) under one or more
  contributor license agreements.  See the NOTICE file distributed with
  this work for additional information regarding copyright ownership.
  The ASF licenses this file to You under the Apache License, Version 2.0
  (the "License"); you may not use this file except in compliance with
  the License.  You may obtain a copy of the License at

      http://www.apache.org/licenses/LICENSE-2.0

  Unless required by applicable law or agreed to in writing, software
  distributed under the License is distributed on an "AS IS" BASIS,
  WITHOUT WARRANTIES OR CONDITIONS OF ANY KIND, either express or implied.
  See the License for the specific language governing permissions and
  limitations under the License.
-->
<!-- The contents of this file will be loaded for each web application -->
<Context>

    <!-- Default set of monitored resources -->
    <WatchedResource>WEB-INF/web.xml</WatchedResource>

    <!-- Uncomment this to disable session persistence across Tomcat restarts -->
    <!--
    <Manager pathname="" />
    -->
	<Manager className="de.javakaffee.web.msm.MemcachedBackupSessionManager"
	memcachedNodes="n1:127.0.1.1:11211"   requestUriIgnorePattern=".*.(png|gif|jpg|css|js)$"
	sessionBackupAsync="false"         sessionBackupTimeout="100"
	transcoderFactoryClass="de.javakaffee.web.msm.serializer.javolution.JavolutionTranscoderFactory"
	copyCollectionsForSerialization="false" />
    <!-- Uncomment this to enable Comet connection tacking (provides events
         on session expiration as well as webapp lifecycle) -->
    <!--
    <Valve className="org.apache.catalina.valves.CometConnectionManagerValve" />
    -->

</Context>
因为支持memcached分布式 如果有多台memcached 在 memcachedNodes="nx:IP:port" 即可
注意:这里的端口号要和启动的设置的端口一致
打开cmd 进入nginx 的解压目录 输入 nginx start 重新启动nginx依次启动两台tomcat
然后在E:javanvapache-tomcat-71webappsROOT,E:javanvapache-tomcat-72webappsROOT下各添加一个
session.jsp
<%@ page contentType="text/html;charset=UTF-8" %>
<%@ page import="java.util.*" %>
<html><head><title>Cluster Test</title></head>
<body>
<%
  //HttpSession session=request.getSession(true);
  System.out.println(session.getId());
  out.println("<br>SESSION ID:" + session.getId()+"<br>");
  // 如果有新的请求,则添加session属性
  String name=request.getParameter("name");
  if (name != null &&name.length() >0) {
     String value=request.getParameter("value");
     session.setAttribute(name, value);
 }
    out.print("<b>Session List:</b>");
    Enumeration<String>names=session.getAttributeNames();
    while (names.hasMoreElements()) {
        String sname=names.nextElement();
        String value=session.getAttribute(sname).toString();
        out.println( sname + "=" + value+"<br>");
        System.out.println( sname + "=" + value);
  }
%>
jvm1
</body>
</html>
JVM 分别是 1 2 分别放进 t1 t2 中 然后打开浏览器
http://127.0.0.1/session.jsp
多次刷新看到不同的jvm 相同的session 表示成功
nginx + tomcat + memcached 环境就搭建好了

