一、自定义TableViewCell
1. 创建Cocoa Touch Class文件,同时,生成xib文件。
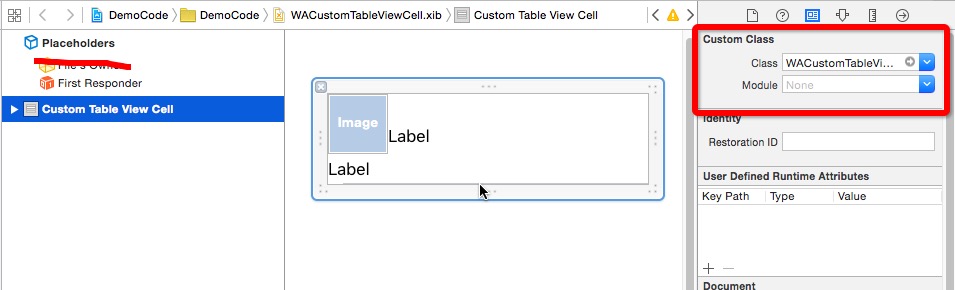
2. 设置xib文件对象的基类
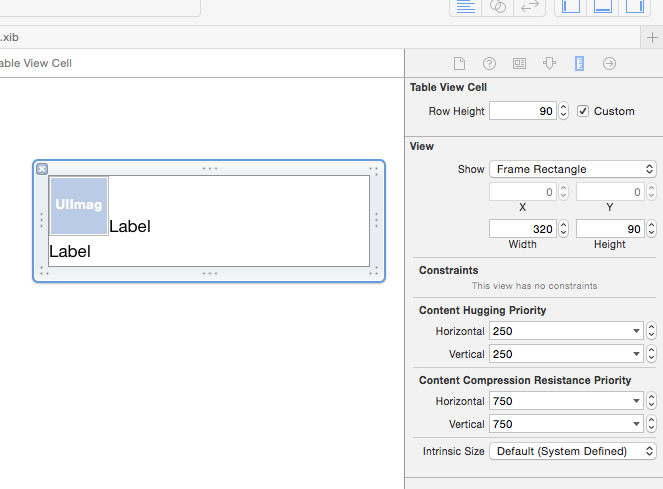
3. 拖拽控件(UIImageView、UILabel),并且设置其位置和大小。
4. 用拖拽方式创建控件属性代码,使用Alt+鼠标左键同时打开xib文件及基类*.h文件。再用Control+鼠标左键,将控件拖拽到*.h代码文件中,生成代码。以此生成控件与属性的关联。
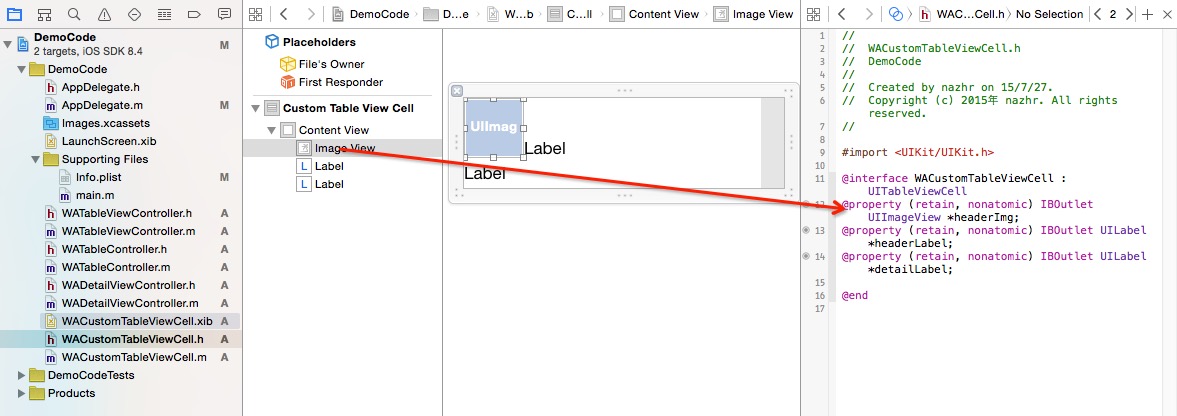
PS: 例如,UIImageView控件在*.h文件中生成代码。
5. 创建一个类文件(WATableController.h、WATableController.m),作为数据源及代理对象。
6. 创建一个类文件(WATableViewController.h、WATableViewController.m),作为root view。
二、tableViewCell
1. Cell 效率优化,使用缓存池,将不在屏幕上显示的Cell放入缓存池中,在使用时,去缓存池中取。
2. 加载xib文件,两种不同方式:
- 通过loadNibNamed方法加载xib文件,这种方式是,在创建Cell时,会每次都要去读取文件。在读取硬盘文件上浪费效率。
 1 static NSString *CellIdentifier = @"CellIdentifierKey1";
 2
 3     UITableViewCell *cell = [tableView dequeueReusableCellWithIdentifier:CellIdentifier];
 4     if (!cell)
 5     {
 6         cell = [[[NSBundle mainBundle] loadNibNamed:@"WACustomTableViewCell" owner:nil options:nil] firstOjbect];
 7
 8     }
 9
10     cell.textLabel.text = fontArray[indexPath.row];
11     cell.accessoryType = UITableViewCellAccessoryDisclosureIndicator;
- 通过UINib类,加载xib文件,只会去硬盘读取一个,以后,会将xib文件的nib对象,放入tableView数据源(放入内存)中,在需要时,从内存读取比硬盘效率比较高。
 1     WACustomTableViewCell *cell = nil;
 2     @try
 3     {
 4         if (!self.iIsRegisterNib)
 5         {
 6             UINib *nib = [UINib nibWithNibName:@"WACustomTableViewCell" bundle:Nil];
 7             [tableView registerNib:nib forCellReuseIdentifier:CellIdentifier];
 8             self.iIsRegisterNib = YES;
 9         }
10         cell = [tableView dequeueReusableCellWithIdentifier:CellIdentifier];
11         cell.headerLabel.text = fontArray[indexPath.row];
12         cell.detailLabel.text = fontArray[indexPath.row];
13
14         cell.accessoryType = UITableViewCellAccessoryDisclosureIndicator;
15     }
16     @catch (NSException *exception)
17     {
18         NSLog(@"exception name: %@ , reason: %@", exception.name, exception.reason);
19     }
三、tableView加载机制
1. IOS 8.3 以前版本
- 第一次加载tableView。
- 先执行初始化方法。
- 执行ViewDidLoad方法。
- 执行ViewWillAppear方法。
- 执行UISectionRowData::refreshWithSection::tableViewRowData方法。
- 执行UITableViewDataSource::numberOfRowsInSection方法。
- 执行UITableViewDataSource::heightForRowAtIndexPath方法。
- 执行UITableViewDataSource::cellForRowAtIndexPath方法。
- 再次加载tableView从第四步开始执行。
2. IOS 8.3 以后版本
- 第一次加载tableView。
- 先执行初始化方法。
- 执行ViewController::ViewDidLoad方法。
- 执行ViewController::ViewWillAppear方法。
- 执行UISectionRowData::refreshWithSection::tableViewRowData方法
- 执行UITableViewDataSource::numberOfRowsInSection方法。
- 执行UITableViewDataSource::heightForRowAtIndexPath方法。
- 执行UITableViewDataSource::cellForRowAtIndexPath方法。
- 再次加载tableVeiw执行ViewController::ViewWillAppear方法,不再执行Cell加载方法,即数据源方法(UITableViewDataSource)。
四、遇到问题
1. 创建VC,在其中实现UITableViewController功能,继承协议(UITableDataSource),问题是app运行,不能正常显示列表(tableview不显示),错误提示(*** Terminating app due to uncaught exception 'NSInvalidArgumentException', reason: '-[__NSCFString count]: unrecognized selector sent to instance 0x7fe778d113b0')
解决方案:通过堆栈信息查找出现错误函数
2. 列表在向上拖时,手机状态栏与列表信息重叠,即被遮档。
解决方案: 分为两步 第一在初始化窗口时,将获取屏幕大小方法bounds修改为applicationFrame,第二步重写设置状态栏样式方法 preferredStatusBarStylle。
3. 没有对应的value-key
setValue:forUndefinedKey:]: this class is not key value coding-compliant for the key name.
原因:在xib创建关联时,View关联类在file's owner的Custom class中设置关联的类名,而在Cell中,是在Custom View Table Cell的Custom class中,设置关联类名。
4. 在tableView的Cell上加一个UIButton,而UIButton的selected和highLight事件被Cell截取。
解决方案:
1. 重写tableView中一些方法:
 1 - (BOOL)touchesShouldCancelInContentView:(UIView *)view
 2 {
 3     if ([view isKindOfClass:[UIButton class]] )
 4     {
 5         return NO;
 6     }
 7     else
 8     {
 9          [super touchesShouldCancelInContentView:view];
10     }
11
12     NSLog(@"touchesShouldCancelInContentView");
13
14     return YES;
15 }
16
17 - (void)touchesCancelled:(NSSet *)touches withEvent:(UIEvent *)event
18 {
19     [super touchesCancelled:touches withEvent:event];
20
21
22     NSLog(@"touchesCancelled");
23 }
PS: 注意在ScrollView中也会有这个问题,解决方法是设置延迟事件触发,设置其delaysContentTouches = NO;。
参考资料:http://www.cnblogs.com/wayne23/p/4011266.html