安装流程
这里使用 brew 来安装软件。
- 安装
brew install nginx
- 查看安装信息(经常用到, 比如查看安装目录等)
brew info nginx
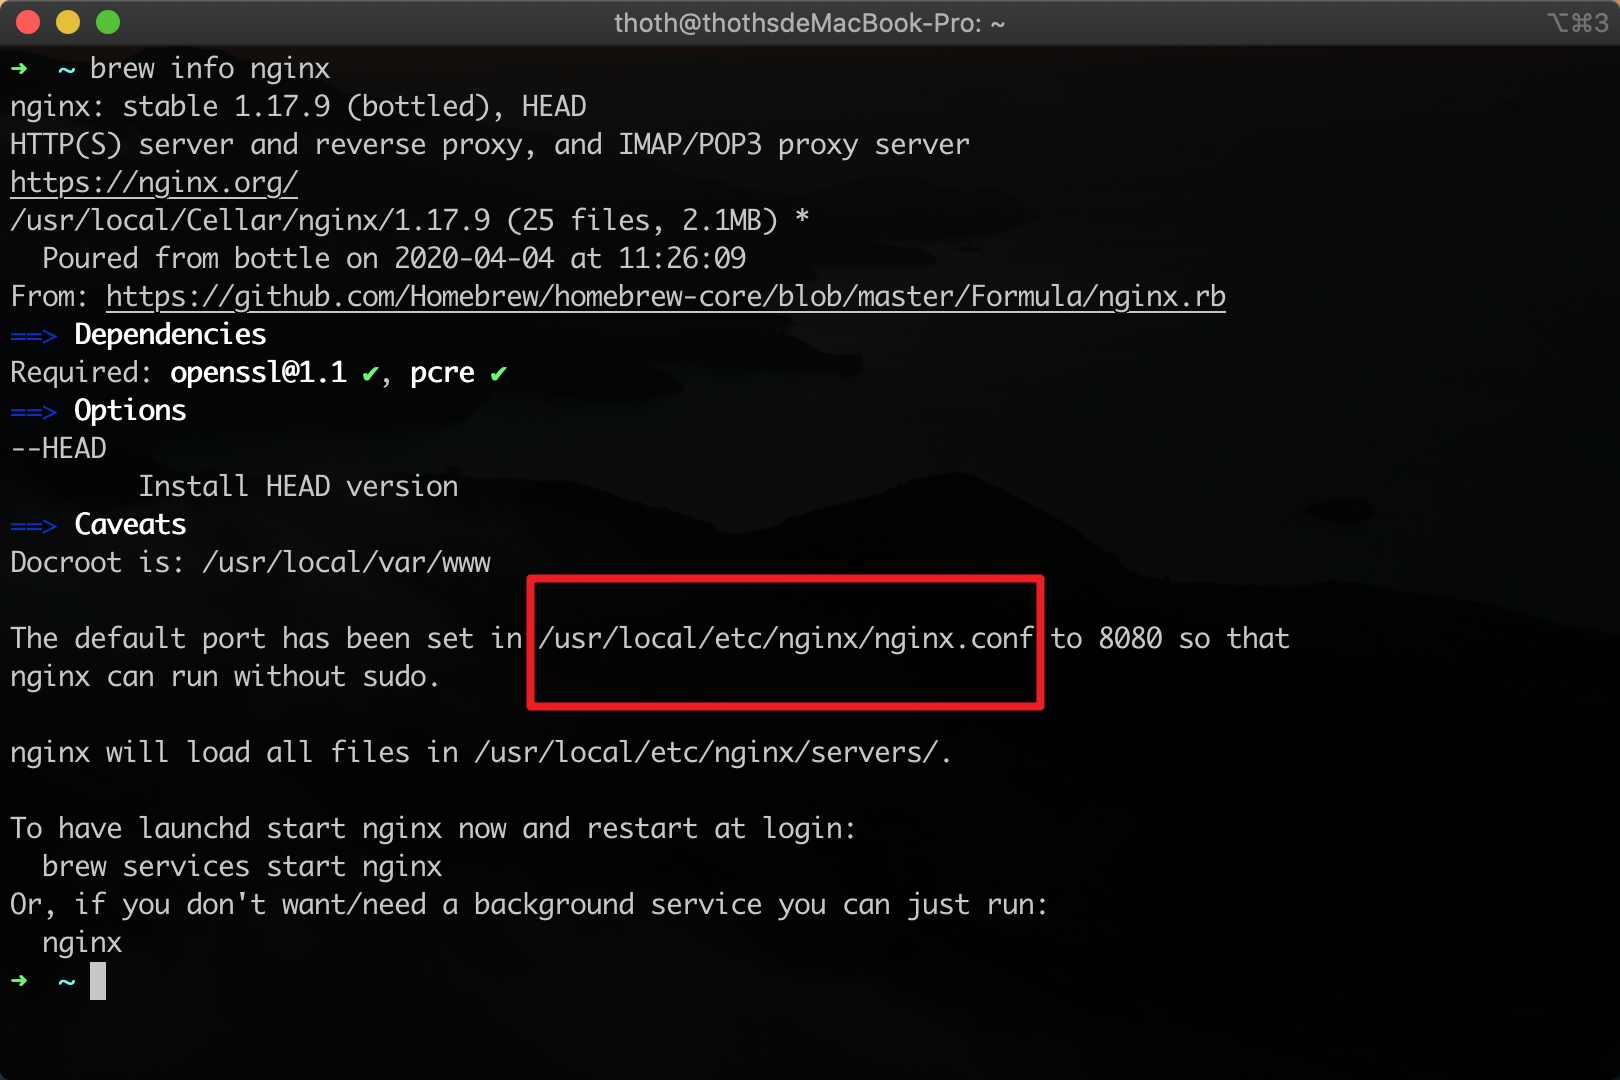
安装后,主要看brew把nginx安装到哪里去了,默认是安装到/usr/local/etc/nginx/nginx.conf
常用命令记录
如果不好使,统一在命令前面加上sudo;
- 查看nginx版本
nginx -v
- 启动nginx服务
brew services start nginx
访问:http://localhost:8080/后,看到如下内容就是启动成功了。

如果没有启动成功,查看一下进程,ps -ef|grep nginx:

# 查看报错文件的路径
➜  ~ nginx -V
nginx version: nginx/1.17.9
built by clang 11.0.0 (clang-1100.0.33.17)
built with OpenSSL 1.1.1d  10 Sep 2019 (running with OpenSSL 1.1.1f  31 Mar 2020)
TLS SNI support enabled
configure arguments: --prefix=/usr/local/Cellar/nginx/1.17.9 --sbin-path=/usr/local/Cellar/nginx/1.17.9/bin/nginx --with-cc-opt='-I/usr/local/opt/pcre/include -I/usr/local/opt/openssl@1.1/include' --with-ld-opt='-L/usr/local/opt/pcre/lib -L/usr/local/opt/openssl@1.1/lib' --conf-path=/usr/local/etc/nginx/nginx.conf --pid-path=/usr/local/var/run/nginx.pid --lock-path=/usr/local/var/run/nginx.lock --http-client-body-temp-path=/usr/local/var/run/nginx/client_body_temp --http-proxy-temp-path=/usr/local/var/run/nginx/proxy_temp --http-fastcgi-temp-path=/usr/local/var/run/nginx/fastcgi_temp --http-uwsgi-temp-path=/usr/local/var/run/nginx/uwsgi_temp --http-scgi-temp-path=/usr/local/var/run/nginx/scgi_temp --http-log-path=/usr/local/var/log/nginx/access.log --error-log-path=/usr/local/var/log/nginx/error.log --with-compat --with-debug --with-http_addition_module --with-http_auth_request_module --with-http_dav_module --with-http_degradation_module --with-http_flv_module --with-http_gunzip_module --with-http_gzip_static_module --with-http_mp4_module --with-http_random_index_module --with-http_realip_module --with-http_secure_link_module --with-http_slice_module --with-http_ssl_module --with-http_stub_status_module --with-http_sub_module --with-http_v2_module --with-ipv6 --with-mail --with-mail_ssl_module --with-pcre --with-pcre-jit --with-stream --with-stream_realip_module --with-stream_ssl_module --with-stream_ssl_preread_module
path=/usr/local/var/log/nginx/error.log
tail -f *
- 重新加载nginx
# 答应我,有任何一丁点修改过nginx的配置文件后,都第一时间重新加载一遍nginx  好吗!
# 答应我,有任何一丁点修改过nginx的配置文件后,都第一时间重新加载一遍nginx  好吗!
# 答应我,有任何一丁点修改过nginx的配置文件后,都第一时间重新加载一遍nginx  好吗!不然你就没法使 你修改的过的功能。

brew services restart nginx
- 关闭nginx服务
brew services stop nginx

- 查看nginx进程
# off
[root@tv2-sec-scan-02 conf.d]# ps -aux | grep nginx
root     22155  0.0  0.0 112712   968 pts/0    S+   09:45   0:00 grep --color=auto nginx

# on
[root@tv2-sec-scan-02 conf.d]# ps -aux | grep nginx
root     22155  0.0  0.0 112712   968 pts/0    S+   09:45   0:00 grep --color=auto nginx
[root@tv2-sec-scan-02 conf.d]# systemctl start nginx
[root@tv2-sec-scan-02 conf.d]# ps -aux | grep nginx
root     22365  0.0  0.0  44744   968 ?        Ss   09:45   0:00 nginx: master process /usr/sbin/nginx -c /etc/nginx/nginx.conf
root     22366  0.0  0.0  45172  1384 ?        S    09:45   0:00 nginx: worker process
root     22368  0.0  0.0 112712   968 pts/0    R+   09:45   0:00 grep --color=auto nginx
典型配置方式
在/usr/local/etc/nginx/nginx.conf主配置文件里 ,配置一个包含属性,内容如下:
# 省略...
include servers/*;
# 意思是加载当前目录下 .servers文件夹内的配置文件,都会被加载进来
在/usr/local/etc/nginx/servers 路径下,配置了一个转发服务,文件叫localhost_80.conf,内容如下:
server {
        listen        80;
        server_name  localhost;
        root   "/Users/thoth/program/nginxweb";
        location / {
            index index.php index.html;
            error_page 400 /error/400.html;
            error_page 403 /error/403.html;
            error_page 404 /error/404.html;
            error_page 500 /error/500.html;
            error_page 501 /error/501.html;
            error_page 502 /error/502.html;
            error_page 503 /error/503.html;
            error_page 504 /error/504.html;
            error_page 505 /error/505.html;
            error_page 506 /error/506.html;
            error_page 507 /error/507.html;
            error_page 509 /error/509.html;
            error_page 510 /error/510.html;
            autoindex  off;
        }
        location ~ .php(.*)$ {
            fastcgi_pass   127.0.0.1:9000;
            fastcgi_index  index.php;
            fastcgi_split_path_info  ^((?U).+.php)(/?.+)$;
            fastcgi_param  SCRIPT_FILENAME  $document_root$fastcgi_script_name;
            fastcgi_param  PATH_INFO  $fastcgi_path_info;
            fastcgi_param  PATH_TRANSLATED  $document_root$fastcgi_path_info;
            include        fastcgi_params;
        }
}
这个可以作为你的模版,你修改一下server_name、root即可。
        server_name  www.test.com;
        root   "/Users/thoth/program/testdir";
查看启动状态是否有报错
- nginx -t
 nginx -t
nginx: the configuration file /usr/local/etc/nginx/nginx.conf syntax is ok
nginx: [emerg] open() "/usr/local/Cellar/nginx/1.17.9/logs/error.log" failed (2: No such file or directory)  # 有报错
nginx: configuration file /usr/local/etc/nginx/nginx.conf test failed

➜  ~ nginx -t
nginx: the configuration file /usr/local/etc/nginx/nginx.conf syntax is ok
nginx: configuration file /usr/local/etc/nginx/nginx.conf test is successful
- 查看进程是否都起来了
➜  ~ ps -ef | grep nginx
    0  6419     1   0  6:59下午 ??         0:00.01 nginx: master process /usr/local/opt/nginx/bin/nginx -g daemon off;
   -2  6424  6419   0  6:59下午 ??         0:00.00 nginx: worker process
  501  6474  1018   0  7:03下午 ttys016    0:00.00 grep --color=auto --exclude-dir=.bzr --exclude-dir=CVS --exclude-dir=.git --exclude-dir=.hg --exclude-dir=.svn --exclude-dir=.idea --exclude-dir=.tox nginx
- 查看端口是否被占用
是不是打开了burp suite的8080拦截。
php 启动
关闭php-fpm
sudo killall php-fpm
启动php-fpm
sudo php-fpm
如果用brew安装的可以
brew services start php
重启php-fpm
先关闭php-fpm、再自动php-fpm即可
sudo  killall  php-fpm
sudo  php-fpm
参考
https://www.jianshu.com/p/6c7cb820a020
http://jalan.space/2017/01/12/2017-01-13-mac-os-nginx/
https://blog.csdn.net/weixin_42896137/article/details/88797094
https://blog.csdn.net/leiflyy/article/details/77717524 # mac 启动php 报错解决