出处: Java断点续传实现原理很简单
关键字: RandomAccessFile
一、作用:
随机流(RandomAccessFile)不属于IO流,支持对文件的读取和写入随机访问。
二、随机访问文件原理:
首先把随机访问的文件对象看作存储在文件系统中的一个大型 byte 数组,然后通过指向该 byte 数组的光标或索引(即:文件指针 FilePointer)在该数组任意位置读取或写入任意数据。
三、相关方法说明:
1、对象声明:RandomAccessFile raf = newRandomAccessFile(File file, String mode);
其中参数 mode 的值可选 "r":可读,"w" :可写,"rw":可读性;
2、获取当前文件指针位置:int RandowAccessFile.getFilePointer();
3、改变文件指针位置(相对位置、绝对位置):
1> 绝对位置:RandowAccessFile.seek(int index);
2> 相对位置:RandowAccessFile.skipByte(int step); 相对当前位置
4、给写入文件预留空间:RandowAccessFile.setLength(long len);
断点续传实现原理:
1)下载断开的时候,记录文件断点的位置position;
2)继续下载的时候,通过RandomAccessFile找到之前的position位置开始下载
实际操作:
我们在D盘的根目录下创建一个名为”test.txt”的文件,文件内容很简单,如图所示:
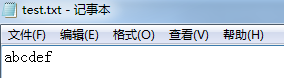
没错,我们输入的内容就是简单的6个英语字母。然后我们右键→属性:

我们要实现的效果很简单:将在D盘的”test.txt”文件写入到E盘当中,但中途我们会模拟一次”中断”行为,然后在重新继续上传,最终完成整个过程。
也就是说,我们这里将会把“D盘”视作一台电脑,并且直接将”E盘”视作一台服务器。那么这样我们甚至都不再与http协议扯上半毛钱关系了,(当然实际开发我们肯定是还是得与它扯上关系的 ^<^),从而只关心最基本的文件读写的”断”和”续”的原理是怎么样的。
import java.io.File;
import java.io.FileInputStream;
import java.io.FileNotFoundException;
import java.io.FileOutputStream;
import java.io.IOException;
import java.io.RandomAccessFile;

public class Test {
    private static int position = -1;

    public static void main(String[] args) {
        // 源文件与目标文件
        File sourceFile = new File("D:/", "test.txt");
        File targetFile = new File("E:/", "test.txt");
        // 输入输出流
        FileInputStream fis = null;
        FileOutputStream fos = null;
        // 数据缓冲区
        byte[] buf = new byte[1];

        try {
            fis = new FileInputStream(sourceFile);
            fos = new FileOutputStream(targetFile);
            // 数据读写
            while (fis.read(buf) != -1) {
                fos.write(buf);
                // 当已经上传了3字节的文件内容时,模拟网络中断了,抛出异常
                if (targetFile.length() == 3) {
                    position = 3;
                    throw new FileAccessException();
                }
            }

        } catch (FileAccessException e) {
            keepGoing(sourceFile, targetFile, position);
        } catch (FileNotFoundException e) {
            System.out.println("指定文件不存在");
        } catch (IOException e) {

        } finally {
            try {
                // 关闭输入输出流
                if (fis != null)
                    fis.close();

                if (fos != null)
                    fos.close();
            } catch (IOException e) {
                e.printStackTrace();
            }
        }
    }

    private static void keepGoing(File source, File target, int position) {
        try {
            Thread.sleep(10000);
        } catch (Exception e) {
            e.printStackTrace();
        }

        try {
            RandomAccessFile readFile = new RandomAccessFile(source, "rw");
            RandomAccessFile writeFile = new RandomAccessFile(target, "rw");

            readFile.seek(position);
            writeFile.seek(position);

            // 数据缓冲区
            byte[] buf = new byte[1];
            // 数据读写
            while (readFile.read(buf) != -1) {
                writeFile.write(buf);
            }
        } catch (FileNotFoundException e) {
            e.printStackTrace();
        } catch (IOException e) {
            e.printStackTrace();
        }
    }

}

class FileAccessException extends Exception {
}
总结一下,我们在这次改动当中都做了什么工作:
- 首先,我们定义了一个变量position,记录在发生中断的时候,已完成读写的位置。(这是为了方便,实际来说肯定应该讲这个值存到文件或者数据库等进行持久化)
- 然后在文件读写的while循环中,我们去模拟一个中断行为的发生。这里是当targetFile的文件长度为3个字节则模拟抛出一个我们自定义的异常。(我们可以想象为实际下载中,已经上传(下载)了”x”个字节的内容,这个时候网络中断了,那么我们就在网络中断抛出的异常中将”x”记录下来)。
- 剩下的就如果我们之前说的一样,在“续传”行为开始后,通过RandomAccessFile类来包装我们的文件,然后通过seek将指针指定到之前发生中断的位置进行读写就搞定了。(实际的文件下载上传,我们当然需要将保存的中断值上传给服务器,这个方式通常为httpConnection.setRequestProperty(“RANGE”,”bytes=x”);)
在我们这段代码,开启”续传“行为,即keepGoing方法中:我们起头让线程休眠10秒钟,这正是为了让我们运行程序看到效果。
现在我们运行程序,那么文件就会开启“由D盘上传到E盘的过程”,我们首先点开E盘,会发现的确多了一个test.txt文件,打开它发现内容如下:
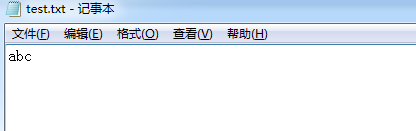
没错,这个时候我们发现内容只有“abc”。这是在我们预料以内的,因为我们的程序模拟在文件上传了3个字节的时候发生了中断。
Ok,我们静静的等待10秒钟过去,然后再点开该文件,看看是否能够成功:

通过截图我们发现内容的确已经变成了“abc”,由此也就完成了续传。
java多线程下载文件原理解析+案例
原理解析: 利用RandomAccessFile在本地创建一个随机访问文件,文件大小和服务器要下载的文件大小相同。 根据线程的数量(假设有三个线程),服务器的文件三等分,并把我们在本地创建的文件同样三等分,每个线程下载自己负责的部分,到相应的位置即可。
示例图:

import java.io.InputStream;
import java.io.RandomAccessFile;
import java.net.HttpURLConnection;
import java.net.URL;

public class MutilDownload {
    private static String path = "http://192.168.80.85:8080/test.doc";
    private static final int threadCount = 3;

    public static void main(String[] args) {
        try {
            URL url = new URL(path);
            HttpURLConnection conn = (HttpURLConnection) url.openConnection();
            conn.setRequestMethod("GET");
            conn.setConnectTimeout(5000);
            int responseCode = conn.getResponseCode();
            if (responseCode == 200) {
                int contentLength = conn.getContentLength();
                System.out.println("length" + contentLength);

                RandomAccessFile rafAccessFile = new RandomAccessFile("test.doc", "rw");
                rafAccessFile.setLength(contentLength);

                int blockSize = contentLength / threadCount;
                for (int i = 0; i < threadCount; i++) {
                    int startIndex = i * blockSize; //每个现成下载的开始位置
                    int endIndex = (i + 1) * blockSize - 1;// 每个线程的结束位置
                    if (i == threadCount - 1) {
                        //最后一个线程
                        endIndex = contentLength - 1;
                    }

                    new DownloadThread(startIndex, endIndex, i).start();
                }

            }
        } catch (Exception e) {

        }
    }

    private static class DownloadThread extends Thread {
        private int startIndex;
        private int endIndex;
        private int threadId;

        public DownloadThread(int startIndex, int endIndex, int threadId) {
            this.startIndex = startIndex;
            this.endIndex = endIndex;
            this.threadId = threadId;
        }

        @Override
        public void run() {
            try {
                URL url = new URL(path);
                HttpURLConnection conn = (HttpURLConnection) url.openConnection();
                conn.setRequestMethod("GET");
                conn.setConnectTimeout(5000);
                conn.setRequestProperty("Range", "bytes=" + startIndex + "-" + endIndex); //固定写法,请求部分资源
                int responseCode = conn.getResponseCode();  // 206表示请求部分资源
                if (responseCode == 206) {
                    RandomAccessFile rafAccessFile = new RandomAccessFile("test.doc", "rw");
                    rafAccessFile.seek(startIndex);
                    InputStream is = conn.getInputStream();
                    int len = -1;
                    byte[] buffer = new byte[1024];
                    while ((len = is.read(buffer)) != -1) {
                        rafAccessFile.write(buffer, 0, len);
                    }
                    rafAccessFile.close();

                    System.out.println("线程" + threadId + "下载完成");
                }
            } catch (Exception e) {

            }
        }
    }
}