1、mysql的下载和安装
这个可参考我另外一篇文章:http://www.cnblogs.com/myIvan/p/9265645.html
2、php的下载和配置修改
下载地址:https://windows.php.net/download
根据自己项目需求下载对应的版本,不过下载时要注意,因为有多个版本
x64代表电脑位数为64,x86代表电脑位数为32位,这个不用多说。
需要注意另外一个区别 thread safe (线程安全) 和 non thread safe(线程不安全),这是因为php有两种运行方式 ISAPI 和 FastCGI 。
常见的apache 采用ISAPI 模式,及把php当成一个模块加载,需要选择线程安全的;
另外一些IIS、nginx采用FastCGI方式运行php,需要选择线程不安全的。
由于我的电脑是64位,且这里使用nginx,所以可以直接下载这一个:

下载完后解压到指定位置,然后修改配置文件:
将php.ini-development文件复制一份 命名为php.ini 然后修改里面几个内容:
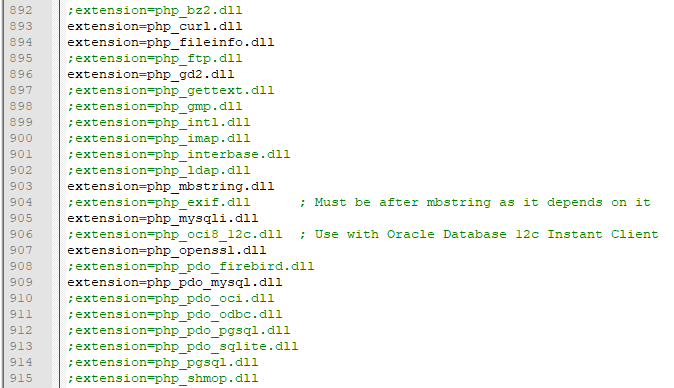
根据需要打开拓展

修改时区
3、nginx的下载安装及配置
下载地址:http://nginx.org/en/download.html
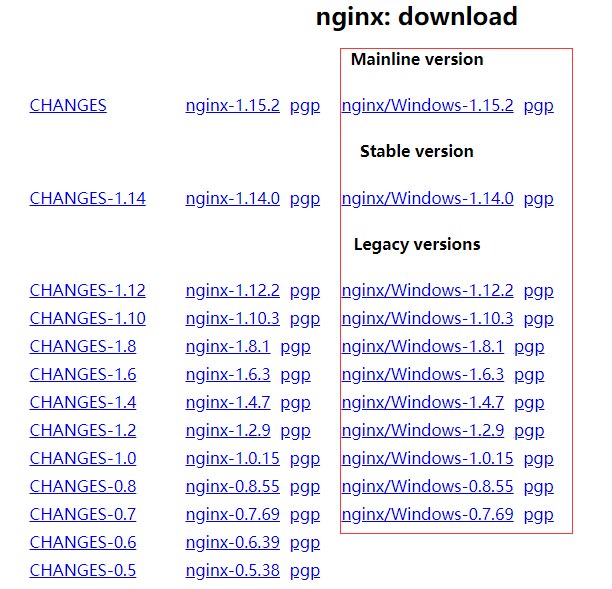
根据需求下载对应版本,建议下载稳定版1.14.0版本及以下
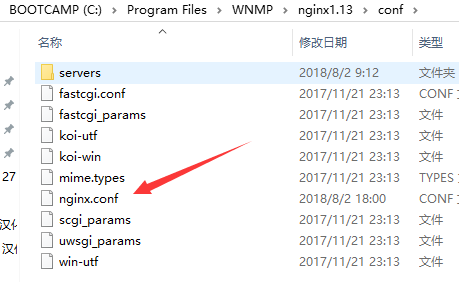
修改配置文件nginx.conf
#user  nobody;
worker_processes  1;
#error_log  logs/error.log;
#error_log  logs/error.log  notice;
#error_log  logs/error.log  info;
#pid        logs/nginx.pid;
events {
    worker_connections  1024;
}
http {
    include       mime.types;
    default_type  application/octet-stream;
    #log_format  main  '$remote_addr - $remote_user [$time_local] "$request" '
    #                  '$status $body_bytes_sent "$http_referer" '
    #                  '"$http_user_agent" "$http_x_forwarded_for"';
    #access_log  logs/access.log  main;
    sendfile        on;
    #tcp_nopush     on;
    #keepalive_timeout  0;
    keepalive_timeout  65;
    #gzip  on;


    server {
        listen       80;
        server_name  localhost;
        #charset koi8-r;
        #access_log  logs/host.access.log  main;
        location / {
            root "C:/Program Files/WNMP/nginx1.13/html";
            index  index.html index.htm;
        }
        error_page   500 502 503 504  /50x.html;
        location = /50x.html {
            root   html;
        }
        # pass the PHP scripts to FastCGI server listening on 127.0.0.1:9000
        #
        location ~ .php$ {
            root           "C:/Program Files/WNMP/nginx1.13/html";
            fastcgi_pass   127.0.0.1:9000;
            fastcgi_index  index.php;
            fastcgi_param     SCRIPT_FILENAME    $document_root$fastcgi_script_name;
			#fastcgi_connect_timeout 600;
			#fastcgi_send_timeout 600;
			#fastcgi_read_timeout 600;
			#fastcgi_buffer_size 256k;
			#fastcgi_buffers  16  256k;
			#fastcgi_busy_buffers_size 512k;
			#fastcgi_temp_file_write_size 512k;
            include        fastcgi_params;
        }
    }
	#加载配置文件 多个站点时用
	include servers/*.conf;
}
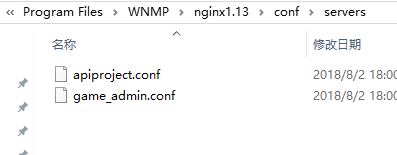
配置多个站点,则在servers目录里添加
server {
    listen       10000;
    server_name xxxxxx;
    index index.php index.htm index.html;
   #根目录
    root C:/Users/defaultuser0/Mydata/apiproject/public;
  #nginx访问日志
    access_log  "C:/Program Files/WNMP/nginx1.13/logs/access_proxy3.log";
  #nginx错误日志
    error_log "C:/Program Files/WNMP/nginx1.13/logs/error_proxy3.log";

     location / {
       if (!-e $request_filename) {
           rewrite  ^(.*)$  /index.php?s=$1  last;
           break;
       }
    }

    location ~ .*.(js)$ {
    	add_header Cache-Control no-store;

    }

    location ~.php$ {
           fastcgi_split_path_info ^(.+.php)(/.+)$;
           #fastcgi_pass unix:/tmp/php-cgi.sock;
	   fastcgi_pass   127.0.0.1:9000;
           fastcgi_index index.php;
	  #fastcgi_buffers  16  256k;
           fastcgi_param  SCRIPT_FILENAME  $document_root$fastcgi_script_name;
           include fastcgi_params;
    }
}
4、redis的下载及配置
官网上应该找不到windows版本,要去github上找,为了方便,我这里分享一下
下载地址:链接: https://pan.baidu.com/s/11egPdrnmIqe7vOIdVvJ-NQ 密码: 7g49
里面有多个版本供选择。
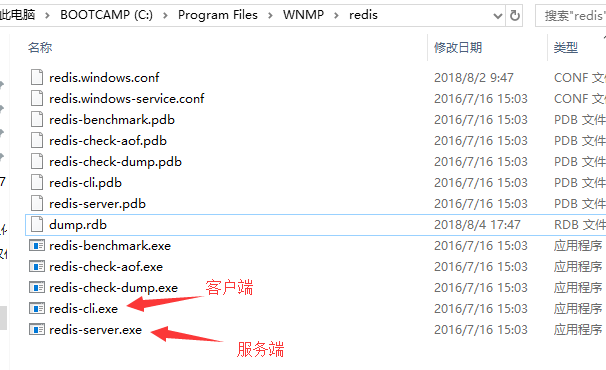
随便一个版本,解压后应该是这样这个目录结构:
配置redis redis.windows.conf文件
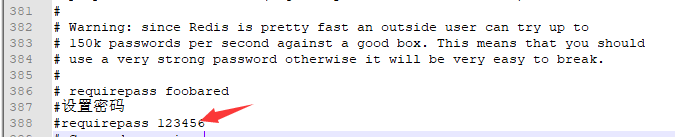

然后就可以到命令行输入:./redis-server.exe redis.windows.conf 启动redis服务;

另外打开一个窗口连接用redis客户端进行连接:
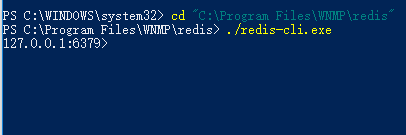
这样就连接成功了,如果设置了密码可能会要求输入密码。
推荐一个redis可视化连接工具:redis-desktop-manager
下载地址:链接: https://pan.baidu.com/s/1e_DVgnb6FigyMGuguoDPKA 密码: p3xm
5、自定义开启关闭脚本start.bat stop.bat
建议将php nginx redis的目录添加进系统环境变量,方便后面使用。
现在各项都准备好了,怎么启动,由于nginx跟apache执行php的方式不一样,所以这里有些麻烦,需要单独启动php,再启动nginx。
php-cgi -b 127.0.0.1:9000
nginx启动直接执行nginx.exe文件即可
不过这样启动后,一定不能关掉cmd窗口。
分享一个工具:RunhiddenConsole 隐藏掉窗口启动;下载地址:链接: https://pan.baidu.com/s/1a8og8143MaPNmo083f347A 密码: dt46
将这个工具的目录也添加进环境变量,下面就可以写一个这样额启动关闭脚本了:start.bat
@echo off
rem 启动FastCGI
echo Starting PHP FastCGI...
RunHiddenConsole   "C:/Program Files/WNMP/php7.1/php-cgi.exe"  -c "C:/Program Files/WNMP/php7.1/php.ini"  -b 127.0.0.1:9000

rem 启动nginx
echo Starting nginx...
RunHiddenConsole "C:/Program Files/WNMP/nginx1.13/nginx.exe" -p "C:/Program Files/WNMP/nginx1.13"

启动 redis
echo Starting redis...
RunHiddenConsole "C:/Program Files/WNMP/redis/redis-server.exe"  "C:/Program Files/WNMP/redis/redis.windows.conf"

pause
Exit
关闭脚本:stop.bat
@echo off
echo Stopping nginx...
taskkill /F /IM nginx.exe > nul
echo Stopping PHP FastCGI...
taskkill /F /IM php-cgi.exe > nul
echo Stopping redis...
taskkill /F /IM redis-server.exe > nul
pause
exit
6、使用xxfpm避免php进程过多崩溃
本地测试过程中,可能会经常出现,一个项目运行太久了,就访问不了了,phpcgi进程就挂掉了。
解决这个东西,需要下载一个东西xxfpm 链接: https://pan.baidu.com/s/1kkTx3f3mS0sO51AebCcAUQ 密码: pcfq
将里面的pthreadGC2.dll 复制到C:WindowsSystem32 和 C:WindowsSysWOW64 下
然后将xxfpm目录也添加进环境变量,就可以这样启动php
RunHiddenConsole xxfpm "C:/Program Files/WNMP/php7.1/php-cgi.exe" -n 5 -i 127.0.0.1 -p 9000
最后修改一下我们的启动脚本 start.bat
@echo off
echo Starting PHP FastCGI...
RunHiddenConsole xxfpm  "C:/Program Files/WNMP/php7.1/php-cgi.exe"  -n 5 -i 127.0.0.1 -p 9000

echo Starting nginx...
RunHiddenConsole "C:/Program Files/WNMP/nginx1.13/nginx.exe" -p "C:/Program Files/WNMP/nginx1.13"

echo Starting redis...
RunHiddenConsole "C:/Program Files/WNMP/redis/redis-server.exe"  "C:/Program Files/WNMP/redis/redis.windows.conf"
pause

Exit
这样就可以一键启动,一键关闭了。