1.dist.eculidean(A, B) # 求出A和B点的欧式距离
参数说明:A,B表示位置信息
2.dlib.get_frontal_face_detector()表示脸部位置检测器
3.dlib.shape_predictor(args['shape_predictor]) 表示脸部特征位置检测器
参数说明:args['shape_predictor'] 表示位置信息
4.Orderdict([('mouth', (23, 30))]) # 构造有序的字典
参数说明:'mouth'表示字典的键,(23, 30) 表示字典的值
使用人脸检测可以获得人脸框的位置信息,再使用人脸框的关键点检测,检测出各个人脸部分的位置
眨眼检测:主要是通过检测脸部6个点,即 A = dist.euclidean(eye[2], eye[4]), 即眼部的2号点与4号点的欧式距离
B = dist.euclidean(eye[1], eye[5]) C = dist.euclidean(eye[0], eye[3]) # 即1号点与5号点的位置, 0号点与3号点的欧式距离
EAR = (A + B) / 2 * C, 分别计算左眼和右眼的评分求平均作为最终的评分,如果小于阈值,则加1,如果连续3次都小于阈值,则表示进行了一次眨眼活动
代码:
第一步:使用OrderedDict() 构建有序的脸部位置序号字典
第二步:使用argparse构造出可以传入的参数
第三步:使用dlib.get_frontal_face_detector()获得脸部位置检测器
第四步:使用dlib.shape_predictor构造脸部特征检测器
第五步:进入循环,读取图片,对图片维度进行扩大,方便进行脸部特征检测,同时进行灰度化,为了脸部特征检测做准备
第六步:使用detector(gray, 0) 进行脸部位置检测
第七步:循环脸部位置,使用predictor(gray, rect)获得脸部特征的位置信息
第八步:将脸部特征的位置信息转换为数组的形式
第九步:根据字典的序号,获得左眼和右眼的位置array
第十步:使用cv2.convexHull构造左右眼的凸包,并使用cv2.drawContours完成画图操作
第十一步:构造函数计算左右眼的EAR值,使用平均值作为最终的EAR
第十二步:循环,满足条件的,眨眼次数+1
第十三步:进行画图操作,同时使用cv2.putText将眨眼次数进行显示
import cv2
import numpy as np
import argparse
import time
import dlib
from scipy.spatial import distance as dist
from collections import  OrderedDict

def shape_to_array(shape, dtype='int'):
    coords = np.zeros((shape.num_parts, 2), dtype=dtype)
    for i in range(shape.num_parts):
        coords[i] = (shape.part(i).x, shape.part(i).y)

    return coords

def accu_angle_eye(eye):
    A = dist.euclidean(eye[1], eye[5])
    B = dist.euclidean(eye[2], eye[4])
    # 计算距离,水平的
    C = dist.euclidean(eye[0], eye[3])
    aspect_ratio = (A + B) / (2.0 *C)

    return aspect_ratio

# 第一步:使用OrderedDict构造脸部特征序号的有序字典
FACE_LANDMAKE_64_IDEX = OrderedDict([
    ("mouth", (48, 68)),
    ("right_eyebrow", (17, 22)),
    ("left_eyebrow", (22, 27)),
    ("right_eye", (36, 42)),
    ("left_eye", (42, 48)),
    ("nose", (27, 36)),
    ("jaw", (0, 17))
])
# EAR的阈值
BlINK_THRESH = 0.3
# 眨眼帧数的阈值
BLINK_TRUE = 3
# 低于阈值的次数
count_blink = 0
# 眨眼次数
Total = 0
# 第二步:使用argparse构造变量参数
ap = argparse.ArgumentParser()
ap.add_argument('-p', '--shape-predictor', default='shape_predictor_68_face_landmarks.dat',
                help='the weight to predictor')
ap.add_argument('-v', '--video', default='test.mp4',
                help='the video to read')
args = vars(ap.parse_args())

# 第三步:使用dlib.get_frontal_face_detector() 获得脸部位置检测器
detector = dlib.get_frontal_face_detector()
# 第四步:使用dlib.shape_predictor获得脸部特征检测器
predictor = dlib.shape_predictor(args['shape_predictor'])

vs = cv2.VideoCapture(args['video'])
time.sleep(1)

(lstart, lend) = FACE_LANDMAKE_64_IDEX['left_eye']
(rstart, rend) = FACE_LANDMAKE_64_IDEX['right_eye']

while True:
    # 第五步:进行循环,读取图片,并对图片做维度扩大,并进灰度化
    frame = vs.read()[1]
    (h, w) = frame.shape[:2]
    width = 1200
    r = width / float(w)
    dim = (width, int(r*h))
    frame = cv2.resize(frame, dim, interpolation=cv2.INTER_AREA)
    gray = cv2.cvtColor(frame, cv2.COLOR_BGR2GRAY)
    # 第六步:使用detector(gray, 0)获得脸部位置信息
    rects = detector(gray, 0)
    # 第七步:循环脸部位置信息,使用predictor(gray, rect)获得脸部特征位置的信息
    for rect in rects:
        shape = predictor(gray, rect)
        # 第八步:将脸部特征信息转换为数组array的格式
        shape = shape_to_array(shape)
        # 第九步:根据字典,获得左眼和右眼的位置信息
        leftEye = shape[lstart:lend]
        rightEye = shape[rstart:rend]

        # 第十步:使用cv2.convexHull获得凸包位置,使用drawContours画出轮廓位置进行画图操作
        leftContours = cv2.convexHull(leftEye)
        rightContours = cv2.convexHull(rightEye)
        cv2.drawContours(frame, [leftContours], -1, (0, 255, 0), 1)
        cv2.drawContours(frame, [rightContours], -1, (0, 255, 0), 1)
        # 第十一步:计算左右眼的EAR值,获得其平均值
        leftScore = accu_angle_eye(leftEye)
        rightScore = accu_angle_eye(rightEye)
        meanScore = (leftScore + rightScore) / 2.0
        #第十二步:循环,满足条件,眨眼次数+1
        if meanScore < BlINK_THRESH:
            count_blink += 1
        else:
            if count_blink >= BLINK_TRUE:
                Total += 1

            count_blink = 0
        # 第十三步:进行画图,使用cv2.putText展示眨眼次数
        cv2.putText(frame, 'Blinks: {}'.format(Total), (10, 30),
                    cv2.FONT_HERSHEY_SIMPLEX, 0.7, (0, 0, 255), 1)
        cv2.putText(frame, 'EAR {:.2f}'.format(meanScore), (300, 30),
                    cv2.FONT_HERSHEY_SIMPLEX, 0.7, (0, 0, 255), 1)
    cv2.imshow('frame', frame)
    if cv2.waitKey(10) & 0xff == 27:
        break

vs.release()
cv2.destroyAllWindows()
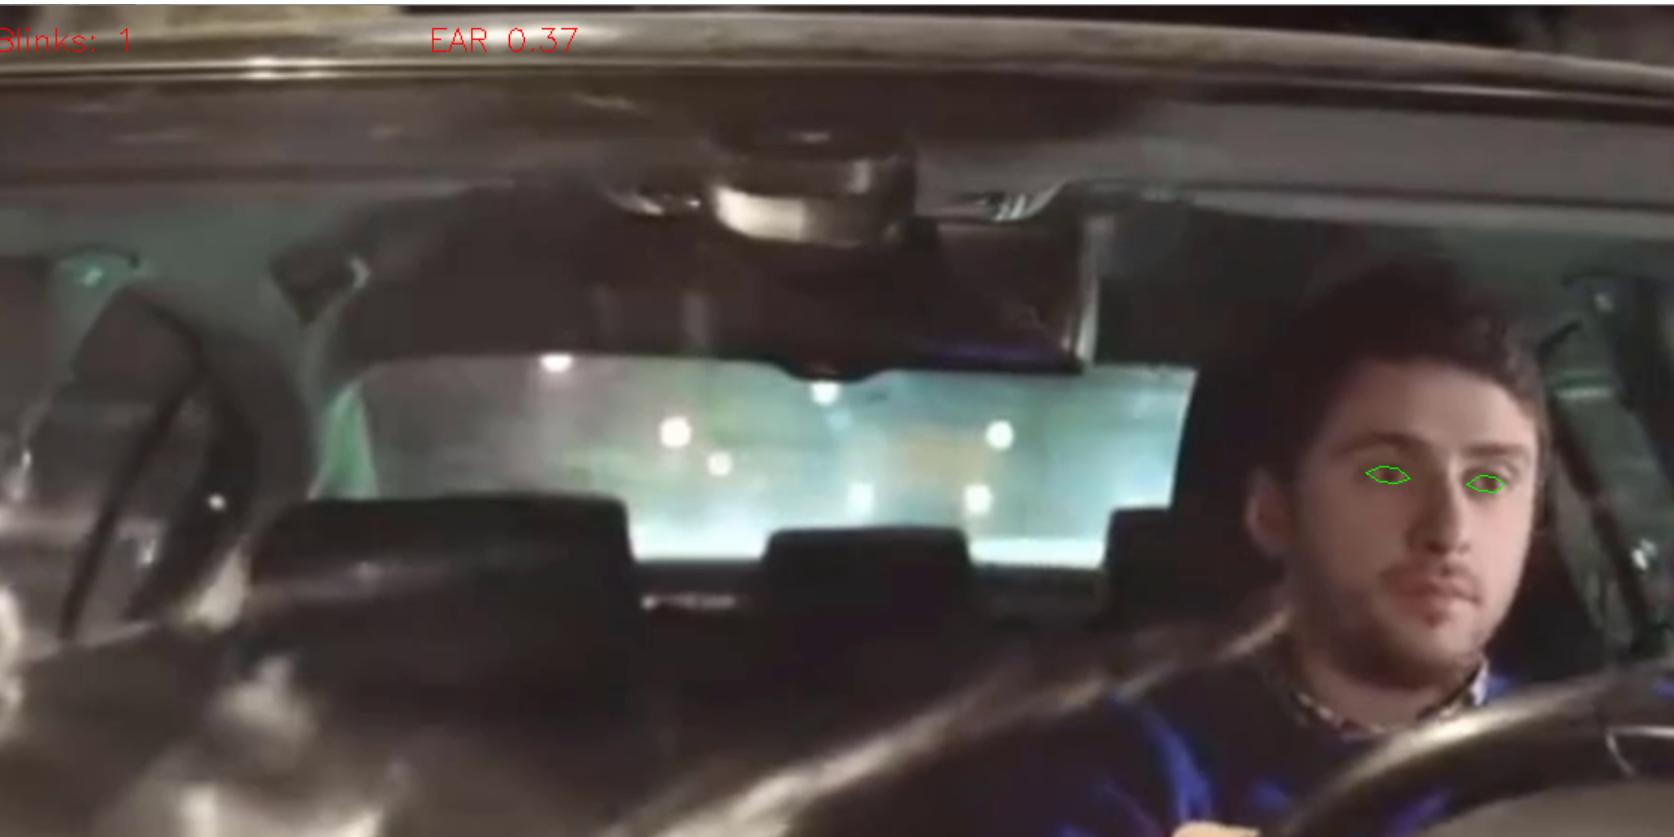
效果图