小程序的登录授权是开发小程序中必不可少的一部分 今天整理了一下小程序的登录授权的流程
首先是官方给的小程序的登录授权流程图

下面是主要的部分哦~
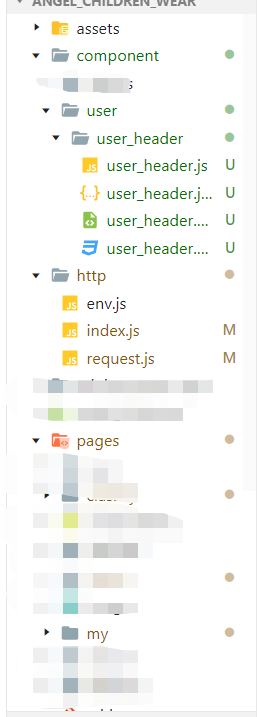
1.项目路径结构
2.登录和未登录的不同状态 my.wxml页面
通过判断是否有token值来控制切换
 <view class="user_header_container">
<!-- -----------登录成功显示的---------- -->
<view class="user_header" wx:if="{{userStatus}}">
	<view class="user_picture">
		<image src="{{userinfo.avatarUrl}}"></image>
	</view>
	<view class="user_name_container">
		<view class="user_name">{{userinfo.nickName}}</view>
	</view>
</view>
<!-- -----------未登录显示的---------- -->
<view class="user_header" wx:else>
	<view class="user_picture">
		<image src="/pages/image/noloading.png"></image>
	</view>
	<view class="user_name_container">
		<button open-type='getUserInfo' bindgetuserinfo="getuserinfo">未登录</button>
	</view>
</view>
3.判断是否登录
  data: {
      // 用户信息
      userinfo:{},
      userStatus:'',
      loadingView:false
    },
  //页面初始化时需要判断
  onLoad: function (options) {
      if(wx.getStorageSync('token')){
        wx.getUserInfo({
          success: res => {
            console.log("信息", res)
            this.setData({
              userinfo:res.userInfo,
              userStatus:wx.getStorageSync('token')
            })
            // console.log(this.data.userStatus)
          }
        })
       }
    },
  //每次进入我的页面都要判断一下
   /**
     * 生命周期函数--监听页面显示
     */
    onShow: function () {
      if(wx.getStorageSync('token')){
        wx.getUserInfo({
          success: res => {
            // console.log("信息", res)
            this.setData({
              userinfo:res.userInfo,
              userStatus:wx.getStorageSync('token')
            })
            // console.log(this.data.userinfo)
          }
        })
    }else{
         this.setData({
          userStatus:''
         })
      }
 },
接下来就是重点了 小程序的登录注册
4.弹框页面 .wxml
  <!---------------确认登录的弹框开始-------------- -->
  <view class="login_dialog" wx:if='{{isShow}}'>
    <view class="wrapper">
       <view class="header">
      <view class="header_image">
              <image class="icon" src="{{userinfo.avatarUrl}}"></image>
      </view>
        <view class="username">{{userinfo.nickName}}</view>
      </view>
     <view class="content">
  <view>请授权小程序登录</view>
  <view>我们不会公布你的这些信息</view>
  <view>只是为了给你提供更好的服务</view>
</view>
<view class="footer">
  <button
type="primary"
open-type='getUserInfo'
bindgetuserinfo="getuserinfo"
>允许</button>
  <button bindtap="nologin">暂不登录</button>
</view>
5.登录注册的核心
 methods: {
      getuserinfo(e) {
        this.data.encryptedData = e.detail.encryptedData
        this.data.iv = e.detail.iv
        // 调用函数
        this.logintap()
        this.setData({
          isShow:false
        })
      },
      // =======验证登录=======
      logintap() {
        wx.login({
          complete: (res) => {
            getUserMsg(res.code).then((res)=> {
              // console.log(res)
              // 临时登录凭证code
              if (res.code == 0) {  //登录成功
                // console.log("666666", res)
                wx.setStorageSync('token', res.data.token)  //保存token
              }
              if (res.code == 10000) {
                //code为10000代表没有注册过
                  //调用注册函数
                  // console.log(111)
                  this.register()
              }
            })
          }
        })
      },
      // 注册函数
      register() {
        wx.login({
          complete: (res) => {
            console.log("1111112222", res)
            // code: res.code,
            // iv: this.data.iv,
            // encryptedData: this.data.encryptedData  //加密用户信息
             //配置注册参数
            getwxre(res.code,this.data.iv, this.data.encryptedData ).then(function (res) {
              console.log("zhuce", res)
              if (res.code == 0) {
                this.logintap()  //注册成功在调用登录
                wx.setStorageSync('token', res.data.token)
                console.log(res.data)
              }
            })
          }
        })
      },
    }
6.退出登录
退出登录其实很简单 就是清除保存在Storage中的信息 和token
  nologin() {
        // console.log(1111111)
        wx.setStorageSync('token', '')
      },
7.检测当前用户登录态是否有效
检测当前用户登录态是否有效用的是wx.checkSession方法
wx.checkSession({ success: function(){ //session 未过期,并且在本生命周期一直有效 }, fail: function(){ //登录态过期 wx.login() //重新登录 .... } })
过程写的有些粗糙 但大体的思路就是这样了 其中 里边用到的登录和注册接口 都是之前封装好的直接拿来用的 我之前的一篇文章介绍过小程序封装request 感兴趣的可以去看一下
https://www.cnblogs.com/mxnl/p/13472023.html
每天一个小知识点,一点一点的成长,加油!