201871020225-牟星源《面向对象程序设计(java)》第十六周学习总结
|
项目 |
内容 |
|
这个作业属于哪个课程 |
https://www.cnblogs.com/nwnu-daizh/ |
|
这个作业的要求在哪里 |
https://www.cnblogs.com/nwnu-daizh/p/12031970.html |
|
作业学习目标 |
(1) 掌握Java应用程序的打包操作; (2) 掌握线程概念; (3) 掌握线程创建的两种技术。 (4) 学习设计应用程序的GUI。 |
随笔博文正文内容包括:
第一部分:总结教材14.1-14.3知识内容
1、程序与进程的概念
(1)程序是一段静态的代码,它是应用程序执行的蓝本。
(2)进程是程序的一次动态执行,它对应了从代码加载、执行至执行完毕的一个完整过程。
(3)操作系统为每个进程分配一段独立的内存空间和系统资源,包括:代码数据以及堆栈等资源。每 一个进程的内部数据和状态都是完全独立的。
(4)多任务操作系统中,进程切换对CPU资源消耗较大。
2、多线程的概念
(1)多线程是进程执行过程中产生的多条执行线索。
(2)线程是比进程执行更小的单位。
(3)线程不能独立存在,必须存在于进程中,同一进程的各线程间共享进程空间的数据。
(4)每个线程有它自身的产生、存在和消亡的过程, 是一个动态的概念。
(5)多线程意味着一个程序的多行语句可以看上去几 乎在同一时间内同时运行。
(6)线程创建、销毁和切换的负荷远小于进程,又称为轻量级进程(lightweight process)。
3、Java实现多线程有两种途径:
(1)创建Thread类的子类
(2)在程序中定义实现Runnable接口的类
4、用Thread类子类创建线程
首先需从Thread类派生出一个子类,在该子类中重写run()方法。
class hand extends Thread
{
public void run()
{……}
}
5、用Thread类的子类创建多线程的关键性操作
(1)定义Thread类的子类并实现用户线程操作,即 run()方法的实现。
(2)在适当的时候启动线程。
由于Java只支持单重继承,用这种方法定义的类不可再继承其他父类。
6、用Runnable()接口实现线程
(1)首先设计一个实现Runnable接口的类;
(2)然后在类中根据需要重写run方法;
(3)再创建该类对象,以此对象为参数建立Thread 类的对象;
(4)调用Thread类对象的start方法启动线程,将 CPU执行权转交到run方法。
7、线程的终止
(1)当线程的run方法执行方法体中最后一条语句后,或者出现了在run方法中没有捕获的异常时,线程将终止,让出CPU使用权。
(2)调用interrupt()方法也可终止线程。 void interrupt()
(3)向一个线程发送一个中断请求,同时把这个线程的“interrupted”状态置为true。
(4)若该线程处于 blocked 状态 ,会抛出 InterruptedException。
8、测试线程是否被中断的方法
Java提供了几个用于测试线程是否被中断的方法。
(1)static boolean interrupted()
(2)检测当前线程是否已被中断 ,并重置状态 “interrupted”值为false。
boolean isInterrupted()
(3)检测当前线程是否已被中断 ,不改变状态 “interrupted”值 。
9、线程的状态
(1)利用各线程的状态变换,可以控制各个线程轮流使用CPU,体现多线程的并行性特征。
(2)线程有如下7种状态:
➢ New (新建)
➢ Runnable (可运行)
➢ Running(运行)
➢ Blocked (被阻塞)
➢ Waiting (等待)
➢ Timed waiting (计时等待)
➢ Terminated (被终止)
10、新创建线程
new(新建)
线程对象刚刚创建,还没有启动,此时线程还处于不可运行状态。例如: Thread thread=new Thread(r); 此时线程thread处于新建状态,有了相应的内存空间以及其它资源。
11、可运行线程
runnable(可运行状态)
➢ 此时线程已经启动,处于线程的run()方法之中。
➢ 此时的线程可能运行,也可能不运行,只要 CPU一空闲,马上就会运行。
➢ 调用线程的start()方法可使线程处于“可运行”状态。例如: thread.start();
12、被阻塞线程和等待线程
blocked (被阻塞)
➢ 一个正在执行的线程因特殊原因,被暂停执行, 进入阻塞状态。
➢ 阻塞时线程不能进入队列排队,必须等到引起阻塞的原因消除,才可重新进入排队队列。
➢ 引起阻塞的原因很多,不同原因要用不同的方法解除。
-sleep(),wait()是两个常用引起线程阻塞的方法。
13、线程阻塞的三种情况
(1)等待阻塞 -- 通过调用线程的wait()方法,让线程等待某工作的完成。
(2)同步阻塞 -- 线程在获取synchronized同步锁失败(因为锁被其它线程所占用),它会进入同步阻塞状态。
(3)其他阻塞 -- 通过调用线程的sleep()或join() 或发出了I/O请求时,线程会进入到阻塞状态。当 sleep()状态超时、join()等待线程终止或者超 时、或者I/O处理完毕时,线程重新转入就绪状态。
14、被终止的线程
Terminated (被终止) 线程被终止的原因有二:
➢ 一是run()方法中最后一个语句执行完毕而自然死亡。
➢ 二是因为一个没有捕获的异常终止了run方法而意外死亡。
➢ 可以调用线程的 stop 方 法 杀 死 一 个 线 程(thread.stop();),但是,stop方法已过时, 不要在自己的代码中调用它。
第二部分:实验部分
实验1: 导入第13章示例程序,测试程序并进行代码注释。
实验1:测试程序1
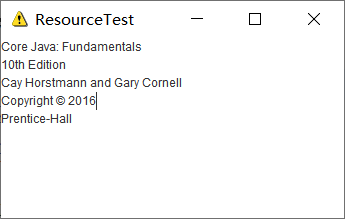
(1)在elipse IDE中调试运行教材585页程序13-1,结合程序运行结果理解程序;
(2)将所生成的JAR文件移到另外一个不同的目录中,再运行该归档文件,以便确认程序是从JAR文件中,而不是从当前目录中读取的资源。
(3)掌握创建JAR文件的方法;
具体代码如下:
import java.io.*;
import java.net.*;
import java.util.*;
import javax.swing.*;
* @version 1.41 2015-06-12
* @author Cay Horstmann
*/
public class ResourceTest
{
public static void main(String[] args)
{
EventQueue.invokeLater(() -> {
JFrame frame = new ResourceTestFrame();
frame.setTitle("ResourceTest");
frame.setDefaultCloseOperation(JFrame.EXIT_ON_CLOSE);
frame.setVisible(true);
});
}
}
* 一个加载图像和文本资源的框架。
*/
class ResourceTestFrame extends JFrame
{
private static final int DEFAULT_WIDTH = 300;
private static final int DEFAULT_HEIGHT = 300;
{
setSize(DEFAULT_WIDTH, DEFAULT_HEIGHT);
//在找到ResourceTest类的地方查找about.gif文件
URL aboutURL = getClass().getResource("about.gif");
//将此图像设置为框架的图标
Image img = new ImageIcon(aboutURL).getImage();
setIconImage(img);
//getResourceAsStream方法的作用是找到与类位于同一位置的资源,返回一个可以加载资源的URL或者输入流
InputStream stream = getClass().getResourceAsStream("about.txt");
//在读取文本时使用同一编码UTF-8
try (Scanner in = new Scanner(stream, "UTF-8"))
{
while (in.hasNext())
textArea.append(in.nextLine() + " ");
}
add(textArea);
}
}
运行结果如下:
实验1:测试程序2
(1)在elipse IDE中调试运行ThreadTest,结合程序运行结果理解程序;
(2)掌握线程概念;
(3)掌握用Thread的扩展类实现线程的方法;
(4)利用Runnable接口改造程序,掌握用Runnable接口创建线程的方法。
|
class Lefthand extends Thread { public void run() { for(int i=0;i<=5;i++) { System.out.println("You are Students!"); try{ sleep(500); } catch(InterruptedException e) { System.out.println("Lefthand error.");} } } } class Righthand extends Thread { public void run() { for(int i=0;i<=5;i++) { System.out.println("I am a Teacher!"); try{ sleep(300); } catch(InterruptedException e) { System.out.println("Righthand error.");} } } } public class ThreadTest { static Lefthand left; static Righthand right; public static void main(String[] args) { left=new Lefthand(); right=new Righthand(); left.start(); right.start(); } } |
具体代码如下:
public void run()
{
for(int i=0;i<=5;i++)
{ System.out.println("You are Students!");
//调用Thread的sleep方法不会创建一个新线程,
//sleep是Thread的静态方法,用于暂停当前线程的活动
try{
sleep(500);
}
catch(InterruptedException e)
{
System.out.println("Lefthand error.");
}
}
}
}
class Righthand extends Thread {
public void run()
{
for(int i=0;i<=5;i++)
{ System.out.println("I am a Teacher!");
try{
sleep(300);
}
catch(InterruptedException e)
{
System.out.println("Righthand error.");
}
}
}
}
public class ThreadTest
{
static Lefthand left;
static Righthand right;
public static void main(String[] args)
{ left=new Lefthand();
right=new Righthand();
//同时启动两个线程
left.start();
right.start();
}
}
运行结果如下:

实验1:测试程序3
(1)在Elipse环境下调试教材625页程序14-1、14-2 、14-3,结合程序运行结果理解程序;
(2)在Elipse环境下调试教材631页程序14-4,结合程序运行结果理解程序;
(3)对比两个程序,理解线程的概念和用途;
(4)掌握线程创建的两种技术。
具体代码如下:
无线程:
* 在长方形边缘上移动和反弹的球
* @version 1.33 2007-05-17
* @author Cay Horstmann
*/
public class Ball
{
private static final int XSIZE = 15;
private static final int YSIZE = 15;
private double x = 0;
private double y = 0;
private double dx = 1;
private double dy = 1;
* 将球移动到下一个位置,如果碰到其中一个边,则反转方向
*/
public void move(Rectangle2D bounds)
{
x += dx;
y += dy;
//宽度上的最小位置
if (x < bounds.getMinX())
{
x = bounds.getMinX();
dx = -dx;
}
//宽度上的最大位置
if (x + XSIZE >= bounds.getMaxX())
{
x = bounds.getMaxX() - XSIZE;
dx = -dx;
}
//高度上的最小位置
if (y < bounds.getMinY())
{
y = bounds.getMinY();
dy = -dy;
}
//宽度上的最大位置
if (y + YSIZE >= bounds.getMaxY())
{
y = bounds.getMaxY() - YSIZE;
dy = -dy;
}
}
* 获取球在其当前位置的形状
*/
public Ellipse2D getShape()
{
return new Ellipse2D.Double(x, y, XSIZE, YSIZE);
}
}
import java.util.*;
import javax.swing.*;
* 画弹力球的部件.
* @version 1.34 2012-01-26
* @author Cay Horstmann
*/
public class BallComponent extends JPanel
{
private static final int DEFAULT_WIDTH = 450;
private static final int DEFAULT_HEIGHT = 350;
* 增加一个球到组件上。
* @param b the ball to add
*/
//创建add方法,在add方法中使用球类型集合的add方法向集合中添加球
public void add(Ball b)
{
balls.add(b);
}
//在Java中,所有的绘制都必须使用Graphics对象,其中包含了绘制图案,图像和文本的方法。
public void paintComponent(Graphics g)
{
super.paintComponent(g); // 使用背景色绘制面板
Graphics2D g2 = (Graphics2D) g;
//获取每一个球的位置和形状并使用默认颜色进行填充
for (Ball b : balls)
{
g2.fill(b.getShape());
}
}
public Dimension getPreferredSize() { return new Dimension(DEFAULT_WIDTH, DEFAULT_HEIGHT); }
}
import java.awt.event.*;
import javax.swing.*;
* 显示动画弹跳球。
* @version 1.34 2015-06-21
* @author Cay Horstmann
*/
public class Bounce
{
public static void main(String[] args)
{
EventQueue.invokeLater(() -> {
JFrame frame = new BounceFrame();
frame.setDefaultCloseOperation(JFrame.EXIT_ON_CLOSE);
frame.setVisible(true);
});
}
}
* 有球部件和按钮的框架。
*/
class BounceFrame extends JFrame
{
private BallComponent comp;
public static final int STEPS = 1000;
public static final int DELAY = 3;
* 构造包含用于显示弹跳球和启动和关闭按钮的框架
*/
public BounceFrame()
{
setTitle("Bounce");
comp = new BallComponent();
add(comp, BorderLayout.CENTER);
JPanel buttonPanel = new JPanel();
//使用addBuuton方法为按钮添加标题,监听器,并且将按钮添加至面板中
addButton(buttonPanel, "Start", event -> addBall());
addButton(buttonPanel, "Close", event -> System.exit(0));
//将按钮面板添加至框架的南部
add(buttonPanel, BorderLayout.SOUTH);
pack();
}
*向容器添加按钮
* @param c the container
* @param 为按钮设置标题
* @param 为按钮设置监听器
*/
public void addButton(Container c, String title, ActionListener listener)
{
JButton button = new JButton(title);
c.add(button);
button.addActionListener(listener);
}
* 在面板中添加一个弹跳球,使其弹跳1000次。
*/
public void addBall()
{
try
{
Ball ball = new Ball();
comp.add(ball);
{
//这样设置的话所有球的移动都处于一个线程当中
ball.move(comp.getBounds());
comp.paint(comp.getGraphics());
Thread.sleep(DELAY);
}
}
//中断异常
catch (InterruptedException e)
{
}
}
}
* 在长方形边缘上移动和反弹的球
* @version 1.33 2007-05-17
* @author Cay Horstmann
*/
public class Ball
{
private static final int XSIZE = 15;
private static final int YSIZE = 15;
private double x = 0;
private double y = 0;
private double dx = 1;
private double dy = 1;
* 将球移动到下一个位置,如果碰到其中一个边,则反转方向
*/
public void move(Rectangle2D bounds)
{
x += dx;
y += dy;
//宽度上的最小位置
if (x < bounds.getMinX())
{
x = bounds.getMinX();
dx = -dx;
}
//宽度上的最大位置
if (x + XSIZE >= bounds.getMaxX())
{
x = bounds.getMaxX() - XSIZE;
dx = -dx;
}
//高度上的最小位置
if (y < bounds.getMinY())
{
y = bounds.getMinY();
dy = -dy;
}
//宽度上的最大位置
if (y + YSIZE >= bounds.getMaxY())
{
y = bounds.getMaxY() - YSIZE;
dy = -dy;
}
}
* 获取球在其当前位置的形状
*/
public Ellipse2D getShape()
{
return new Ellipse2D.Double(x, y, XSIZE, YSIZE);
}
}
import java.util.*;
import javax.swing.*;
* 画弹力球的部件.
* @version 1.34 2012-01-26
* @author Cay Horstmann
*/
public class BallComponent extends JPanel
{
private static final int DEFAULT_WIDTH = 450;
private static final int DEFAULT_HEIGHT = 350;
* 增加一个球到组件上。
* @param b the ball to add
*/
//创建add方法,在add方法中使用球类型集合的add方法向集合中添加球
public void add(Ball b)
{
balls.add(b);
}
//在Java中,所有的绘制都必须使用Graphics对象,其中包含了绘制图案,图像和文本的方法。
public void paintComponent(Graphics g)
{
super.paintComponent(g); // 使用背景色绘制面板
Graphics2D g2 = (Graphics2D) g;
//获取每一个球的位置和形状并使用默认颜色进行填充
for (Ball b : balls)
{
g2.fill(b.getShape());
}
}
public Dimension getPreferredSize() { return new Dimension(DEFAULT_WIDTH, DEFAULT_HEIGHT); }
}
import java.awt.event.*;
* 显示动画弹跳球。
* @version 1.34 2015-06-21
* @author Cay Horstmann
*/
public class BounceThread
{
public static void main(String[] args)
{
EventQueue.invokeLater(() -> {
JFrame frame = new BounceFrame();
frame.setTitle("BounceThread");
frame.setDefaultCloseOperation(JFrame.EXIT_ON_CLOSE);
frame.setVisible(true);
});
}
}
* 有面板和按钮的框架。
*/
class BounceFrame extends JFrame
{
private BallComponent comp;
public static final int STEPS = 1000;
public static final int DELAY = 5;
/**
* 构造包含用于显示弹跳球和开始和关闭按钮的组件的框架
*/
public BounceFrame()
{
comp = new BallComponent();
add(comp, BorderLayout.CENTER);
JPanel buttonPanel = new JPanel();
addButton(buttonPanel, "Start", event -> addBall());
addButton(buttonPanel, "Close", event -> System.exit(0));
add(buttonPanel, BorderLayout.SOUTH);
pack();
}
* 添加一个按钮到框架中.
* @param c the container
* @param 为按钮设置标题
* @param 为按钮设置监听器
*/
public void addButton(Container c, String title, ActionListener listener)
{
JButton button = new JButton(title);
c.add(button);
button.addActionListener(listener);
}
* 在画布上添加一个弹跳球并开始一条线使其弹跳
*/
public void addBall()
{
Ball ball = new Ball();
comp.add(ball);
//将移动球的代码放置在一个独立的线程中,运行这段代码可以提高弹跳球的相应性能
//实现一个BallRunnable类,然后,将动画代码放在run方法中,这样就即将动画代码放在了一个单独的线程中
Runnable r = () -> {
try
{
for (int i = 1; i <= STEPS; i++)
{
ball.move(comp.getBounds());
//调用组件的repaint方法,重新绘制组件
comp.repaint();
Thread.sleep(DELAY);
}
}
catch (InterruptedException e)
{
}
};
//将Runnable对象作为入口参数传入Thread的构造函数,再调用start方法就可以启动线程
Thread t = new Thread(r);
t.start();
}
}
运行结果如下:
无线程:
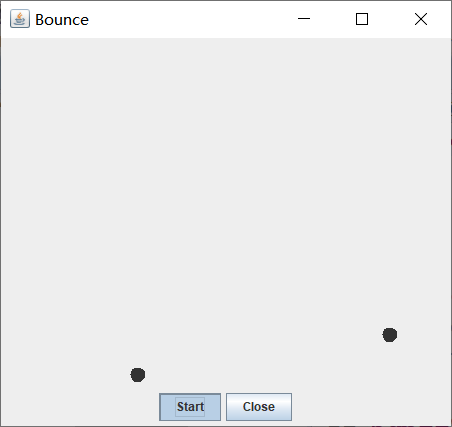
运用线程:

这两种代码的区别就是无线程的部分只能一次让一个小球滚动,当这个小球运行结束后才可以进入下一个运行。而有线程的代码则可以让多个小球同时滚动,这就是线程的作用。
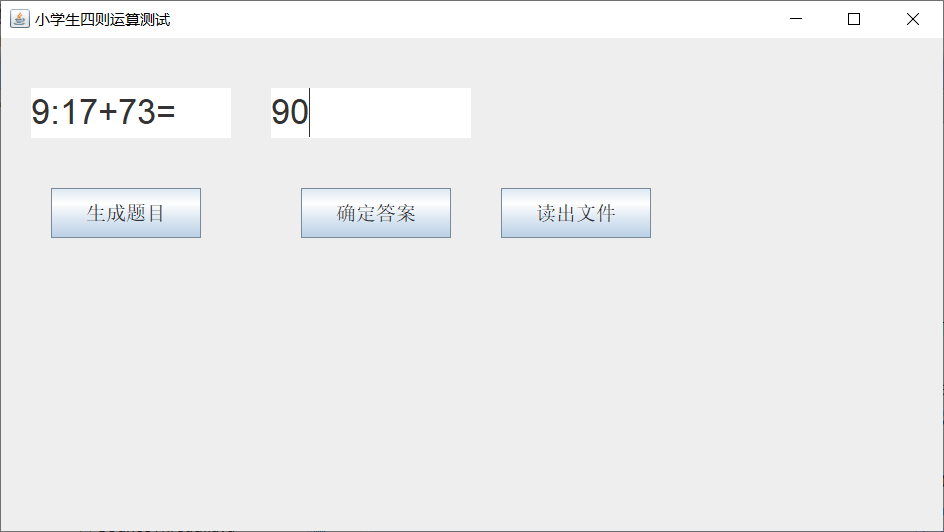
实验2:结对编程练习:采用GUI界面设计以下程序,并创建程序归档文件。
(1)设计一个100以内整数小学生四则运算练习程序,由计算机随机产生10道加减乘除练习题,学生输入答案,由程序检查答案是否正确,每道题正确计10分,错误不计分,10道题测试结束后给出测试总分;
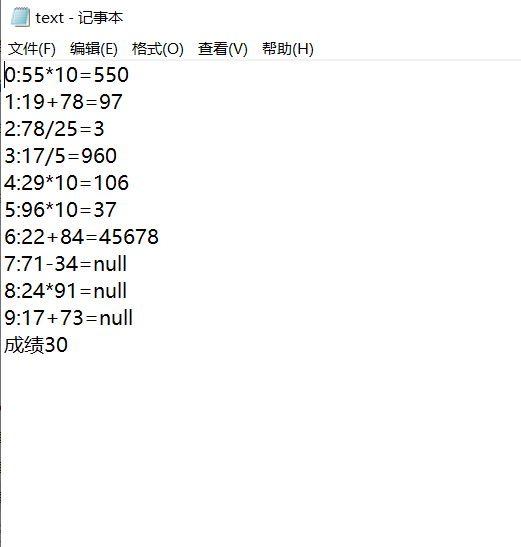
(2)将程序中测试练习题及学生答题结果输出到文件,文件名为test.txt。
包含以下4部分:(该项17周实验课现场检查评分:30分)
具体要求如下:
(1)程序设计思路简述;
(2)符合编程规范的程序代码;
(3)程序运行功能界面截图;
具体代码如下:
import java.awt.EventQueue;
import java.awt.Toolkit;
{
Toolkit t=Toolkit.getDefaultToolkit();
Dimension s=t.getScreenSize();
EventQueue.invokeLater(() -> {
JFrame frame = new Demo();
frame.setBounds(0, 0,(int)s.getWidth()/2,(int)s.getHeight()/2);
frame.setTitle("小学生四则运算测试");
frame.setDefaultCloseOperation(JFrame.EXIT_ON_CLOSE);
frame.setVisible(true);
});
}
}
import java.awt.event.ActionEvent;
import java.awt.event.ActionListener;
import java.io.FileNotFoundException;
import java.io.PrintWriter;
import java.util.Collections;
import java.util.Scanner;
public class Demo extends JFrame {
private String[] c=new String[10];
private String[] c1=new String[10];
private int[] list=new int[10];
int i=0,i1=0,sum = 0;
private PrintWriter out = null;
private JTextArea text,text1;
private int counter;
public Demo() {
JPanel Panel = new JPanel();
Panel.setLayout(null);
JLabel JLabel1=new JLabel("");
JLabel1.setBounds(500, 800, 400, 30);
JLabel1.setFont(new Font("Courier",Font.PLAIN,35));
JButton Button = new JButton("生成题目");
Button.setBounds(50,150,150,50);
Button.setFont(new Font("Courier",Font.PLAIN,20));
Button.addActionListener(new Action());
JButton Button2 = new JButton("确定答案");
Button2.setBounds(300,150,150,50);
Button2.setFont(new Font("Courier",Font.PLAIN,20));
Button2.addActionListener(new Action1());
JButton Button3 = new JButton("读出文件");
Button3.setBounds(500,150,150,50);
Button3.setFont(new Font("Courier",Font.PLAIN,20));
Button3.addActionListener(new Action2());
text=new JTextArea(30,80);text.setBounds(30, 50, 200, 50);
text.setFont(new Font("Courier",Font.PLAIN,35));
text1=new JTextArea(30,80);
text1.setBounds(270, 50, 200, 50);
text1.setFont(new Font("Courier",Font.PLAIN,35));
Panel.add(text1);
Panel.add(Button2);
Panel.add(Button3);
Panel.add(JLabel1);
add(Panel);
}
private class Action implements ActionListener
{
public void actionPerformed(ActionEvent event)
{
text1.setText("0");
if(i<10) {
int a = 1+(int)(Math.random() * 99);
int b = 1+(int)(Math.random() * 99);
int m= (int) Math.round(Math.random() * 3);
switch(m)
{
case 0:
while(a<b){
b = (int) Math.round(Math.random() * 100);
a = (int) Math.round(Math.random() * 100);
}
c[i]=(i+":"+a+"/"+b+"=");
list[i]=Math.floorDiv(a, b);
text.setText(i+":"+a+"/"+b+"=");
i++;
break;
case 1:
c[i]=(i+":"+a+"*"+b+"=");
list[i]=Math.multiplyExact(a, b);
text.setText(i+":"+a+"*"+b+"=");
i++;
break;
case 2:
c[i]=(i+":"+a+"+"+b+"=");
list[i]=Math.addExact(a, b);
text.setText(i+":"+a+"+"+b+"=");
i++;
break ;
case 3:
while(a<=b){
b = (int) Math.round(Math.random() * 100);
a = (int) Math.round(Math.random() * 100);
}
c[i]=(i+":"+a+"-"+b+"=");
text.setText(i+":"+a+"-"+b+"=");
list[i]=Math.subtractExact(a, b);
i++;
break ;
}
}
}
}
private class Action1 implements ActionListener
{
public void actionPerformed(ActionEvent event)
{
if(i<10) {
text.setText(null);
String daan=text1.getText().toString().trim();
int a = Integer.parseInt(daan);
if(text1.getText()!="") {
if(list[i1]==a) sum+=10;
}
c1[i1]=daan;
i1++;
}
}
}
{
public void actionPerformed(ActionEvent event)
{
try {
out = new PrintWriter("text.txt");
} catch (FileNotFoundException e) {
// TODO Auto-generated catch block
e.printStackTrace();
}
for(int counter=0;counter<10;counter++)
{
out.println(c[counter]+c1[counter]);
}
out.println("成绩"+sum);
out.close();
}
运行结果如下:
第三部分:实验总结
这一周我们主要学习了线程的知识,知道了什么是线程,以及一些相关概念。但是在实际的实验中,仍有一些困惑,在一些代码的理解上仍不够到位,在后面的学习中,我会加强对代码的理解,并积极进行课后训练。