1.安装git
[root@insure ~]# yum install git
[root@insure ~]# git --version
卸载git yum remove git
安装2.10版本
安装wget命令
yum -y install wget
下载wget https://www.kernel.org/pub/software/scm/git/git-2.10.0.tar.gz
解压 tar -zxvf git-2.10.0.tar.gz
编译安装
cd git-2.10.0
make prefix=/usr/local/git all
make prefix=/usr/local/git install
增加软连接[root@insure git-2.10.0]# ln -s /usr/local/git/bin/* /usr/bin/
查看版本
[root@insure git-2.10.0]# git --version
git version 2.10.0
2.建立git仓库并设置权限
mkdir /opt/git/repositories
chown -R git:git /opt/git/repositories
chmod 755 /opt/git/repositories
3.建立git用户
adduser git
passwd git 密码设置*******
3.创建仓库
mkdir test.git
[root@insure repositories]# cd test.git
[root@insure test.git]# git --bare init
Initialized empty Git repository in /opt/git/repositories/test.git/
git仓库建立OK
4.新建Apache
安裝apache
[root@insure opt]# yum install httpd apr apr-util
[root@insure opt]# yum install httpd-manual mod_ssl mod_perl mod_auth_mysql
启动测试是否安装成功
[root@insure opt]# /bin/systemctl start httpd.service
[root@insure opt]# /bin/systemctl enable httpd
Created symlink from /etc/systemd/system/multi-user.target.wants/httpd.service to /usr/lib/systemd/system/httpd.service.
[root@insure opt]# /bin/systemctl status httpd.service
● httpd.service - The Apache HTTP Server
Loaded: loaded (/usr/lib/systemd/system/httpd.service; enabled; vendor preset: disabled)
Active: active (running) since Tue 2018-12-11 10:12:38 CST; 56s ago
5.创建git用户并设置密码
[root@insure opt]# htpasswd -m -c /etc/httpd/conf.d/git-team.htpasswd git
(PS: -m:表示MD5加密方式 ;-c:表示创建文件,只有第一次创建用户时候加上该参数,以后不用)
设置git-team.htpasswd访问权限
[root@insure opt]# chmod 640 /etc/httpd/conf.d/git-team.htpasswd
修改httpd.conf
[root@insure opt]# cd /etc/httpd/conf
在文件末尾添加下列内容:
<VirtualHost *:80>
ServerName 自己的服务器IP或者域名
SetEnv GIT_HTTP_EXPORT_ALL
SetEnv GIT_PROJECT_ROOT /home/git/repositories
ScriptAlias /git/ /usr/libexec/git-core/git-http-backend/
<Location />
AuthType Basic
AuthName "Git"
AuthUserFile /etc/httpd/conf.d/git-team.htpasswd
Require valid-user
</Location>
</VirtualHost>
重启apache
[root@localhost ~]# /bin/systemctl restart httpd.service
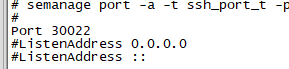
5.修改ssh默认端口
修改配置文件/etc/ssh/sshd_config添加22号端口
重启ssh服务
systemctl restart sshd.service
查看
netstat -anp|grep ssh

修改/etc/services

1. 本地登录到远程服务器设置免密登录
修改vi /etc/ssh/sshd_config
#PasswordAuthentication yes 改为no
PubkeyAuthentication no 改为yes
2. 本地电脑 cmd
ssh-keygen -t rsa
把生成的公钥id_rsa.pub 上传到远程服务器
添加到.ssh authorized_keys中
3. 测试连接
$ ssh root@47.96.*.*
Last login: Tue Dec 11 19:15:56 2018 from 101.86.55.108
Welcome to Alibaba Cloud Elastic Compute Service !
$ git clone root@47.96.*.*:/home/gitrepo/runoob.git
Cloning into 'runoob'...
warning: You appear to have cloned an empty repository.
systemctl restart sshd.service
http://www.runoob.com/git/git-server.html