解压 elasticsearch.rar ,配置elasticsearch_node1configelasticsearch.yml 文件
cluster.name: es2019

network.host: 0.0.0.0

http.port: 9201
node.master: true
node.data: true
path.data: D:/all/env/elasticsearch_node1/data
path.logs: D:/all/env/elasticsearch_node1/logs
bootstrap.memory_lock: true
transport.tcp.port: 9301
discovery.zen.ping.unicast.hosts: ["192.168.20.180:9301", "192.168.20.180:9302", "192.168.20.180:9303"]
# 要启动两个节点作为主节点
discovery.zen.minimum_master_nodes: 2

http.cors.enabled: true
http.cors.allow-origin: /.*/
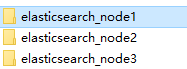
复制三份,修改下面的属性
http.port: 9201
transport.tcp.port: 9301
path.data: D:/all/env/elasticsearch_node1/data
path.logs: D:/all/env/elasticsearch_node1/logs
启动三个es,斌测试是否成功。
通过地址访问
http://127.0.0.1:9201/_cluster/health
http://127.0.0.1:9201/_cat/health?v
http://localhost:9202/_cat/nodes?v

注意:
由于配置文件配置的master节点至少有两个,会报错 Master not discovered exception"
data文件夹中有数据是,启动es时es集群会一致报错,
[node-2] failed to send join request to master [{node-1}{WbcP0pC_T32jWpYvu5is1A}{2_LCVHx1QEaB
原因是:是因为复制的elasticsearch文件夹下包含了data文件中示例一的节点数据,需要把示例二data文件下的文件清空。删除es集群data数据库文件夹下所有文件即可