1. 安装webpack:
// 初始化、安装webpack以及webpack-cli
npm init
npm install --save-dev webpack webpack-cli
2.创建配置文件: webpack.config.js (webpack默认配置文件名,可改)
3.创建项目目录:
例:

4.配置:
// webpack.config.js
const path = require('path');
const HtmlWebpackPlugin = require('html-webpack-plugin');

module.exports = {
  mode: 'development',  //开发模式
  entry: { //入口
    "js/index": './src/js/index.js'  // js为打包后生成的文件夹名 index为生成文件名
  // index: './src/js/index.js'   // 此种写法则生成在dist目录下不会生成js目录
  },
  output: { //输出
    //publicPath: 'dist/',
    path: path.resolve(__dirname, 'dist'),   //此处必须为绝对地址
    filename: '[name]'.js    //文件名
  },
  module: {
    rules: [
      // 要使css文件生效需要 style-loader, css-loader
      {test: /.css$/, use: 'style-loader' },
      {test: /.css$/, use: 'css-loader' }
    ]
  },
  plugins: [ //插件
    new HtmlWebpackPlugin({ //生成html需要使用 html-webpack-plugin插件
      template: './src/index.html',
      filename: 'index.html'
    })
  ]
}
*注:html-webpack-plugin地址:  https://github.com/jantimon/html-webpack-plugin
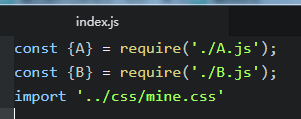
5.入口文件:
在入口文件中引入相应的js模块及css
6.运行:
1.命令行执行 npx webpack
2. 在page.json中配置脚本文件
"scripts": {
  "build": "webpack"
 }
*注:如果配置文件名不是wepack.config.js 例: npx webpack --config webpack.config.my.js
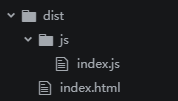
综上所述即可将文件打包到dist目录下:
这样打包后的需要手动打开在浏览器打开index.html,如果想要实现在浏览器输入网址形式打开页面,则可以通过安装 webpac-dev-server,实现启动一个本地服务。
npm install -D webpack-dev-server

// webpack.config.js 中添加
devServer: {
  port: '3000',  // 运行端口号
  open: true    //是否自动在浏览器运行
}

// 配置运行脚本
"scripts": {
  "dev": "webpack-dev-server"
}
以上即可实现一个简单的webpack配置打包,但如果想在项目中运用还远远不够,深入学习将持续更新......