上篇博客我们讲到,spring在做xml解析的时候,将xml中的各种属性,都封装到一个GenericBeanDefinition对象中,那么在将xml标签进行解析的时候,会出现两种情况,一种是针对传统(默认)标签的解析,而spring也提供了另外一种自定义标签的解析。
首先我们先来看个自定义的例子。
/**
 * @author monco
 * @data 2020/9/27 15:28
 * @description :自定义需要注入到spring的对象
 */
public class CustomUser {

    private String id;

    private String username;

    private String email;

    public String getId() {
        return id;
    }

    public void setId(String id) {
        this.id = id;
    }

    public String getUsername() {
        return username;
    }

    public void setUsername(String username) {
        this.username = username;
    }

    public String getEmail() {
        return email;
    }

    public void setEmail(String email) {
        this.email = email;
    }
}
/**
 * @author monco
 * @data 2020/9/27 15:37
 * @description : 解析自定义标签 custom
 */
public class MyNamespaceHandler extends NamespaceHandlerSupport {

    @Override
    public void init() {
        registerBeanDefinitionParser("custom", new UserBeanDefinitionParser());
    }
}
/**
 * @author monco
 * @data 2020/9/27 15:32
 * @description : 将xml中读取的标签 放入到 BeanDefinition 中
 */
public class UserBeanDefinitionParser extends AbstractSingleBeanDefinitionParser {

    protected Class getBeanClass(Element element) {
        return CustomUser.class;
    }

    protected void doParse(Element element, BeanDefinitionBuilder builder) {
        String username = element.getAttribute("username");
        String email = element.getAttribute("email");
        if (StringUtils.hasText(username)) {
            builder.addPropertyValue("username", username);
        }
        if (StringUtils.hasText(email)) {
            builder.addPropertyValue("email", email);
        }
    }
}
我们在代码层面需要做的事就是三步,第一步,定义一个需要注册的bean,第二步,将xml中解析的元素转化成BeanDefinition,第三步,将BeanDefinition注册到spring容器中,交给spring容器管理。
下面我们需要配置一些其他的东西。请睁大眼睛 仔细观察。
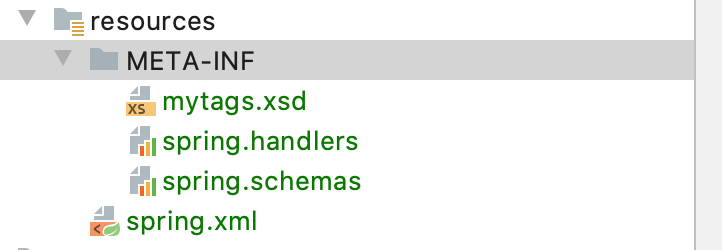
我们需要在resources文件夹下,创建META-INF文件夹,在其中创建3个文件,一个xsd文件,一个handlers文件,一个schemas文件。
xsd 文件
<?xml version="1.0" encoding="UTF-8"?>
<xsd:schema xmlns="http://www.monco.com/schema/mytags"
            xmlns:xsd="http://www.w3.org/2001/XMLSchema" targetNamespace="http://www.monco.com/schema/mytags"
            elementFormDefault="qualified">
    <!--自定义标签的名字 叫 custom-->
    <xsd:element name="custom">
        <xsd:complexType>
            <xsd:attribute name="id" type="xsd:string"></xsd:attribute>
            <xsd:attribute name="username" type="xsd:string"></xsd:attribute>
            <xsd:attribute name="email" type="xsd:string"></xsd:attribute>
        </xsd:complexType>
    </xsd:element>
</xsd:schema>
handlers 文件 指定读取的 id namespace
http://www.monco.com/schema/mytags=com.monco.bean.custom.MyNamespaceHandler
schemas 文件 指定读取的xsd 位置
http://www.monco.com/schema/mytags.xsd=META-INF/mytags.xsd
spring.xml 文件
<beans xmlns="http://www.springframework.org/schema/beans"
       xmlns:xsi="http://www.w3.org/2001/XMLSchema-instance"
       xmlns:context="http://www.springframework.org/schema/context"
       xsi:schemaLocation="http://www.springframework.org/schema/beans
    http://www.springframework.org/schema/beans/spring-beans.xsd
    http://www.springframework.org/schema/context
    http://www.springframework.org/schema/context/spring-context.xsd
    http://www.monco.com/schema/mytags
    http://www.monco.com/schema/mytags.xsd
"
       xmlns:monco="http://www.monco.com/schema/mytags"
       default-lazy-init="false">

    <!--自定义标签-->
    <context:component-scan base-package="com.monco"/>

    <!--传统标签-->
    <bean class="com.monco.entity.User" id="user">
        <constructor-arg name="username" value="monco"/>
        <constructor-arg name="password" value="123456"/>
    </bean>

    <!--replace-method-->
    <bean id="replaceClass" class="com.monco.bean.ReplaceClass" lazy-init="false"/>
    <bean id="originClass" class="com.monco.bean.OriginClass">
        <replaced-method name="method" replacer="replaceClass">
            <!--方法可能出现重载的情况,要根据类型和方法名找方法-->
            <arg-type match="java.lang.String"/>
        </replaced-method>
    </bean>

    <monco:custom id="customUser" username="monco" email="18552193820@163.com"/>

</beans>
测试类
 @Test
    public void testCustomTag() {
        ClassPathXmlApplicationContext applicationContext = new ClassPathXmlApplicationContext("spring.xml");
        CustomUser customUser = (CustomUser) applicationContext.getBean("customUser");
        System.out.println(customUser.getUsername());
    }
运行结果

通过上述一个简单的例子,我们可以发现,我们自己定义的Bean竟然奇迹般的被解析到了。现在我们就来分析下,这是why?这些配置文件的作用到底是啥?我们学了这些东西到底有啥用?
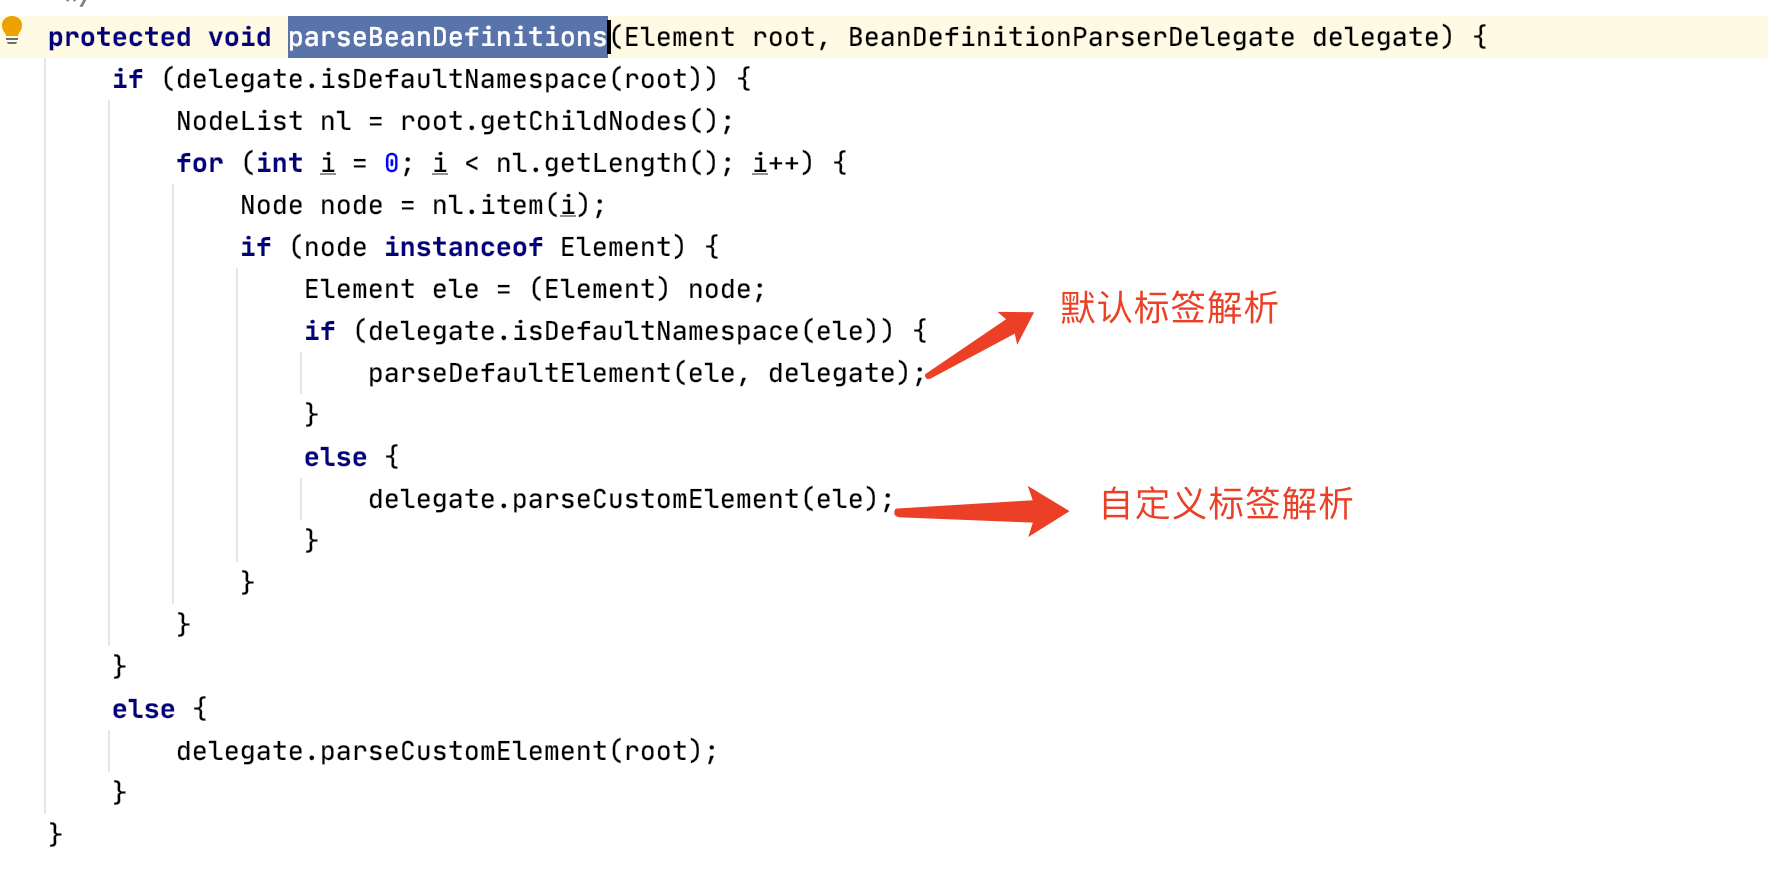
上节我们讲到 DefaultBeanDefinitionDocumentReader 中的 parseBeanDefinitions 的方法
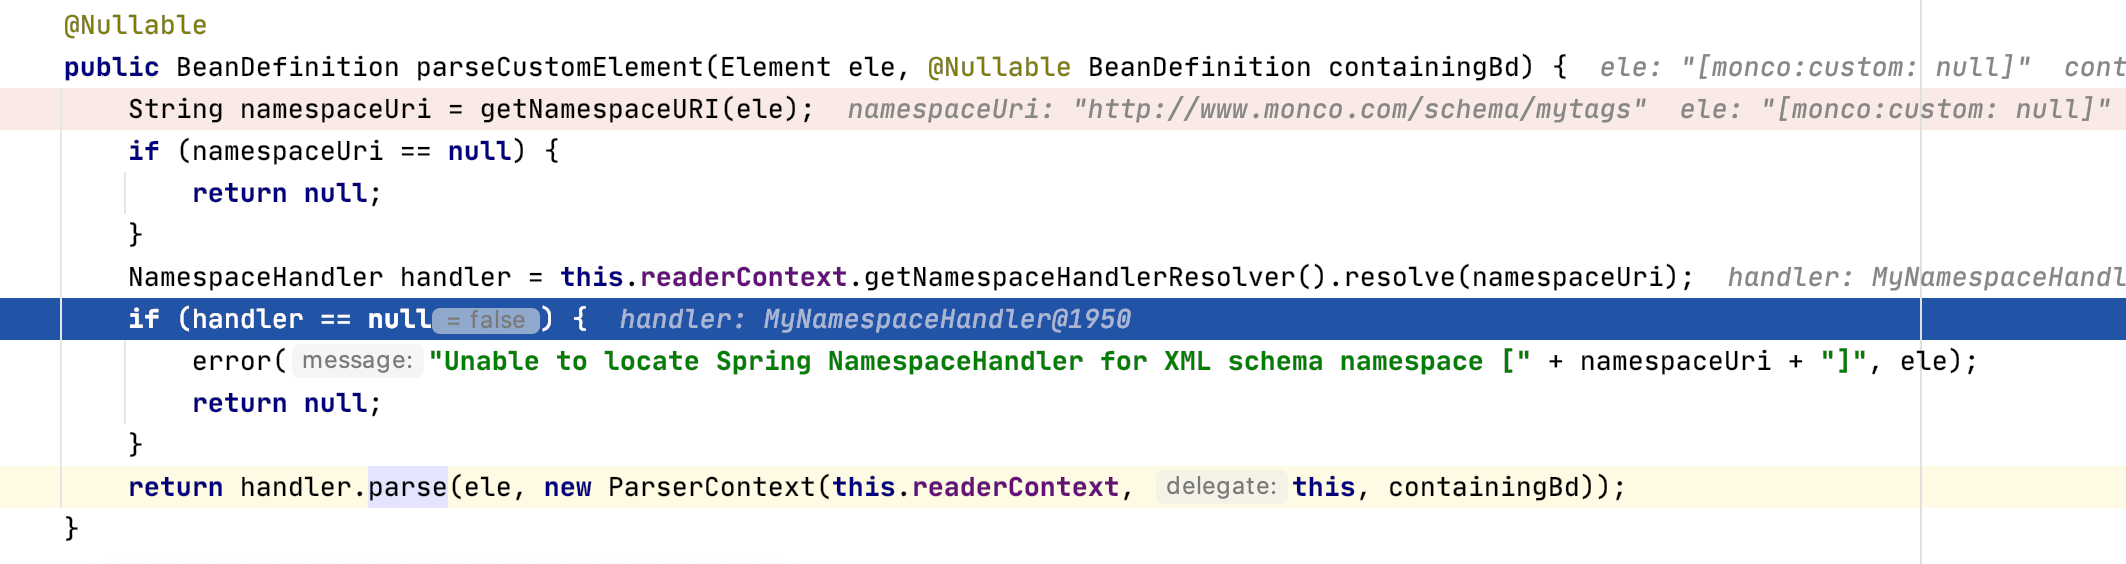
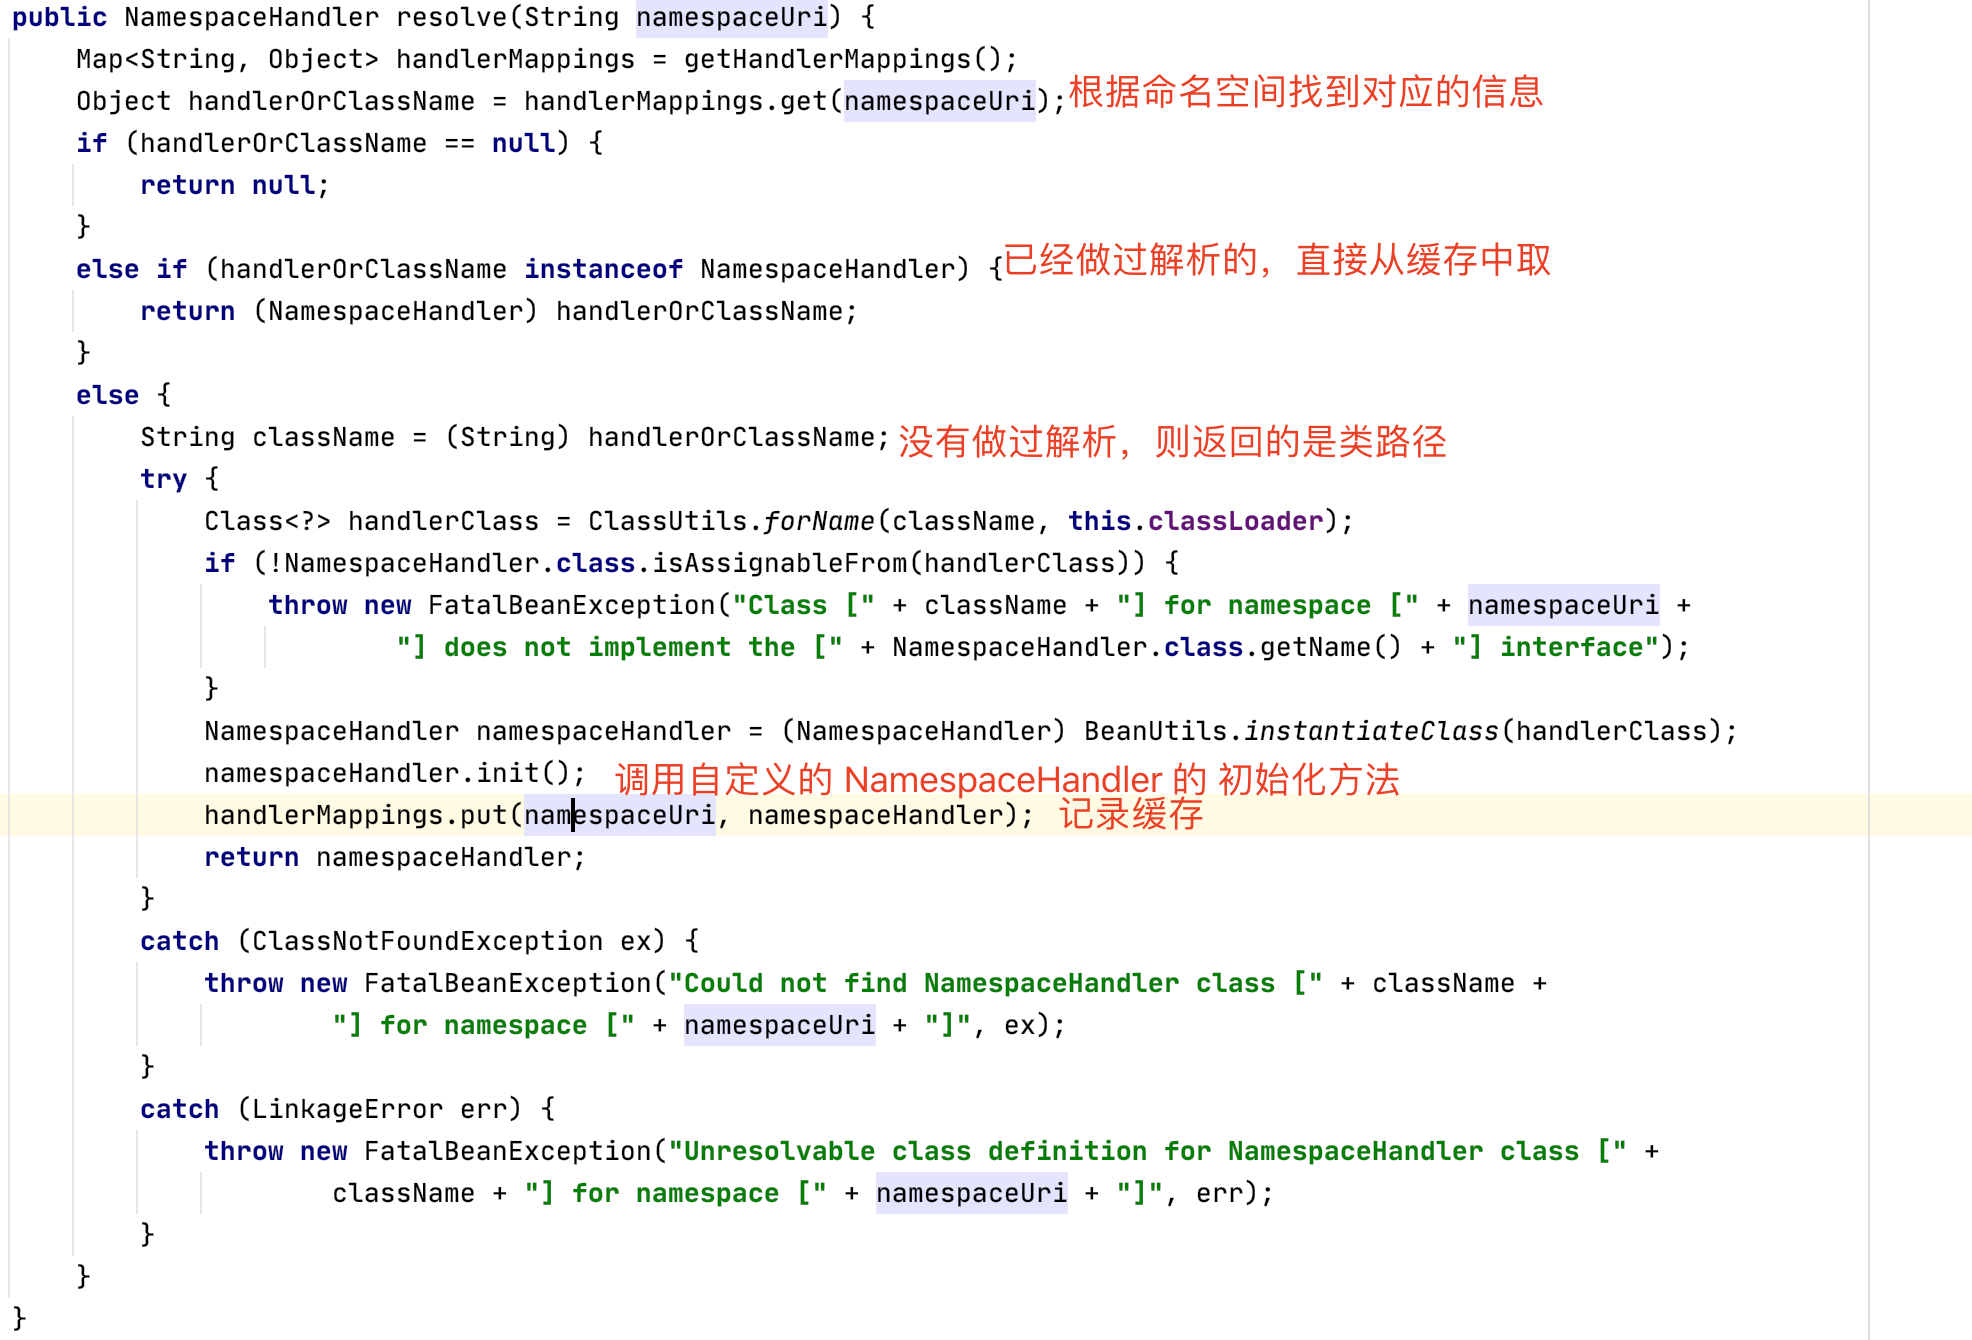
我们发现在实际去解析自定义标签的第一步,就是将元素中的namespaceURI读取出来,读取到 namespaceURI 之后,我们就可以 handlers 文件找到对应的 处理类
通过 文件 来找到处理类的这个过程 我们暂且称之为 SPI 思想。
我们通过上述步骤可以解决根据namespace 找到对应的处理类,接下来,我们需要执行 parse() 方法,将对应的标签写入BeanDefinition就可以了。主要是SPI的思想。
具体可以参考 这篇博客。
下一节主要介绍,将xml解析到Bean 中,接下来的重点是 怎样加载这个Bean。