用 Dockerfile 创建上节的 ubuntu-with-vi,其内容则为:
FROM ubuntu
RUN apt-get update && apt-get install vim -y
下面我们运行 docker build 命令构建镜像并详细分析每个细节。
root@ubuntu:~# pwd ①
/root
root@ubuntu:~# ls ②
Dockerfile
root@ubuntu:~# docker build -t ubuntu-with-vi-dockerfile . ③
Sending build context to Docker daemon 32.26 kB ④
Step 1 : FROM ubuntu ⑤
---> f753707788c5
Step 2 : RUN apt-get update && apt-get install -y vim ⑥
---> Running in 9f4d4166f7e3 ⑦
......
Setting up vim (2:7.4.1689-3ubuntu1.1) ...
---> 35ca89798937 ⑧
Removing intermediate container 9f4d4166f7e3 ⑨
Successfully built 35ca89798937 ⑩
root@ubuntu:~#
① 当前目录为 /root。
② Dockerfile 准备就绪。
③ 运行 docker build 命令,-t 将新镜像命名为 ubuntu-with-vi-dockerfile,命令末尾的 . 指明 build context 为当前目录。Docker 默认会从 build context 中查找 Dockerfile 文件,我们也可以通过 -f 参数指定 Dockerfile 的位置。
④ 从这步开始就是镜像真正的构建过程。 首先 Docker 将 build context 中的所有文件发送给 Docker daemon。build context 为镜像构建提供所需要的文件或目录。
Dockerfile 中的 ADD、COPY 等命令可以将 build context 中的文件添加到镜像。此例中,build context 为当前目录 /root,该目录下的所有文件和子目录都会被发送给 Docker daemon。
所以,使用 build context 就得小心了,不要将多余文件放到 build context,特别不要把 /、/usr 作为 build context,否则构建过程会相当缓慢甚至失败。
⑤ Step 1:执行 FROM,将 ubuntu 作为 base 镜像。
ubuntu 镜像 ID 为 f753707788c5。
⑥ Step 2:执行 RUN,安装 vim,具体步骤为 ⑦、⑧、⑨。
⑦ 启动 ID 为 9f4d4166f7e3 的临时容器,在容器中通过 apt-get 安装 vim。
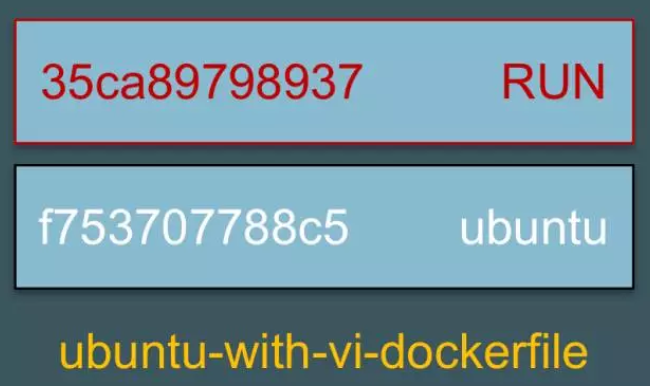
⑧ 安装成功后,将容器保存为镜像,其 ID 为 35ca89798937。
这一步底层使用的是类似 docker commit 的命令。
⑨ 删除临时容器 9f4d4166f7e3。
⑩ 镜像构建成功。
通过 docker images 查看镜像信息。

镜像 ID 为 35ca89798937,与构建时的输出一致。
在上面的构建过程中,我们要特别注意指令 RUN 的执行过程 ⑦、⑧、⑨。Docker 会在启动的临时容器中执行操作,并通过 commit 保存为新的镜像。
查看镜像分层结构
ubuntu-with-vi-dockerfile 是通过在 base 镜像的顶部添加一个新的镜像层而得到的。
这个新镜像层的内容由 RUN apt-get update && apt-get install -y vim 生成。这一点我们可以通过 docker history 命令验证。
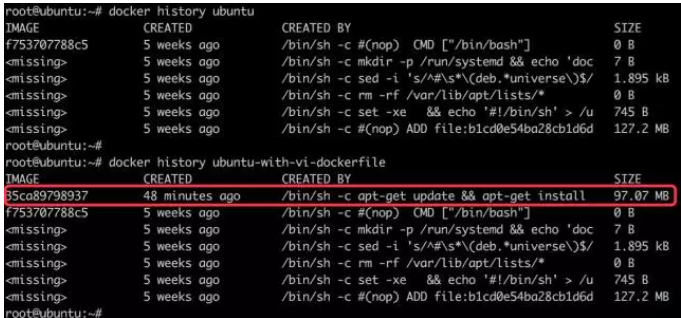
docker history 会显示镜像的构建历史,也就是 Dockerfile 的执行过程。
ubuntu-with-vi-dockerfile 与 ubuntu 镜像相比,确实只是多了顶部的一层 35ca89798937,由 apt-get 命令创建,大小为 97.07MB。docker history 也向我们展示了镜像的分层结构,每一层由上至下排列。
用Dockerfile构建nginx
#zbw dockerfile
FROM centos
MAINTAINER zbw@163.com
WORKDIR /opt/mytest
COPY testfile .
ADD etc-docker.tar.gz .
RUN set -x && yum install epel-release -y && yum install nginx -y
RUN ln -sf /dev/stdout /var/log/nginx/access.log && ln -sf /dev/stderr /var/log/nginx/error.log
EXPOSE 80
CMD ["nginx", "-g", "daemon off;"]