yum安装PHP7.2
由于linux的yum源不存在php7.x,所以我们要更改yum源:
rpm -Uvh https://dl.fedoraproject.org/pub/epel/epel-release-latest-7.noarch.rpm
rpm -Uvh https://mirror.webtatic.com/yum/el7/webtatic-release.rpm
查看yum源中有没有php7.x
yum search php7
看到下图,证明php已经存在yum源中
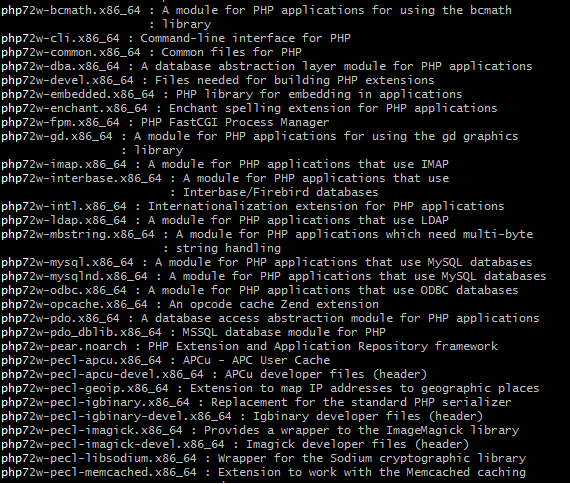
yum 安装php72w和各种拓展,选自己需要的即可:
yum -y install php72w php72w-cli php72w-common php72w-devel php72w-embedded php72w-fpm php72w-gd php72w-mbstring php72w-mysqlnd php72w-opcache php72w-pdo php72w-xml
安装完成
查看php版本
php -v

配置php.ini
vi /etc/php.ini 按下esc进入命令模式
yum安装Apacha
yum -y install httpd
安装Apache扩展包
yum -y install httpd-manual mod_ssl mod_perl mod_auth_mysql
yum安装Mysql
yum -y install mysql
yum -y install mysql-server
yum -y install php-mysql
安装mysql-server遇到问题
错误:No package mysql-server available.Package php-mysql-5.4.16-36.el7_1.x86_64 already installed and latest versionNothing to do
原因是因为CentOS 7 版本将MySQL数据库软件从默认的程序列表中移除,用mariadb代替了
解决方案:从官网下载mysql-server
wget http://dev.mysql.com/get/mysql-community-release-el7-5.noarch.rpm
rpm -ivh mysql-community-release-el7-5.noarch.rpm
yum install mysql-community-server
然后需要确定,输入y回车即可
Is this ok[y/d/N]:y
yum 安装php的时候,用命令yum -y install php*遇到提示phpxx-common conflicts with php-common这个错误信息,这时候可以看到
Error: phpxx-common conflicts with php-common
You could try using --skip-broken to work around the problem
You could try running: package-cleanup --problems
package-cleanup --dupes
这样的错误提示。
这样在重新安装的时候 用命令
yum -y install php* --skip-broken
安装Mysql扩展包
yum -y install mysql-connector-odbc mysql-devel libdbi-dbd-mysql
配置Apache、mysql开机启动
chkconfig httpd on
chkconfig mysqld on
或者
systemctl enable mysqld
systemctl daemon-reload
重启Apache、mysql服务
service mysqld restart
service php-fpm start
systemctl restart httpd
查看mysql运行状态
service mysqld status
systemctl status mysqld.service
获取MySQL的临时密码
grep 'temporary password' /var/log/mysqld.log

登陆并修改密码
使用默认的密码登陆
mysql -uroot -p
用该密码登录到服务端后,必须马上修改密码,不然会报如下错误:
mysql> select @@log_error;
ERROR 1820 (HY000): You must reset your password using ALTER USER statement before executing this statement.
mysql>
修改密码
ALTER USER 'root'@'localhost' IDENTIFIED BY 'root123';
授权其他机器登陆
mysql> GRANT ALL PRIVILEGES ON *.* TO 'root'@'%' IDENTIFIED BY '123456' WITH GRANT OPTION; #123456为你需要设置的密码
mysql> FLUSH PRIVILEGES;
mysql> exit;
mysq配置默认编码为utf8
修改/etc/my.cnf配置文件,在[mysqld]下添加编码配置,如下所示:
[mysqld]
character_set_server=utf8
init_connect='SET NAMES utf8'
重新启动mysql服务
默认配置文件路径:配置文件:/etc/my.cnf
日志文件:/var/log//var/log/mysqld.log
服务启动脚本:/usr/lib/systemd/system/mysqld.service socket
文件:/var/run/mysqld/mysqld.pid
如果忘记密码或者没有从log日志中找到密码
首先确认服务器出于安全的状态,也就是没有人能够任意地连接MySQL数据库。
修改MySQL的登录设置:
vim /etc/my.cnf
在[mysqld]的段中加上一句:skip-grant-tables
[mysqld]
datadir=/var/lib/mysql
socket=/var/lib/mysql/mysql.sock
skip-grant-tables
保存并且退出vi。
重新启动mysqld
service mysqld restart
Stopping MySQL: [ OK ]
Starting MySQL: [ OK ]
登录并修改MySQL的root密码
Welcome to the MySQL monitor. Commands end with ; or g.
Your MySQL connection id is 3 to server version: 3.23.56
Type ‘help;' or ‘h' for help. Type ‘c' to clear the buffer.
mysql> USE mysql ;
Database changed
mysql> UPDATE user SET Password = password ( 'new-password' ) WHERE User = 'root' ;
Query OK, 0 rows affected (0.00 sec)
Rows matched: 2 Changed: 0 Warnings: 0
mysql> flush privileges ;
Query OK, 0 rows affected (0.01 sec)
mysql> quit
将MySQL的登录设置修改回来
vim /etc/my.cnf
将刚才在[mysqld]的段中加上的skip-grant-tables删除
保存并且退出vim
重新启动mysqld
service mysqld restart
Stopping MySQL: [ OK ]
Starting MySQL: [ OK ]
配置Apache项目
安装完成Apache后,我们可以使用http://你的服务器ip/测试访问Apache,如果能显示如下图,则说明Apache已经安装成功。

注:如果我们测试无法打开这个页面,那么首先要考虑几个情况:
1、是不是开启了iptables防火墙,如果是的话,可以用systemctl stop iptables关闭后再试
2、是不是开启了firewalld防火墙,如果是的话,可以用systemctl stop firewalld关闭后再试
3、是不是开启了SELinux功能,如果是的话,可以用setenforce 0临时关闭SELinux后再试
4、重启Apache 服务
systemctl restart httpd
Apache安装好后配置文件在/etc/httpd/conf/httpd.conf编辑它
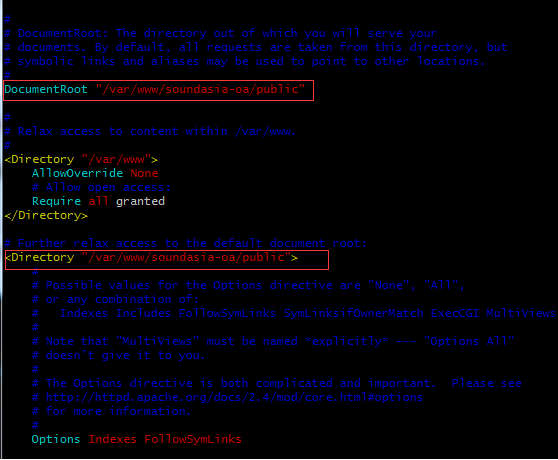
vim /etc/httpd/conf/httpd.conf
打开文件后,我们输入/docu,然后按下回车,这样就可以快速搜索到我们要找到内容。如下图,可以看到有两个/var/www/html的地方,我们要修改的就是这两个地方,把/var/www/html修改成我们想要的路径,比如/www/soundasia-oa/public,该路径为我们项目的启动路径,那么修改后就是这样的。
重启Apache服务了
systemctl restart httpd
Centos上Apache重启,mysql重启, nginx 重启方法
1.重启 apache
service httpd restrat
/etc/init.d/httpd stop
/etc/init.d/httpd start
或
systemctl start httpd.service #启动
systemctl stop httpd.service #停止
systemctl restart httpd.service #重启
systemctl enable httpd.service #开机启动
systemctl disable httpd.service #开机不启动
systemctl status httpd.service #检查httpd状态
2.重启 mysql
service mysql restart
/etc/init.d/mysqld stop
/etc/init.d/mysqld start
3.重启Nginx
service nginx restart
/etc/init.d/nginx stop
/etc/init.d/nginx start
各linux版本重启apache命令
Slackware Linux命令:
/etc/rc.d/rc.httpd restart
ubuntu、Debian 系统命令:
/etc/init.d/apache2 restart
Fedora 、Redhat、CentOS系统重启Apache命令:
/etc/init.d/httpd restart
或
service httpd restart(CentOS 成功)