4.Thymeleaf
概念
Thymeleaf 是一个跟 FreeMarker 类似的模板引擎,它可以完全替代JSP 。相较与其他的模板引擎,它有如下特点:
- 动静结合:Thymeleaf 在有网络和无网络的环境下皆可运行,无网络显示静态内容,有网络用后台得到数据 替换静态内容
- 与SpringBoot完美整合,springboot默认整合thymeleaf
4.1 入门案例
编写接口
编写UserService,调用UserMapper的查询所有方法
@Service
public class UserService {
    @Autowired
    private UserDao userDao;
    public List<User> queryAll() {
        return this.userDao.selectAll();
    }
}
编写一个controller,返回一些用户数据,放入模型中,等会在页面渲染 编写一个controller,返回一些用户数 据,放入模型中,等会在页面渲染
@Controller
public class UserController {
    @Autowired
    private UserService userService;
    @RequestMapping("/all")
    public String all(Model model) {
        List<User> list = userService.findAll();
        model.addAttribute("users", list);
        // 返回模板名称(就是classpath:/templates/目录下的html文件名)
        return "users";
    }
}
引入启动器
<dependency>
    <groupId>org.springframework.boot</groupId>
    <artifactId>spring-boot-starter-thymeleaf</artifactId>
</dependency>
SpringBoot会自动为Thymeleaf注册一个视图解析器:
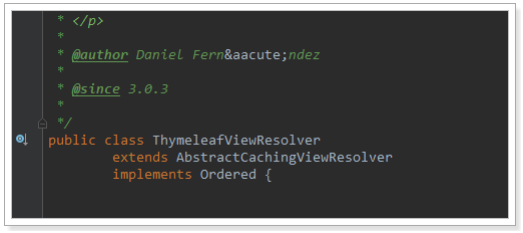
与解析JSP的InternalViewResolver类似,Thymeleaf也会根据前缀和后缀来确定模板文件的位置:
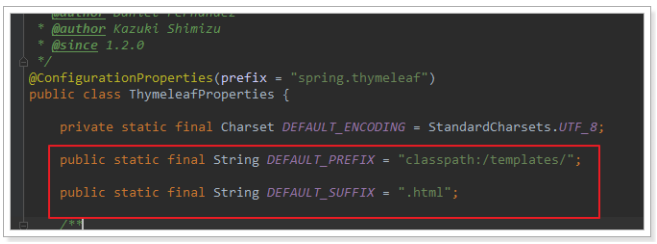
- 默认前缀: classpath:/templates/
- 默认后缀: .html
所以如果我们返回视图: users ,会指向到 classpath:/templates/users.html
一般我们无需进行修改,默认即可。
静态页面
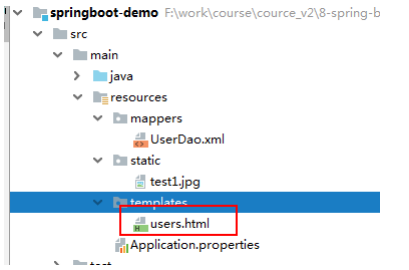
根据上面的文档介绍,模板默认放在classpath下的templates文件夹,我们新建一个html文件放入其中:
编写html模板,渲染模型中的数据:
注意,把html 的名称空间,改成: xmlns:th="http://www.thymeleaf.org" 会有语法提示
<!DOCTYPE html>
<html xmlns:th="http://www.thymeleaf.org">
<head>
    <meta charset="UTF-8">
    <title>首页</title>
    <style type="text/css">
        table {border-collapse: collapse; font-size: 14px; width: 80%; margin: auto}
        table, th, td {border: 1px solid darkslategray;padding: 10px}
    </style>
</head>
<body>
<div style="text-align: center">
    <span style="color: darkslategray; font-size: 30px">欢迎光临!</span>
<hr/>
<table class="list">
    <tr>
        <th>id</th>
        <th>姓名</th>
        <th>用户名</th>
        <th>年龄</th>
        <th>性别</th>
        <th>生日</th>
        <th>备注</th>
        <th>操作</th>
    </tr>
    <tr th:each="user, status : ${users}" th:object="${user}">
        <td th:text="${user.id}">1</td>
        <td th:text="*{name}">张三</td>
        <td th:text="*{userName}">zhangsan</td>
        <td th:text="${user.age}">20</td>
        <td th:text="${user.sex} == 1 ? '男': '女'">男</td>
        <td th:text="${#dates.format(user.birthday, 'yyyy-MM-dd')}">1980-02-30</td>
        <td th:text="${user.note}">1</td>
        <td>
            <a th:href="@{/delete(id=${user.id}, userName=*    {userName})}">删除</a>
            <a th:href="|/update/${user.id}|">修改</a>
            <a th:href="'/approve/' + ${user.id}">审核</a>
        </td>
    </tr>
</table>
</div>
</body>
</html>
我们看到这里使用了以下语法:
- ${} :这个类似与el表达式,但其实是ognl的语法,比el表达式更加强大
- th- 指令: th- 是利用了Html5中的自定义属性来实现的。如果不支持H5,可以用 data-th- 来代替
- th:each :类似于 c:foreach 遍历集合,但是语法更加简洁
- th:text :声明标签中的文本
- 例如 1 ,如果user.id有值,会覆盖默认的1
- 如果没有值,则会显示td中默认的1。这正是thymeleaf能够动静结合的原因,模板解析失败不影响 页面的显示效果,因为会显示默认值!
测试
接下来,我们打开页面测试一下:

模板缓存
Thymeleaf会在第一次对模板解析之后进行缓存,极大的提高了并发处理能力。但是这给我们开发带来了不便,修 改页面后并不会立刻看到效果,我们开发阶段可以关掉缓存使用:
# 开发阶段关闭thymeleaf的模板缓存
spring.thymeleaf.cache=false
注意:
在Idea中,我们需要在修改页面后按快捷键: Ctrl + Shift + F9 对项目进行rebuild才可以。
我们可以修改页面,测试一下。
4.2 thymeleaf详解
表达式
它们分为三类
1. 变量表达式
2. 选择或星号表达式
3. URL表达式
变量表达式
变量表达式即OGNL表达式或Spring EL表达式(在Spring中用来获取model attribute的数据)。如下所示:
${session.user.name}
它们将以HTML标签的一个属性来表示:
<h5>表达式</h5>
<span>${text}</span>
<span th:text="${text}">你好 thymleaf</span>
选择(星号)表达式
选择表达式很像变量表达式,不过它们用一个预先选择的对象来代替上下文变量容器(map)来执行,如下: * {customer.name}
被指定的object由th:object属性定义:
users.html
<tr th:each="user : ${users}" th:object="${user}">
  <td th:text="${user.id}">1</td>
  <td th:text="*{name}">张三</td>
  <td th:text="*{userName}">zhangsan</td>
  ....
URL表达式
URL表达式指的是把一个有用的上下文或回话信息添加到URL,这个过程经常被叫做URL重写。 @{/order/list}
URL还可以设置参数: @{/order/details(id=${orderId}, name=*{name})}
相对路径: @{../documents/report}
让我们看这些表达式:
<form th:action="@{/createOrder}">
<a href="main.html" th:href="@{/main}">
url表达式
<a th:href="@{/delete(id=${user.id}, userName=*{userName})}">删除</a>
文本替换
<a th:href="|/update/${user.id}|">修改</a>
字符串拼接
<a th:href="'/approve/' + ${user.id}">审核</a>
表达式常见用法
字面(Literals)
- 文本文字(Text literals): 'one text', 'Another one!',…
- 数字文本(Number literals): 0, 34, 3.0, 12.3,…
- 布尔文本(Boolean literals): true, false
- 空(Null literal): null
- 文字标记(Literal tokens): one, sometext, main,…
文本操作(Text operations)
- 字符串连接(String concatenation): +
- 文本替换(Literal substitutions): |The name is ${name}|
算术运算(Arithmetic operations)
- 二元运算符(Binary operators): +, -, *, /, %
- 减号(单目运算符)Minus sign (unary operator): -
- 布尔操作(Boolean operations)
- 二元运算符(Binary operators): and, or
- 布尔否定(一元运算符)Boolean negation (unary operator): !, not
比较和等价(Comparisons and equality)
- 比较(Comparators): >, <, >=, <= (gt, lt, ge, le)
- 等值运算符(Equality operators): ==, != (eq, ne)
条件运算符(Conditional operators)
- If-then: (if) ? (then)
- If-then-else: (if) ? (then) : (else)
- Default: (value) ?: (defaultvalue)
常用th标签
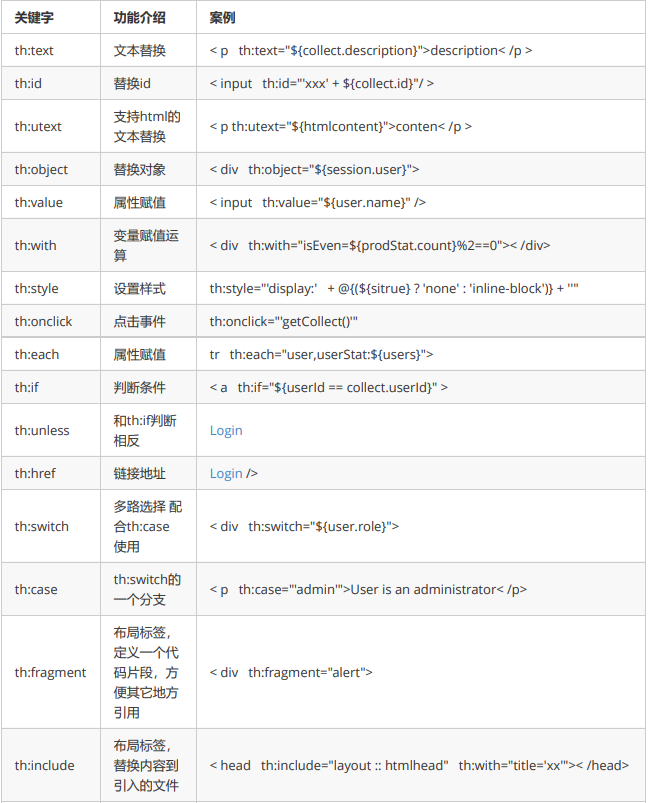
还有非常多的标签,这里只列出最常用的几个
基本用法
1. 赋值、字符串拼接
字符串拼接还有另外一种简洁的写法
<a th:href="|/update/${user.id}|">修改</a>
<a th:href="'/approve/' + ${user.id}">审核</a>
2. 条件判断 If/Unless
Thymeleaf中使用th:if和th:unless属性进行条件判断,下面的例子中, 标签只有在 th:if 中条件成立时才显 示:
<h5>if指令</h5>
<a th:if="${users.size() > 0}">查询结果存在</a><br>
<a th:if="${users.size() <= 0}">查询结果不存在</a><br>
<a th:unless="${session.user != null}" href="#">登录</a><br>
th:unless于th:if恰好相反,只有表达式中的条件不成立,才会显示其内容。
也可以使用 (if) ? (then) : (else) 这种语法来判断显示的内容
3. for 循环
<tr th:each="user, status : ${users}" th:object="${user}" th:class="${status.even} ?
'grey'">
  <td th:text="${status.even}"></td>
  <td th:text="${user.id}">1</td>
  <td th:text="*{name}">张三</td>
  <td th:text="*{userName}">zhangsan</td>
  <td th:text="${user.age}">20</td>
  <td th:text="${user.sex} == 1 ? '男' : '女'">男</td>
  <td th:text="${#dates.format(user.birthday, 'yyyy-MM-dd')}">1980-02-30</td>
  <td th:text="${user.note}">1</td>
  <td>
    <a th:href="@{/delete(id=${user.id}, userName=*{userName})}">删除</a>
    <a th:href="|/update/${user.id}|">修改</a>
    <a th:href="'/approve/' + ${user.id}">审核</a>
  </td>
</tr>
status称作状态变量,属性有:
- index:当前迭代对象的index(从0开始计算)
- count: 当前迭代对象的index(从1开始计算)
- size:被迭代对象的大小
- current:当前迭代变量
- even/odd:布尔值,当前循环是否是偶数/奇数(从0开始计算)
- first:布尔值,当前循环是否是第一个
- last:布尔值,当前循环是否是最后一个
4. 内联文本
内联文本:[[…]]内联文本的表示方式,使用时,必须先用th:inline=”text/javascript/none”激活,th:inline可以在 父级标签内使用,甚至作为body的标签。内联文本尽管比th:text的代码少,不利于原型显示。
在thymeleaf指令中显示
<h6 th:text="${text}">静态内容</h6>
使用内联文本显示model attribute
<h5>内联文本</h5>
<div>
    <h6 th:inline="text">[[${text}]]</h6>
    <h6 th:inline="none">[[${text}]]</h6>
    <h6>[[${text}]]</h6>
</div>
原则能用指令就用th指令
<h5>内联js</h5>
    <script th:inline="javascript">
    /*<![CDATA[*/
      var text = '[[${text}]]';
      alert(text);
    /*]]>*/
</script>
6. 内嵌变量
为了模板更加易用,Thymeleaf还提供了一系列Utility对象(内置于Context中),可以通过#直接访问:
- dates : java.util.Date**的功能方法类。
- calendars : 类似#dates,面向java.util.Calendar
- numbers : 格式化数字的功能方法类
- strings : 字符串对象的功能类,contains,startWiths,prepending/appending等等。
- objects: 对objects的功能类操作。
- bools: 对布尔值求值的功能方法。
- arrays:对数组的功能类方法。
- lists: 对lists功能类方法
- sets
- maps
…
下面用一段代码来举例一些常用的方法:
dates
<h5>内置变量</h5>
<h6 th:text="${#dates.createNow()}">获取当前日期</h6>
strings
<h5>内置变量</h5>
<h6 th:text="${#dates.createNow()}">获取当前日期</h6>
<h6 th:text="${#strings.substring(text, 6, 9)}">截取字符串</h6>
<h6 th:text="${#strings.length(text)}">获得长度</h6>
<h6 th:text="${#strings.randomAlphanumeric(6)}">随机字符串</h6>
<h6 th:text="${#strings.equals(text, 'hello text....')}"></h6>
使用thymeleaf布局
使用thymeleaf布局非常的方便
在/resources/templates/目录下创建footer.html,内容如下
<!DOCTYPE html> <html xmlns:th="http://www.thymeleaf.org"> <body> <footer th:fragment="copy(title)"> © thymeleaf<br> <span th:text="${title}">title footer</span> </footer> </body> </html>
在页面任何地方引入:
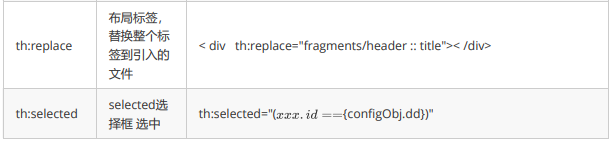
<h5>thymeleaf布局</h5>
<div th:insert="footer :: copy('test1')"></div>
<div th:replace="footer :: copy('test2')"></div>
<div th:include="footer :: copy('test3')"></div>
- th:insert :保留自己的主标签,保留th:fragment的主标签。
- th:replace :不要自己的主标签,保留th:fragment的主标签。
- th:include :保留自己的主标签,不要th:fragment的主标签。(官方3.0后不推荐)
返回的HTML如下:
<h5>thymeleaf布局</h5> <div><footer> © thymeleaf<br> <span>test</span> </footer></div> <footer> © thymeleaf<br> <span>test</span> </footer> <div> © thymeleaf<br> <span>test</span> </div>
5. Mybatis Plus

快速入门
创建工程,引入依赖
<?xml version="1.0" encoding="UTF-8"?>
<project xmlns="http://maven.apache.org/POM/4.0.0"
xmlns:xsi="http://www.w3.org/2001/XMLSchema-instance"
xsi:schemaLocation="http://maven.apache.org/POM/4.0.0 http://maven.apache.org/xsd/maven4.0.0.xsd">
<modelVersion>4.0.0</modelVersion>
<groupId>com.lxs</groupId>
<artifactId>mybatis-plus-demo-quickstart</artifactId>
<version>1.0-SNAPSHOT</version>


<parent>
  <groupId>org.springframework.boot</groupId>
  <artifactId>spring-boot-starter-parent</artifactId>
  <version>2.3.0.RELEASE</version>
  <relativePath/>
</parent>


<properties>
  <project.build.sourceEncoding>UTF-8</project.build.sourceEncoding>
  <project.reporting.outputEncoding>UTF-8</project.reporting.outputEncoding>
  <java.version>1.8</java.version>
  <mybatisplus.version>3.3.2</mybatisplus.version>
  <skipTests>true</skipTests>
</properties>


<dependencies>
  <dependency>
    <groupId>org.springframework.boot</groupId>
    <artifactId>spring-boot-starter</artifactId>
  </dependency>
  <dependency>
    <groupId>com.h2database</groupId>
    <artifactId>h2</artifactId>
    <scope>runtime</scope>
  </dependency>
  <dependency>
    <groupId>com.baomidou</groupId>
    <artifactId>mybatis-plus-boot-starter</artifactId>
    <version>${mybatisplus.version}</version>
  </dependency>
  <dependency>
    <groupId>org.assertj</groupId>
    <artifactId>assertj-core</artifactId>
    <scope>test</scope>
  </dependency>
  <dependency>
    <groupId>org.projectlombok</groupId>
    <artifactId>lombok</artifactId>
    <scope>provided</scope>
  </dependency>
  <dependency>
    <groupId>org.springframework.boot</groupId>
    <artifactId>spring-boot-starter-test</artifactId>
    <scope>test</scope>
  </dependency>
</dependencies>


<build>
  <plugins>
    <plugin>
      <groupId>org.springframework.boot</groupId>
      <artifactId>spring-boot-maven-plugin</artifactId>
    </plugin>
  </plugins>
</build>
</project>
配置文件application.yml
yml配置简介
在Springboot中,推荐使用properties或者YAML文件来完成配置,但是对于较复杂的数据结构来说,YAML又远远 优于properties。我们快速介绍YAML的常见语法格式。
先来看一个Springboot中的properties文件和对应YAML文件的对比:
#properties(示例来源于Springboot User guide):
environments.dev.url=http://dev.bar.com
environments.dev.name=Developer Setup
environments.prod.url=http://foo.bar.com
environments.prod.name=My Cool App
my.servers[0]=dev.bar.com
my.servers[1]=foo.bar.com
可以明显的看到,在处理层级关系的时候,properties需要使用大量的路径来描述层级(或者属性),比如
environments.dev.url和environments.dev.name。其次,对于较为复杂的结构,比如数组(my.servers),写起
来更为复杂。而对应的YAML格式文件就简单很多:
#YAML格式
environments:
    dev:
        url: http://dev.bar.com
        name: Developer Setup
    prod:
        url: http://foo.bar.com
        name: My Cool App
my:
    servers:
        - dev.bar.com
        - foo.bar.com
application.yml
# DataSource Config
spring:
    datasource:
        driver-class-name: org.h2.Driver
        schema: classpath:db/schema-h2.sql
        data: classpath:db/data-h2.sql
        url: jdbc:h2:mem:test
        username: root
        password: test
# Logger Config
logging:
    level:
        com.lxs.quickstart: debug
数据库脚本文件/db/data-h2.sql和/db/schema-h2.sql(拷贝)
h2数据库是一个基于内存的数据库,在jvm启动时,自动执行脚本加载相应的数据
springboot 中使用h2数据库直接按照上面配置,配置schema表结构脚本和data数据脚本即可
注意这里用户名密码可以省略不写,或者随意设定
启动类
@SpringBootApplication
@MapperScan("com.lxs.quickstart.mapper")
public class QuickstartApplication {
    public static void main(String[] args) {
        SpringApplication.run(QuickstartApplication.class, args);
    }
}
实体类
@Data
public class User {
    private Long id;
    private String name;
    private Integer age;
    private String email;
}
dao
public interface UserMapper extends BaseMapper<User> {
}
@RunWith(SpringRunner.class)
@SpringBootTest
public class SampleTest {
    @Resource
    private UserMapper userMapper;
    @Test
    public void testSelect() {
        System.out.println(("----- selectAll method test ------"));
        List<User> userList = userMapper.selectList(null);
        Assert.assertEquals(6, userList.size());
        userList.forEach(System.out::println);
    }
}
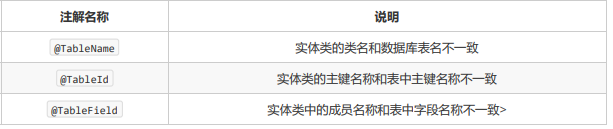
常用注解
MyBatisPlus提供了一些注解供我们在实体类和表信息出现不对应的时候使用。通过使用注解完成逻辑上匹 配。
mybatis plus注解策略配置
如果mysql自增主键注解策略设置如下
@TableId(type = IdType.AUTO)
private Long id;
默认主键策略
/**
* 采用雪花算法生成全局唯一主键
**/
ASSIGN_ID(3)
排除实体类中非表字段
使用 @TableField(exist = false) 注解
主键策略参考源码IdType
内置增删改查
测试
@Test
public void testInsert() {
    User user = new User();
    user.setName("开课吧");
    user.setEmail("lxs@163.com");
    user.setAge(3);
    Assert.assertTrue(mapper.insert(user) > 0);
    mapper.selectList(null).forEach(System.out :: println);
}
@Test
public void testDelete() {
// //主键删除
// mapper.deleteById(3l);
// mapper.selectList(null).forEach(System.out :: println);
// //批量删除:1
// mapper.delete(new QueryWrapper<User>().like("name", "J"));
// mapper.selectList(null).forEach(System.out :: println);
// //批量删除:2
// mapper.delete(Wrappers.<User>query().like("name", "J"));
// mapper.selectList(null).forEach(System.out :: println);
//批量删除:2
  mapper.delete(Wrappers.<User>query().lambda().like(User::getName, "J"));
  mapper.selectList(null).forEach(System.out :: println);
}
@Test
public void testUpdate() {
// //基本修改
// mapper.updateById(new User().setId(1l).setName("慧科"));
// mapper.selectList(null).forEach(System.out :: println);
// //批量修改:1
// mapper.update(null, Wrappers.<User>update().set("email", "huike@163.com").like("name","J"));
// mapper.selectList(null).forEach(System.out :: println);
//批量修改:2
  mapper.update(new User().setEmail("huike@163.com"), Wrappers.<User>update().like("name","J"));
  mapper.selectList(null).forEach(System.out :: println);
}
@Test
public void testSelect() {
// //基本查询
// System.out.println(mapper.selectOne(Wrappers.<User>query().eq("name", "Tom")));
//投影查询
  mapper.selectList(new QueryWrapper<User>().select("id", "name")).forEach(user -> {
  System.out.println(user);
  });
}
分页
内置分页
@Configuration
public class MybatisPlusConfig {
/**
* 分页插件
*/
@Bean
public PaginationInterceptor paginationInterceptor() {
    // 开启 count 的 join 优化,只针对 left join !!!
    return new PaginationInterceptor().setCountSqlParser(new JsqlParserCountOptimize(true));
    }
}
优化left join count场景
在一对一join操作时,也存在优化可能,看下面sql
select u.id,ua.account from user u left join user_account ua on u.id=ua.uid
#本来生成的count语句像这样
select count(1) from (select u.id,ua.account from user u left join user_account ua on
u.id=ua.uid)
这时候分页查count时,其实可以去掉left join直查user,因为user与user_account是1对1关系,如下:
查count:
select count(1) from user u
查记录:
select u.id,ua.account from user u left join user_account ua on u.id=ua.uid limit 0,50
测试
@Test
public void testPage() {
  System.out.println("------ baseMapper 自带分页 ------");
  Page<User> page = new Page<>(1, 5);
  IPage<User> pageResult = mapper.selectPage(page, new QueryWrapper<User>().eq("age", 20));
  System.out.println("总条数 ------> " + pageResult.getTotal());
  System.out.println("当前页数 ------> " + pageResult.getCurrent());
  System.out.println("当前每页显示数 ------> " + pageResult.getSize());
  pageResult.getRecords().forEach(System.out :: println);
}
自定义xml分页
#配置mybatis plus
mybatis-plus:
    type-aliases-package: com.lxs.crud.entity #别名搜索
    mapper-locations: classpath:/mappers/*.xml #加载映射文件
UserMapper接口
public interface UserMapper extends BaseMapper<User> {
/**
* 如果映射的接口方法有2个参数需要@Param定义参数名,定义参数名后,映射文件中使用p.属性 c.属性,具体访
问
*
* @param page
* @param conditioin
* @return
*/
public IPage<User> selectUserByPage(@Param("p") IPage<User> page, @Param("c") User conditioin);
}
UserMapper.xml映射文件
<?xml version="1.0" encoding="UTF-8"?>
<!DOCTYPE mapper
PUBLIC "-//mybatis.org//DTD Mapper 3.0//EN"
"http://mybatis.org/dtd/mybatis-3-mapper.dtd">
<mapper namespace="com.lxs.mybatisplus.samples.crud.mapper.UserMapper">
<sql id="selectSql">
  SELECT * FROM user
</sql>
<select id="selectUserByPage" resultType="user">
<include refid="selectSql"></include>
<where>
<if test="c.age !=null">
age = #{c.age}
</if>
<if test="c.email !=null">
and email like '%${c.email}%'
</if>
</where>
</select>
</mapper>
测试
@Test
public void testXmlPage() {
  System.out.println("------ baseMapper 自定义xml分页 ------");
  Page<User> page = new Page<>(1, 5);
  User user = new User();
  user.setAge(20);
  user.setEmail("test");
  IPage<User> pr = mapper.selectUserByPage(page, user);
  System.out.println("总条数 ------> " + pr.getTotal());
  System.out.println("当前页数 ------> " + pr.getCurrent());
  System.out.println("当前每页显示数 ------> " + pr.getSize());
  pr.getRecords().forEach(System.out :: println);
}
pageHelper分页
引入pageHelper依赖
<dependency>
    <groupId>com.github.pagehelper</groupId>
    <artifactId>pagehelper</artifactId>
    <version>5.1.11</version>
</dependency>
mybatis plus 整合pageHelper的配置类
@Configuration
@MapperScan("com.lxs.mybatisplus.samples.crud.mapper")
public class MybatisPlusConfig {
/**
* mp分页插件
*/
@Bean
  public PaginationInterceptor paginationInterceptor() {
    // 开启 count 的 join 优化,只针对 left join !!!
    return new PaginationInterceptor().setCountSqlParser(new JsqlParserCountOptimize(true));
  }
/**
* 两个分页插件都配置,不会冲突
* pagehelper的分页插件
*/
@Bean
  public PageInterceptor pageInterceptor() {
    return new PageInterceptor();
  }
}
映射文件
<select id="selectUserByPage2" resultType="user">
<include refid="selectSql"></include>
<where>
<if test="age !=null">
age = #{age}
</if>
<if test="email !=null">
and email like '%${email}%'
</if>
</where>
</select>
测试
@Test
public void testPageHelper() {
// pagehelper
// PageInfo<User> page = PageHelper.startPage(1, 2).doSelectPageInfo(() ->
  mapper.selectList(Wrappers.<User>query()));
  PageHelper.startPage(1,2);
// PageInfo<User> page = new PageInfo<>(mapper.selectList(Wrappers.<User>query()));
  User u = new User();
  u.setAge(20);
  PageInfo<User> page = new PageInfo<User>(mapper.selectUserByPage2(u));
  List<User> list = page.getList();
  System.out.println("总行数=" + page.getTotal());
  System.out.println("当前页=" + page.getPageNum());
  System.out.println("每页行数=" + page.getPageSize());
  System.out.println("总页数=" + page.getPages());
  System.out.println("起始行数=" + page.getStartRow());
  System.out.println("是第一页=" + page.isIsFirstPage());
  System.out.println("是最后页=" + page.isIsLastPage());
  System.out.println("还有下一页=" + page.isHasNextPage());
  System.out.println("还有上一页=" + page.isHasPreviousPage());
  System.out.println("页码列表" + Arrays.toString(page.getNavigatepageNums()));
}