Elment UI
1.简介
Element UI是饿了么团队提供的一套基于Vue2.0的组件库,可以快速搭建网站,提高开发效率
ElementUI PC端
MintUI 移动端
2.快速上手
初始化
D:\vue.js\code\day04>vue init webpack-simple element-demo
2.1 安装element-ui
注意:本次使用版本安装因为学习视频版本的v1版本,不使用版本安装会安装v2版本,在配置样式不一样
cd element-demo
cnpm install
cnpm install element-ui@1.4.13 -S
2.2 在main.js中引入并使用组件
import Vue from 'vue'
import ElementUI from 'element-ui'
import 'element-ui/lib/theme-default/index.css'  // 样式文件需要单独引入,v2版本名字为theme-chalk
import App from './App.vue'
// 引入后使用
Vue.use(ElementUI)

new Vue({
  el: '#app',
  render: h => h(App)
})
这种引入方式引入所有组件,这样引入的模块较多,还可以按需引入
2.3 在webpack.config.js中添加loader
CSS样式和字体图标都需要相应的loader来加载所以需要style-loader ,css-loader
默认并没有style-loader模块,所以需要单独安装
cnpm install style-loader -D
修改webpack.config.js增加css文件及字体等文件的解析loader,增加以下代码
{
        test:/\.css$/,
        loader:'style-loader!css-loader'
      },
      {
        test: /\.(eot|svg|ttf|woff|woff2)(\?\S*)?$/,
        loader: 'file-loader'
      },

2.4使用组件
使用按钮,编辑App.vue增加按钮
 <br>
    <!-- 按钮 -->
    <el-button type="primary">我的按钮</el-button>
    <el-button type="danger">我的按钮</el-button>
    <el-button type="info">我的按钮</el-button>
    <el-button type="warning">我的按钮</el-button>
    <el-button type="success">我的按钮</el-button>
    <br>
分别增加了不同类型的按钮,在页面查看

图标按钮
<el-button type="success" icon="edit">编辑</el-button>
<el-button type="success" icon="search">搜索</el-button>
<el-button type="primary">上传<i class="el-icon-upload el-icon--right"></i></el-button>
页面显示

图标
 <!-- 图标 -->
    <i class="el-icon-close"></i>
    <i class="el-icon-delete"></i>
    <i class="el-icon-loading"></i>
页面显示
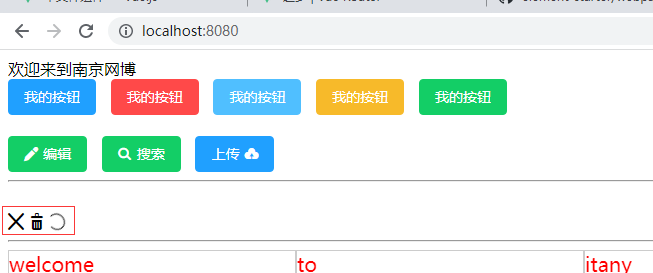
布局
<!-- 布局 -->
    <el-row>
      <el-col :span="6" class="grid">welcome</el-col>
      <el-col :span="6" class="grid">to</el-col>
      <el-col :span="6" class="grid">itany</el-col>
      <el-col :span="6" class="grid">网博</el-col>
    </el-row>
    <el-row>
      <el-col :span="12" class="grid">welcome</el-col>
      <el-col :span="12" class="grid">to</el-col>
    </el-row>
页面显示

日期选择器
 <!-- 日期选择器 -->
    <DatePicker></DatePicker>
日期选择器组件
DatePicker.vue
<template>
	<el-date-picker
      v-model="value"
      type="date"
      placeholder="选择日期"
	  size="small"
      :picker-options="options">
    </el-date-picker>
</template>

<script>
	export default {
		data(){
			return {
				value:'',
				options:{
					disabledDate(time) {
		            	return time.getTime() < Date.now() - 8.64e7;
		            },
		            firstDayOfWeek:1
				}
			}
		}
	}
</script>
页面显示

上传组件
Upload.vue
<template>
	<el-upload
	  class="upload-demo"
	  action="https://jsonplaceholder.typicode.com/posts/"
	  :on-preview="handlePreview"
	  :on-remove="handleRemove"
	  :file-list="fileList">
	  <el-button size="small" type="primary">点击上传</el-button>
	  <div slot="tip" class="el-upload__tip">只能上传jpg/png文件,且不超过500kb</div>
	</el-upload>
</template>

<script>
	export default {
		data(){
			return {
				fileList: [
						{
							name: 'food.jpeg',
							url: 'https://fuss10.elemecdn.com/3/63/4e7f3a15429bfda99bce42a18cdd1jpeg.jpeg?imageMogr2/thumbnail/360x360/format/webp/quality/100'
						},
						{
							name: 'food2.jpeg',
							url: 'https://fuss10.elemecdn.com/3/63/4e7f3a15429bfda99bce42a18cdd1jpeg.jpeg?imageMogr2/thumbnail/360x360/format/webp/quality/100'
						}
				]
			}
		},
		 methods: {
	      handleRemove(file, fileList) {
	        console.log(file, fileList);
	      },
	      handlePreview(file) {
	        console.log(file);
	      }
	    }
	}

</script>
App.vue
 <DatePicker></DatePicker>
    <!-- 文件上传 -->
    <Upload></Upload>
页面显示


自定义全局组件
全局组件(插件):就是可以在main.js中使用Vue.use()进行全局引入,然后在其他组件中就可以使用了,如vue-router
import VueRouter from 'vue-router'
Vue.use(VueRouter)
普通组件(插件):每次使用都要引入,如axios
import axiso from 'axios'
自定义组件
初始化项目
vue init webpack-simple component-demo
在文件夹src下插件组件目录components在该目录下再新建目录user
插件组件文件src/components/user/Login.vue
<template>
    <div id="login">
        {{msg}}
    </div>
</template>

<script>
    export default{
        data(){
            return{
                msg:"用户登录"
            }
        }
    }
</script>

<style scoped>
    #login{
        color:red;
        font-size:20px;
        text-shadow:2px 2px 5px;
    }
</style>
创建src\components\user\index.js引入,需要有install方法
import Login from './Login.vue'

export default {
    install:function(Vue){
        Vue.component('Login',Login)
    }
}
在main.js中引入使用
import Vue from 'vue'
import App from './App.vue'

import Login from './components/user'

Vue.use(Login);

new Vue({
  el: '#app',
  render: h => h(App)
})
修改App.vue引用组件
<template>
  <div id="app">
  <Login></Login>
  </div>
</template>
启动
cnpm run dev
页面显示

Vuex
1.简介
Vuex是一个专门为Vue.js应用程序开发的状态管理模式。它采用集中式存储管理应用的所有组件的状态,并以相应的规则保证状态,以一种可预测的方式发生改变。
简单来说,用来集中管理数据。 基于Flux的前端状态管理框架。
2.基本用法
初始化
D:\vue.js\code\day04>vue init webpack-simple vuex-demo
2.1 安装vuex
cd vuex-demo
cnpm install vuex -S
启动
cnpm install
cnpm run dev
2.2 创建store.js文件,在main.js文件中导入并配置store选项
import Vue from 'vue'
import App from './App.vue'

import store from './store.js'   // 导入store对象
new Vue({
  store:store, // 配置store选项,指定为store对象,会自动将store对象注入到所有子组件中,在子组件中通过this.$store访问该store对象
  el: '#app',
  render: h => h(App)
})
2.3编辑store.js文件
Vuex的核心是Store(仓库),相当于一个容器,一个store实例中可以包含以下的属性和方法
state 定义属性(状态,数据)
getters 用来获取属性
actions 定义方法(动作)
commit 提交变化,修改数据的唯一方式就是显示提交mutations
mutations
store.js
2.4编辑App.vue
在子组件中访问store对象的两种方式
方式1:通过this.$store访问
方式2:通过mapGetters,mapActions访问,vuex提供了两个方法
mapGetters 获取属性(数据)
mapActions 获取方法(动作)
使用方式2的代码store.js
// vue的配置
import Vue from 'vue'
import Vuex from 'vuex'

// 定义属性,数据
Vue.use(Vuex);
var state={
    count:6
}

// 定义getters
var getters={
    count(state){
        return state.count
    }
}
// 创建store对象
const store=new Vuex.Store({
    state,
    getters
})

// 导出store对象
export default store;
App.vue
<template>
  <div id="app">
      <button>增加</button>
      <button>减小</button>
      <p>当前数字为:{{count}}</p>
  </div>
</template>

<script>
// 方式2导入辅助函数
import {mapGetters} from 'vuex'

export default {
  name: 'app',
  data () {
    return {
      msg: 'Welcome to Your Vue.js App'
    }
  },
  // 方式1 通过this.$store访问
  // computed:{
  //   count(){
  //     return this.$store.state.count;
  //   }
  // }
  // 方式2
  computed:mapGetters([
    'count'
  ])

}
</script>

<style>
#app {
  font-family: 'Avenir', Helvetica, Arial, sans-serif;
  -webkit-font-smoothing: antialiased;
  -moz-osx-font-smoothing: grayscale;
  text-align: center;
  color: #2c3e50;
  margin-top: 60px;
}

h1, h2 {
  font-weight: normal;
}

ul {
  list-style-type: none;
  padding: 0;
}

li {
  display: inline-block;
  margin: 0 10px;
}

a {
  color: #42b983;
}
</style>
页面显示

下面定义方法改变这个值
修改代码store.js
// vue的配置
import Vue from 'vue'
import Vuex from 'vuex'

// 定义属性,数据
Vue.use(Vuex);
var state={
    count:6
}

// 定义getters
var getters={
    count(state){
        return state.count
    }
}

// 定义actions,要执行的操作,如流程的判断,异步请求
const actions = {
    // increment(context){  // 包含commit,dispaych,state
    //     console.log(context)
    // }
    increment({commit,state}){
        commit('increment');  // 提交一个名为increment的变化,这个名称可以自定义,可认为是类型名
    }
}
// d定义mutations,处理状态(数据)的改变
const mutations={
    increment(state){
        state.count++;
    }
}
// 创建store对象
const store=new Vuex.Store({
    state,
    getters,
    actions,
    mutations
})

// 导出store对象
export default store;
App.vue
<template>
  <div id="app">
      <button @click='increment'>增加</button>
      <button>减小</button>
      <p>当前数字为:{{count}}</p>
  </div>
</template>

<script>
// 方式2导入辅助函数
import {mapGetters,mapActions} from 'vuex'

export default {
  name: 'app',
  data () {
    return {
      msg: 'Welcome to Your Vue.js App'
    }
  },
  // 方式1 通过this.$store访问
  // computed:{
  //   count(){
  //     return this.$store.state.count;
  //   }
  // }
  // 方式2
  computed:mapGetters([
    'count'
  ]),
  methods:mapActions([
    'increment'
  ])

}
</script>

<style>
#app {
  font-family: 'Avenir', Helvetica, Arial, sans-serif;
  -webkit-font-smoothing: antialiased;
  -moz-osx-font-smoothing: grayscale;
  text-align: center;
  color: #2c3e50;
  margin-top: 60px;
}

h1, h2 {
  font-weight: normal;
}

ul {
  list-style-type: none;
  padding: 0;
}

li {
  display: inline-block;
  margin: 0 10px;
}

a {
  color: #42b983;
}
</style>
页面显示

同理可添加减小的方法
点击增加或者减小执行了会记录在vue调试工具里面

项目结构
Vuex 并不限制你的代码结构。但是,它规定了一些需要遵守的规则:
-
应用层级的状态应该集中到单个 store 对象中。
-
提交 mutation 是更改状态的唯一方法,并且这个过程是同步的。
-
异步逻辑都应该封装到 action 里面。
只要你遵守以上规则,如何组织代码随你便。如果你的 store 文件太大,只需将 action、mutation 和 getter 分割到单独的文件。
对于大型应用,我们会希望把 Vuex 相关代码分割到模块中。下面是项目结构示例:
├── index.html
├── main.js
├── api
│   └── ... # 抽取出API请求
├── components
│   ├── App.vue
│   └── ...
└── store
    ├── index.js          # 我们组装模块并导出 store 的地方
    ├── actions.js        # 根级别的 action
    ├── mutations.js      # 根级别的 mutation
    └── modules
        ├── cart.js       # 购物车模块
        └── products.js   # 产品模块