参考:https://www.jianshu.com/p/20ca9daba85f
参考官网:https://docs.aiohttp.org/en/stable/
什么是aiohttp
用于asyncio和Python的异步HTTP客户端/服务器
安装与使用
使用pip安装
pip install aiohttp
简单实例使用
aiohttp的自我介绍中就包含了客户端和服务器端,所以我们分部来看下客户端和服务器端的简单代码示例。
客户端
use_aiohttp.py
import aiohttp
import asyncio

# 创建获取网页的函数,传递参数为session和一个url
async def fetch(session,url):
    async with session.get(url) as response:
        return await response.text()

async def main():
    # 创建session并把session和需要获取网页的url作为参数传递给协程函数fetch
    # 协程函数把网页文本下载下来
    async with aiohttp.ClientSession() as session:
        html = await fetch(session,"http://httpbin.org/headers")
        print(html)

asyncio.run(main())
运行结果如下
# {
#   "headers": {
#     "Accept": "*/*",
#     "Accept-Encoding": "gzip, deflate",
#     "Host": "httpbin.org",
#     "User-Agent": "Python/3.7 aiohttp/3.8.0",
#     "X-Amzn-Trace-Id": "Root=1-6180979e-602b0f9d2a6eece96d9dae2f"
#   }
#   }
这个代码是不是很简单,一个函数用来发起请求,另外一个函数用来下载网页。
服务器端
aiohttp_server.py
from aiohttp import web

async def handle(request):
    # 从请求获取name的属性信息,如果没有则取'Anonymous'
    name = request.match_info.get('name', "Anonymous")
    print(request.match_info)
    # print(request)
    print(name)
    text = "Hello, " + name
    # 把text作为相应返回,如果访问的为/则返回 "Hello, Anonymous"
    # 如果访问为/{name}则返回对应的 "Hello,{name}"
    return web.Response(text=text)

app = web.Application()
# 添加两个路由访问/和访问/{name}都去调用函数handle
# 如果使用/访问则默认用户为Anonymous如果使用/{name}访问则用户为对应的{name}
app.add_routes([web.get('/', handle),web.get('/{name}', handle)])

if __name__ == '__main__':
    web.run_app(app)
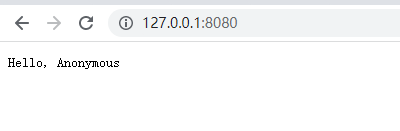
运行这个代码,然后访问http://127.0.0.1:8080就可以看到你的网站了,很 基础的一个网页,你可以在后面跟上你的名字。
访问根目录/
带一个name访问 /liuym
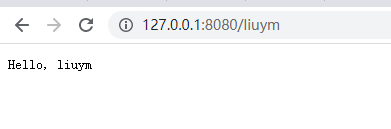
运行这个代码,然后访问http://127.0.0.1:8080就可以看到你的网站了,很 基础的一个网页,你可以在后面跟上你的名字。
入门
简单示范
首先是学习客户端,也就是用来发送http请求的用法。首先看一段代码,会在代码中讲述需要注意的地方:
aiohttp_client.py
# 客户端示范 start
import aiohttp
import asyncio

async def main():
    # 使用关键字async with 以及ClientSession方法创建一个session对象
    async with aiohttp.ClientSession() as session:
        # 所以该session对象访问一个站点,创建一个response对象
        async with session.get('http://httpbin.org/get') as resp:
            # 打印响应状态码
            print(resp.status)
            # 200
            # 打印响应文本
            print(await resp.text())

asyncio.run(main())
# 客户端示范 end
代码解释:
在网络请求中,一个请求就是一个会话,然后aiohttp使用的是ClientSession来关联会话,所以第一个重点,看一下ClientSession: 看源码
class ClientSession:
    """First-class interface for making HTTP requests."""
...
在源码中,这个类的注释是使用HTTP请求接口的一个类。然后上面的代码就是实例化一个ClientSession类,然后命名为session,然后用session去发送轻松。这里有一个坑,那就是ClientSession.get()协程的必需参数只能是str类和yarl.URL的实例。
当然这只是get请求,其他的post、put都是支持的:
session.put('http://httpbin.org/put', data=b'data')
session.delete('http://httpbin.org/delete')
session.head('http://httpbin.org/get')
session.options('http://httpbin.org/get')
session.patch('http://httpbin.org/patch', data=b'data')
在URL中传递参数
有时候在发起网络请求的时候需要附加一些参数到url中,这一点也是支持的
import aiohttp
import asyncio

async def main():
    # 使用关键字async with 以及ClientSession方法创建一个session对象
    async with aiohttp.ClientSession() as session:
        # 所以该session对象访问一个站点,创建一个response对象
        # async with session.get('http://httpbin.org/get') as resp:
        params = {'key1': 'value1', 'key2': 'value2'}
        async with session.get('http://httpbin.org/get',params=params) as resp:
            expect = 'http://httpbin.org/get?key1=value1&key2=value2'
            print(resp.url)
            assert str(resp.url) == expect
            # 打印响应状态码
            print(resp.status)
            # 200
            # 打印响应文本
            print(await resp.text())

asyncio.run(main())
运行输出
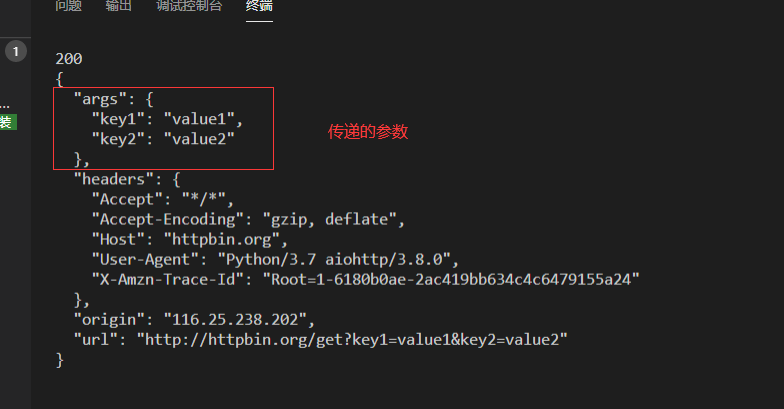
我们可以通过params参数来指定要传递的参数,
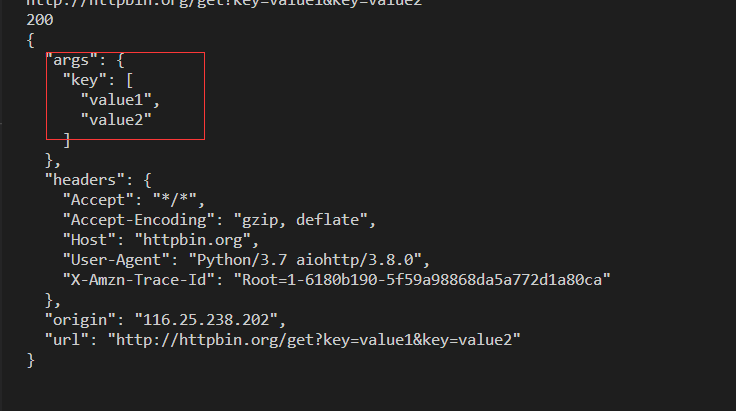
同时如果需要指定一个键对应多个值的参数,那么MultiDict就在这个时候起作用了。你可以传递两个元祖列表来作为参数:
# 一个建对应多个值参数 start
import aiohttp
import asyncio

async def main():
    # 使用关键字async with 以及ClientSession方法创建一个session对象
    async with aiohttp.ClientSession() as session:
        # 所以该session对象访问一个站点,创建一个response对象
        # async with session.get('http://httpbin.org/get') as resp:
        params = [('key','value1'), ('key','value2')]
        async with session.get('http://httpbin.org/get',params=params) as resp:
            expect = 'http://httpbin.org/get?key=value1&key=value2'
            print(resp.url)
            assert str(resp.url) == expect
            # 打印响应状态码
            print(resp.status)
            # 200
            # 打印响应文本
            print(await resp.text())

asyncio.run(main())
# 一个建对应多个值参数 end
输出如下
当然也可以之间传递一个str类型的数据到url中,但是这个时候需要注意的就是传递的字符串类型中最好是都可以被编码的。
async with session.get('http://www.yznx.xyz', params='/index.php/2019/09/02/使用flask-mail和实现邮箱激活账户/') as resp:
编译后的路径大概是这样:
http://www.yznx.xyz/?/index.php/2019/09/02/%E4%BD%BF%E7%94%A8flask-mail%E5%92%8C%E5%AE%9E%E7%8E%B0%E9%82%AE%E7%AE%B1%E6%BF%80%E6%B4%BB%E8%B4%A6%E6%88%B7/=
读取响应内容
我们可以读取到服务器的响应状态和响应内容,这也是使用请求的一个很重要的部分。通过status来获取响应状态码,text()来获取到响应内容,当然也可以之计指明编码格式为你想要的编码格式:
async def main():
    async with aiohttp.ClientSession() as session:
        async with session.get('http://httpbin.org/get') as resp:
            print(resp.status)
            print(await resp.text(encoding=utf-8))

"""输出结果:
200
<!doctype html>
<html lang="zh-CN">
<head>
......

"""
非文本内容格式
对于网络请求,有时候是去访问一张图片,这种返回值是二进制的也是可以读取到的:
await resp.read()
将text()方法换成read()方法就好。
获取请求信息
ClientResponse(客户端响应)对象含有request_info(请求信息),主要是url和headers信息。 raise_for_status结构体上的信息会被复制给ClientResponseError实例。
请求的自定义
有时候做请求的时候需要自定义header,主要是为了让服务器认为我们是一个浏览器。然后就需要我们自己来定义一个headers:
示例:
aiohttp_client.py
# 自定义Header start
import aiohttp
import asyncio
async def main():
    # 自定义header
    headers = {
        "User-Agent": "Mozilla/5.0 (Windows NT 10.0; Win64; x64) "
                      "AppleWebKit/537.36 (KHTML, like Gecko)"
                      " Chrome/78.0.3904.108 Safari/537.36"
    }
    async with aiohttp.ClientSession() as session:
        # 传递参数headers值为自定义的header
        async with session.get('http://192.168.1.100',headers=headers) as resp:
            print(await resp.text())
asyncio.run(main())
# 自定义Header end
访问自己搭建的nginx服务器查看nginx日志可以看到,加headers和没有加headers的日志显示原始浏览器信息是不同的

自定义cookie
发送你自己的cookies给服务器,你可以为ClientSession对象指定cookies参数:
# 自定义cookie start
import aiohttp
import asyncio
async def main():
    url = 'http://httpbin.org/cookies'
    cookies = {'cookies_are': 'working'}
    async with aiohttp.ClientSession(cookies=cookies) as session:
        # 传递参数headers值为自定义的header
        async with session.get(url) as resp:
            print(await resp.json())
asyncio.run(main())
# 自定义cookie end
输出cookies如下
{'cookies': {'cookies_are': 'working'}}
使用代理
有时候在写爬虫的时候需要使用到代理,所以aiohttp也是支持使用代理的,我们可以在发起请求的时候使用代理,只需要使用关键字proxy来指明就好,但是有一个很难受的地方就是它只支持http代理,不支持HTTPS代理。使用起来大概是这样:
 proxy = “http://127.0.0.1:10809”
    async with aiohttp.ClientSession(headers=headers) as session:
        async with session.get(url=login_url, proxy=proxy) as response:
            resu = await response.text()
使用起来大概是这样,然后代理记得改成自己的。
和asyncio结合使用
其实aiohttp最适合的伴侣就是asyncio,这两个结合起来使用是最好不过的了。然后这里我就写一个简单的实例代码来对比一下。同步和异步的差别。
示例代码
示例就简单的用豆瓣电影吧,这是我从开始学习爬虫就一直练习的网站。然后写一些基本需要使用到的库:
- lxml
- requests
- datetime
- asyncio
- aiohttp
同步
from datetime import datetime

import requests
from lxml import etree

headers = {"User-Agent": "Mozilla/5.0 (Windows NT 10.0; Win64; x64) AppleWebKit"
                         "/537.36 (KHTML, like Gecko) "
                         "Chrome/72.0.3626.121 Safari/537.36"}


def get_movie_url():
    req_url = "https://movie.douban.com/chart"
    response = requests.get(url=req_url, headers=headers)
    html = etree.HTML(response.text)
    movies_url = html.xpath(
        "//*[@id='content']/div/div[1]/div/div/table/tr/td/a/@href")
    return movies_url


def get_movie_content(movie_url):
    response = requests.get(movie_url, headers=headers)
    result = etree.HTML(response.text)
    movie = dict()
    name = result.xpath('//*[@id="content"]/h1/span[1]//text()')
    author = result.xpath('//*[@id="info"]/span[1]/span[2]//text()')
    movie["name"] = name
    movie["author"] = author
    return movie


if __name__ == '__main__':
    start = datetime.now()
    movie_url_list = get_movie_url()
    movies = dict()
    for url in movie_url_list:
        movies[url] = get_movie_content(url)
    print(movies)
    print("同步用时为:{}".format(datetime.now() - start))
异步
import asyncio
from datetime import datetime

import aiohttp
from lxml import etree
headers = {"User-Agent": "Mozilla/5.0 (Windows NT 10.0; Win64; x64) AppleWebKit"
                         "/537.36 (KHTML, like Gecko) "
                         "Chrome/72.0.3626.121 Safari/537.36"}


async def get_movie_url():
    req_url = "https://movie.douban.com/chart"
    async with aiohttp.ClientSession(headers=headers) as session:
        async with session.get(url=req_url, headers=headers) as response:
            result = await response.text()
            result = etree.HTML(result)
        return result.xpath("//*[@id='content']/div/div[1]/div/div/table/tr/td/a/@href")


async def get_movie_content(movie_url):
    async with aiohttp.ClientSession(headers=headers) as session:
        async with session.get(url=movie_url, headers=headers) as response:
            result = await response.text()
            result = etree.HTML(result)
        movie = dict()
        name = result.xpath('//*[@id="content"]/h1/span[1]//text()')
        author = result.xpath('//*[@id="info"]/span[1]/span[2]//text()')
        movie["name"] = name
        movie["author"] = author
    return movie

if __name__ == '__main__':
    start = datetime.now()
    loop = asyncio.get_event_loop()
    movie_url_list = loop.run_until_complete(get_movie_url())
    tasks = [get_movie_content(url) for url in movie_url_list]
    movies = loop.run_until_complete(asyncio.gather(*tasks))
    print(movies)
    print("异步用时为:{}".format(datetime.now() - start))