模块就是一个以py结尾的python代码文件,(文件名为hello.py,则模块名为hello), 用于实现一个或多个功能(变量,函数,类等)
模块分为
1. 标准库(python自带的模块,可以直接调用
2. 开源模块(第三方模块,需要先pip安装,再调用
3. 自定义模块(自己定义的模块)
模块主要存放在/usr/local/lib/python3.6/目录下,还有其它目录下。使用sys.path查看。
[root@node1 python]# python3
Python 3.6.6 (default, Oct 10 2020, 11:59:31)
[GCC 4.8.5 20150623 (Red Hat 4.8.5-39)] on linux
Type "help", "copyright", "credits" or "license" for more information.
>>> import sys
>>> print(sys.path)
['', '/usr/local/lib/python36.zip', '/usr/local/lib/python3.6', '/usr/local/lib/python3.6/lib-dynload', '/root/.local/lib/python3.6/site-packages', '/usr/local/lib/python3.6/site-packages']
# 模块路径列表,第一个值为空代码当前目录
# sys.path和linux上的$PATH很类似,如果两个目录里分别有同名模块,则按顺序来调用目录靠前的。
# sys.path的结果是一个列表,所以你可以使用sys.path.append()或sys.path.insert()增加新的模块目录。
示例: 手动在当前目录下(pycharm当前项目目录)写一个简单模块(名为hello.py)
hello.py
def funct1():
    print("funct1")

def funct2():
    print("funct2")

def funct3():
    print("funct3")

if __name__ == "__main__":
    print("haha")   # 直接执行hello.py会执行这段代码
else:
    print("hehe")   # 通过调用模块的方式会执行这段代码
直接执行会输出haha
在同目录下写一个1.py来调用hello.py
import hello    # 调用同目录下的hello模块,相当于执行了hello.py语句

hello.funct1()  # 可以调用hello模块里的funct1()函数
hello.funct2()  # 可以调用hello模块里的funct2()函数
hello.funct3()  # 可以调用hello模块里的funct3()函数
执行输出
:与上面的hello.py同目录下,再写一个1.py来调用hello.py
:与上面的hello.py同目录下,再写一个1.py来调用hello.
hehe
funct1
funct2
funct3
解析:调用模块执行hello.py因为不满足条件if __name__ == "__main__":所以执行输出hehe
其他输出为调用对应函数输出
模块导入的基本语法
导入单模块
import module1
导入多个模块
import module1,module2,module3
from导入模块所有变量函数
from hello import *
使用这种方法导入执行时无需加hello即直接执行函数即可例如
from  hello import *   # 调用同目录下的hello模块,相当于执行了hello.py语句

# print(__name__)
funct1()  # 可以调用hello模块里的funct1()函数
funct2()  # 可以调用hello模块里的funct2()函数
funct3()  # 可以调用hello模块里的funct3()函数
from导入模块文件中的部分函数
from hello import funct1,funct2
使用这种方法只能执行导入的函数例如执行以上则无法使用函数funct3
import语法导入与frim语法导入的区别
import导入方法相当于是直接解释模块文件
像from这样的语法导入,相当于是把hello.py里的文件直接复制过来,调用hello.py里的funct1()的话,就不需要hello.funct1()了,而是直接funct1()调用了,如果你本地代码里也有funct1(),就会冲突,后面的会overwrite前面的
# 代码一
import hello
hello.funct1()  # 需要使用模块名调用

# 代码二
from hello import *
funct1()    # 无需使用模块名调用

# 代码三
import hello
def funct1():
    print("local funct1")
hello.funct1()  # 调用模块里的函数funct1
funct1()        # 调用本地的function

# 代码四
from hello import *
def funct1():
    print("local funct1")
hello.funct1()  # hello模块里的funct1与本地的funct1冲突
funct1()    # 得到的是本地funct1的结果
为了区分本地funct1和导入的hello模块里的function,可以导入的时候做别名
#
from hello import funct1 as funct1_hello
def funct1():
    print("local funct1")
funct1_hello()
funct1()
os模块
os模块.py
import os
print(os.getcwd())	# 查看当前目录
#os.chdir("/tmp")	# 改变当前目录
print(os.curdir)	# 打印当前目录 输出为 .
print(os.pardir)	# 打印上级目录输出为 ..
#os.chdir(os.pardir)	# 切换到上级目录
print(os.listdir("/"))	# 列出目录里的文件,结果为相对路径并且为list类型
print(os.stat("/etc/fstab"))	# 得到文件状态信息,结果为一个tuple类型
print(os.stat("/etc/fstab")[6])	# 得到状态信息(tuple)的第7个元素,也就是大小
print(os.stat("/etc/fstab")[-4])# 得到状态信息的倒数第4给元素,也就是大写
print(os.stat("/etc/fstab").st_size)	# 用这个方法也可以得到文件的大小

print(os.path.getsize(__file__))	# 得到文件的大小,__file__是特殊变量,代表文件自己
print(os.path.getsize("/etc/fstab"))	# 得到指定文件的大小

print(os.path.abspath(__file__))	# 得到当前程序文件的绝对路径
print(os.path.dirname("/etc/fstab"))	# 得到文件绝对路径的目录名,不包括文件即/etc
print(os.path.basename("/etc/fstab"))	# 得到文件名不包括目录 fstab
print(os.path.split("/etc/fstab"))	# 把dirname和basename分开结果为tuple类型 ('/etc', 'fstab')
print(os.path.join("/etc","fstab"))	# 把dirname和basename合并结果为字符串 fstab无需加符合/ /etc/fstab


print(os.path.isfile("/tmp/1.txt"))	# 判断是否为文件 结果为bool类型 True
print(os.path.isabs("1.txt"))		# 判断是否绝对路径 False
print(os.path.exists("/tmp/11.txt"))	# 判断文件是否存在
print(os.path.isdir("/tmp"))		# 判断是否目录
print(os.path.islink("/etc/rc.local"))	# 判断是不是链接文件

# os.rename("/tmp/1.txt","/tmp/11.txt")	# 文件重命名
# os.remove("/tmp/1.txt")		# 删除文件

os.mkdir("/tmp/aaa")	# 创建文件夹
os.rmdir("/tmp/aaa")	# 删除文件夹
os.makedirs("/tmp/a/b/c/d")	# 创建多层文件夹
os.removedirs("/tmp/a/b/c/d")	# 删除多层文件夹
os.popen()和os.system()可以直接调用linux里的命令,二者有一点小区别:
[root@node1 模块]# cat os模块2.py
import os
# 下面这两句执行操作都可以成功,如果文件存在则覆盖创建新文件
os.popen("touch /tmp/222")
os.system("touch /tmp/333")
print(os.popen("cat /etc/fstab").read())	# 通过read()得到命令的内容,可以直接打印出内容,也可以赋值给变量
print(os.system("cat /etc/fstab"))	# 除了执行命令以外,执行目录显示文件内容,还会显示返回值(0 非0 类似shell里$?判断执行是否成功)
# 所以如果是为了得到命令的结果,并且相对结果赋值进行后续操作的话就使用os.popen("pwd").read()
练习: 递归找一个目录里的所有链接文件
方法一
[root@node1 模块]# cat 查找链接文件.py
import os

dir = input("input a directory:")

def find_symlink(dir):
    # 遍历输入文件夹的的目录列表
    # os.listdir(dir)返回的是对应目录的一级文件或者文件夹列表
    for file in os.listdir(dir):
	# 使用os.path.join把文件夹即返回的列表组成文件的绝对路径
        absfile = os.path.join(dir, file)
	# 判断如果是链接文件则打印
        if os.path.islink(absfile):
            print("{} is a symlink".format(absfile))
	# 如果是文件夹则循环调用函数
        elif os.path.isdir(absfile):
            find_symlink(absfile)

# 判断如果输入的是文件夹则调用函数
if os.path.isdir(dir):
    find_symlink(dir)
# 如果不是文件夹则提示输入的不是文件夹
else:
    print("what you input is not a directory")
方法二
[root@node1 模块]# cat 查找链接文件2.py
import os
dir = input("inpur a directory:")

command = "find {} -type l".format(dir)

print(command)

if os.path.isdir(dir):
    #print(os.popen(command).read())
    print(os.system(command))
else:
    print("what you input is not a directory")
练习: 递归查找指定目录的空文件
[root@node1 模块]# cat 查找空文件.py
import os

dir = input("input a directory:")

def find_empty(dir):
    for file in os.listdir(dir):
        absfile = os.path.join(dir, file)
        if os.path.getsize(absfile) == 0:
            print("{} is a empty".format(absfile))
        elif os.path.isdir(absfile):
            find_empty(absfile)

if os.path.isdir(dir):
    find_empty(dir)
else:
    print("what you input is not a directory")
sys模块
示例
[root@node1 模块]# cat sys模块.py
import sys, os
print(sys.path) 	# 模块路径
print(sys.version)	# python解释器版本信息
print(sys.platform)	# 操作系统平台名称例如 linux

# sys.argv[0]		# sys.argv[0]等同于shell里的$0,sys.argv[1]等同与shell的$1
# sys.exit()

# sys.stout.write("hellow world")
# 执行脚本命令为 python3 sys模块.py df -h
# 即本次执行sys.argv=["sys模块.py", "df", "-h"]
# 使用join方法以空格为分割符把切片后的列表["df", "-h"]组合成字符串"df -h"
command = " ".join(sys.argv[1:])
print(command)
# 打印结果为df -h

# 调用系统命令执行df -h 使用read()把执行结果打印
print(os.popen(command).read())
执行输出如下
[root@node1 模块]# python3 sys模块.py df -h
['/nas/nas/scripts/python/模块', '/usr/local/lib/python36.zip', '/usr/local/lib/python3.6', '/usr/local/lib/python3.6/lib-dynload', '/root/.local/lib/python3.6/site-packages', '/usr/local/lib/python3.6/site-packages']
3.6.6 (default, Oct 10 2020, 11:59:31)
[GCC 4.8.5 20150623 (Red Hat 4.8.5-39)]
linux
df -h
文件系统                 容量  已用  可用 已用% 挂载点
devtmpfs                 2.9G     0  2.9G    0% /dev
tmpfs                    2.9G   16K  2.9G    1% /dev/shm
tmpfs                    2.9G   54M  2.8G    2% /run
tmpfs                    2.9G     0  2.9G    0% /sys/fs/cgroup
/dev/mapper/centos-root   60G  4.7G   56G    8% /
/dev/sda1                197M  164M   34M   83% /boot
/dev/mapper/centos-home   20G   33M   20G    1% /home
/dev/mapper/centos-opt    20G   33M   20G    1% /opt
tmpfs                    2.9G   24K  2.9G    1% /var/lib/ceph/osd/ceph-2
tmpfs                    581M     0  581M    0% /run/user/0
172.16.40.232:/nas       1.0T  215G  809G   21% /nas/nas
random模块
示例
import random
print(random.random())  # 0-1之间随机浮点数
# 0.12266246730987784
print(random.uniform(1, 3)) # 1-3之间随机浮点数
# 2.827372114420131
print(random.randint(1, 3)) # 1-3之间随机整数
# 2
print(random.randrange(1, 3))   # 1-2之间随机整数,不包括3
# 1
print(random.randrange(1, 9, 2))    # 1,3,5,7随机最后参数2为步长不包括9
# 5
print(random.choice("hello,world")) # 随机字符串里面的一个字符包括,
# d
print(random.sample("hello,world", 3))  # 随机取字符串内3个字符组成列表
# ['d', 'r', 'e']
list1 = [1, 2, 3, 4, 5]
random.shuffle(list1)   # 列表随机打乱顺序
print(list1)
# [2, 4, 5, 1, 3]
输出如下
0.1634682227150962
2.130834169394176
3
1
3
h
['l', 'r', 'e']
[4, 3, 5, 2, 1]
示例:随机打印四位小写字母
import random
# 定义空字符串
code = ""
# 循环四次分别随机次数4给小写字母
for i in range(4):
    # j为随机的小写字母,这个for循环只循环1次
    for j in chr(random.randint(97, 122)):
        # 字符串相加
        code += j
# 四次循环以后输出结果即四位随机小写字母
print(code)
示例:随机打印3个字符串,字符串可以是大小写字母及数字
import random
code = ""
for i in range(4):
    j = random.randint(1, 3)
    if j == 1:
        code += chr(random.randint(97, 122))
    elif j == 2:
        code += chr(random.randint(65, 91))
    else:
        code += str(random.randint(0, 9))
print(code)
re模块
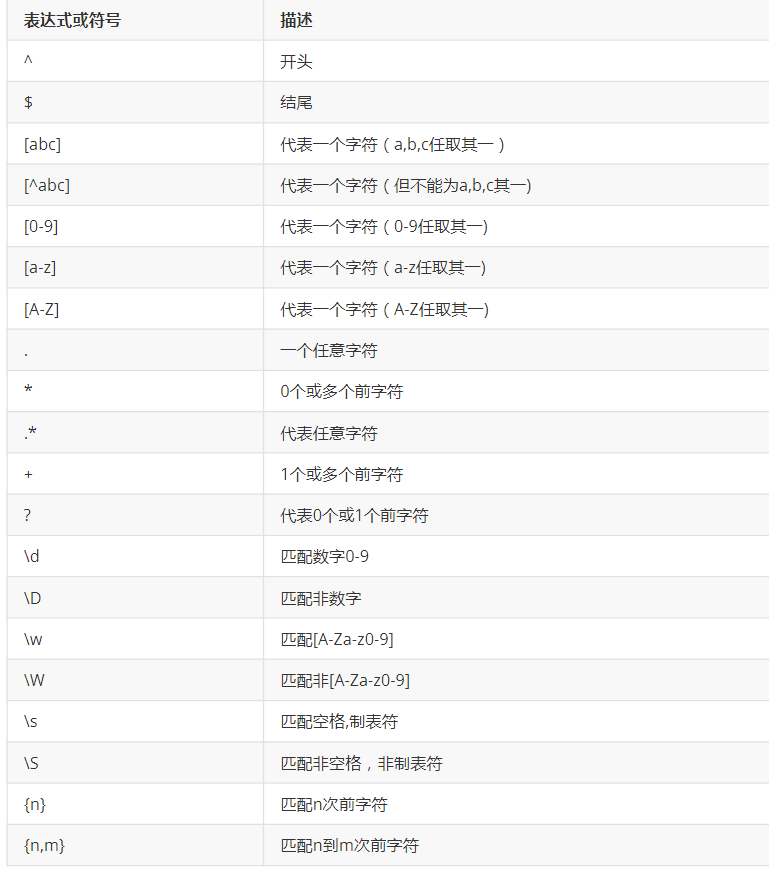
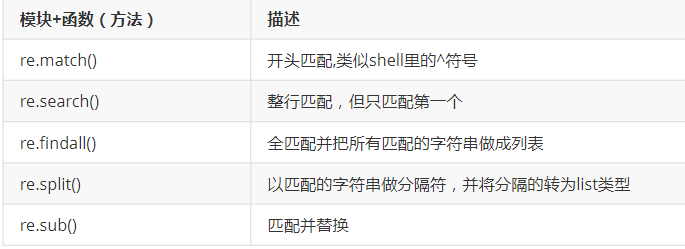
示例
re.match示例
[root@node1 模块]# cat re.match.py
import re
print(re.match("aaa", "sdsfaaads")) # re.match匹配开通,结果为None表示匹配未成功
print(re.match("aaa", "aaasd")) # 有结果输出,表示匹配成功
# 输出为<_sre.SRE_Match object; span=(0, 3), match='aaa'>

abc=re.match("aaad+","aaa234324bbbbccc")
print(abc.group())  # 结果为aaa234324 表示匹配到的那部分字符串
re.search示例
import re
print(re.search("aaa", "sdfaaasdaaawwwsdf"))    # 有结果输出,表示匹配成功;re.search就是全匹配,而不是开头(但只返回一个匹配的结果);想开头匹配的话可以使用^aaa
print(re.search("aaad+","aaa111222bbbbcccaaaa333444").group()) # 验证,确实只返回一个匹配的结果,并使用group方法将其匹配结果打印出来
re.findall示例
[root@node1 模块]# cat re.findall.py
import re
print(re.findall("aaad+", "aaa111222bbbbcccaaaa333444"))   # 没有group方法,本次匹配所有aaa后面带数字,数字个数不限
# ['aaa111222', 'aaa333444']
print(re.findall("aaad+|ddd[0-9]+","aaa111222bbbbddd333444")) # 匹配aaa带任意数字 或者ddd带任意数字
# ['aaa111222', 'ddd333444']
re.sub示例
import re
print(re.sub(":", "-", "root:x:0:0:root:/root:/bin/bash"))# 全替换:成-
print(re.sub(":", "-", "root:x:0:0:root:/root:/bin/bash", count = 3))# 全替换:成-
替换练习:对输入的关键字进行屏蔽,如笨蛋使用**代替
[root@node1 模块]# cat 替换练习屏蔽关键字.py
import re

input_str = input("Please input:")
def badword_replace(input_str):
    # 定义屏蔽关键字
    bad_words = ["笨蛋","草","靠","羊驼"]
    # 循环替换,如果遇到关键字替换 "*"*len(word)代表以输入的关键字的长度替换如果输入一个字则是一个*两个字则是两个*
    for word in bad_words:
        input_str = re.sub(word, "*"*len(word), input_str)
    print(input_str)

badword_replace(input_str)
小结
match匹配开头
search匹配整行不一定在开头,但是只匹配第一个
match和search需要使用group方法打印匹配的字符
findall匹配所有并且把匹配到的字符以列表形式返回
re.split示例
[root@node1 模块]# cat re.split.py
import re
print(re.split(":", "root:x:0:0:root:/root:/bin/bash"))	# 以:为分隔符分割后面的字符串,并转为列表
# ['root', 'x', '0', '0', 'root', '/root', '/bin/bash']
split练习:打印文件/etc/passwd以:为分隔符的最后一列
[root@node1 模块]# cat 打印文件passwd的最后一列.py
import re
f = open("/etc/passwd", "r")
for line in f:
    # 把每一行以:为分隔符,分割结果为一个列表
    line_list = re.split(":", line)
    # 打印列表最后的元素即最后一列
    print(line_list[-1], end="")
f.close()
练习:使用input输入一个字符串,判断是否为强密码: 长度至少8位,包含大写字母,小写字母,数字和下划线这四类字符则为强密码
不使用正则的方法
def check_password(password):
    # 设立flag分别代表统计大小字母,小写字母,数字,下划线
    # 如果出现过一次该对应字符则flag置为False即不再统计一次
    flag1 = True
    flag2 = True
    flag3 = True
    flag4 = True
    # 出现不同字符的次数初始值为0
    count = 0
    if len(password) < 8:
        print("too short")
    else:
        for i in password:
            # 判断出现的大小字母
            if i.isupper() and flag1:
                count += 1
                flag1 = False
                continue
            # 判断出现的小写字母
            elif i.islower() and flag2:
                count += 1
                flag2 = False
                continue
            # 判断出现的数字
            elif i.isdigit() and flag3:
                count += 1
                flag3 = False
                continue
            # 判断出现的下划线
            elif i == "_" and flag4:
                count += 1
                flag4 = False
                continue
        if count >= 4:
            print(count)
            print("strong password")
        else:
            print(count)
            print("weak password")
password = input("Please input password:")
check_password(password)
使用正则的方法
import re
def check_password(password):
    if len(password) < 8:
        print("Too short")
    else:
        if re.search('[A-Z]', password) and re.search('[a-z]', password) and re.search('[d]', password) and re.search('[_]', password):
            print("Strong password")
        else:
            print("weak password")

password = input("Please input password:")

check_password(password)
解析:re.search匹配整个字符串如果有匹配则有返回,需要同时满足4个返回才输出强密码提示
练习:文件处理
1,打印/etc/passw中以daemon开头的行
2,打印包含root的行
3,打印文件中出现字符root的次数
[root@node1 模块]# cat 文件处理.py
import re
# 打开文件
f = open("/etc/passwd","r")
#print(f)
# 定义空列表用来存储以daemon开头的行
daemon_list = []
# 定义空列表用来存储包含root的行
root_list = []
# 定义空列表用来存储所有root 然后计算列表长度来计算文件中包含root的次数
root_len = []
for line in f:
    # 如果开头匹配到daemon则把整行追加至列表
    if re.match("daemon", line):
        daemon_list.append(line)
    # 如果包含root则把整行追加至列表
    elif re.search("root", line):
        root_list.append(line)
	# 把匹配到的root分割成列表然后累加 列表root_len为一个只包含字符串root的列表
        root_len += re.findall("root", line)
print("以daemon开头的行")
for i in daemon_list:
    print(i,end="")
print("包含root的行")
for i in root_list:
    print(i,end="")
print("包含root {}个".format(len(root_len)))
f.close()
time,datetime,calendar模块
python有三种时间类型
| 时间类型 | 描述 |
| struct_tiem | 记录时间的年月日时分等 |
| timestamp时间戳 | 记录距离1970-01-01 00:00:00有多少秒 |
| 格式化的时间字符串 | 如2020-11-05 09:00:00 |
三种类型之间的转换图
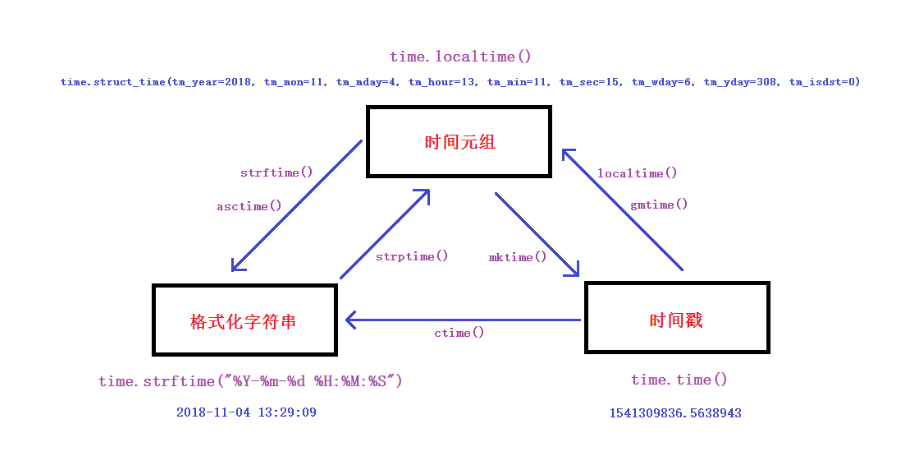
示例
import time # 加载时间模块

time.sleep(1)   # 暂停1秒

print(time.localtime()) # 打印本地时间元组
# time.struct_time(tm_year=2020, tm_mon=11, tm_mday=5, tm_hour=9, tm_min=58, tm_sec=8, tm_wday=3, tm_yday=310, tm_isdst=0)
print(time.gmtime())    # 打印时间元组时间为格林威治时间
# time.struct_time(tm_year=2020, tm_mon=11, tm_mday=5, tm_hour=9, tm_min=58, tm_sec=8, tm_wday=3, tm_yday=310, tm_isdst=0)
对应如下
| 序号 | 字段 | 值 |
|---|---|---|
| 0 | 4位数年 | 2008 |
| 1 | 月 | 1 到 12 |
| 2 | 日 | 1到31 |
| 3 | 小时 | 0到23 |
| 4 | 分钟 | 0到59 |
| 5 | 秒 | 0到61 (60或61 是闰秒) |
| 6 | 一周的第几日 | 0到6 (0是周一) |
| 7 | 一年的第几日 | 1到366 (儒略历) |
| 8 | 夏令时 | -1, 0, 1, -1是决定是否为夏令时的旗帜 |
print(time.strftime("%Y-%m-%d %H:%M:%S"))   # 打印当前时间,格式化字符串
# 2020-11-05 10:05:38
print(time.strftime("%F %T"))   # 打印当前时间,格式化字符串
# 2020-11-05 10:05:38
print(time.time())  # 打印当前时间时间戳,离1970年1月1号0点的秒数
# 1604541938.294913
示例,三种时间格式的转换
abc = time.localtime()  # 把时间元组赋值给变量abc
print(time.mktime(abc)) # 把时间元组转换成时间戳,精确到秒
# 1604542173.0
print(time.strftime("%Y-%m-%d %H:%M:%S", abc)) # 时间元组转换成时间字符串,自定义格式
# 2020-11-05 10:11:20
print(time.asctime(abc))    # 时间元组转换成字符串,默认格式
# Thu Nov  5 10:13:47 2020
print(time.strptime("2020-11-05 10:30:25", "%Y-%m-%d %H:%M:%S"))    # 格式化字符串转换成时间元组
# time.struct_time(tm_year=2020, tm_mon=11, tm_mday=5, tm_hour=10, tm_min=30, tm_sec=25, tm_wday=3, tm_yday=310, tm_isdst=-1)
print(time.localtime(86400))    # 打印距离1970-01-01 00:00:00时间为86400秒时间的时间元组 即24小说以后的时间元组
# time.struct_time(tm_year=1970, tm_mon=1, tm_mday=2, tm_hour=8, tm_min=0, tm_sec=0, tm_wday=4, tm_yday=2, tm_isdst=0)
print(time.gmtime(86400))   # 打印距离1970-01-01 00:00:00时间为86400秒的时间元组,格林威治时间

print(time.ctime(335235))   # 时间戳转换成字符串时间,默认格式
# Mon Jan  5 05:07:15 1970
datetime,calendar模块
import datetime, calendar
print(datetime.datetime.now())  # 打印现在时间
# 2020-11-05 11:29:17.723348
print(datetime.datetime.now()+datetime.timedelta(+3))   # 三天后时间
# 2020-11-08 11:29:17.723348
print(datetime.datetime.now()+datetime.timedelta(days=-3)) # 三天前时间
# 2020-11-02 11:29:17.723348
print(datetime.datetime.now()+datetime.timedelta(hours=5))  # 五小时后时间
# 2020-11-05 16:29:17.723348
print(datetime.datetime.now()+datetime.timedelta(minutes=-10))  # 十分钟前时间
# 2020-11-05 11:19:17.723348
print(datetime.datetime.now()+datetime.timedelta(weeks=1))  # 一星期之后时间
# 2020-11-12 11:29:17.723348
print(calendar.calendar(2020))  # 打印2020年日历
print(calendar.isleap(2020))    # 判断某年是否是闰年
# True
练习:打印出昨天的日期(格式要求为YYYY-mm-dd)
# cat 打印昨天日期.py
import time
# 方法一
# time.strftime("%Y-%m-%d",时间元组)把时间元组格式化成年月日输出
# time.localtime(时间戳)把时间戳转换成时间元组
# time.time()-86400 为现在的时间戳减去86400即24销售之前的时间戳
print(time.strftime("%Y-%m-%d", time.localtime(time.time()-86400)))
# 方法二
import datetime
abc = datetime.datetime.now() + datetime.timedelta(-1)
print(abc)
# 2020-11-05 08:52:20.352911
# str(abc)把时间转化成字符串 2020-11-05 08:52:20.352911
# 使用split方法以空格为分隔符把字符串转换成列表["2020-11-05", "08:52:20.352911"]
# 输出列表的第一个元素即格式化的日期
print(str(abc).split(" ")[0])
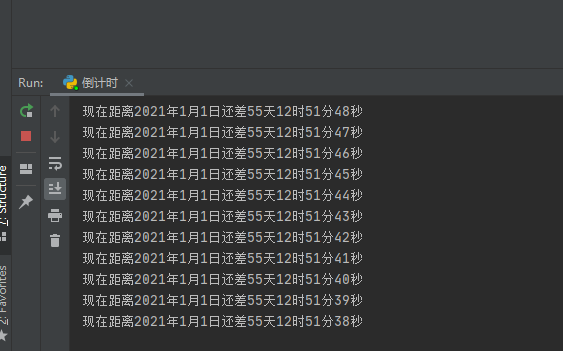
练习:做一个倒计时计算现在距离2021年还有多久
# cat 倒计时
import time
while True:
    # 计算2021-01-01 00:00:00的时间戳
    # time.strptime("2021-01-01 00:00:00", "%Y-%m-%d %H:%M:%S")使用格式化方式把时间戳转换成时间元组
    # time.mktime(时间元组) 把时间元组转换成时间戳
    time_stamp_2021 = time.mktime(time.strptime("2021-01-01 00:00:00", "%Y-%m-%d %H:%M:%S"))
    time_stamp_now = time.time()
    # print("2021年1月1日的时间戳为{}".format(int(time_stamp_2021)))
    # print("现在的时间戳为{}".format(int(time_stamp_now)))
    # 计算2021-01-01 00:00:00到现在的时间戳时间相差的秒数并转换成整数赋值给goal_seconds
    goal_seconds = int(time_stamp_2021 - time_stamp_now)
    # 如果相差为0则代表现在的时间戳已经走到2021-01-01 00:00:00了 则退出循环
    if goal_seconds == 0:
        break
    # 否则根据相差时间的秒数计算相差的天时分秒,然后休息1秒钟继续循环
    else:
        print("现在距离2021年1月1日还差{}天{}时{}分{}秒".format(int(goal_seconds/86400), int(goal_seconds%86400/3600), int(goal_seconds%3600/60), int(goal_seconds%60)))
        time.sleep(1)
输出如下
练习:每隔一秒循环打印2020年的日期格式为(2020-01-01)
每隔一秒打印2020年日期.py
# 方法一
import time
# 获取2020-01-01的时间元组
time_tuple_2020 = time.strptime("2020-01-01", "%Y-%m-%d")
# 获取2020-12-31的时间元组
time_tuple_2021  = time.strptime("2020-12-31", "%Y-%m-%d")
# print(time_tuple_2020)
# print(time.strftime("%Y-%m-%d", time_tuple_2020))
# 把两个时间元组转换成时间戳
time_stamp_2020 = time.mktime(time_tuple_2020)
time_stamp_2021 = time.mktime(time_tuple_2021)
# print(time_stamp_2020)
# 循环依次打印日期格式为2020-01-01
while True:
    if int(time_stamp_2020) >= int(time_stamp_2021):
        break
    else:
        # 格式化输出日期,然后把时间戳+86400即下一天的时间戳
        print(time.strftime("%Y-%m-%d", time.localtime(time_stamp_2020)))
        time_stamp_2020 += 86400
        time.sleep(1)
每隔一秒打印2020年日期2.py
# 方法二
import time, datetime

start_time = datetime.datetime.strptime("2020-01-01", "%Y-%m-%d")
# start_time = 2020-01-01 00:00:00
delta = datetime.timedelta(days=1)

# str(start_time).split()[0]
# str(start_time)把日期转换成字符串 2020-01-01 00:00:00
# str(start_time).split()为把字符串转换成列表 ["2020-01-01", "00:00:00"] 不指定分隔符时分隔符默认为空格
while True:
    if str(start_time).split()[0] == "2020-01-20":
        break
    else:
        print(str(start_time).split()[0])
        start_time = start_time + delta
        time.sleep(1)
第三方模块只psutil
psutil是一个跨平台库,能够轻松实现获取系统运行的进程和系统利用率(包括CPU、内存、磁盘、网络等)信息。它主要应用于系统监控,分析和限制系统资源及进程的管理。因为是第三方模块,所以需要先使用pip命令安装后再能使用
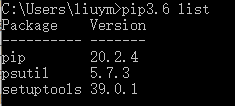
# pip3.6 install psutil
# pip3.6 list
windows下需要安装pip3.6才能执行pip安装模块,windows安装pip参考:https://www.cnblogs.com/minseo/p/13947395.html
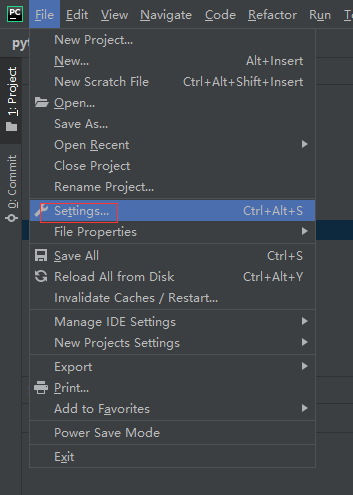
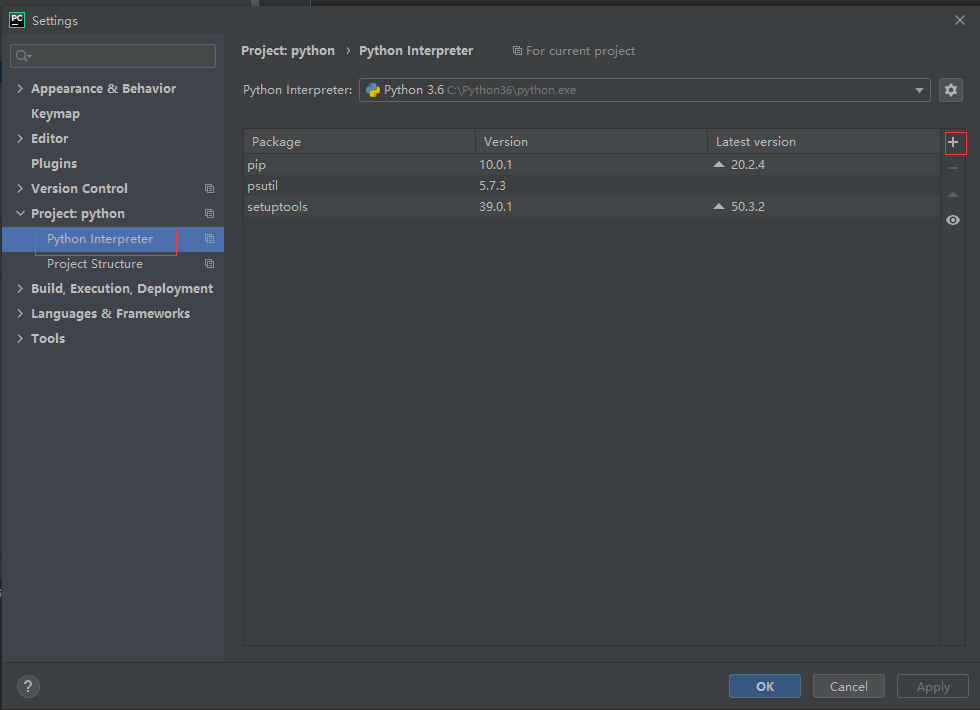
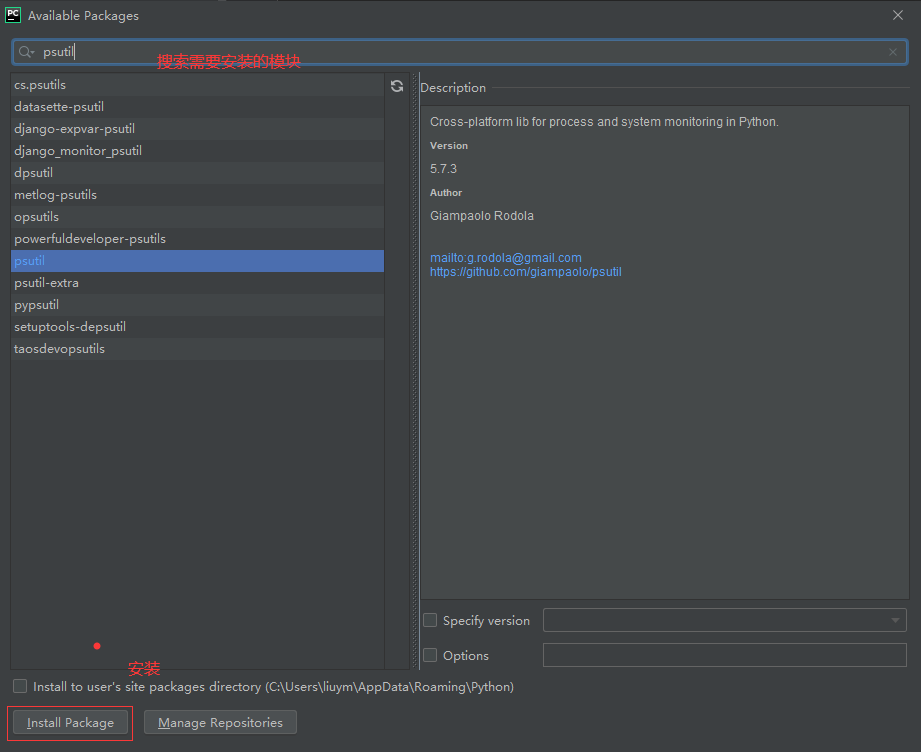
使用PyCharm安装模块
pastil示例
import psutil
# cpu
print(psutil.cpu_times())   # cpu各时间状态,类型为tuple
# scputimes(user=26065.78125, system=24281.81250000006, idle=508792.35937499994, interrupt=168.40625, dpc=488.09375)
print(psutil.cpu_count())   # cpu核数,逻辑核数 类型为int
# 8
# memory
print(psutil.virtual_memory())  # 内存状态,类型为tuple
# svmem(total=17178800128, available=11681599488, percent=32.0, used=5497200640, free=11681599488)
print(psutil.swap_memory()) # 交换swap状态,类型为tuple
# sswap(total=19728936960, used=6905610240, free=12823326720, percent=35.0, sin=0, sout=0)
# partition
print(psutil.disk_partitions()) # 查看所有分区信息,类型为列表,列表元素类型为tuple
# [sdiskpart(device='C:\', mountpoint='C:\', fstype='NTFS', opts='rw,fixed'), sdiskpart(device='D:\', mountpoint='D:\', fstype='NTFS', opts='rw,fixed'), sdiskpart(device='E:\', mountpoint='E:\', fstype='', opts='cdrom')]
print(psutil.disk_usage("/"))   # 查看分区/信息 类型为tuple
# sdiskusage(total=34340859904, used=934404096, free=33406455808, percent=2.7)
print(psutil.disk_usage("c:/")) # 查看分区c:/信息,类型为tuple
# sdiskusage(total=63260954624, used=37185134592, free=26075820032, percent=58.8)
# io
print(psutil.disk_io_counters())    # 查看所有io信息,类型为tuple
# sdiskio(read_count=376113, write_count=2186178, read_bytes=21786895872, write_bytes=46681673216, read_time=12747, write_time=17433)
print(psutil.disk_io_counters(perdisk=True)) # 查看每一个磁盘的io信息,类型为dist内部为tuple
# {'PhysicalDrive0': sdiskio(read_count=374041, write_count=2167981, read_bytes=21706172416, write_bytes=46569422848, read_time=12731, write_time=17417), 'PhysicalDrive1': sdiskio(read_count=2072, write_count=18197, read_bytes=80723456, write_bytes=112250368, read_time=16, write_time=16)}
# network
print(psutil.net_io_counters()) # 查看所有网卡的总信息(发包,收包等),类型为tuple
# snetio(bytes_sent=636645887, bytes_recv=1632356419, packets_sent=2344801, packets_recv=6043099, errin=0, errout=0, dropin=0, dropout=0)
print(psutil.net_io_counters(pernic=True))  # 查看每一个网卡的信息,类型为dict,内部为tuple
# {'Ethernet0': snetio(bytes_sent=630656366, bytes_recv=1632356483, packets_sent=2310778, packets_recv=6043100, errin=0, errout=0, dropin=0, dropout=0), 'Loopback Pseudo-Interface 1': snetio(bytes_sent=0, bytes_recv=0, packets_sent=0, packets_recv=0, errin=0, errout=0, dropin=0, dropout=0), 'vEthernet (Default Switch)': snetio(bytes_sent=5989521, bytes_recv=0, packets_sent=34023, packets_recv=0, errin=0, errout=0, dropin=0, dropout=0)}

# process
print(psutil.pids())    # 查看所有进程id 类型为列表,元素类型为int
# [0, 4, 68, 340, 368, 392, 400, 424, 432]
print(psutil.pid_exists(1)) # 判断对应进程是否存在,元素类型为bool
# False
print(psutil.Process(0))    # 查看进程相关信息,类型为tuple
# psutil.Process(pid=0, name='System Idle Process', status='running')
# user
print(psutil.users())   # 查看当前用户登录信息,类型为list
# [suser(name='liuym', terminal=None, host='192.168.1.123', started=1604882731.7022765, pid=None)]
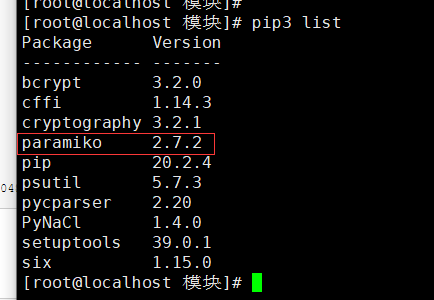
paramiko模块
安装
pip3 install paramiko
查看
示例:使用paramiko实现文件的上传和下载
[root@localhost 模块]# cat paramiko文件上传下载.py
import paramiko
trans = paramiko.Transport(("192.168.1.101", 22))   # 产生连接赋值给trans
trans.connect(username="root", password="password")   # 连接的用户名和密码
sftp = paramiko.SFTPClient.from_transport(trans)    # 指定为sftp传输模式
sftp.get("/etc/fstab", "/tmp/fstab")  # 把对方机器的文件/etc/fstab 下载到本地c:/fstab (Windows目录写法,需要写全文件名,否则执行会报权限错误)
sftp.put("/etc/fstab", "/tmp/1.txt")  # 把本机文件上传至远程连接主机对应目录,同理目标文件需要写全文件名,可以与原文件名不一致
trans.close()
运行没有返回,会把远程主机的文件下载以及把本地文件上传至服务器192.168.1.101
上面示例把密码写到代码中取,不安全,下面使用免密登录,需要事先设置好ssh免密
ssh-keygen
ssh-copy-id -i 192.168.1.102
ssh 192.168.1.102
[root@localhost 模块]# cat paramiko文件上传下载2.py
import paramiko
trans = paramiko.Transport(("192.168.1.102", 22))   # 产生连接赋值给trans

private_key=paramiko.RSAKey.from_private_key_file("/root/.ssh/id_rsa")
trans.connect(username="root",pkey=private_key)# 提前使用ssh-keygen做好免密登录
sftp = paramiko.SFTPClient.from_transport(trans)    # 指定为sftp传输模式
sftp.get("/etc/fstab", "/tmp/fstab2")  # 把对方机器的文件/etc/fstab 下载到本地c:/fstab (Windows目录写法,需要写全文件名,否则执行会报权限错误)
sftp.put("/etc/fstab", "/tmp/1.txt")  # 把本机文件上传至远程连接主机对应目录,同理目标文件需要写全文件名,可以与原文件名不一致
trans.close()
示例:使用paramiko远程登陆实现执行命令操作
[root@localhost 模块]# cat paramiko远程登陆操作.py
import paramiko

ssh = paramiko.SSHClient() # 创建一个客户端连接实例

private_key = paramiko.RSAKey.from_private_key_file("/root/.ssh/id_rsa")

ssh.set_missing_host_key_policy(paramiko.AutoAddPolicy)  # 加了这一句,如果第一次ssh连接要你输入yes,也不用输入了

ssh.connect(hostname="192.168.1.102",port=22,username="root",pkey=private_key)# 把password=123456换成pkey=private_key

stdin,stdout,stderr = ssh.exec_command("touch /tmp/321")

cor_res = stdout.read()	# 标准输出赋值
err_res = stderr.read()	# 错误输出赋值

if cor_res:
    result = cor_res
else:
    result = err_res


print(cor_res.decode())	# 网络传输的是二进制需要使用decode输出
print(err_res.decode())
ssh.close()	# 关闭连接
执行后会在对应的主机创建文件,但是本次使用的命令是touch没有输出,如果使用其他命令例如pwd则会输出/root如果使用一个没有的命令则会输出错误输出

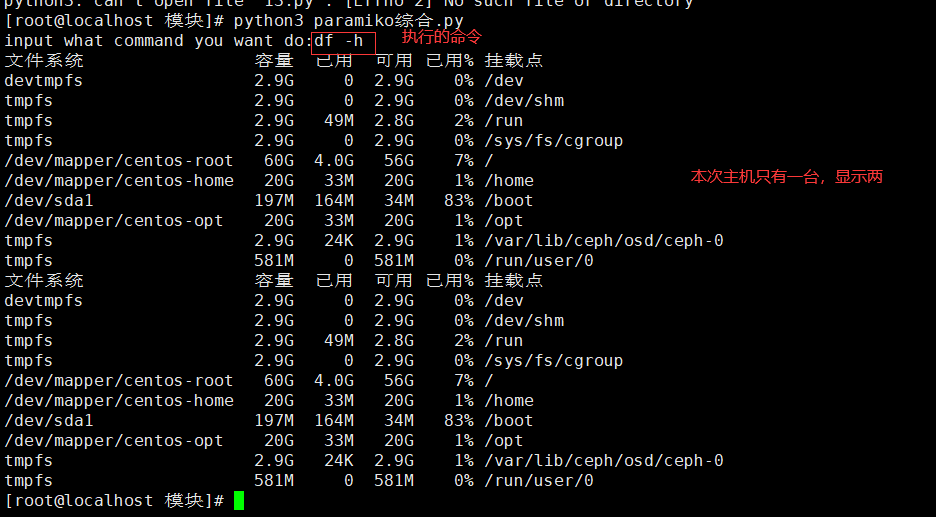
练习:写一个程序,针对一批次主机执行命令然后查看返回结果
[root@localhost 模块]# cat paramiko综合.py
import paramiko

def remote_exec_command(ip, command, port=22):
    ssh = paramiko.SSHClient()
    ssh.set_missing_host_key_policy(paramiko.AutoAddPolicy)
    private_key = paramiko.RSAKey.from_private_key_file("/root/.ssh/id_rsa")
    ssh.connect(hostname=ip, port=port,username="root",pkey=private_key)

    stdin, stdout, stderr = ssh.exec_command(command)
    print(stdout.read().decode(), end="")
    print(stderr.read().decode(), end="")
    ssh.close()


# remote_exec_command("192.168.1.102","df -h")

def read_ip_port():
    cmd = input("input what command you want do:")
    f = open("/tmp/1.txt","r")
    for line in f:
        read_ip = line.strip().split(":")[0] # 去掉空格和回车然后转换成列表["192.168.1.120", "22"]
        read_port = line.strip().split(":")[1]
        remote_exec_command(read_ip, cmd, read_port)
    f.close()

read_ip_port()
其中文本/tmp/1.txt存储了主机的用户名和端口号
[root@localhost 模块]# cat /tmp/1.txt
192.168.1.102:22
192.168.1.102:22
执行输入需要执行的命令
:与上面的hello.py同目录下,再写一个1.py来调用