环境搭建
配置ApplicationContext.xml容器文件【半注解实现】
<?xml version="1.0" encoding="UTF-8"?>
<beans xmlns="http://www.springframework.org/schema/beans"

       xmlns:xsi="http://www.w3.org/2001/XMLSchema-instance"
       xmlns:context="http://www.springframework.org/schema/context"
       xmlns:aop="http://www.springframework.org/schema/aop"

       xmlns:p="http://www.springframework.org/schema/p"
       xmlns:c="http://www.springframework.org/schema/c"

       xsi:schemaLocation="
       http://www.springframework.org/schema/beans
       http://www.springframework.org/schema/beans/spring-beans.xsd

       http://www.springframework.org/schema/context
       http://www.springframework.org/schema/context/spring-context.xsd

       http://www.springframework.org/schema/aop
       http://www.springframework.org/schema/aop/spring-aop.xsd
"
>
    <context:annotation-config />


</beans>
配置注解组件扫描位置
<context:component-scan base-package="cn.dai" />
配置之后,会有叶子+放大镜的图标,用于扫描、搜索组件

@Component注解
注册Bean不再需要写XML标签
在类上打上@Component注解,直接在Spring容器中注册为Bean
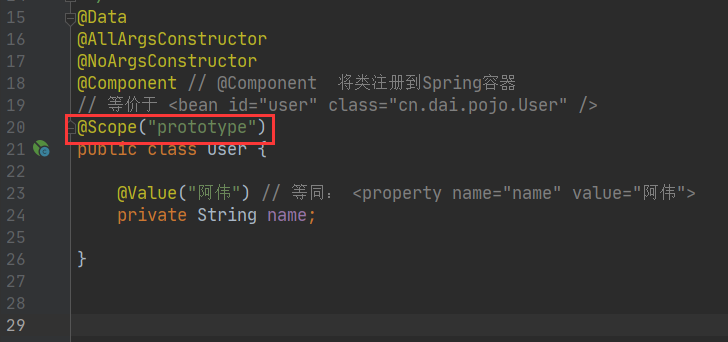
package cn.dai.pojo;

import lombok.AllArgsConstructor;
import lombok.Data;
import lombok.NoArgsConstructor;
import org.springframework.stereotype.Component;

/**
 * @author ArkD42
 * @file Spring
 * @create 2020 - 05 - 05 - 8:39
 */
@Data
@AllArgsConstructor
@NoArgsConstructor
@Component // @Component  将类注册到Spring容器
// 等价于 <bean id="user" class="cn.dai.pojo.User" />
public class User {
    private String name;
}
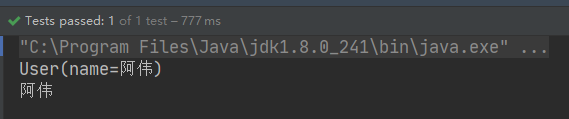
测试
public class AnnotationTest {

    @Test
    public void anoTest(){
        ApplicationContext applicationContext = new ClassPathXmlApplicationContext("ApplicationContext.xml");
        User user = applicationContext.getBean("user", User.class);
        System.out.println(user);
        String name = user.getName();
        System.out.println(name);
    }
}
在属性上打上注解,即:使用字段赋值
    @Value("阿伟") // 等同: <property name="name" value="阿伟">
    private String name;
测试
这个@Value注解同样对SETTER方法使用,
这里使用了Lombok就没有代码上的SETTER方法能注解了
    @Value("阿杰")
    public void setName(String name){
        this.name = name;
    }
@Component的衍生注解
在Web开发中我们会按照MVC的三层架构分层开发
Spring分别对这些层的注册使用不同名称的注解,
其本质的功能都是一样的,注册到Spring容器
1、Dao层【@Repository】
2、Service层【@Service】
3、Controller层【@Controller】
这四个注解的功能是一样的
@Scope Bean作用域注解
一般值就设置:
Singleton
Prototype
单例或者原型这两种情况
总结:
XML适用任何配置,编写繁琐
注解需要XML的约束支持
最佳实践?
1、XML管理Bean
2、属性交给注解完成
注意注解的约束开启,这样才有效
全注解配置
JavaConfig配置
现在这个工程是没有写过任何XML容器文件的
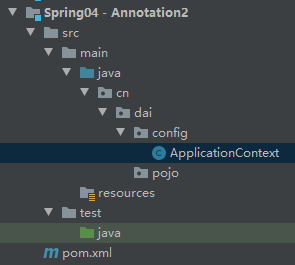
可以看到在包目录中编写另一个config目录
我编写了一个ApplicationContext,这个类就充当了我们的Spring容器
@Configuration注解
被注解的类注册成为Bean容器
package cn.dai.config;

import org.springframework.context.annotation.Configuration;

/**
 * @author ArkD42
 * @file Spring
 * @create 2020 - 05 - 05 - 9:12
 */
@Configuration
public class ApplicationContext {

}
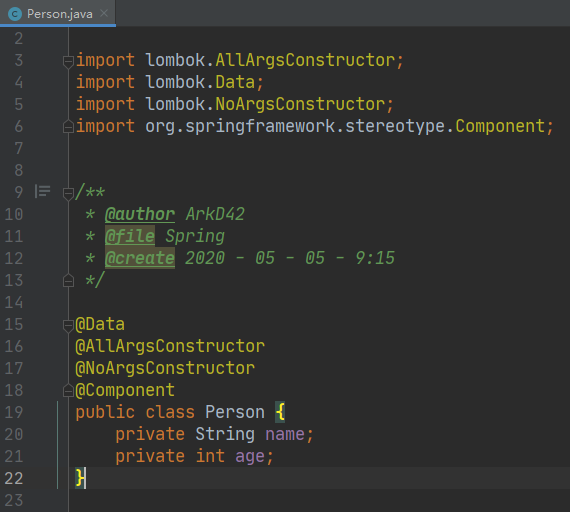
编写一个实体类
@Data
@AllArgsConstructor
@NoArgsConstructor
public class Person {
    private String name;
    private int age;
}
@Bean 注解
将这个类在容器类中注册
这个注解充当了@Component作用
 @Bean
    public Person person(){
        return  new Person();
    }
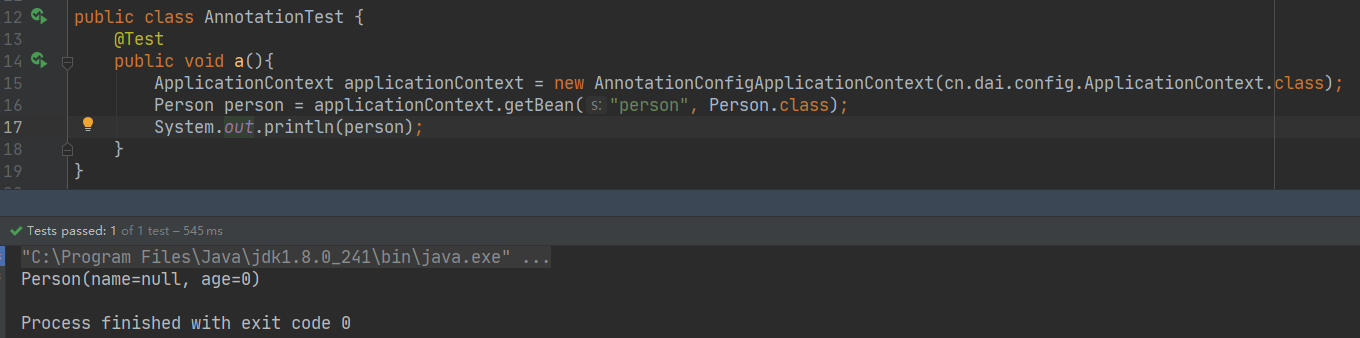
实际测试获取对象
使用的是new AnnotationConfigApplicationContext(cn.dai.config.ApplicationContext.class)
将我们的容器类的类对象注入,获取容器实例
下面获取的参数是容器类中方法的名字和所对应的Bean类的类对象
public class AnnotationTest {
    @Test
    public void a(){
        ApplicationContext applicationContext = new AnnotationConfigApplicationContext(cn.dai.config.ApplicationContext.class);
        Person person = applicationContext.getBean("person", Person.class);
        System.out.println(person);
    }
}
@ComponentScan 注解
或者显示的声明扫描目录
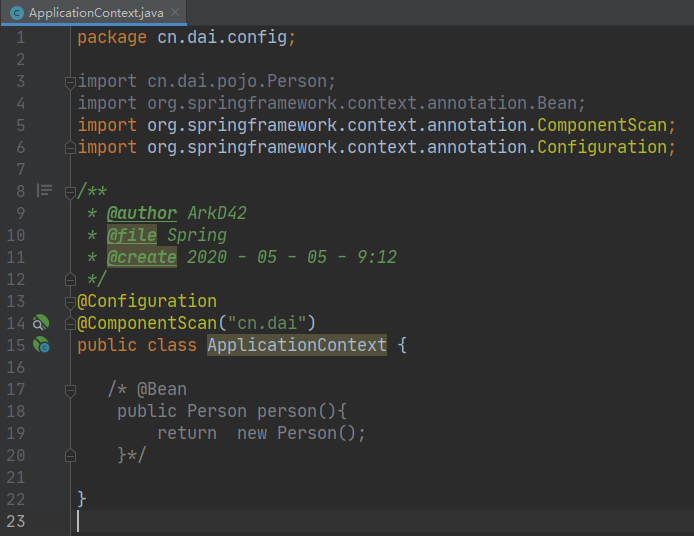
然后实体类使用@Component
被扫描进容器类注册
测试结果还是一样可以
要注意的是
使用@Component 被扫描后获取的实例是从Spring中获取的,并非容器类
使用@Bean 获取的实例,则就是这个注解的方法获取的实例
并不是同一个对象
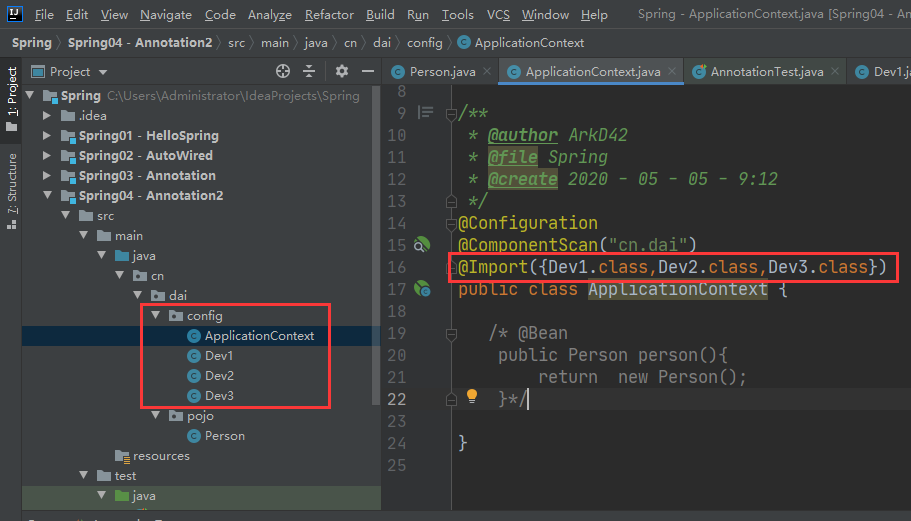
@Import 合并导入注解
跟XML的导入标签一样,我们可以声明多个容器类,
然后在其中一个核心总容器类使用@Import把其他容器类导入进来