pom.xml文件介绍
modelVersion 当前pom的版本
groupId项目包名
artifactId模块名,项目名
version版本
mvn -v 查看maven版本
mvn compile 编译 生成class字节码文件
mvn test  运行测试用例 test目录
mvn package 生成jar包 会成成编译文件 生成后会执行测试用例
    clean 删除target目录
   install 安装jar包到本地仓库中
   -Dmaven.test.skip=true跳过测试
archetype插件,创建符合maven规定的目录骨架
mvn archetype:generate
mvn archetype:generate -DgroupId=组织名,公司网址的反写+项目名 -DartifactId=一般指当前项目在组织中的唯一标识。项目名-模块名
-Dversion=版本号
-Dpackage=代码所存在的包
坐标(构件)、仓库(本地仓库和远程仓库)镜像仓库
maven/lib/maven-model-builder.jar包查看默认布局 https://search.maven.org/
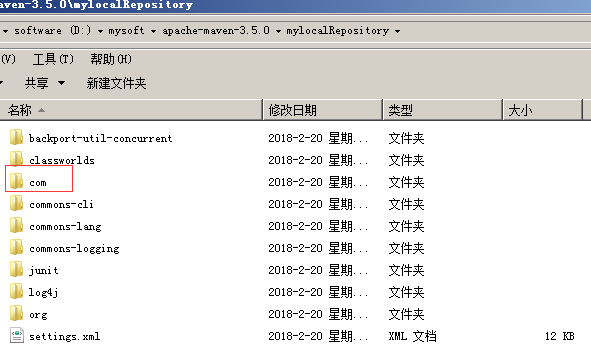
镜像仓库
setting文件 修改mirror节点

更改仓库位置:
从远程仓库下载后,默认存在当前用户目录中。C:UsersAdministrator.m2
epository

修改
<localRepository>D:mysoftapache-maven-3.5.0mylocalRepository</localRepository>
然后将setting文件拷贝到该目录下,再次install的时候,就能发现jar包已经安装到此目录了
在eclipse右键pom文件
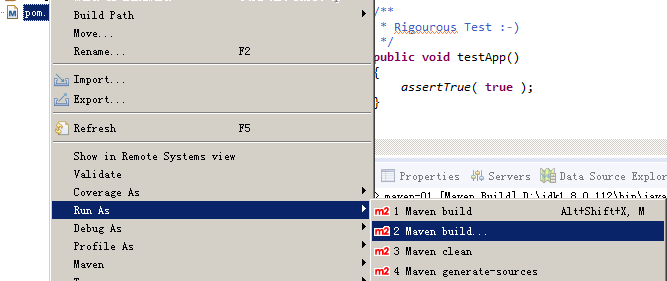
输入package命令,可进行打包操作。
一个完整的项目构建过程包括:清理、编译、测试、打包、集成测试、验证、部署
maven声明周期:clean清理 default构建项目 site生成项目站点
clean
    pre-clean 执行清理前工作
    clean    清理上一次构建生成的所有文件
    post-clean    执行清理后的文件
default
    compile
    test
    pakeage
    install
site
    pre-site 在商城项目站点前要完成的事情
    site 生成项目的站点文档
    post-site    生成站点后要做的动作
    site-deploy 发布生成站点到服务器上

官方插件地址:http://maven.apache.org/plugins/index.html
在pom中添加插件
<build>
        <plugins>
            <plugin>
                <!--插件-->
                <groupId>org.apache.maven.plugins</groupId>
                <artifactId>maven-source-plugin</artifactId>
                <version>2.1.2</version>
                <executions>
                    <execution>
                        <!--阶段-->
                        <phase>package</phase>
                        <goals>
                            <!--目标-->
                            <goal>jar-no-fork</goal>
                        </goals>
                    </execution>
                </executions>
            </plugin>
        </plugins>
    </build>
在IDEA中,help-findaciton-maven project,找到package 右键build。用命令执行:
$ mvn package source:jar-no-fork -Dmaven.test.skip=true
mvn help:describe -Dplugin=groupId:artifactId:version 查看提供了哪些用法。mvn help:describe -Dplugin=groupId:artifactId:version
pom中其他项说明:


    <!--项目名称-->
    <name></name>
    <!--地址 -->
    <url></url>
    <!--说明 -->
    <description></description>
    <!-- 开发人员-->
    <developers></developers>
    <!-- 组织-->
    <organization></organization>
    <!-- 许可证信息-->
    <licenses></licenses>
    <!-- 依赖-->
    <developers>
        <dependency>
            <!--坐标-->
            <groupId></groupId>
            <artifactId></artifactId>
            <version></version>
            <type></type>
            <!-- 依赖范围 表示只在test有用-->
            <scope>test</scope>
            <!-- 依赖是否可选,默认false-->
            <optional></optional>
            <!-- 排除依赖传递列表-->
            <exclusions>
                <exclusion></exclusion>
            </exclusions>
        </dependency>
    </developers>
    <!-- 依赖管理-->
    <dependencyManagement>
        <dependencies>
            <dependency>
            </dependency>
        </dependencies>
    </dependencyManagement>
    <!-- 为构建行为提供相应的支持-->
    <build>
        <plugins>
            <plugin>
                <!--坐标-->

            </plugin>
        </plugins>

    </build>
    <!---->
    <parent></parent>
    <!--聚合 多个maven项-->
    <modules></modules>
http://maven.apache.org/guides/introduction/introduction-to-dependency-mechanism.html#Dependency_Scope
<scope>test</scope>
setting配置文件 修改jdk版本 在profile节点下
依赖冲突:1、短路优先,2、先声明优先
        <dependency>
            <groupId>com.milan</groupId>
            <artifactId>maven02</artifactId>
            <version>1.0-SNAPSHOT</version>
            <exclusions>
                <exclusion>
                    <groupId>com.milan</groupId>
                    <artifactId>maven01</artifactId>
                </exclusion>
            </exclusions>
        </dependency>
聚合和继承
将多个maven项目同时install -聚合
<packaging>pom</packaging>
 <modules>
    <module>../maven01</module>
    <module>../maven02</module>
    <module>../maven03</module>
  </modules>
<!--parent-->
<?xml version="1.0" encoding="UTF-8"?>
<project xmlns="http://maven.apache.org/POM/4.0.0"
         xmlns:xsi="http://www.w3.org/2001/XMLSchema-instance"
         xsi:schemaLocation="http://maven.apache.org/POM/4.0.0 http://maven.apache.org/xsd/maven-4.0.0.xsd">
    <modelVersion>4.0.0</modelVersion>
    <groupId>com.milan</groupId>
    <artifactId>maven_jicheng</artifactId>
    <version>1.0-SNAPSHOT</version>
    <packaging>pom</packaging>
    <properties>
        <junit.version>3.8.1</junit.version>
    </properties>
    <dependencyManagement>
        <dependencies>
            <dependency>
                <groupId>junit</groupId>
                <artifactId>junit</artifactId>
                <version> ${junit.version}</version>
                <scope>test</scope>
            </dependency>
        </dependencies>
    </dependencyManagement>
</project>

<!--使用-->
<project xmlns="http://maven.apache.org/POM/4.0.0" xmlns:xsi="http://www.w3.org/2001/XMLSchema-instance"
  xsi:schemaLocation="http://maven.apache.org/POM/4.0.0 http://maven.apache.org/xsd/maven-4.0.0.xsd">
  <modelVersion>4.0.0</modelVersion>

  <groupId>com.milan</groupId>
  <artifactId>maven03</artifactId>
  <version>1.0-SNAPSHOT</version>
  <packaging>jar</packaging>
  <name>maven03</name>
  <url>http://maven.apache.org</url>
  <properties>
    <project.build.sourceEncoding>UTF-8</project.build.sourceEncoding>
  </properties>
  <parent>
    <groupId>com.milan</groupId>
    <artifactId>maven_jicheng</artifactId>
    <version>1.0-SNAPSHOT</version>
  </parent>
  <dependencies>
    <dependency>
      <groupId>junit</groupId>
      <artifactId>junit</artifactId>
    </dependency>
  </dependencies>
</project>
搭建Web项目 http://mvnrepository.com/artifact/javax.servlet/javax.servlet-api/4.0.0
创建webAPP项目
手动创建src/main/java src/test/java目录
pom添加
 <dependency>
      <groupId>javax.servlet</groupId>
      <artifactId>javax.servlet-api</artifactId>
      <version>4.0.0</version>
      <scope>provided</scope>
    </dependency>


和
<plugins>
      <plugin>
        <groupId>org.eclipse.jetty</groupId>
        <artifactId>jetty-maven-plugin</artifactId>
        <version>9.4.8.v20171121</version>
      </plugin>
    </plugins>
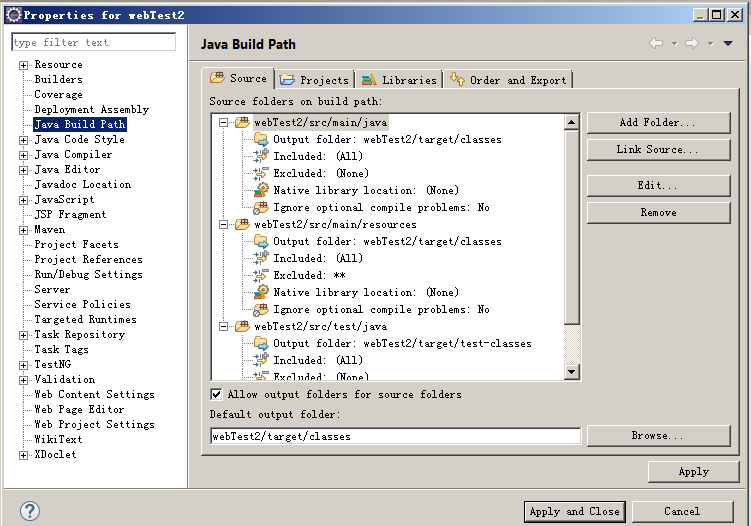
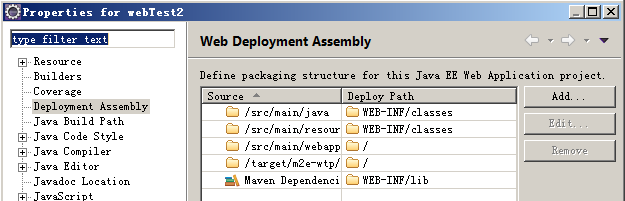
确保输出路径正确:
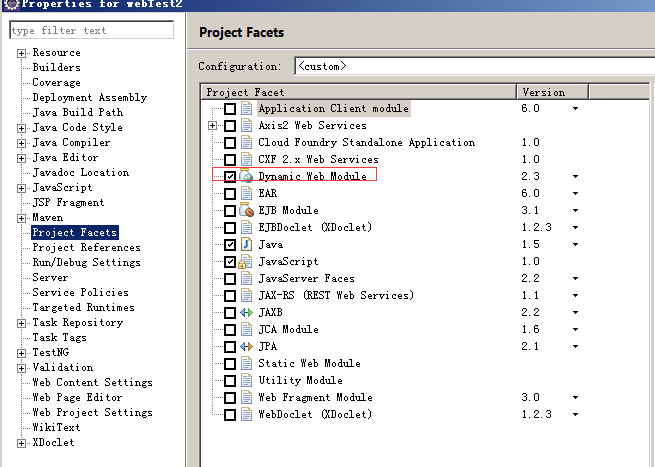
转化成web项目。项目右键,属性,
jetty:run 启动,查看http://localhost:8080/
修改setting
     <plugin>
        <groupId>org.eclipse.jetty</groupId>
        <artifactId>jetty-maven-plugin</artifactId>
        <version>9.4.8.v20171121</version>
        <executions>
          <execution>
            <phase>package</phase>
            <goals>
              <!--在打包成功后 用jetty:run来运行-->
              <goal>run</goal>
            </goals>
          </execution>
        </executions>
      </plugin>
用tomcat来启动 http://tomcat.apache.org/maven-plugin.html
修改
plugin
<groupId>org.apache.tomcat.maven</groupId>
        <artifactId>tomcat6-maven-plugin</artifactId>
        <version>2.2</version>
用package命令启动 访问http://localhost:8080/webTest2 OK