zabbix安装完zabbix server服务端,剩下监控其他主机就需要安装zabbix agent客户端
zabbix agent需要部署在被监控主机上,负责将被监控主机的数据提交到zabbix server
zabbix工作模式:
agent端会将采集完的数据主动发送到server端,这种模式成为主动模式(agent端)
agent端可以不将采集完的数据发送到server端,而是等server来拉去数控,主动模式与被动模式可以一起存在,不冲突
管理员可以在agent端使用zabbix_sender工具测试是否能够向server端发送数据
在server端使用zabbix_get工具,测试是否能够从agent端拉去数据
本文主要安装Zabbix agent在CentOS版本下:
创建zabbix用户
[root@Mike-VM-Node1 ~]# groupadd zabbix
[root@Mike-VM-Node1 ~]# useradd -g zabbix -m zabbix
CentOS6安装客户端
[root@Mike-VM-Node1 ~]# rpm -ivh http://repo.zabbix.com/zabbix/3.4/rhel/6/x86_64/zabbix-release-3.4-1.el6.noarch.rpm
Retrieving http://repo.zabbix.com/zabbix/3.4/rhel/6/x86_64/zabbix-release-3.4-1.el6.noarch.rpm
Preparing...                          ################################# [100%]
Updating / installing...
   1:zabbix-release-3.4-1.el6.centos  ################################# [100%]
[root@Mike-VM-Node1 ~]# yum -y install zabbix-agent
CentOS7安装客户端
[root@Mike-VM-Node1 ~]# rpm -ivh http://repo.zabbix.com/zabbix/3.4/rhel/7/x86_64/zabbix-release-3.4-1.el7.centos.noarch.rpm
Retrieving http://repo.zabbix.com/zabbix/3.4/rhel/7/x86_64/zabbix-release-3.4-1.el7.centos.noarch.rpm
Preparing...                          ################################# [100%]
Updating / installing...
   1:zabbix-release-3.4-1.el7.centos  ################################# [100%]
[root@Mike-VM-Node1 ~]# yum -y install zabbix-agent
因为两个系统版本的 rpm 源是不一样的,所以安装需要找到对应的源文件,我这里就标明清楚了
配置Zabbix agent文件
[root@Mike-VM-Node1 ~]# vim /etc/zabbix/zabbix_agentd.conf

Server=192.168.18.30

ServerActive=192.168.18.30

Hostname=192.168.18.66

[root@Mike-VM-Node1 ~]#
配置文件说明:
允许zabbix服务器远程zabbix_agentd执行命令:EnableRemoteCommands=1 (默认为0)
允许开启远程执行命令日志:LogRemoteCommands=1 (默认为0)
zabbix agent 默认PID路径: PidFile=/var/run/zabbix/zabbix_agentd.pid
zabbix agent默认日志路径: LogFile=/var/log/zabbix/zabbix_agentd.log
zabbix agent服务端IP: Server=192.168.18.30 (需写自己服务端IP)
zabbi agent服务端主动模式IP: ServerActive=192.168.18.30 (需写自己服务端IP)
zabbix agent客户端IP: Hostname=192.168.18.66 (需写监控自身可以通信IP)
启动zabbix agent客户端
centos6
[root@Mike-VM-Node1 ~]# chkconfig zabbix-agent on
[root@Mike-VM-Node1 ~]# service zabbix-agent start
centos7
[root@Mike-VM-Node1 ~]# systemctl start zabbix-agent.service
[root@Mike-VM-Node1 ~]# systemctl enable zabbix-agent.service
Created symlink from /etc/systemd/system/multi-user.target.wants/zabbix-agent.service to /usr/lib/systemd/system/zabbix-agent.service.
[root@Mike-VM-Node1 ~]#
添加防火墙端口
firewalld
[root@Mike-VM-Node1 ~]# firewall-cmd --zone=public --add-port=10050/tcp --permanent
[root@Mike-VM-Node1 ~]# firewall-cmd –reload
iptables
[root@Mike-VM-Node1 ~]# iptables -A INPUT -p tcp --dport 10050 -j ACCEPT
[root@Mike-VM-Node1 ~]# service iptables save
或者关闭防火墙
[root@Mike-VM-Node1 ~]# systemctl stop firewalld
[root@Mike-VM-Node1 ~]# systemctl stop iptables
如果不能访问,网络排查问题检测:
1.使用ping命令,在客户端与server直接互相ping通,或者telnet 10050端口
2.关闭或者开放相关防火墙,linux还需关闭selinux
3.检查server的地址是否填错
一键shell脚本
#!/bin/bash

groupadd zabbix
useradd -g zabbix -m zabbix

server=192.168.18.55
ServerActive=192.168.18.55
hostname=192.168.18.66

rpm -ivh http://repo.zabbix.com/zabbix/3.4/rhel/7/x86_64/zabbix-release-3.4-1.el7.centos.noarch.rpm
yum -y install zabbix-agent

sed -i "/^Hostname=.*/s/Hostname=.*/Hostname=${hostname}/g" /etc/zabbix/zabbix_agentd.conf
sed -i "/^Server=.*/s/Server=.*/Server=${server}/g" /etc/zabbix/zabbix_agentd.conf
sed -i "/^ServerActive=.*/s/ServerActive=.*/ServerActive=${server}/g" /etc/zabbix/zabbix_agentd.conf


systemctl start zabbix-agent.service
systemctl enable zabbix-agent.service
脚本中的 server 、hostname 地址和 rpm 源可以更换为自己的地址或者系统rpm 源
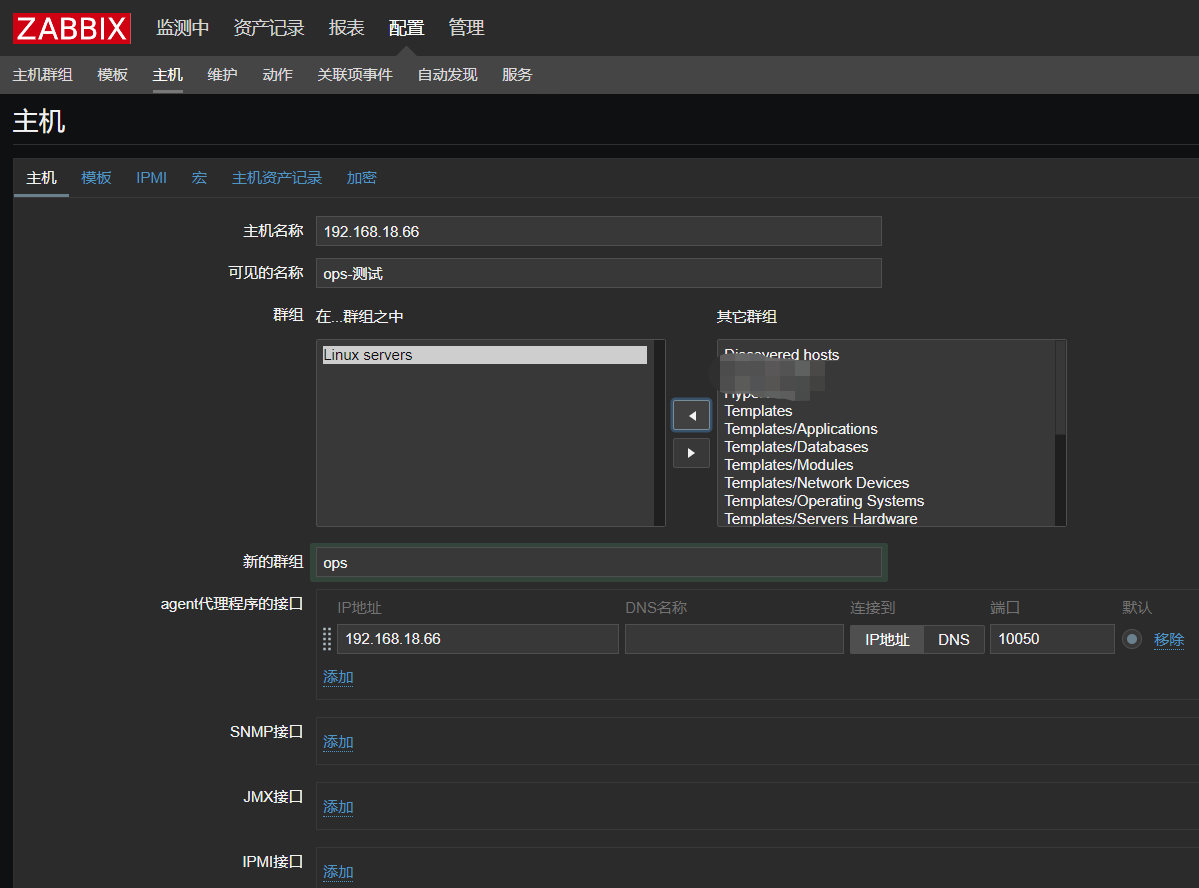
Zabbix服务端添加主机
打开zabbix web页面点 配置>主机>创建主机,填写自己刚刚在客户端的ip
然后点模版>选择>找到 Template OS Linux>添加
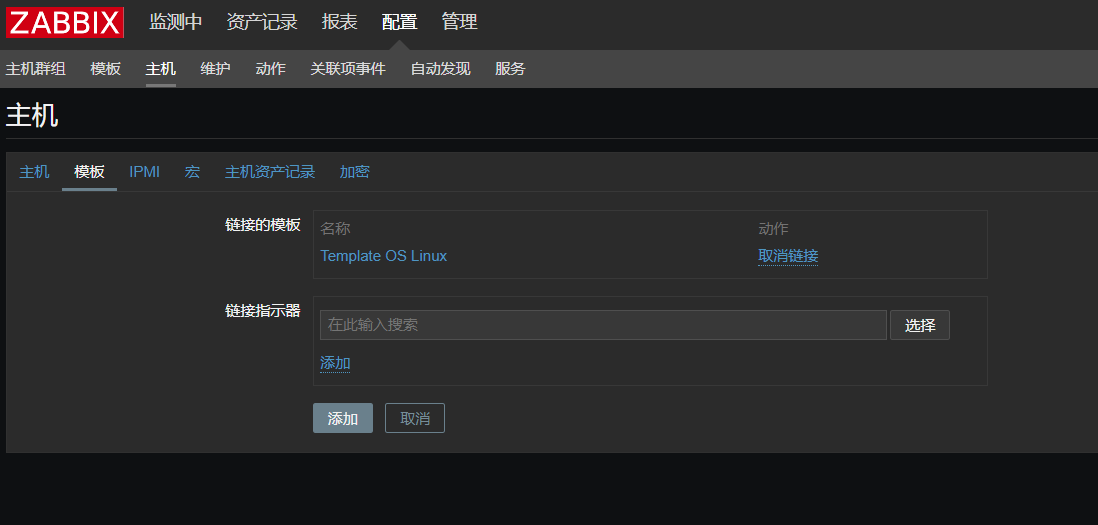
最后可以看到可用性这里已经是绿色就代表监控到客户端主机了

如果还是红色的话,需要检测服务端和客户端10050是否可以通信,可以使用 telnet 测试
或者检测一下客户端的ip是否写错了,在web页面里面填写的不一致导致
zabbix还是有很多功能,添加主机只是第一步,后面还有很多监控指标需要监控哦~~
本文分享完毕,感谢支持点赞~~