标: 在 ubuntu 16.04 上部署一个 asp.net core 站点,打开网站后显示一段文字。
安装 net core
运行环境:ubuntu 16.04 LTS
1.添加 apt 源
依次执行三条命令
sudo sh -c 'echo "deb [arch=amd64] https://apt-mo.trafficmanager.net/repos/dotnet-release/ xenial main" > /etc/apt/sources.list.d/dotnetdev.list'
sudo apt-key adv --keyserver hkp://keyserver.ubuntu.com:80 --recv-keys 417A0893
sudo apt-get update
2.执行安装
sudo apt-get install dotnet-dev-1.0.4
3.验证安装结果
执行命令
dotnet --version
显示 1.0.4 表示一切正常。

编写程序
IDE:visual studio community 2017 版
Web 框架:Nancy(nancy 是一个轻量级、但是功能很强大的 web 框架,在此不做详细介绍。)
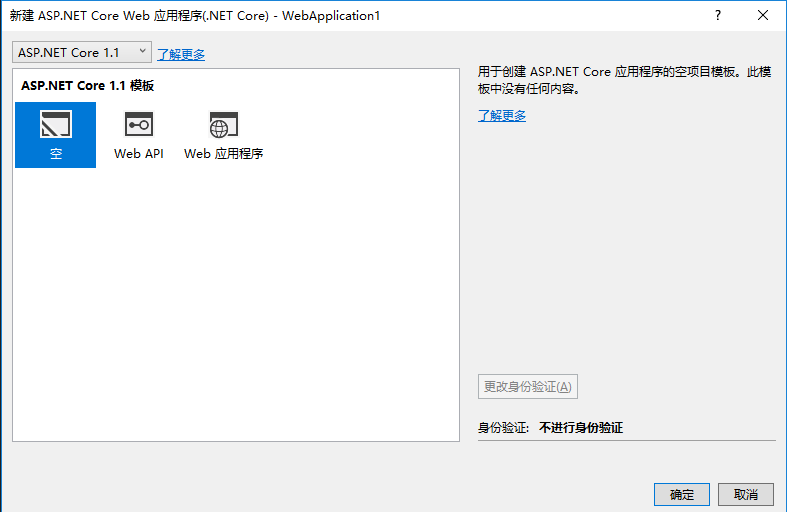
1.在 vs 中新建一个空的 asp.net core web 应用程序
2.添加 nuget 包
默认的程序有三个包
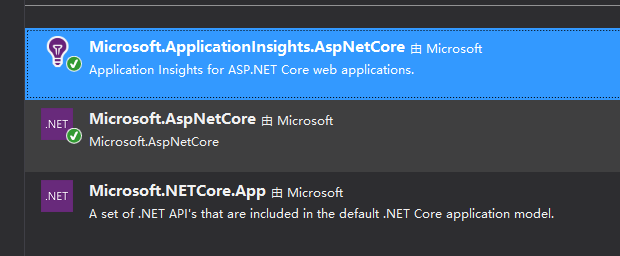
咱们用不上 application insight,删掉,然后添加 microsoft.aspnetcore.owin 和 nancy 两个包,先安装 owin,再安装 nancy。
注意 nancy 对 aspnet core 的支持还处于测试版,所以再搜索 nancy 之前需要勾选 nuget 包管理器的 “包括预发行版”

3.修改 Program.cs 文件
删除我们不需要的代码
public static void Main(string[] args)
  {
  var host = new WebHostBuilder()
  .UseKestrel()
  .UseContentRoot(Directory.GetCurrentDirectory())
//去掉                .UseIISIntegration()
  .UseStartup<Startup>()
// 去掉                .UseApplicationInsights()
  .Build();

  host.Run();
  }
4.修改 Startup.cs 文件
using Nancy.Owin; // 添加 nancy 的 owin 支持
public void Configure(IApplicationBuilder app, IHostingEnvironment env, ILoggerFactory loggerFactory)
  {
  loggerFactory.AddConsole();

  if (env.IsDevelopment())
  {
  app.UseDeveloperExceptionPage();
  }

// 只需要添加一行代码即可,注意必须先 using Nancy.Owin;
 app.UseOwin(p => p.UseNancy());

/*因为咱们用 nancy 框架,下面的代码可删掉
  app.Run(async (context) =>
  {
  await context.Response.WriteAsync("Hello World!");
  });
  }*/
5.添加 nancy 所需的 module 文件,本文中使用 homeModule.cs
public homeModule()
        {
            Get("/", p =>
            {
                return View["index.html"];
            });
        }
和 asp net mvc 类似, nancy 的 module 文件名直接影响到 nancy 搜索 view 的路径, 比如 homeModule, nancy 会搜索 views/home/index.html 这个路径。当然也可以通过配置修改 nancy 搜索 view 的方法。
事实上 nancy 的任何组件都可以配置、甚至替换成自己的,所以相当灵活。
新建 views/home/index.html 文件, 随便写一段话,不做赘述。按 F5 调试运行即可。
有两点要注意一下
1.因为咱们不是以 iis 作为宿主来运行( 在Program.cs文件中删掉了 UseIISIntegration 代码) ,所以在 vs 的浏览方式中不能选 IIS Express,要选择项目名称。

2.新添加的 view 文件,vs 不会复制到输出目录,导致运行出错,要改一下输出方式。

部署到 ubuntu
将项目改为 release 模式,然后在 vs 的项目上点右键,选择“打包”命令, vs 会进行编译,最后将 dll 编译到 bin
elease
etcore1.1 目录下。

在把文件上传到 ubuntu 之前要对 hello.runtimeconfig.dev.json 做一点修改,这是一个大坑,微软的官方教程中都没提到这块。
这个文件的内容很简单:
"additionalProbingPaths": [
"C:\Users\michael\.nuget\packages"
]
additionalProbingPaths 就是 nuget 的包路径, 因为我们是在 win 上开发,所以是 %USERPROFILE%.nugetpackages,要部署到 ubuntu 之前,需修改为 /root/.nuget/packages
将上述文件通过 scp 或者 ftp 等等工具传到 ubuntu 上,比如放在 /home/web/hello 中,然后在 Ubuntu 上执行
dotnet hello.dll 即可

此时只能在远程服务器上用 http://localhost:5000 访问,非常不方便,要想在客户端访问,需要再添加一个反向代理。
添加反向代理
依照主流,咱们选择 nginx
1.安装 nginx
执行 apt install nginx. 不做赘述
2.配置 nginx
编辑/etc/nginx/sites-available/default 文件。
server {
listen 80;
location / {
proxy_pass http://localhost:5000;
proxy_http_version 1.1;
proxy_set_header Upgrade $http_upgrade;
proxy_set_header Connection keep-alive;
proxy_set_header Host $host;
proxy_cache_bypass $http_upgrade;
}
}
3.运行 nginx
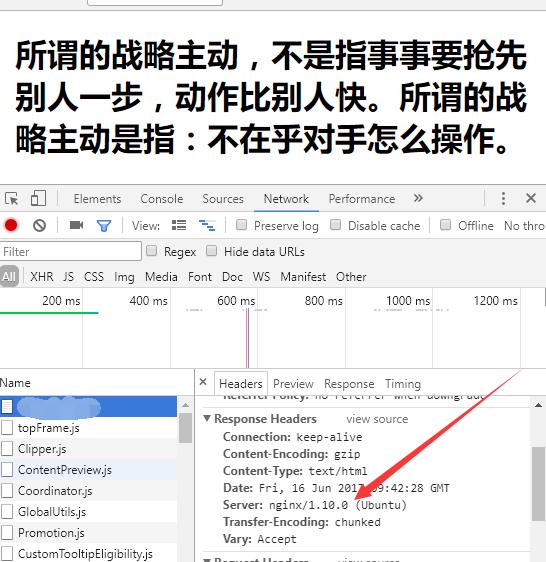
执行 sudo service nginx start。
大功告成,现在在客户端使用 http://服务器IP/ 即可看到 net core 在 ubuntu 上运行的网站啦。