通过openmv来进行测距的两种办法
第一就是通过ApriTag的3D定位进行测距
第二就是通过利用参照物进行测距
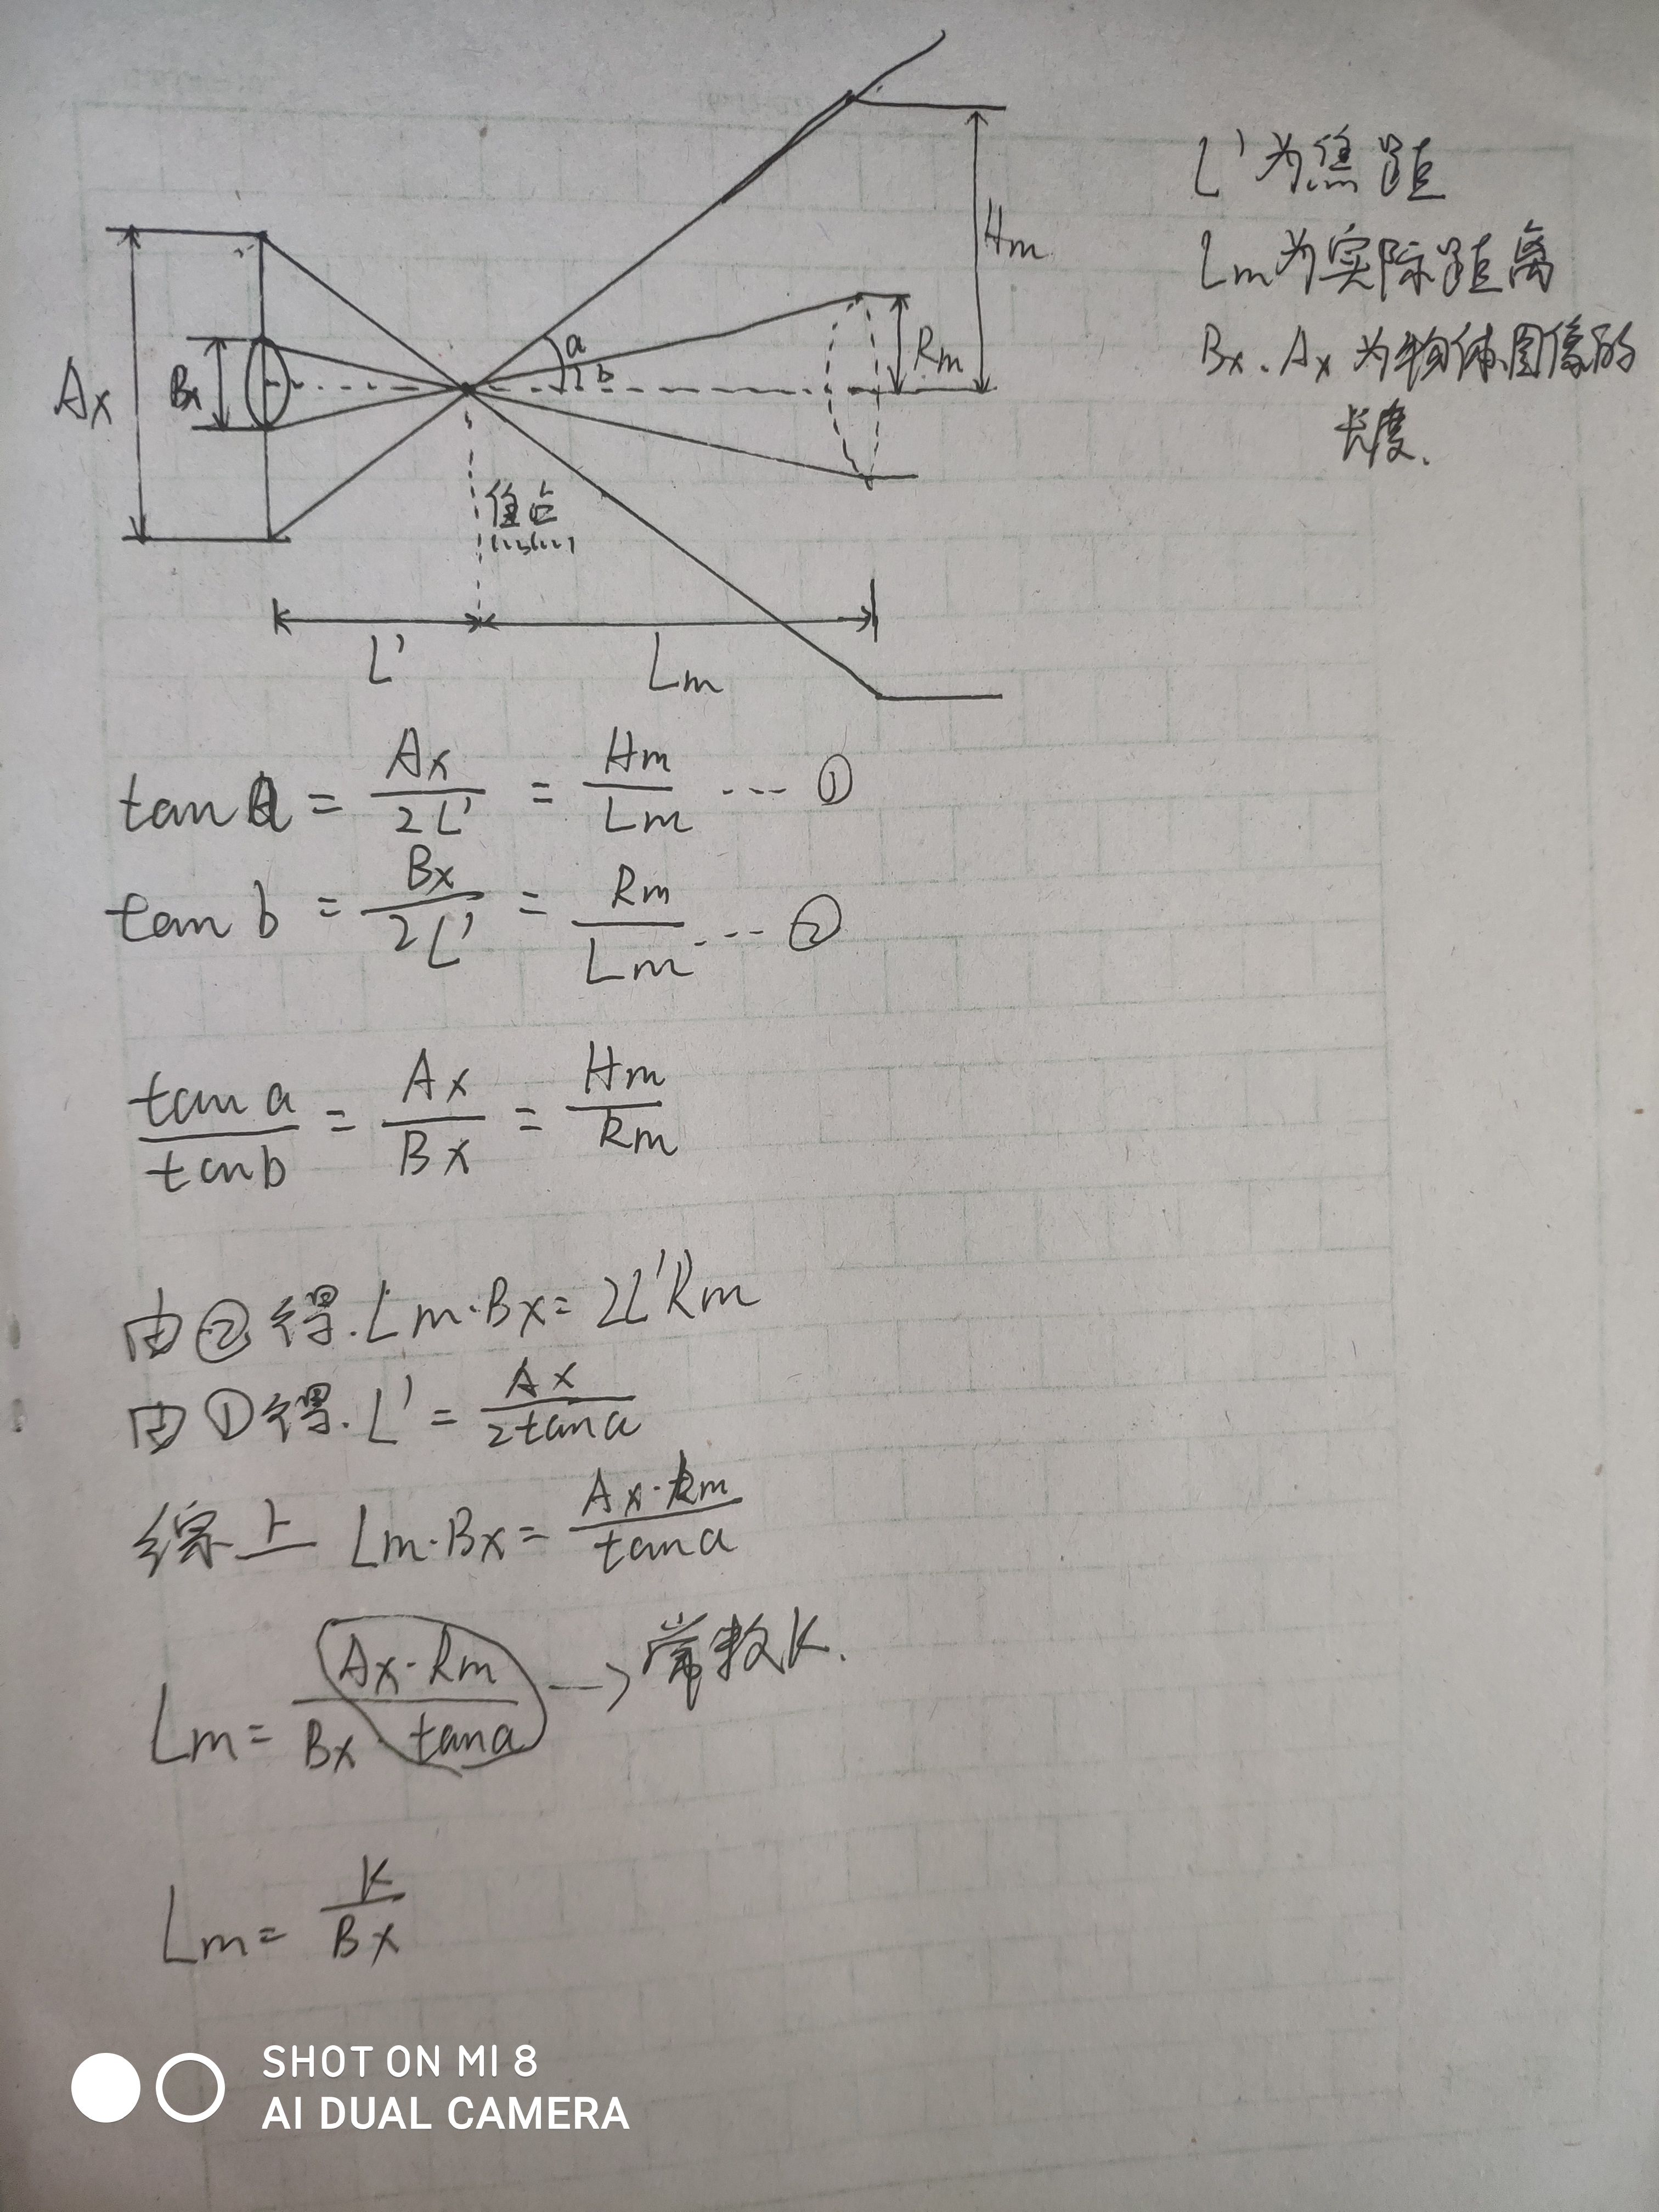
通过上图可以看出实际距离和物体的像素大小成反比
如何得到常数k就是需要解决的问题
先将物体放在固定的距离x,然后打印出物体的像素大小y,就可以得到常数k
k = x*y
 1 # Measure the distance
 2 #
 3 # This example shows off how to measure the distance through the size in imgage
 4 # This example in particular looks for yellow pingpong ball.
 5
 6 import sensor, image, time
 7
 8 # For color tracking to work really well you should ideally be in a very, very,
 9 # very, controlled enviroment where the lighting is constant...
10 yellow_threshold   = ( 56,   83,    5,   57,   63,   80)
11 # You may need to tweak the above settings for tracking green things...
12 # Select an area in the Framebuffer to copy the color settings.
13
14 sensor.reset() # Initialize the camera sensor.
15 sensor.set_pixformat(sensor.RGB565) # use RGB565.
16 sensor.set_framesize(sensor.QQVGA) # use QQVGA for speed.
17 sensor.skip_frames(10) # Let new settings take affect.
18 sensor.set_auto_whitebal(False) # turn this off.
19 clock = time.clock() # Tracks FPS.
20
21 K=5000#the value should be measured
22 #k = 物体放置距离 × 打印的Lx
23
24 while(True):
25     clock.tick() # Track elapsed milliseconds between snapshots().
26     img = sensor.snapshot() # Take a picture and return the image.
27
28     blobs = img.find_blobs([yellow_threshold])
29     if len(blobs) == 1:
30         # Draw a rect around the blob.
31         b = blobs[0]
32         img.draw_rectangle(b[0:4]) # rect
33         img.draw_cross(b[5], b[6]) # cx, cy
34         Lx = (b[2]+b[3])/2
35         print(Lx)
36         length = K/Lx
37         print(length)
38
39     #print(clock.fps()) # Note: Your OpenMV Cam runs about half as fast while
40     # connected to your computer. The FPS should increase once disconnected.
根据上面代码先将物体放置在固定位置,例如10cm,然后打印出该物体在openmv中的像素值Lx
可以得出k =10 * Lx
然后就可以对物体进行测距
对于Lx 的计算是先通过将捕捉的物体颜色范围的色块,然后通过b[2]色块的宽和b[3]色块的高取的物体的平均半径
参考文章 https://blog.csdn.net/qq_42518517/article/details/101059853