------------恢复内容开始------------
几何变换是指将一幅图像映射到另外一幅图像内的操作
一、缩放
函数具体形式为
dst = cv2.resize(src, dsize[, dst[, fx[, fy[, interpolation]]]])
dst代表输出的目标图像,类型与src相同,大小为dsize 或可以通过src.size() ,fx,fy计算得到
src代表需要缩放的原始图像
dsize代表输出图像大小
fx表示水平方向的缩放比例
fy表示垂直方向的缩放比例
interpolation代表插值方式
当缩小图像时,使用区域插值方式(INTER_AREA)能够得到最好的效果
当放大图像时,使用三次样条插值(INTER_CUBIC)方式和双线性插值(INTER_LINEAR)方式能够取的较好的结果,
1 import cv2
2 img = cv2.imread("/home/miao/dog.jpg")
3 rows,cols = img.shape[:2]
4 size = (int( cols*0.9) , int(rows * 0.5))
5 rst = cv2.resize( img , size)
6 print("img.shape=" , img.shape)
7 print("rst.shape=" , rst.shape)
img.shape= (200, 300, 3)
rst.shape= (100, 270, 3)
列数变为原来0.9倍,行数变为原来0.5倍
1 import cv2
2 img = cv2.imread("/home/miao/dog.jpg")
3 rst = cv2.resize(img , None , fx = 2 , fy = 0.5)
4 print("img.shape= " , img.shape)
5 print("rst.shape= " , rst.shape)
img.shape=  (200, 300, 3)
rst.shape=  (100, 600, 3)
fx是水平方向的缩放,将列数变为原来的2倍
fy是垂直方向的缩放,将行数变为原来的0.5倍
二、翻转
该函数可以实现垂直方向、水平方向和两个方向同时翻转
函数形式为
dst = cv2.flip( src , flipCode)
flipCode代表旋转类型,参数意义如下
| 参数值 | 说明 | 意义 |
| 0 | 只能是0 | 绕着x轴翻转 |
| 正数 | 1、2、3等任意正数 | 绕着y轴翻转 |
| 负数 | -1、-2、-3等任意负数 | 围绕x轴,y轴同时翻转 |
 1 import cv2
 2 img = cv2.imread("/home/miao/dog.jpg")
 3 x = cv2.flip(img , 0)
 4 y = cv2.flip(img , 1)
 5 xy = cv2.flip(img , -1)
 6 cv2.imshow("img" , img)
 7 cv2.imshow("x" , x)
 8 cv2.imshow("y" , y)
 9 cv2.imshow("xy" , xy)
10 cv2.waitKey()
11 cv2.destroyAllWindows()
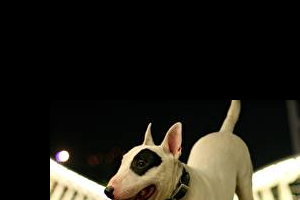
原图

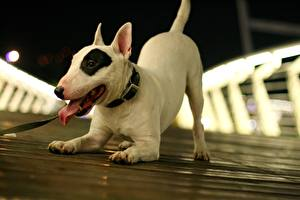
x

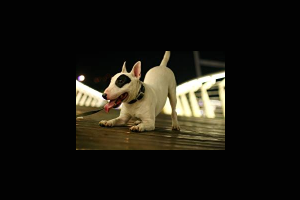
y

xy

三、仿射
通过一系列的几何变换来实现平移、旋转等多种操作。该变换保持图像的平直性和平行性,
平直性是指在经过变换后直线仍然是直线
平行性是指在完成仿射变换后,平行线仍然是平行线
函数形式为
dst = cv2.warpAffine( src , M , dsize [, flags [, borderMode [, borderValue]]])
dst代表仿射后的输出图像
src代表要仿射的原始图像
M代表一个2x3的变换矩阵
dsize代表要输出图像的尺寸
flags代表插值方法,默认为INTER_LINEAR
borderMode代表边类型,默认为DORDER_CONSTANT
borderValue代表边界值,默认为0
通过转换矩阵M将原始图像src转换为目标图像dst
dst(x,y) = src(M11*x + M12 *y + M13 ,M21 * x + M22 * y + M23)
平移
 1 import cv2
 2 import numpy as np
 3 img = cv2.imread("/home/miao/dog.jpg")
 4 height , width = img.shape[:2]
 5 x = 50
 6 y = 100
 7 M = np.float32([[1,0,x] , [0 , 1, y]])
 8 move = cv2.warpAffine(img , M ,(width , height))
 9 cv2.imshow("original" , img )
10 cv2.imshow("move" , move)
11 cv2.waitKey()
12 cv2.destroyAllWindows()
由上的公式可得
dst( x , y) = src(1*x + 0 * y + 50 , 0 * x + 1 * y +100)
即可得到图像的平移

旋转需要调用函数来生成转换矩阵M
函数形式如下
cv2.getRotationMatrix2D(center , angel , scale)
center为旋转中心点
angel为旋转角度,整数表示逆时针旋转,负数表示顺时针旋转
scale为变换尺度(缩放大小)
1 import cv2
2 img = cv2.imread("/home/miao/dog.jpg")
3 height , width = img.shape[:2]
4 M = cv2.getRotationMatrix2D((width/2 , height/2) , 45 , 0.6 )
5 rotate = cv2.warpAffine(img , M , (width , height))
6 cv2.imshow("original" , img)
7 cv2.imshow("rotation" , rotate)
8 cv2.waitKey()
9 cv2.destroyAllWindows()
函数是以图中心为原点,逆时针旋转45度,并将目标图像缩小为原始图像的0.6倍

更复杂的仿射变换
通过函数
cv2.getAffineTransform( src , dst)
src为输入图像的三个点坐标
dst为输出图像的三个点坐标
三个点坐标为对应平行四边形的左上角,右上角和左下角三个点
 1 import cv2
 2 import numpy as np
 3 img = cv2.imread("/home/miao/dog.jpg")
 4 rows , cols, ch = img.shape
 5 p1 = np.float32([[0,0],[cols-1,0] , [0,rows-1]])
 6 p2 = np.float32([[0,rows*0.33],[cols*0.85, rows*0.25],[cols*0.15,rows*0.71]])
 7 M = cv2.getAffineTransform(p1 , p2)
 8 dst = cv2.warpAffine(img , M ,(cols , rows))
 9 cv2.imshow("original" , img)
10 cv2.imshow("result" , dst)
11 cv2.waitKey()
12 cv2.destroyAllWindows()

四、重映射
将一幅图像内的像素点放置到另外一幅图像内的指定位置即为重映射
函数形式为
dst = cv2.remap( src , map1 , map2 ,interpolation [, borderMode [ , borderValue]])
dst 代表目标图像,它和src具有相同的大小和类型
src代表原始图像
map1
1.表示(x,y)点的一个映射
2.表示CV _16SC2 , CV_32FC1 ,CV_32FC2类型(x,y)点的x值
map2
1.当map1表示(x,y)时,该值为空
2.当map1表示(x,y)点的x值时,该值是CV_16UC1,CV_32FC1类型(x,y)点的y值
interpolation代表插值方式,这里不支持INTER_AREA
borderMode代表边界模式,
borderValue代表边界值,该值默认为0
以下为将原始图像内第0行第3列上的像素值映射到所有像素点,即map1为3,map2为0
其映射关系即为map1和map2对应的像素位置对应图像的像素点的位置,即map1和map2的[0,0]对应图像的[0,0],然后将结果位置值存入该点,即map1存第几列,map2存第几行。对应以下代码即每个点映射的都是[0,3]的值
 1 import cv2
 2 import numpy as np
 3 img = np.random.randint( 0 ,256 , size = [4,5] , dtype = np.uint8)
 4 rows , cols = img.shape
 5 mapx = np.ones(img.shape , np.float32) * 3
 6 mapy = np.ones(img.shape , np.float32) * 0
 7 rst = cv2.remap( img , mapx ,mapy ,cv2.INTER_LINEAR)
 8 print("img =
" , img)
 9 print("mapx =
" , mapx)
10 print("mapy =
" , mapy)
11 print("rst =
" , rst)
img =
 [[150 228 176  51  98]
 [126 172 203 204  89]
 [ 84  31 202 132  61]
 [ 85  44  44 169 204]]
mapx =
 [[3. 3. 3. 3. 3.]
 [3. 3. 3. 3. 3.]
 [3. 3. 3. 3. 3.]
 [3. 3. 3. 3. 3.]]
mapy =
 [[0. 0. 0. 0. 0.]
 [0. 0. 0. 0. 0.]
 [0. 0. 0. 0. 0.]
 [0. 0. 0. 0. 0.]]
rst =
 [[51 51 51 51 51]
 [51 51 51 51 51]
 [51 51 51 51 51]
 [51 51 51 51 51]]
结果即为全是51
 1 import cv2
 2 import numpy as np
 3 #img = np.random.randint( 0 , 256 , size = [9,9] , dtype = np.uint8)
 4 img = cv2.imread("/home/miao/dog.jpg")
 5 rows , cols = img.shape[:2]
 6 mapx = np.zeros(img.shape[:2] , np.float32)
 7 mapy = np.zeros(img.shape[:2] , np.float32)
 8 for i in range(rows):
 9     for j in range(cols):
10         mapx.itemset((i,j) , j)
11         mapy.itemset((i,j) , i)
12 rst_copy = cv2.remap(img , mapx , mapy , cv2.INTER_LINEAR)
13
14 for i in range(rows):
15     for j in range(cols):
16         mapx.itemset((i,j) , j)
17         mapy.itemset((i,j) , rows - 1 -i)
18 rst_x = cv2.remap(img , mapx , mapy , cv2.INTER_LINEAR)
19
20 for i in range(rows):
21     for j in range(cols):
22         mapx.itemset((i,j) ,cols - 1-  j)
23         mapy.itemset((i,j) , i)
24 rst_y = cv2.remap(img , mapx , mapy , cv2.INTER_LINEAR)
25
26 for i in range(rows):
27     for j in range(cols):
28         mapx.itemset((i,j) ,cols - 1 - j)
29         mapy.itemset((i,j) ,rows - 1 - i)
30 rst_xy = cv2.remap(img , mapx , mapy , cv2.INTER_LINEAR)
31
32 for i in range(rows):
33     for j in range(cols):
34         mapx.itemset((i,j) ,i )
35         mapy.itemset((i,j) ,j )
36 rst_x_y = cv2.remap(img , mapx , mapy , cv2.INTER_LINEAR)
37
38 for i in range(rows):
39     for j in range(cols):
40         if 0.25*cols<j<0.75*cols and 0.25*rows<i<0.75*rows:
41             mapx.itemset((i,j) , 2*(j - 0.25*cols)  + 0.5)
42             mapy.itemset((i,j) , 2*(i - 0.25*rows)  + 0.5)
43
44         else :
45             mapx.itemset((i,j) , 0)
46             mapy.itemset((i,j) , 0)
47
48 rst = cv2.remap(img , mapx , mapy , cv2.INTER_LINEAR)
49 cv2.imshow("original" , img)
50 cv2.imshow("rst_x" , rst_x)
51 cv2.imshow("rst_y" , rst_y)
52 cv2.imshow("rst_xy" , rst_xy)
53 cv2.imshow("rst_x_y" , rst_x_y)
54 cv2.imshow("result" , rst)
55 cv2.waitKey()
56 cv2.destroyAllWindows()
原图
复制(第一个for循环)
绕x轴旋转(第二个for循环)

绕y轴旋转(第三个for循环)

绕x轴、y轴(第四个for循环)

x轴、y轴交换(第五个for循环)

图像缩放(第六个for循环)
图像缩放的for循环中
if 0.25*cols<j<0.75*cols and 0.25*rows<i<0.75*rows:
    mapx.itemset((i,j) , 2*(j - 0.25*cols)  + 0.5)
    mapy.itemset((i,j) , 2*(i - 0.25*rows)  + 0.5)
else :
    mapx.itemset((i,j) , 0)
    mapy.itemset((i,j) , 0)
将列值和行值取在0.25-0.75的范围内,其他范围取值为(0,0)的值
在该范围内j减去0.25cols是为了可以从0到cols-1,乘2是每2个点取一次
加0.5是取两个像素点之间的位置,该点是不存在像素值的,可以采用不同的方法实现插值
------------恢复内容结束------------
file:///home/miao/桌面/y.png